Shortcuts Menu
The Shortcuts menu allows you to access a lot of your everyday functions directly from the Load Management screen in AscendTMS.
To access the Shortcuts Menu, right-click anywhere on a load as shown below:
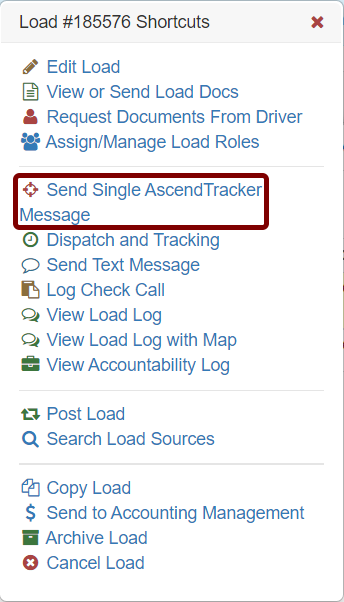
You will then see the Shortcuts Menu:
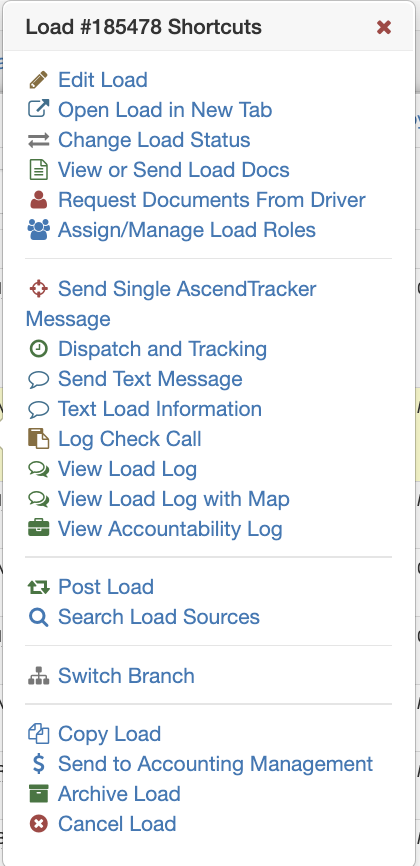
From here, you have the ease of access to many load building and dispatching features.
Edit Load
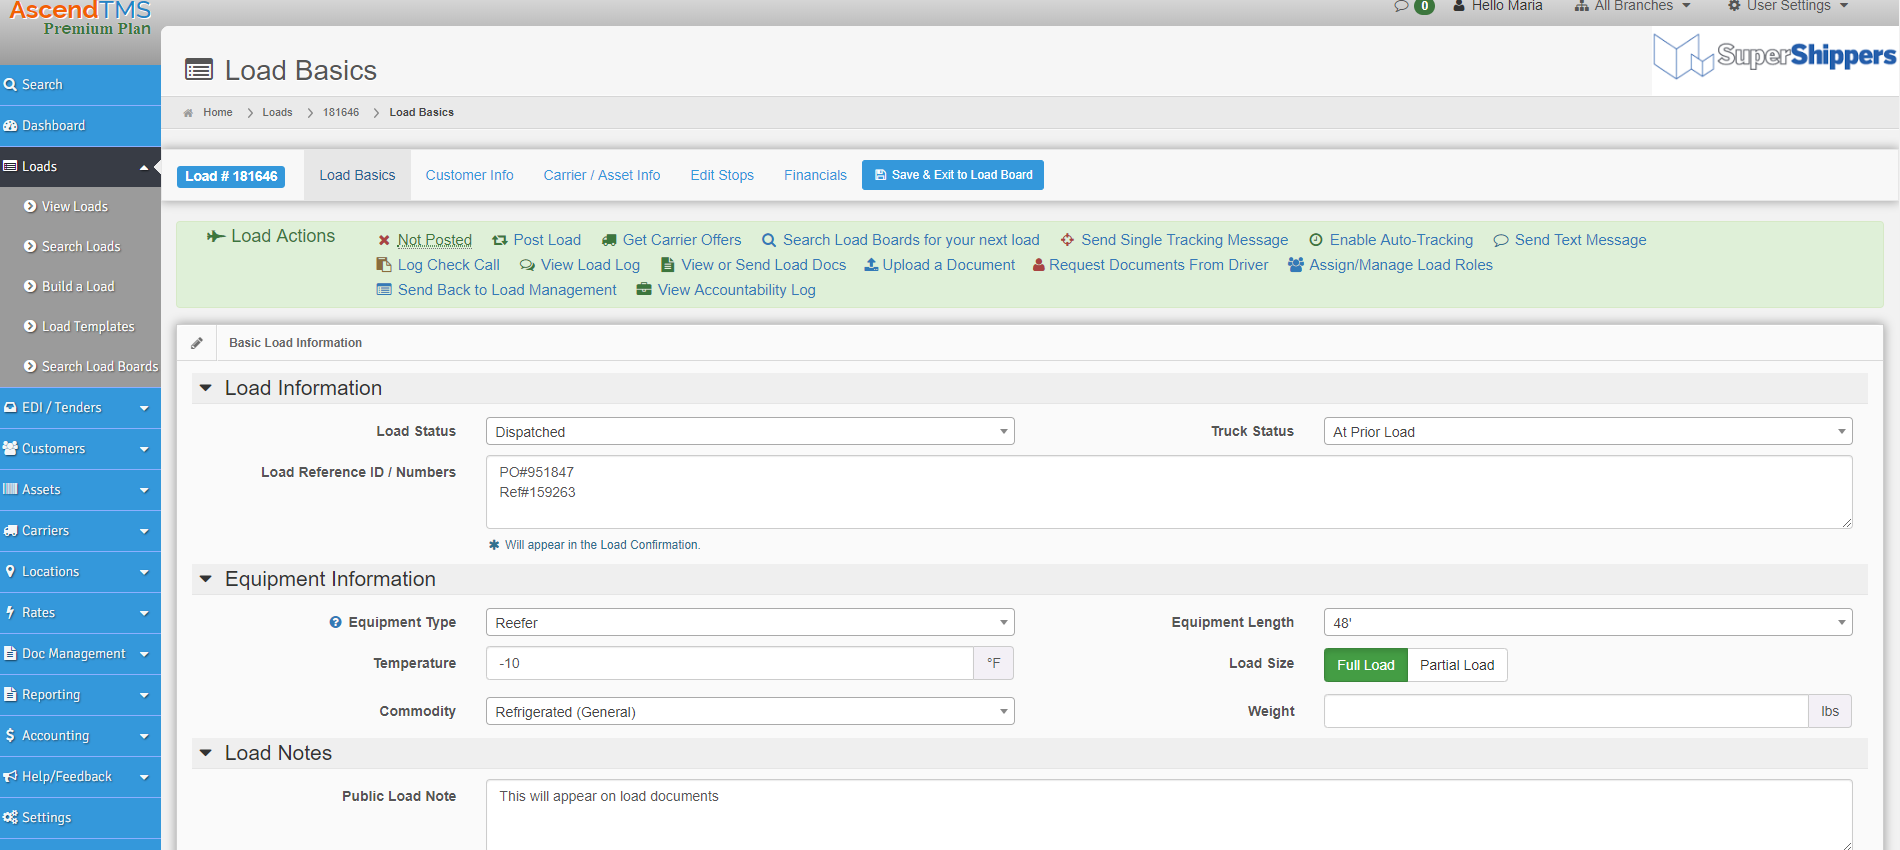
By selecting "Edit Load" from the shortcuts menu, you will be taken to the Load Basics screen. You are now inside the load and can update the truck or load statuses, make any adjustments, add new information or navigate to important load details.
View or Send Load Docs
This selection gives you the ability to View load documents and e-mail them directly to your customer, carrier or anyone you wish. When you select this option from the shortcuts menu, you will see this screen below:
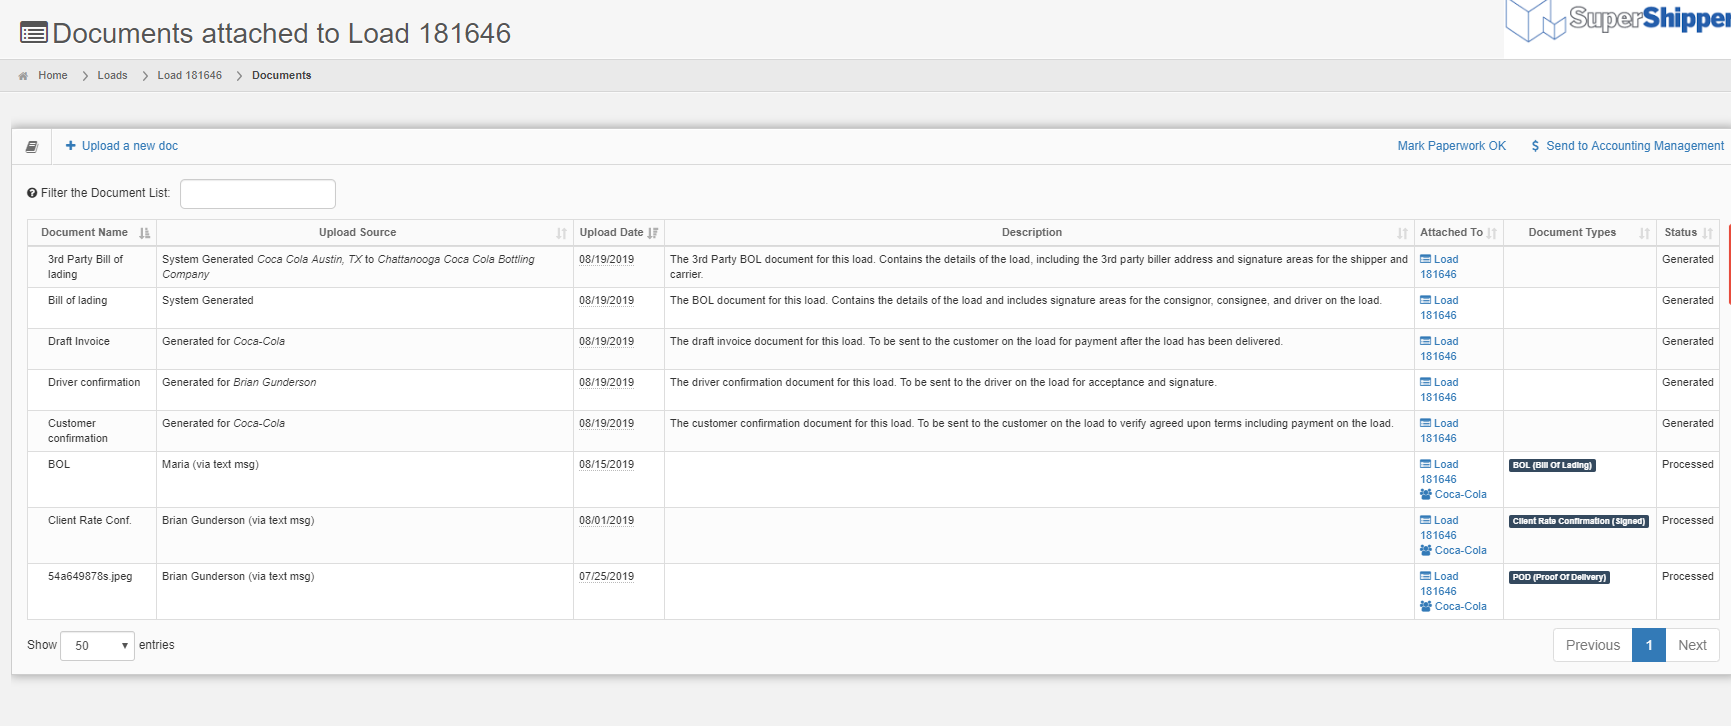
You can see the generated documents that AscendTMS automatically creates for you based on the information that is entered into the load itself. Some of these documents include a Driver confirmation (a.k.a. Load Confirmation), Customer Confirmation (a.k.a. Rate Con), Bill of Lading and more!
Request Documents From Driver
With this shortcut function, you can quickly and easily request load documents from your driver. This means that you can gather and process BOL's, POD's and any other load documents you require to Invoice your customer - and you can do this even before the driver returns!
First, you will select "Request Documents from Driver" from the shortcuts menu and you will see this modal:
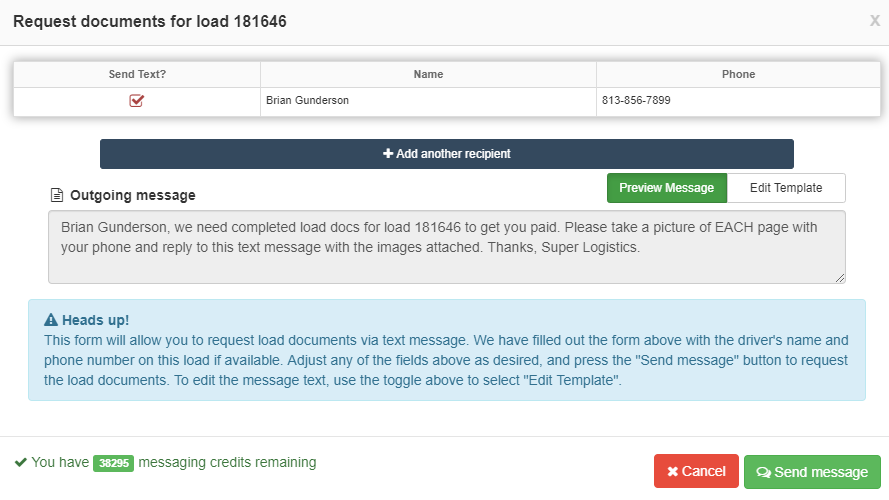
The Driver's name and phone number will appear at the top, with the option to add another recipient if you wish. You will see a preview of the message, which you have the ability to edit by selecting "Edit Template".
Once you are satisfied with the message, simply click "Send Message" and the driver will receive a normal text message on their cell phone.
NOTE: Make sure that you have left the part of the message that tells the driver to "take a picture of EACH page with your phone and reply to this text message with the image attached".
When the driver replies with the photos, they are instantly placed in your AscendTMS load log of the specific load you requested from:

Additionally, you can view and process these in the Load Documents:
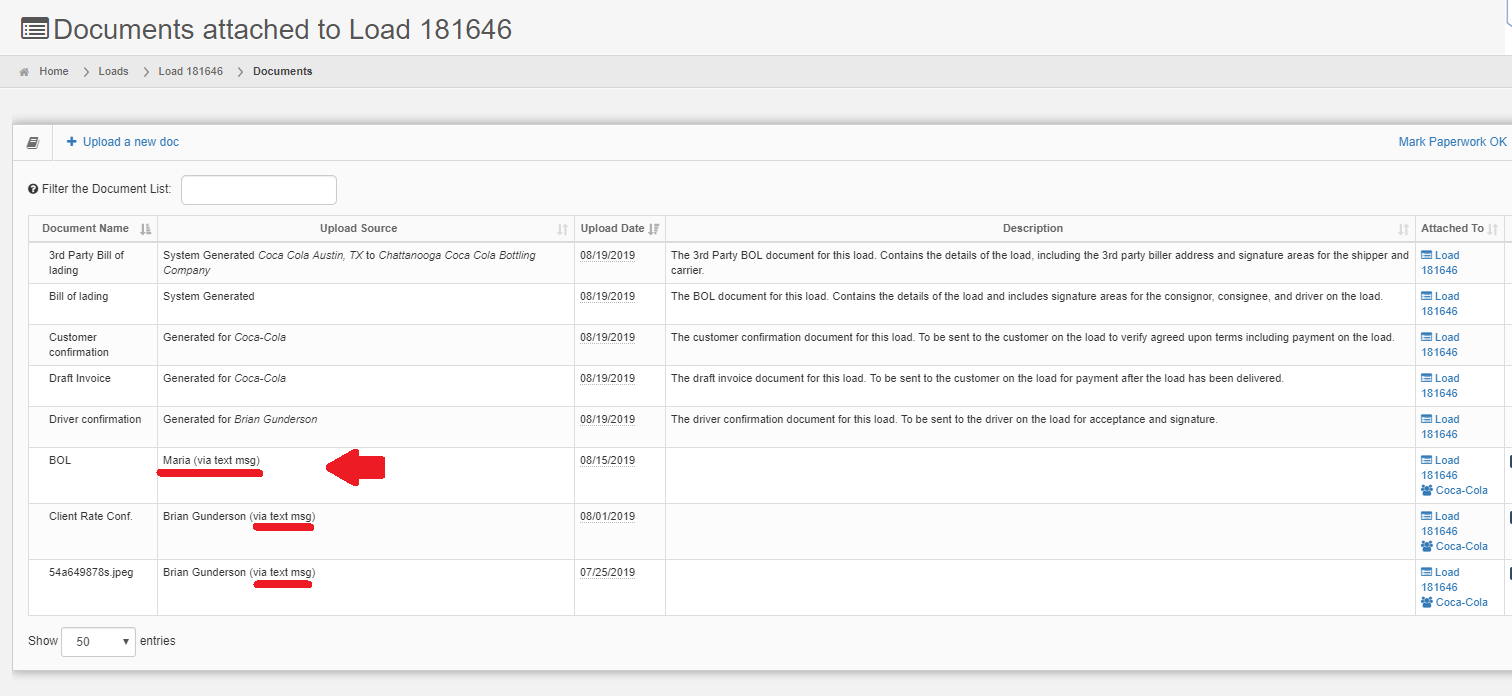
They will be displayed above, signifying they were received "via text".
Assign/Manage Load Roles
Here you are able to assign roles to the load, such as Dispatcher or Sales agent. These roles can be non-commissionable or commissionable. For more information on Load Roles and how to add them, please click HERE.
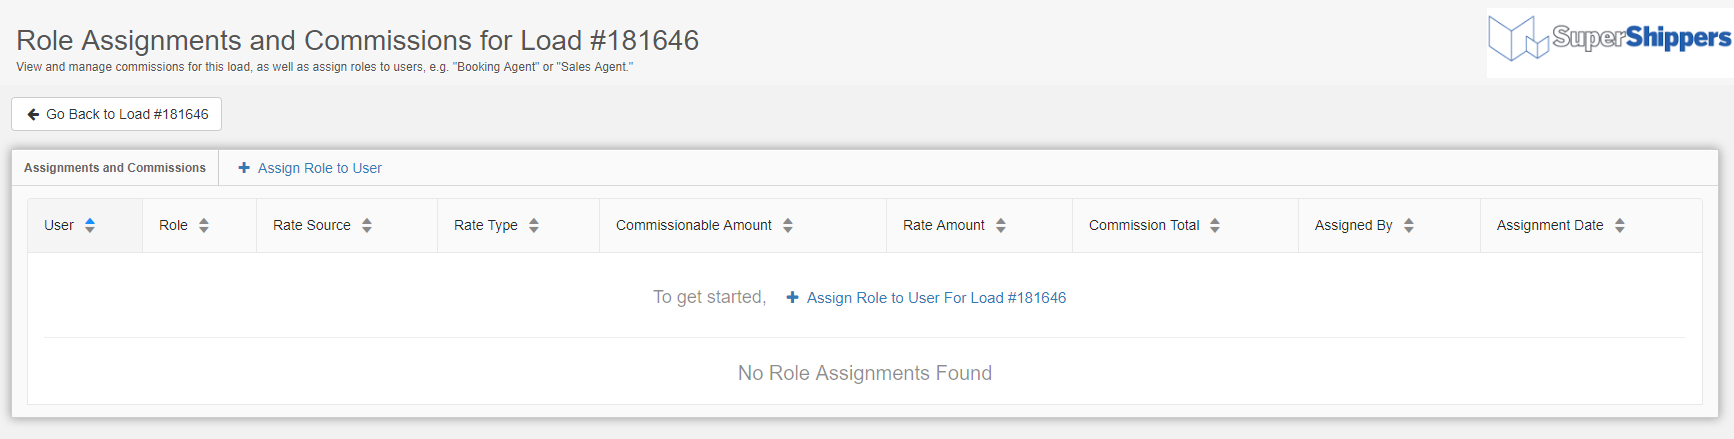
When you select "Assign/Manage Load Roles" you will be brought to this screen below:
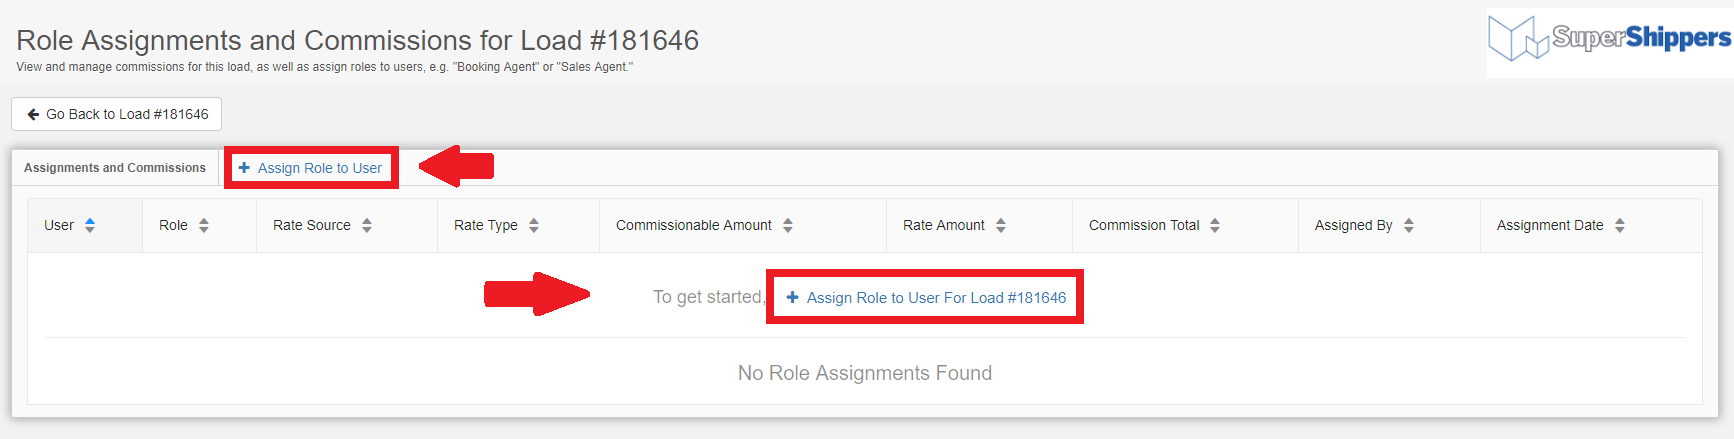
From here, select "+Assign Role to User" shown below:
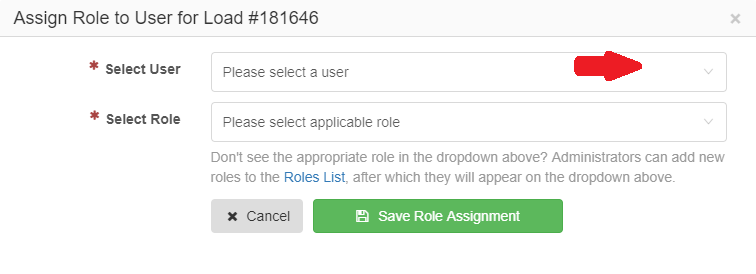
You will then see this modal:
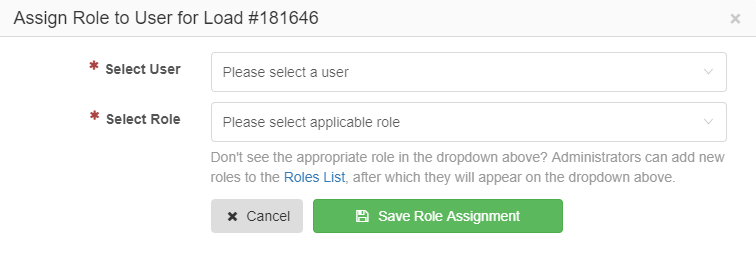
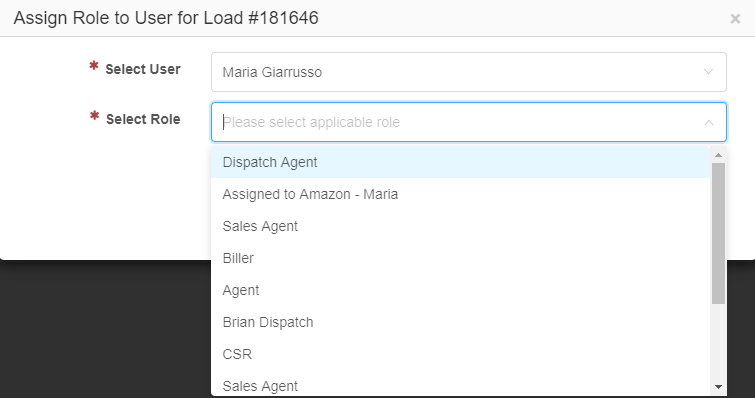
Now, select a user from the drop-down list:

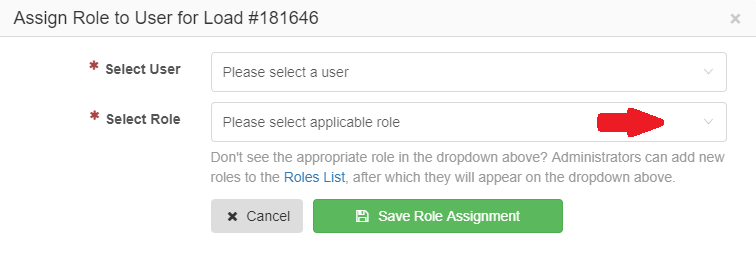
Then, select the role you wish to assign to that user:
Once you have selected the user and the role, then click save:

You can then choose to add another role if you would like. This is also the area where you can manage user roles on each load.
Send Single Tracking Message
Would it be great to be able to locate the driver moving your load? Well, it is as simple as 1...2...3...
1. Select "Send Single Tracking Message, shown below:
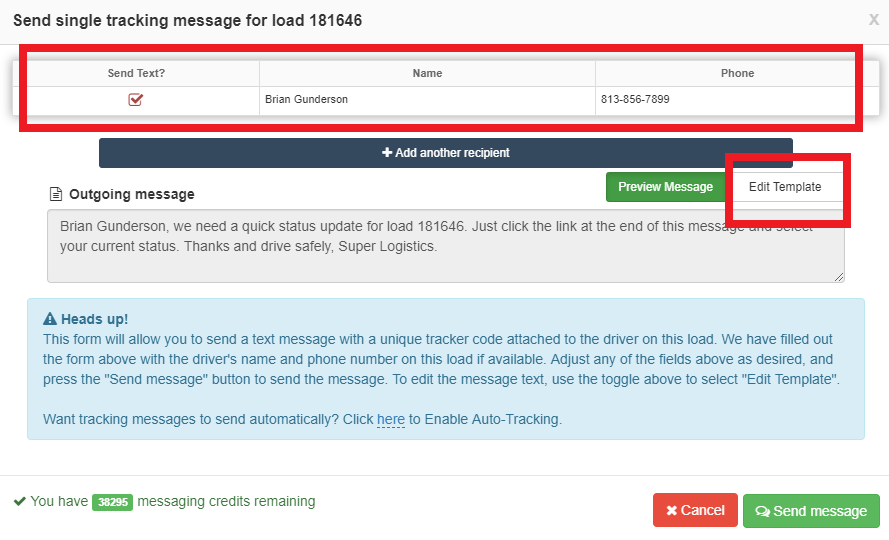
2. Confirm the Recipient and Message - editing the template if needed:
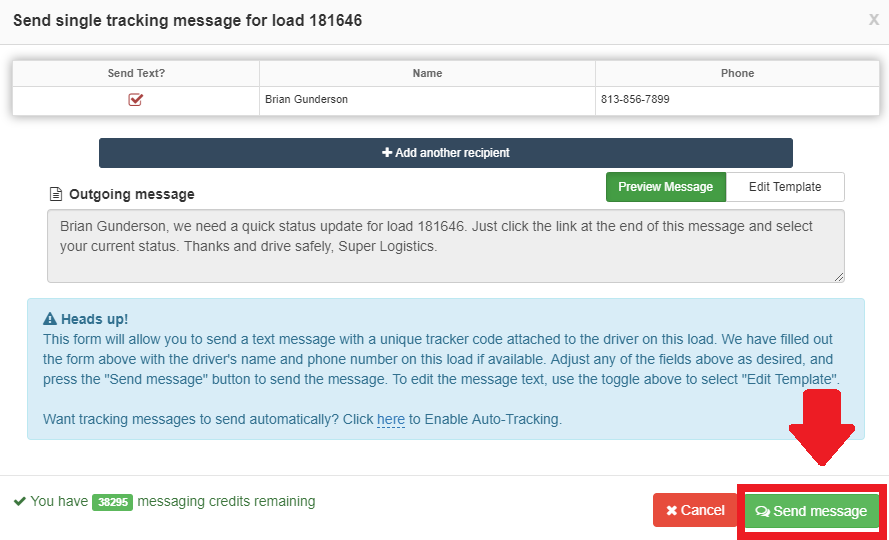
3. Once confirmed - select "Send Message"
It really is just that simple - now all you have to do is await the response. When the driver receives this message, they will see a hyperlink that they can click on, as instructed in the template. Once they have selected this hyperlink, they will be brought to a browser that gives them 4 options, shown below:
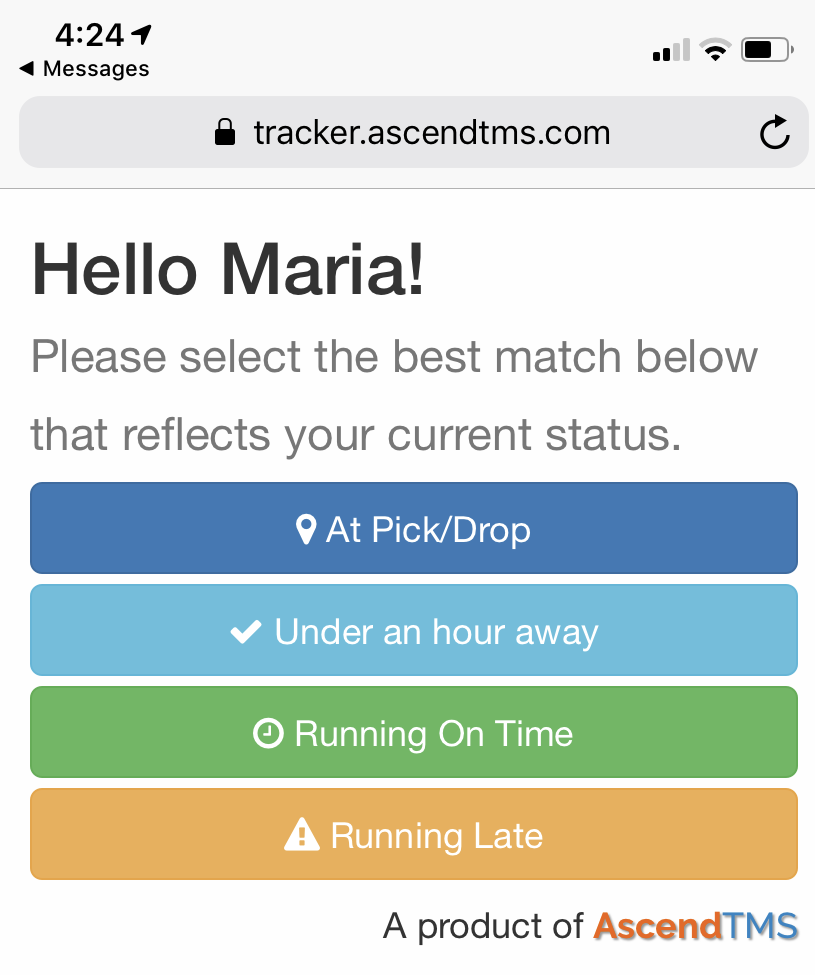
When the driver selects one of the four options above, it will send that information back into the Load Log in AscendTMS.
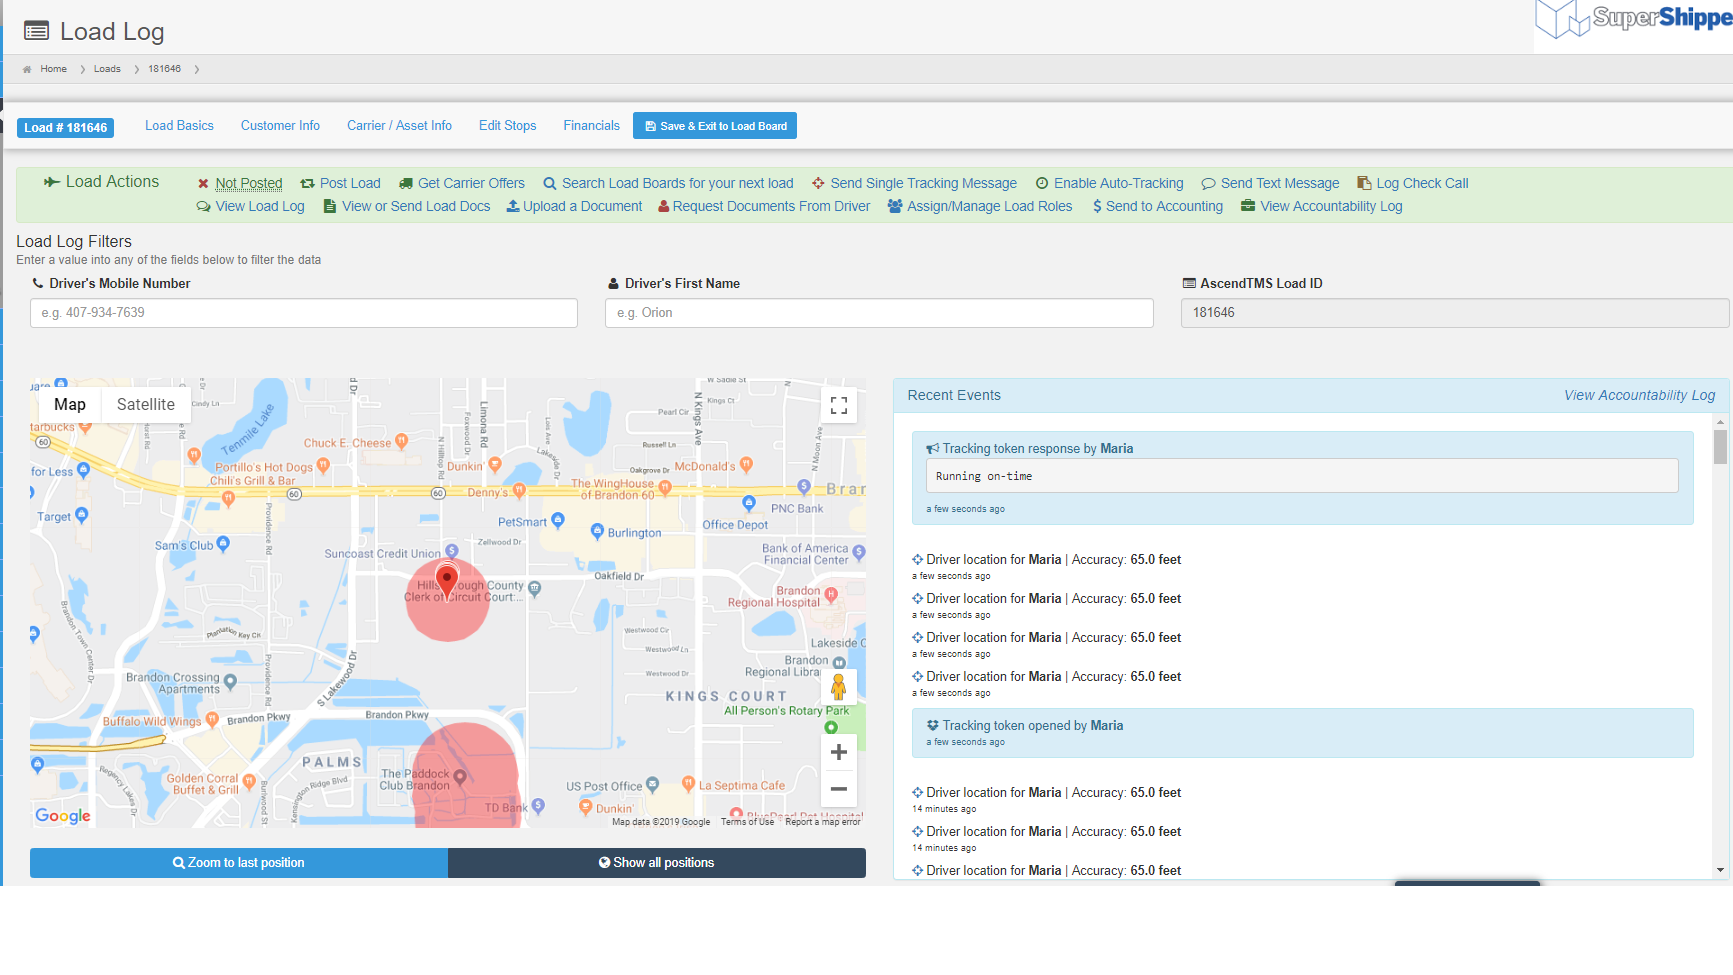
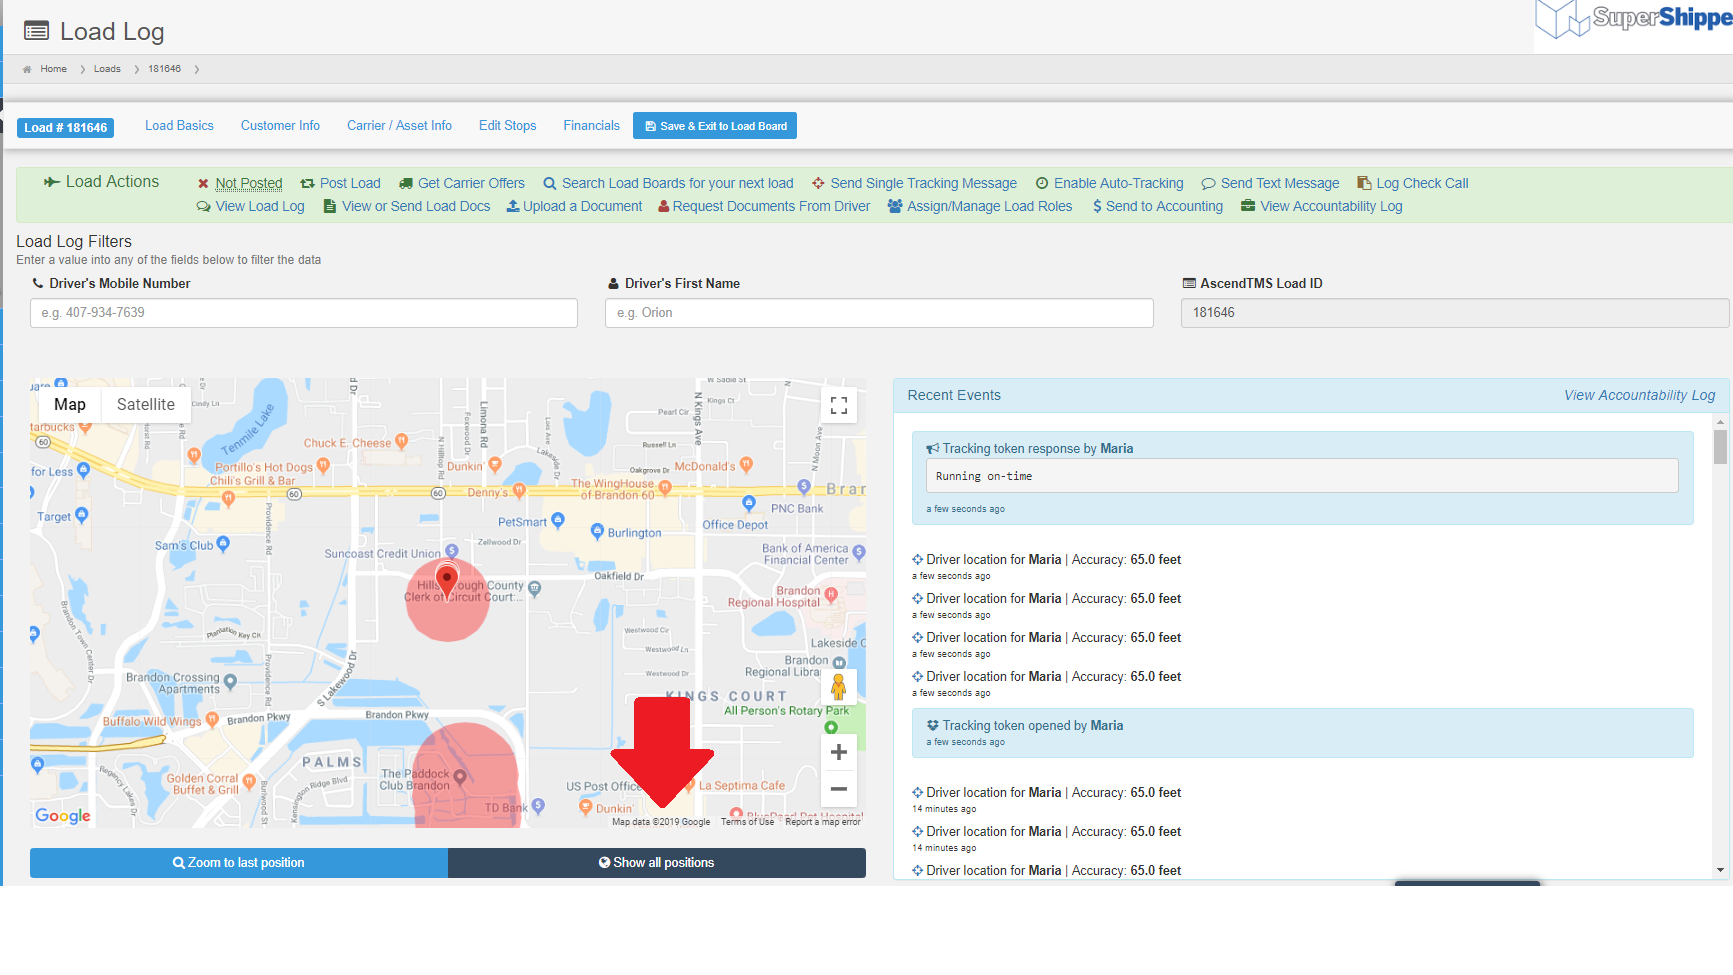
You can select "Show All Positions" or "Zoom to Position"
Enable Auto-Tracking
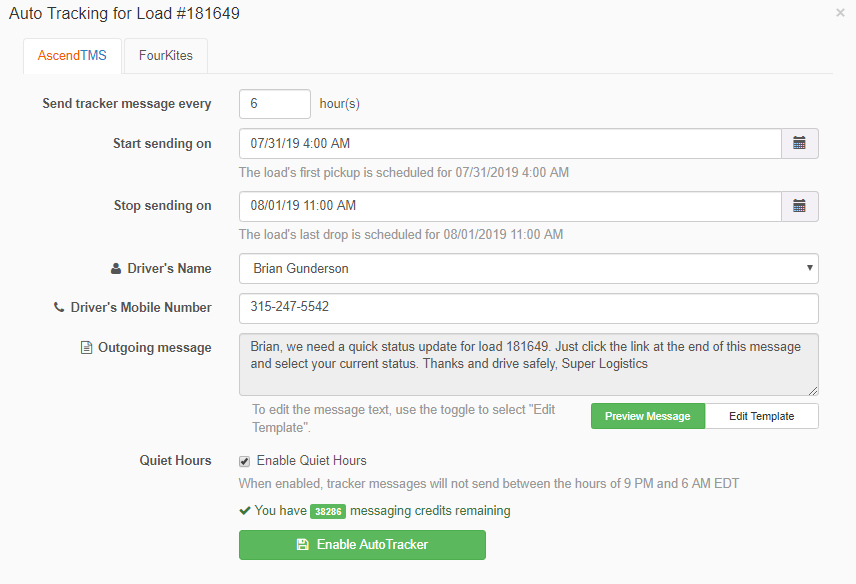
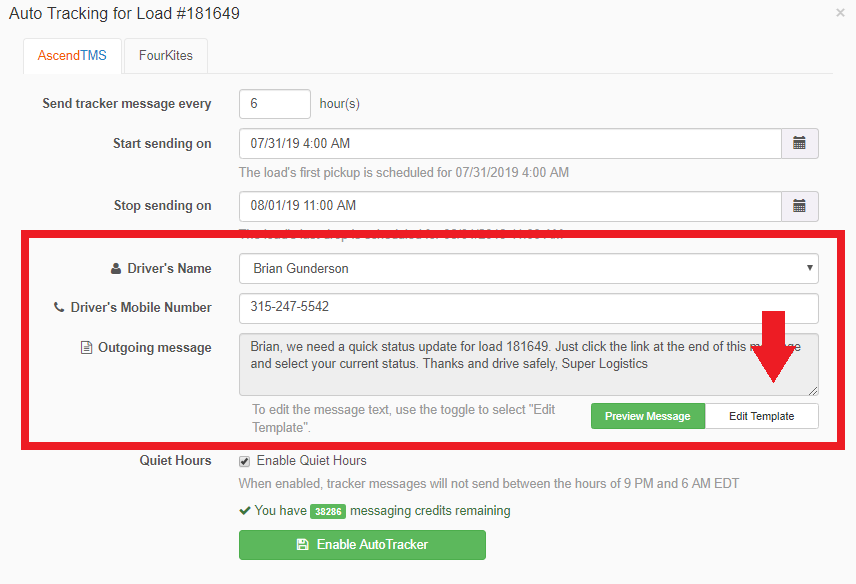
Using this feature allows you to set up tracking messages to be sent automatically so that AscendTMS does the work for you. Once you have selected "Enable auto-tracking" you will see this modal:
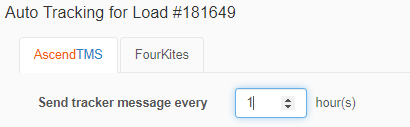
First, enter the interval that you wish the tracking message to be sent to your driver, shown below:
Additionally, you can set the time and date to start sending the messages and when to stop them. To change the date and/or time, you can select the icon on the right to edit:

Confirm the driver's information, name and phone number, as well as the Message that will be sent to them via text. Should you wish to change or edit the message, you can do so by selecting "Edit Template" shown below:
And finally, you can choose whether or not you would like to enable "Quiet Hours" by selecting the checkbox below:

This feature, when enabled, will stop the auto-tracking messages from being sent between the hours of 9PM and 6AM EST.
Once you have made your selections, you can now choose the green box to "Enable AutoTracker" and you are all set!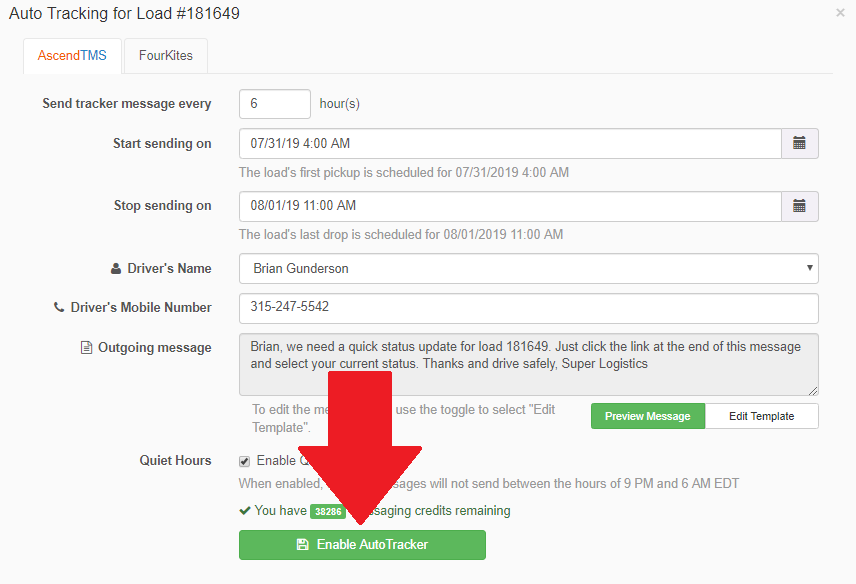
Send Text Message
With this option on the shortcuts menu, you no longer have to use your personal cell phone to send messages to your driver. You can choose to "Send Text Message" from AscendTMS and it will be received as a normal text, just as if you had sent it from your cell phone.
When selected, you will see this modal:

Your Driver's information should appear at the top. Additionally, you can select "Add another recipient" and add any name and phone number you wish.
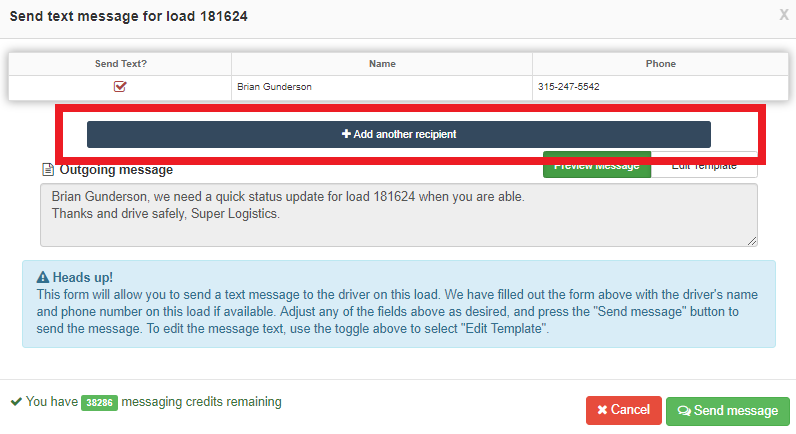
Once you have confirmed and/or edited the message template, you can select "Send Message" in Green. This, along with any response(s) from your driver, will be stored in the Load Log.
Send Driver Load Detail Information
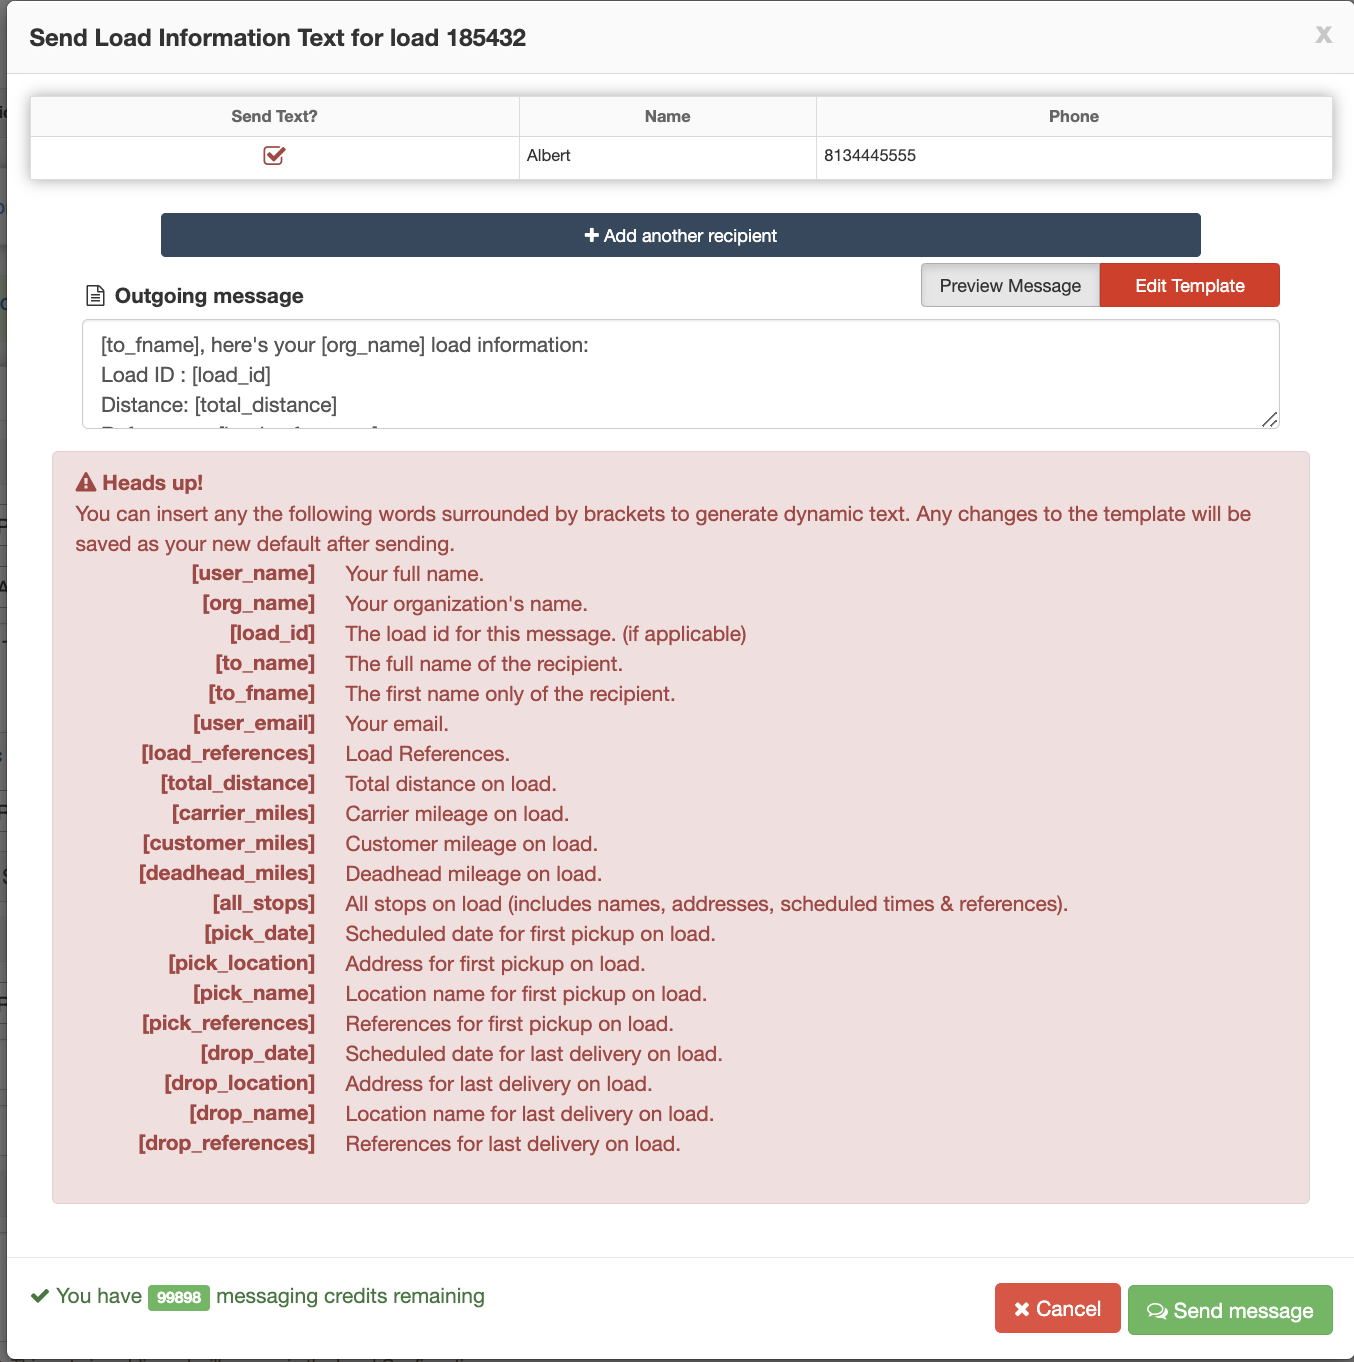
With this option, you can text the driver the load details from the load. When you open the modal for texting, you can edit the template as shown below. Once you do this, you will see a list of editable items such as load reference numbers and miles. Just copy the bracketed item to the message box to create your message to the driver. Once you set this template, all text messages you send will have the details you set.
Log Check Call
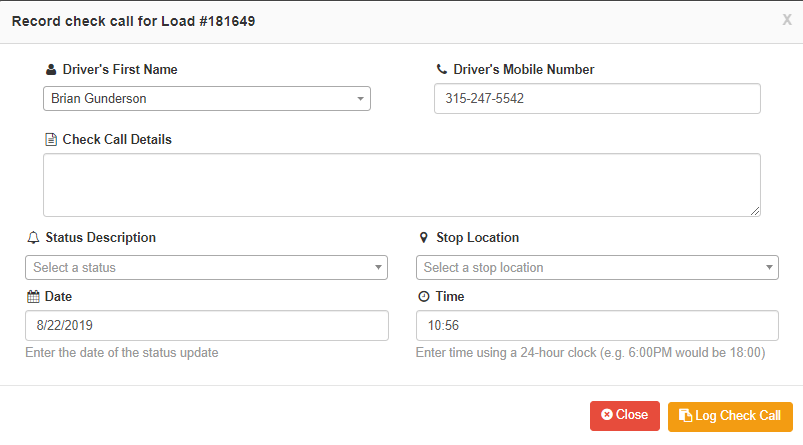
Here you can log manual check calls that will be stored in your Load Log. You can log call details, status updates, stop locations and date/time.
Once you are done logging the information, simply select the yellow button to "Log Check Call". You will then see the "Call Logged" message below, signifying that you can now view this in the Load Log.
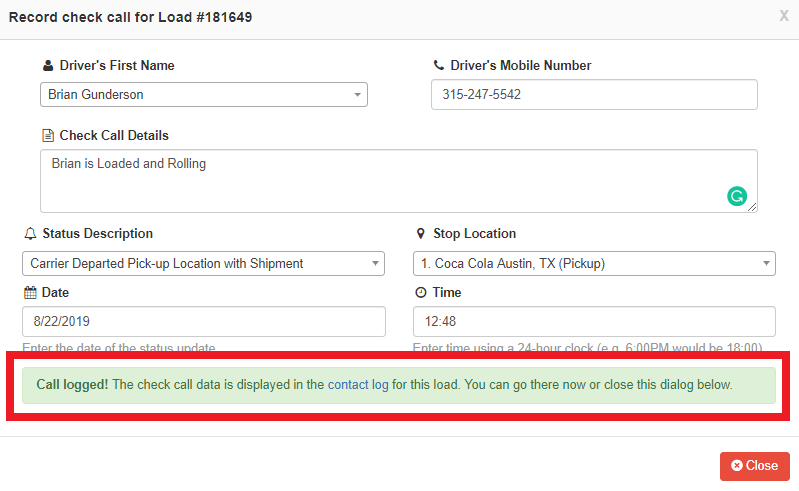
If you wish to see the Load log now, simply click on "contact log" that is displayed in the "Call Logged!" box above. Otherwise, you can access the Load Log from inside any load, or from your Shortcuts menu.
View Load Log
The Load Log in AscendTMS keeps track of ALL communication between your company and the Carrier/Driver. You will find text messages, logged check calls, requests for documents and tracking information here.

Post Load
Using the "Post Load" option from your Shortcuts Menu allows you to quickly post your load to one or all of our numerous Load Board integrations. For more information on posting loads - please click here. To learn how to customize your columns, please click HERE.
Search Load Boards
By selecting "Search Load Boards" you will be taken to our search engine for our integrated Load Boards.
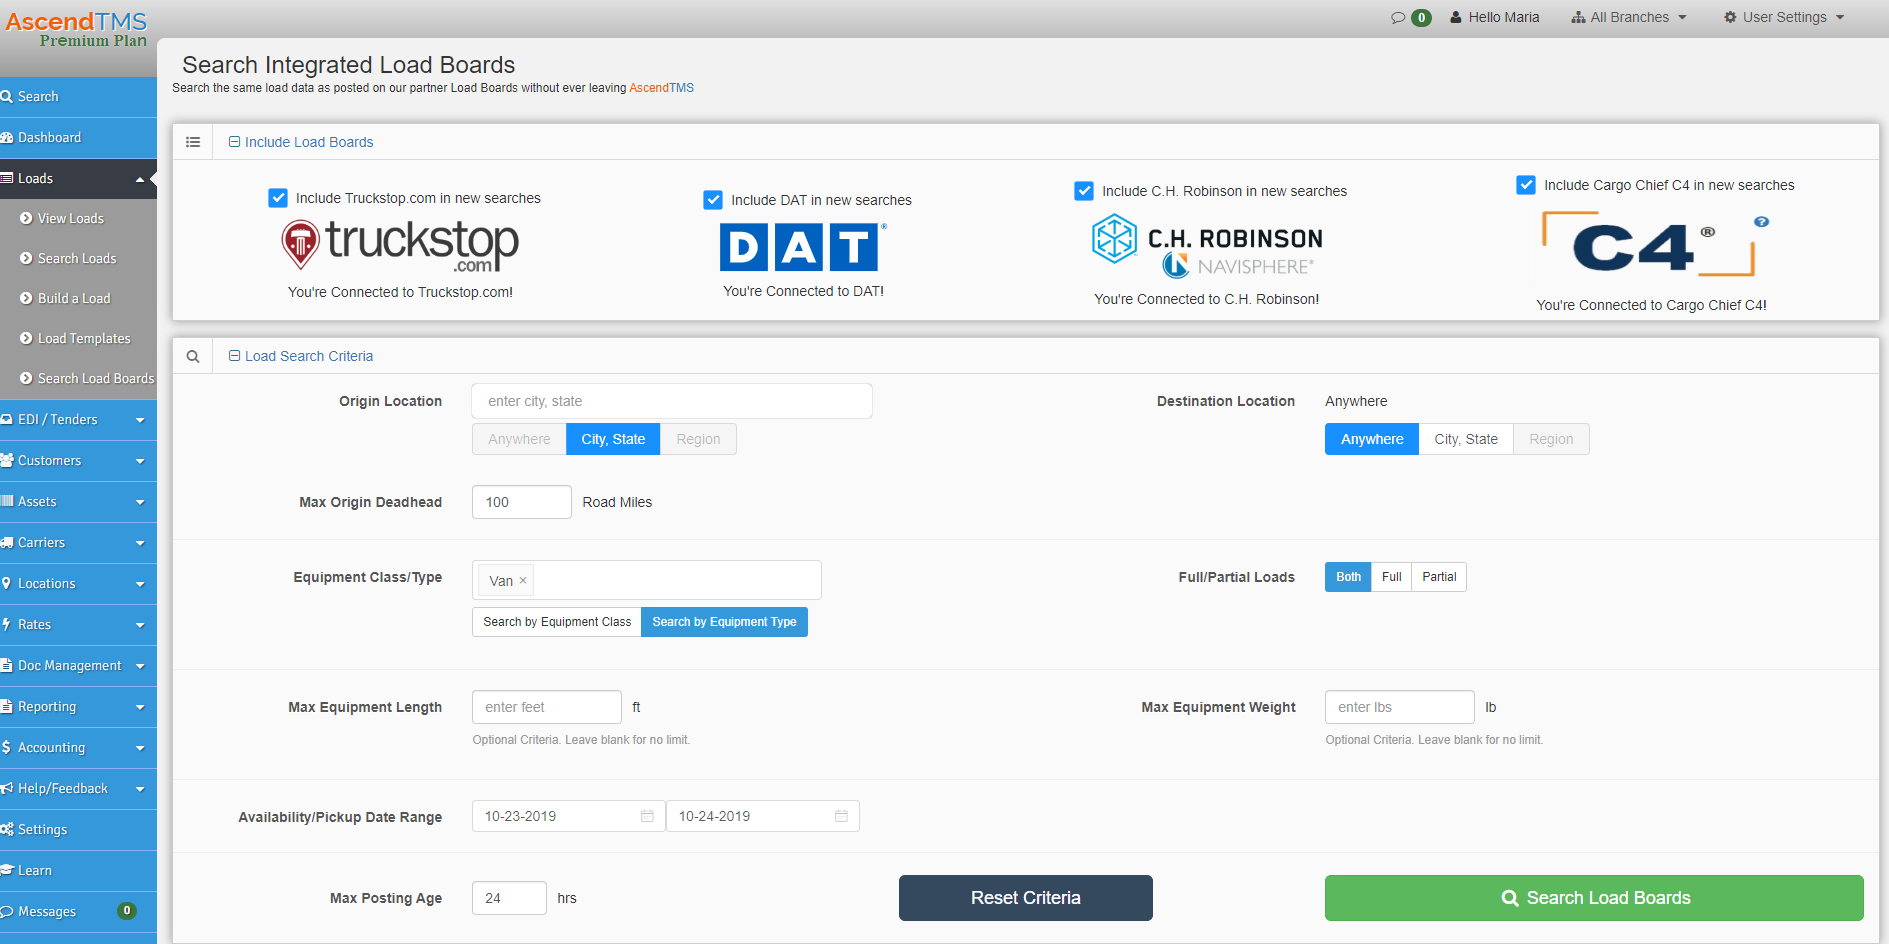
What is so great about using this option from your shortcuts menu is that not only will you be taken to the page where you can search multiple load boards, but AscendTMS will auto-fill key data for you. For example, when you choose to "Search Load Boards" from the shortcuts menu - you will see the Last Delivery location (which will appear above in the Origin Location), the Last Delivery date (which will appear above in the Availability/Pickup Date Range) and also the Equipment on the load (which will appear in the equipment field above).
Switch Branch
By selecting "Switch Branch" you will see a pop-up modal appear:
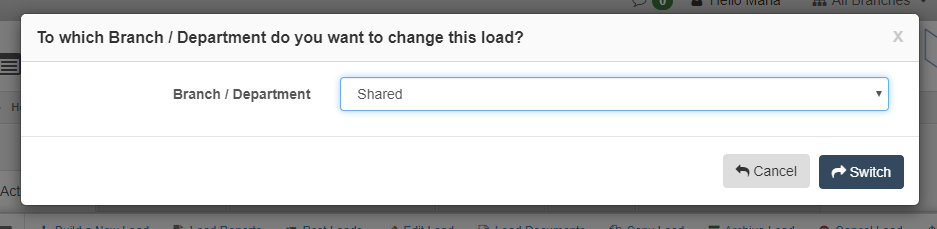
Now, you can open the drop-down list and select which branch you would like to move this load to. For more information on branches, please click HERE.
Copy Load
The "Copy Load" function allows you to copy a load you have already built, in its entirety, significantly saving you time. *Note - this function will copy a load ENTIRELY - meaning everything down to the notes will be copied.
Send to Accounting Management
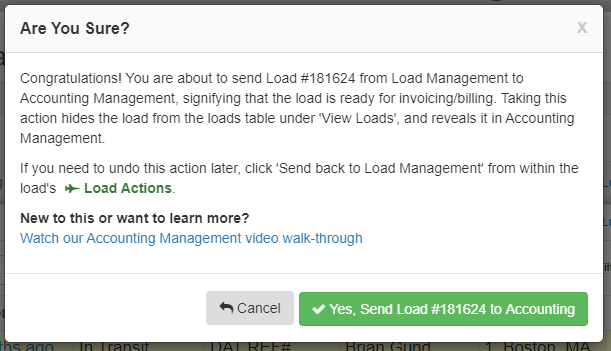
By selecting "Send to Accounting Management" you will see a confirmation modal like below:
However, if you are missing a payee/payor - OR - you have neglected to assign a financial line item to an entity, you may see a modal with a warning such as:
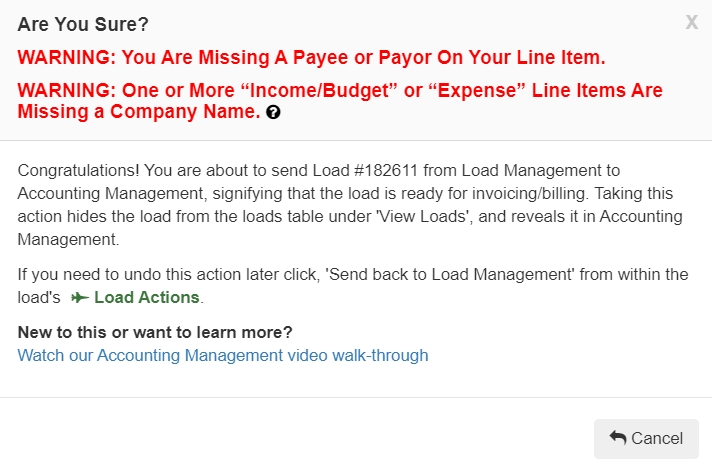
You will not have an option to "Yes, Send to Accounting" until you correct/add the financial line items. However, once you add/correct this - you will get the normal confirmation modal again.
Once you are ready, select "Yes, Send Load #181624 to Accounting". This will move the load out of Load Management and into Accounting. Please click HERE for more information on managing your Invoices and Bills.
Archive Load
Archiving your loads is simply a way to "put away" your old loads to avoid clutter and to make it easier to navigate your active and current loads in your AscendTMS account. Archived loads are accessible to you and your team at ANY time in the future, and can even be "unarchived" with one simple click if needed. For more information on Archiving, please click HERE.
Cancel Load
By selecting "Cancel Load" you will see this modal appear:
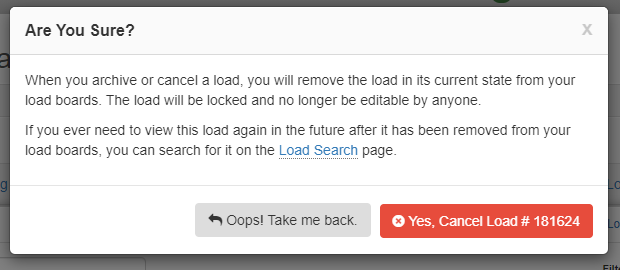
If you are sure you wish to cancel this particular load - simply select "Yes, Cancel Load". If you ever need to view this load again in the future, you can search for it under the Loads Tab by selecting "Search Loads". For more information, please click HERE.
Maria
Comments