How to Build a Load
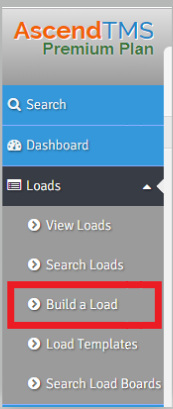
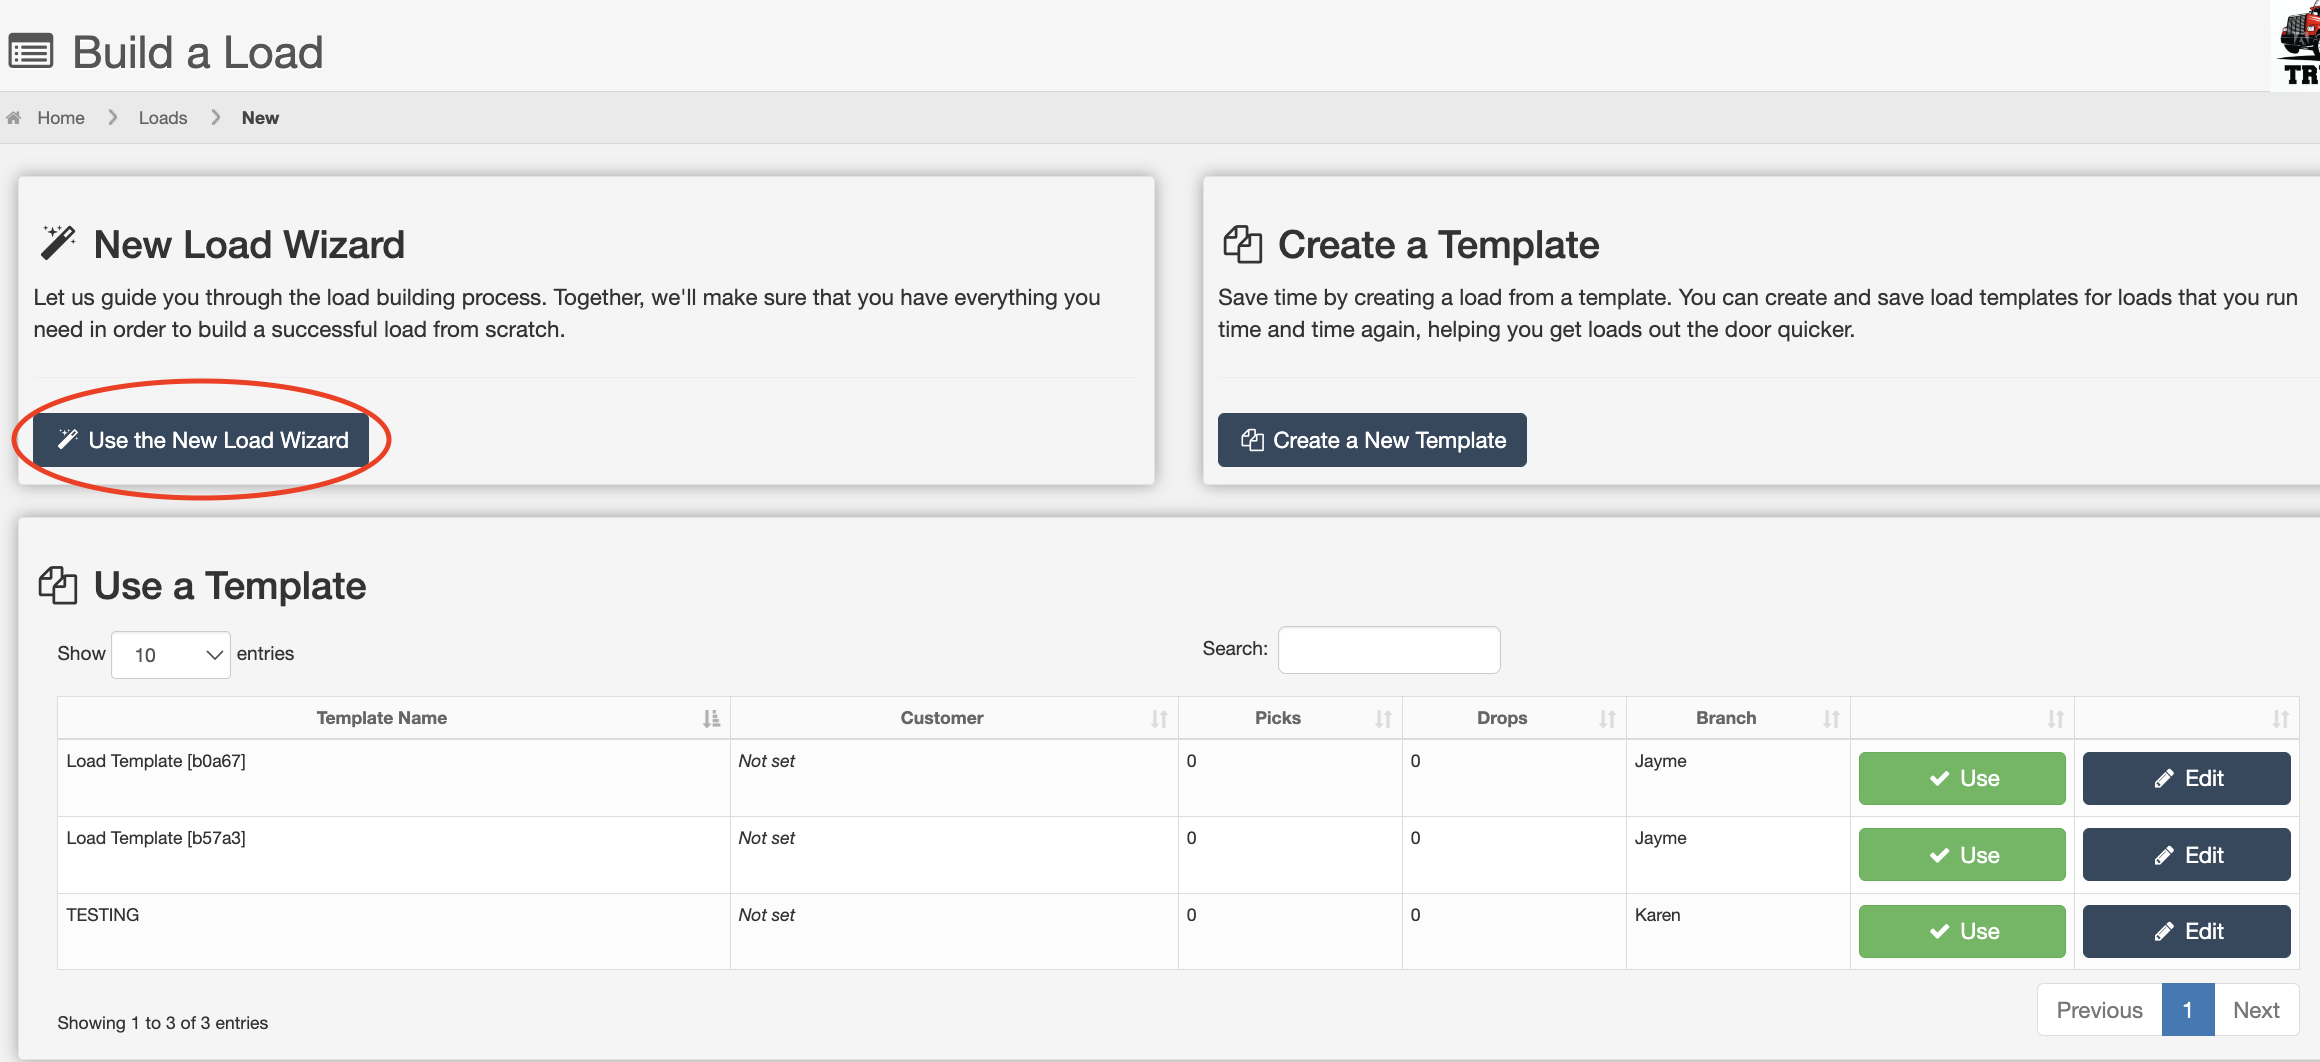
The new load wizard walks you through building a load. To build a new load, click the "Use the New Load Wizard" button that is located on the new load wizard widget.
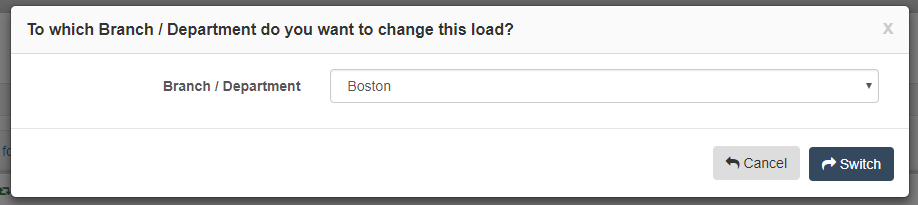
Assigning a Branch
The first prompt when building a new load is assigning a branch. This will determine which users will have access to the load.
Load Basics
After assigning a branch, it's time to get started building your load. The first section of the load is Load Basics.
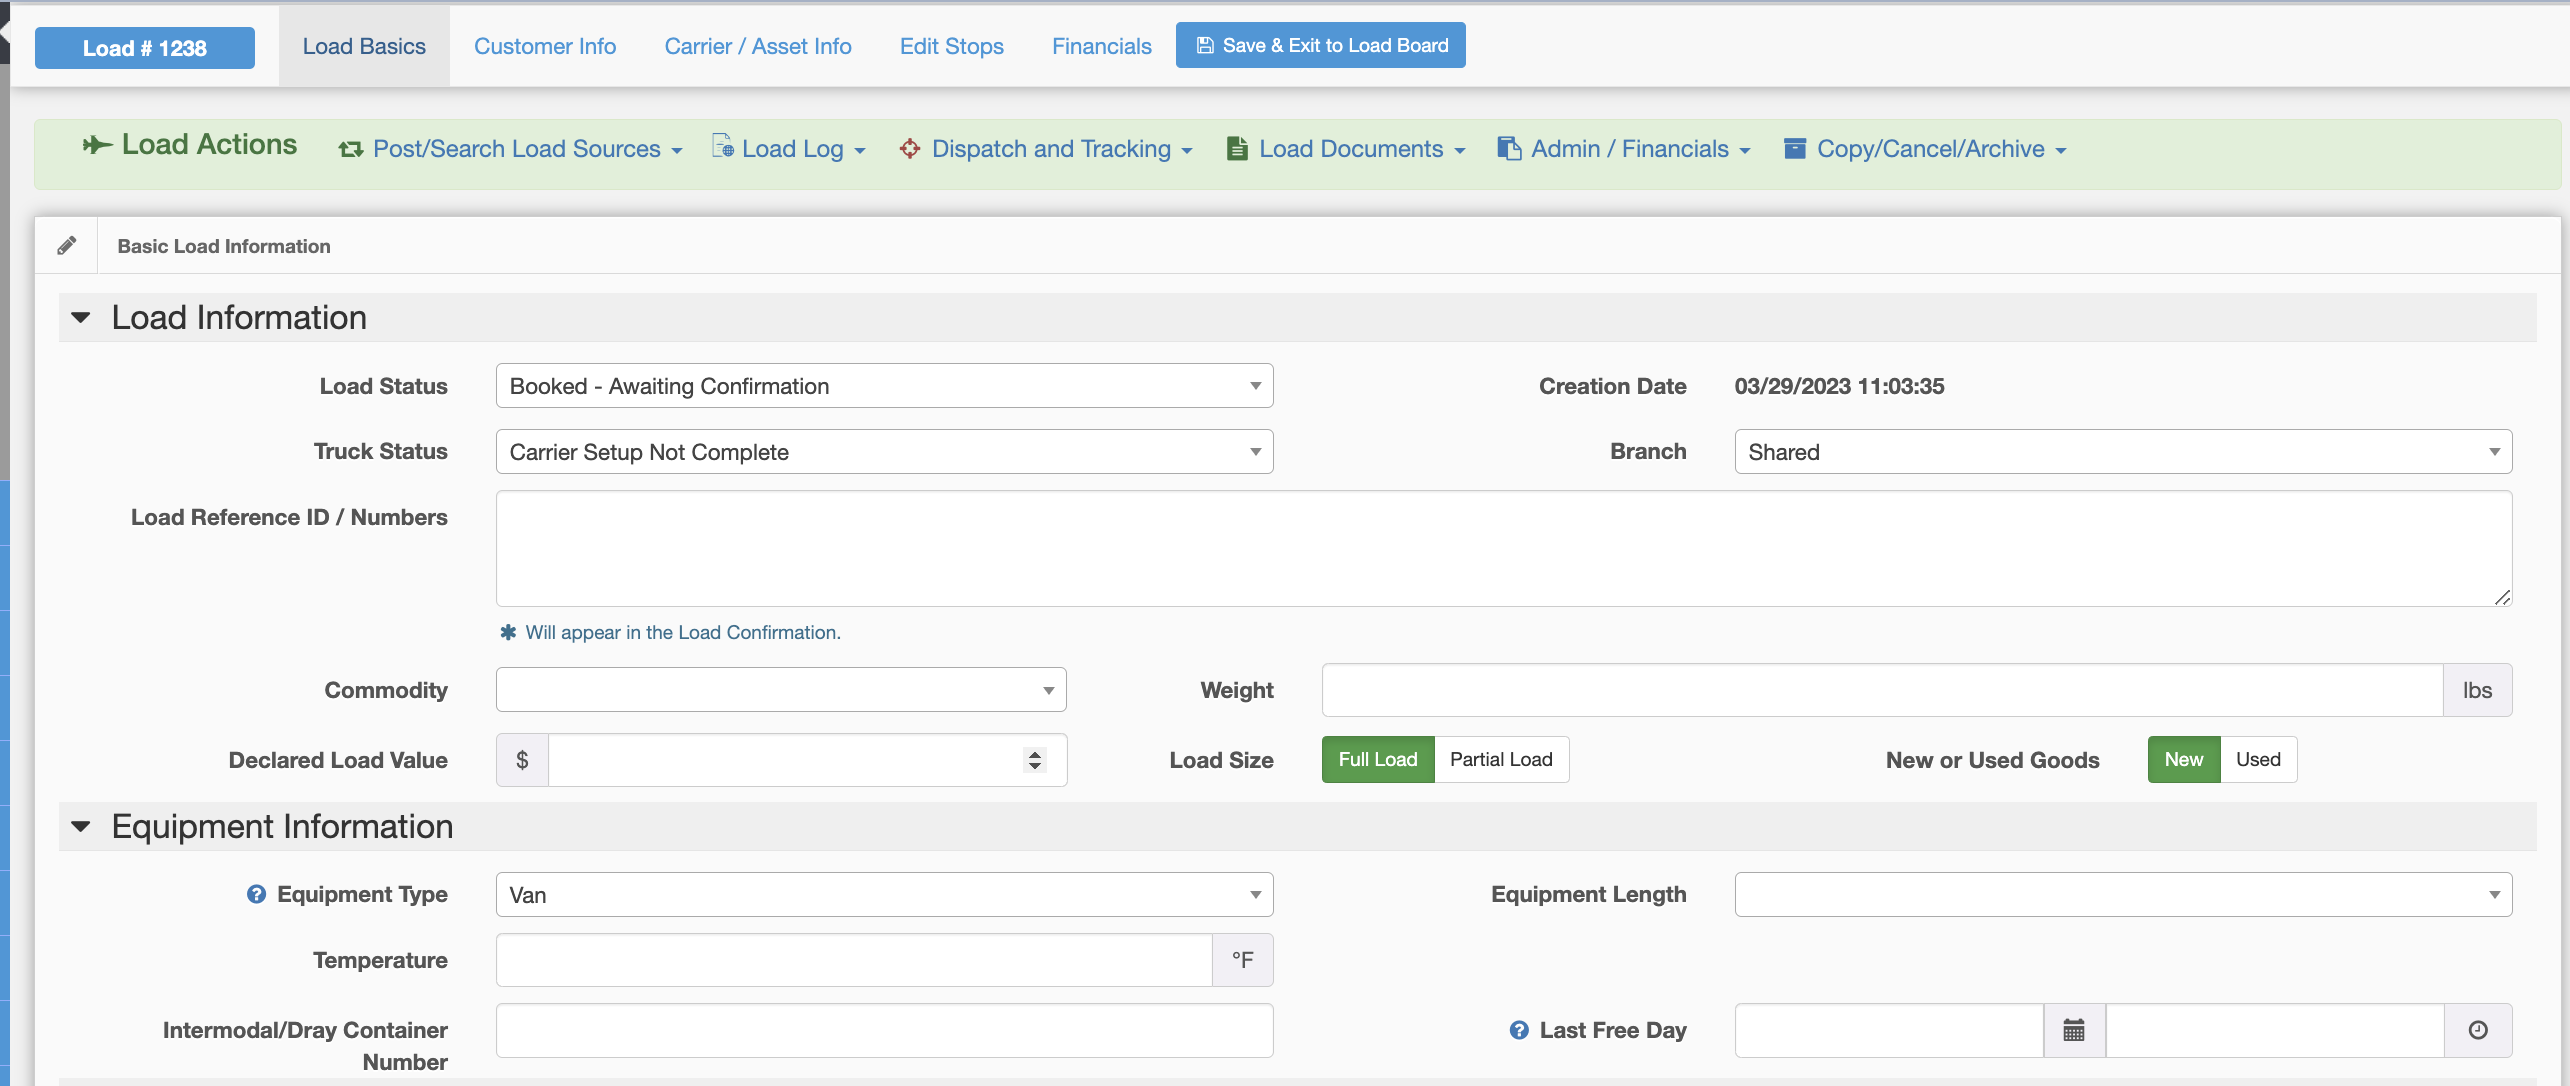
Here you can enter the load information, equipment information, and load notes fields, then click the customer info button at the bottom of the screen.
You will notice that there are drop-downs for load status, truck status, equipment type, equipment length and commodity. You can enter and edit values for these fields by going to Settings > Company Settings > Edit your drop-down lists. Information on how to edit these lists can be found here.
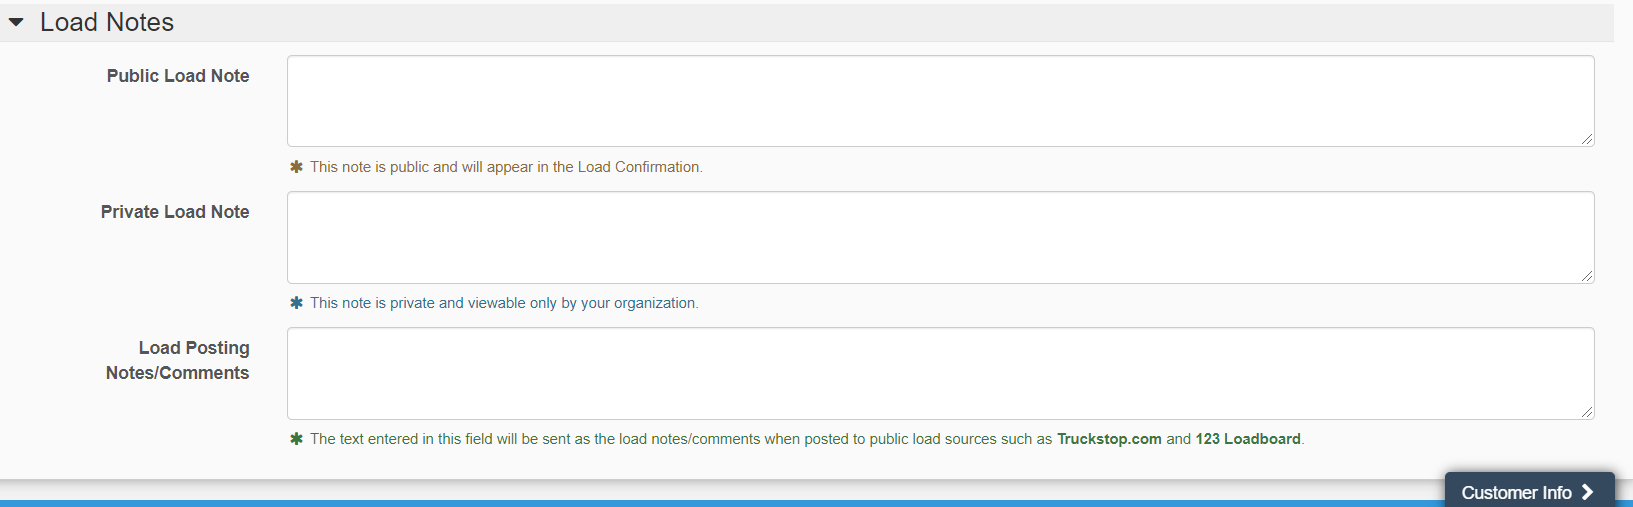
The last section in this area is Load Notes. Three options are available:
Public Load Note: What you enter in this field will appear in the notes section of BOLs, 3rd Party BOLs and Rate Confirmations that AscendTMS will create for you.
Private Load Note: The information entered here will only be visible by AscendTMS users within your organization.
Load Posting Notes/Comments: If you will be using AscendTMS to post to load boards and you have instructions that you want to communicate to possible carriers then you will want to add them to this section.
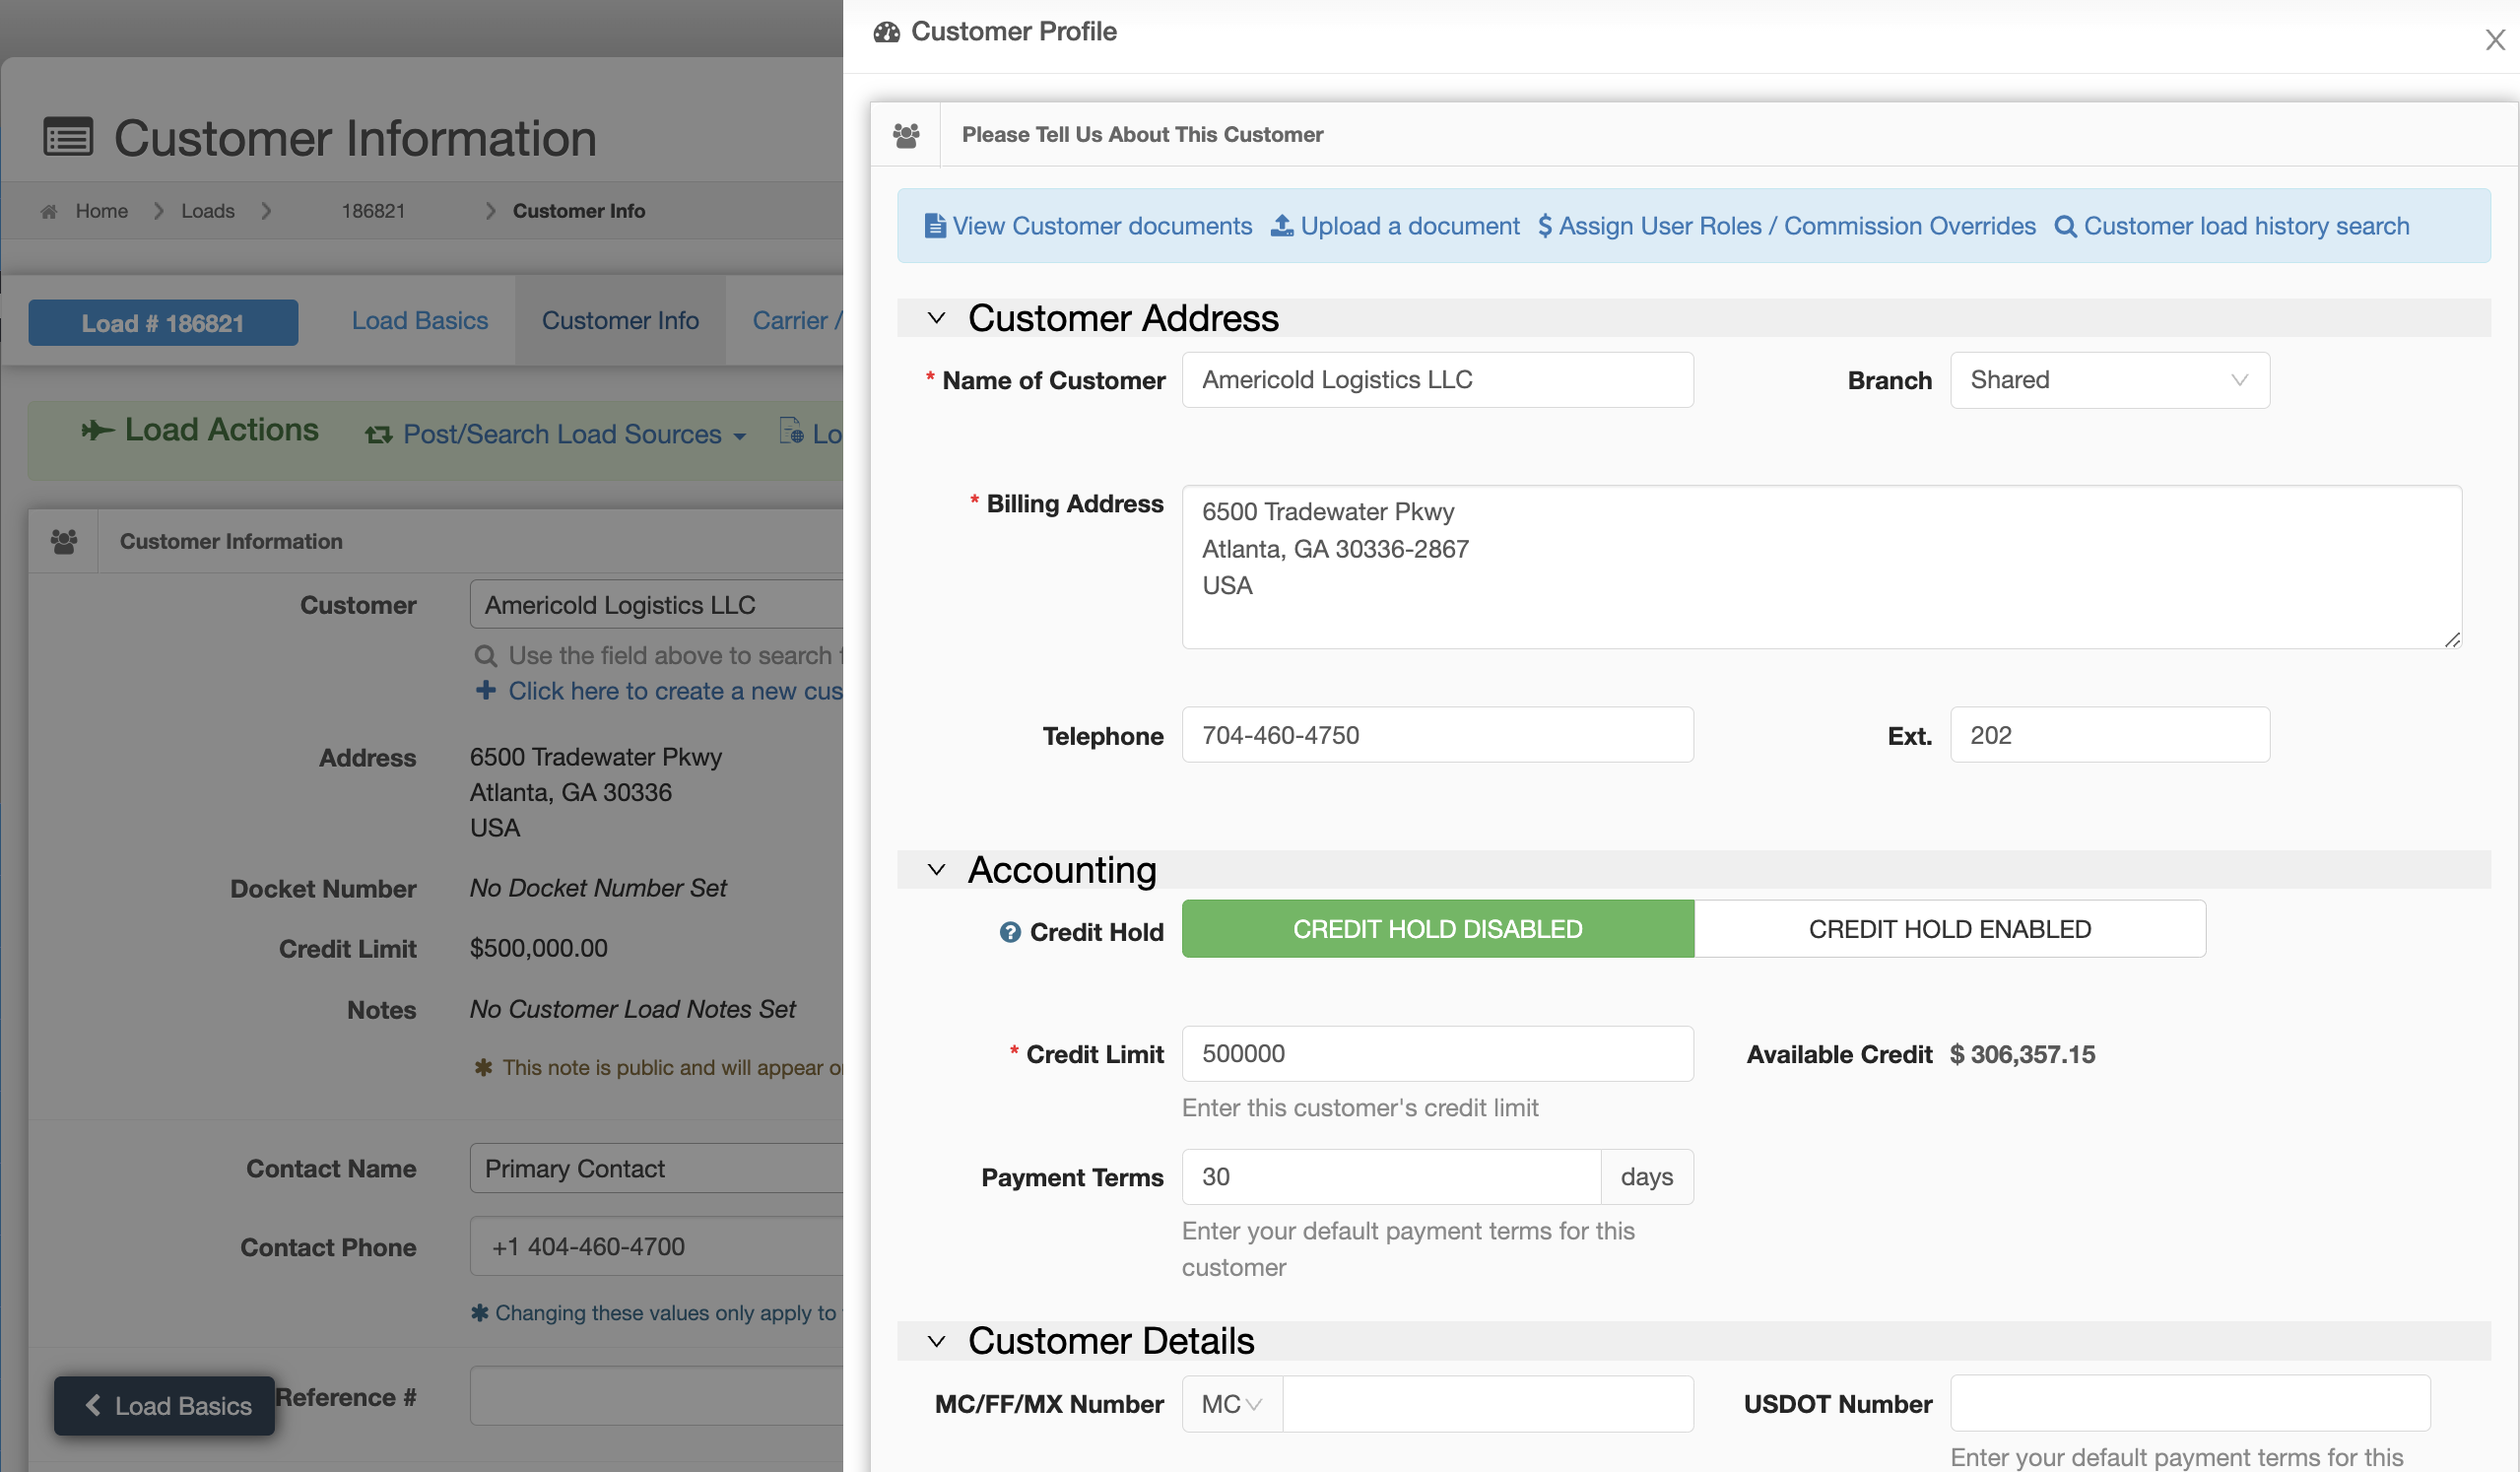
Customer Info
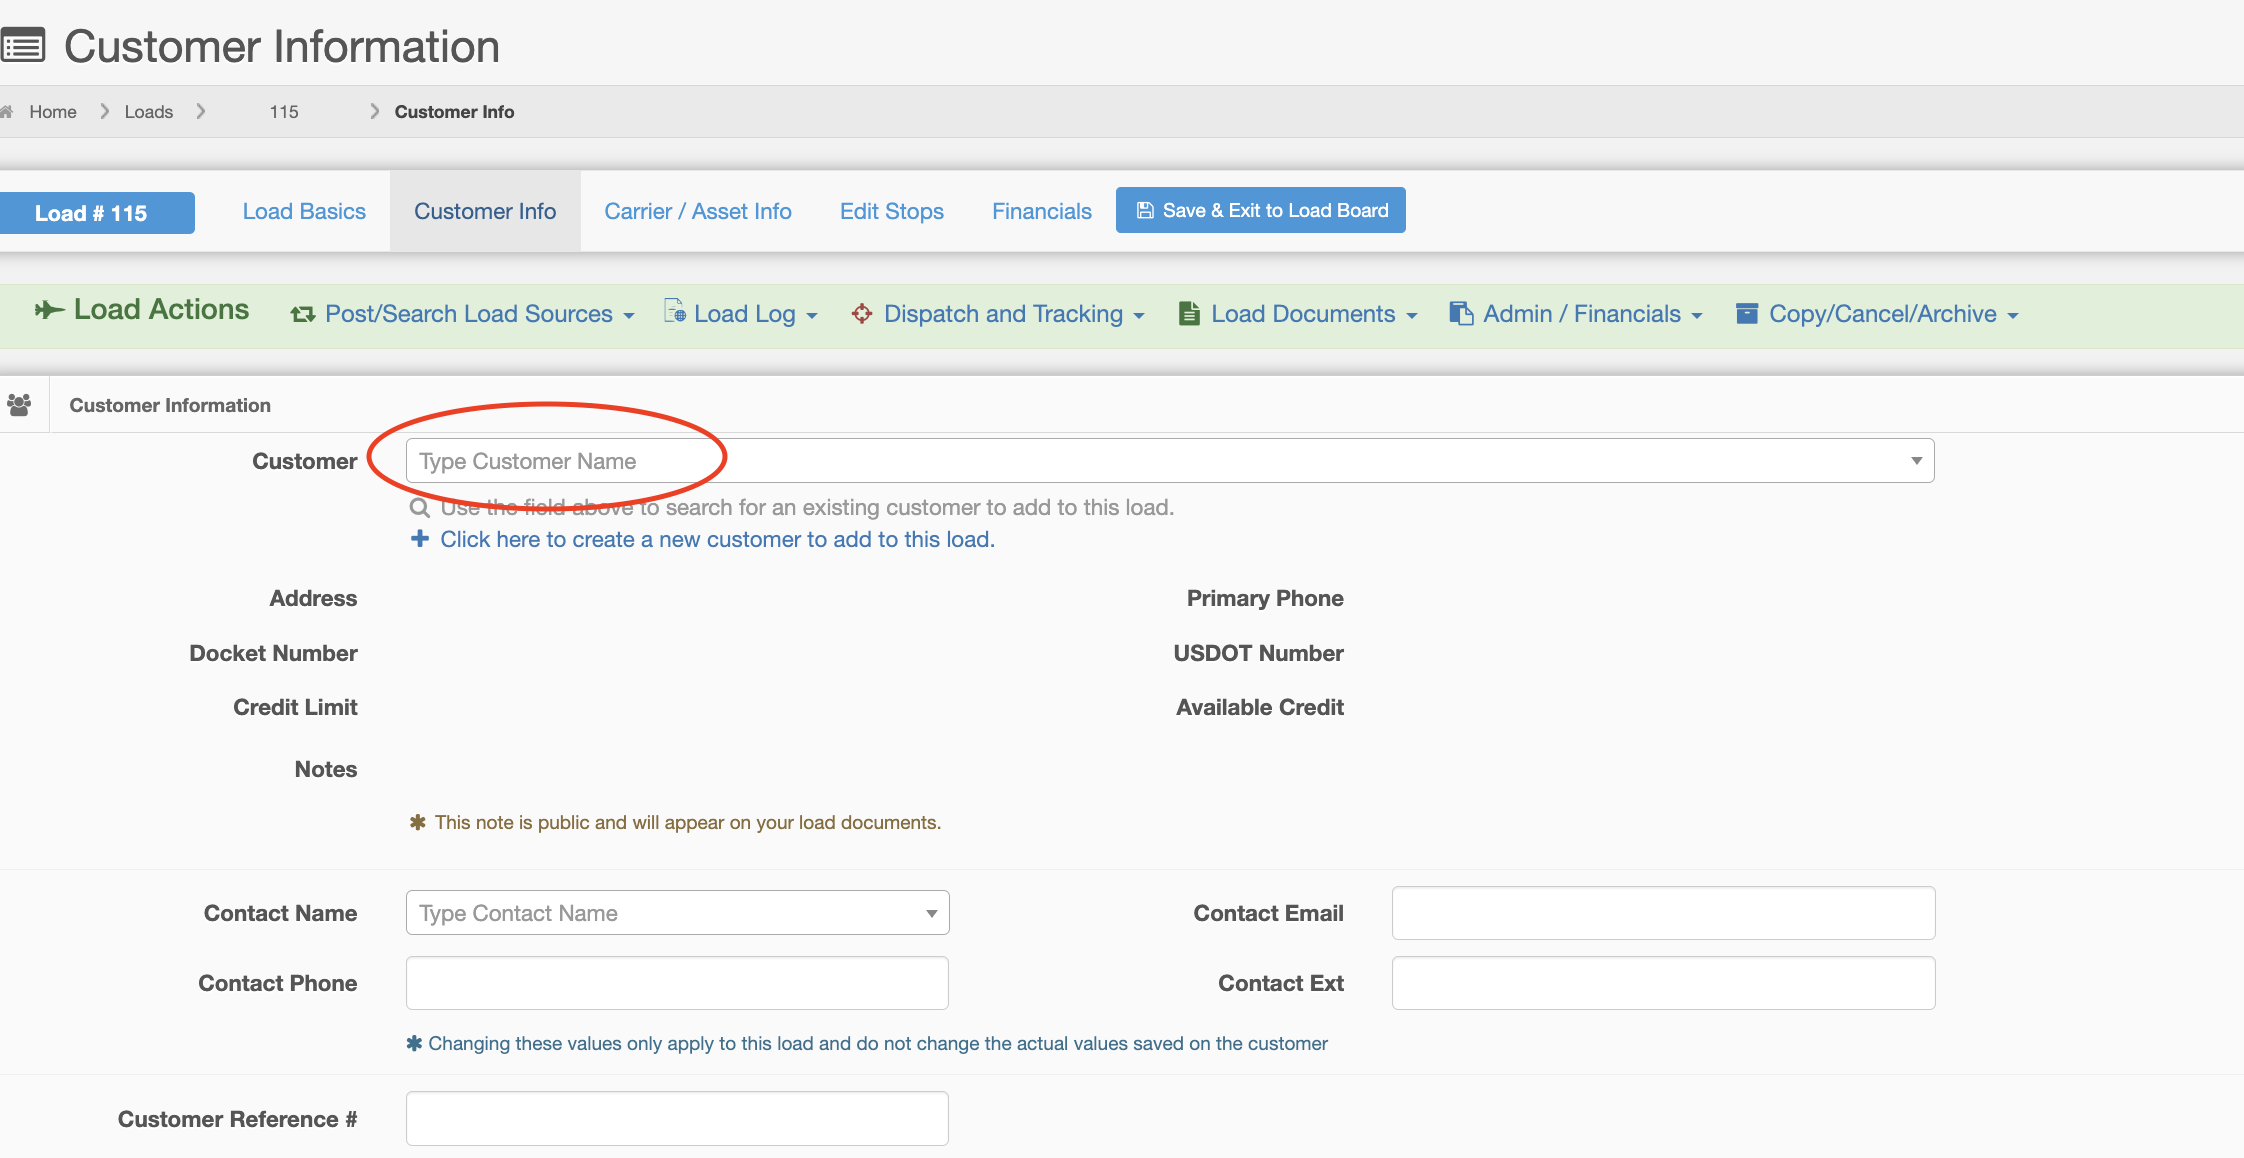
The next step is to select your customer. You can do this by typing the name of your customer as shown below:
Once you select your customers, the rest of the form will populate. The form can still be edited if you need to change or add any information.
What if my customer is not in the system?
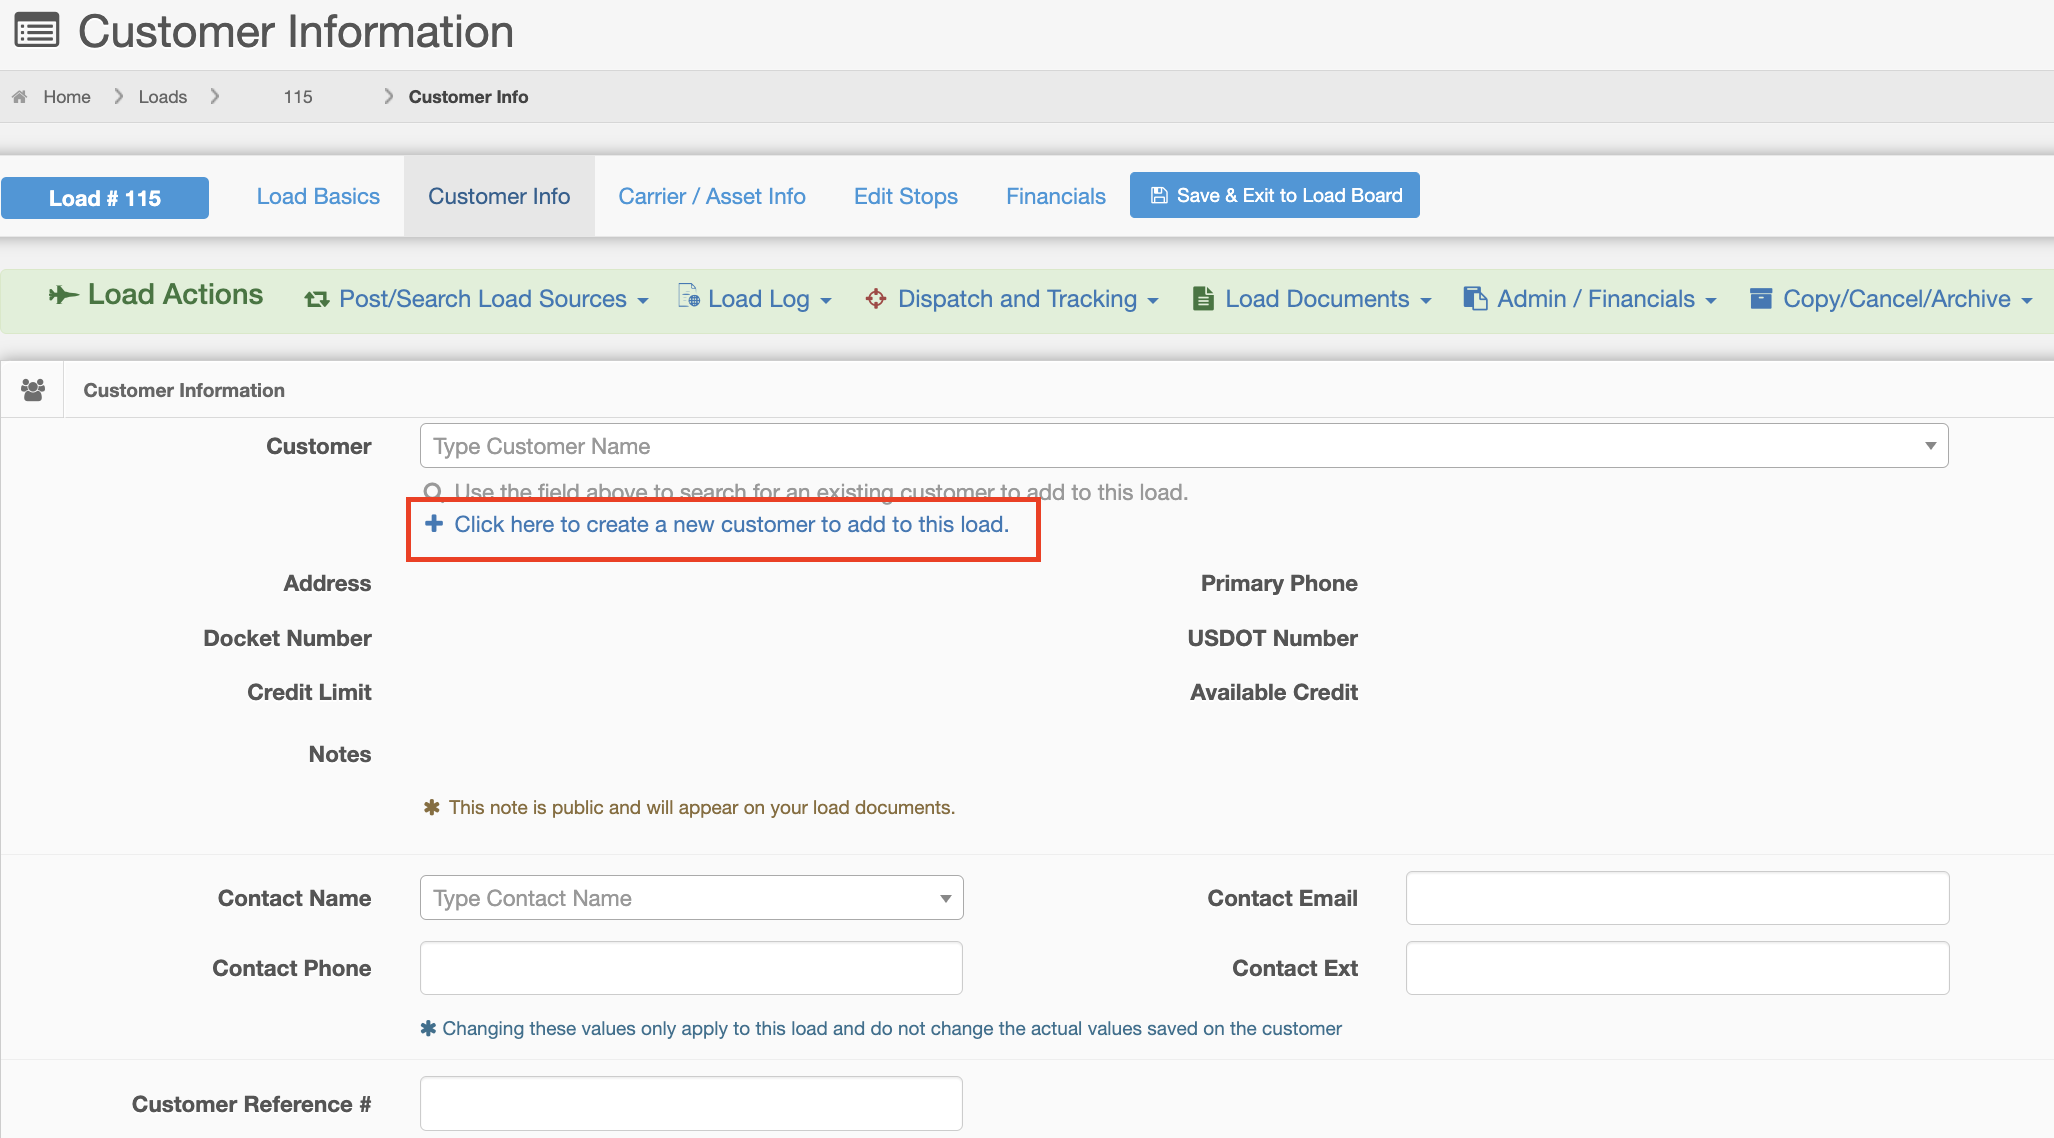
If your customer is new or not in your system you can still add them in this screen. Simply click the option to create a new customer, which is below the customer selector box.
From here, you can enter a Customer name or address in the “Search for a Customer” field. This field is powered by Google and does an internet search for you. If you are able to find the company and select the information, the rest of the form will populate automatically. If not, you will need to fill out the fields manually. Once you are done, click the “Save & Return” button on the bottom right-hand corner of the page.
Once all of your customer's information has been entered, click the "Edit Stops" button on the lower right
Carrier/Asset Info.
The third tab is the carrier/asset info. shown below:
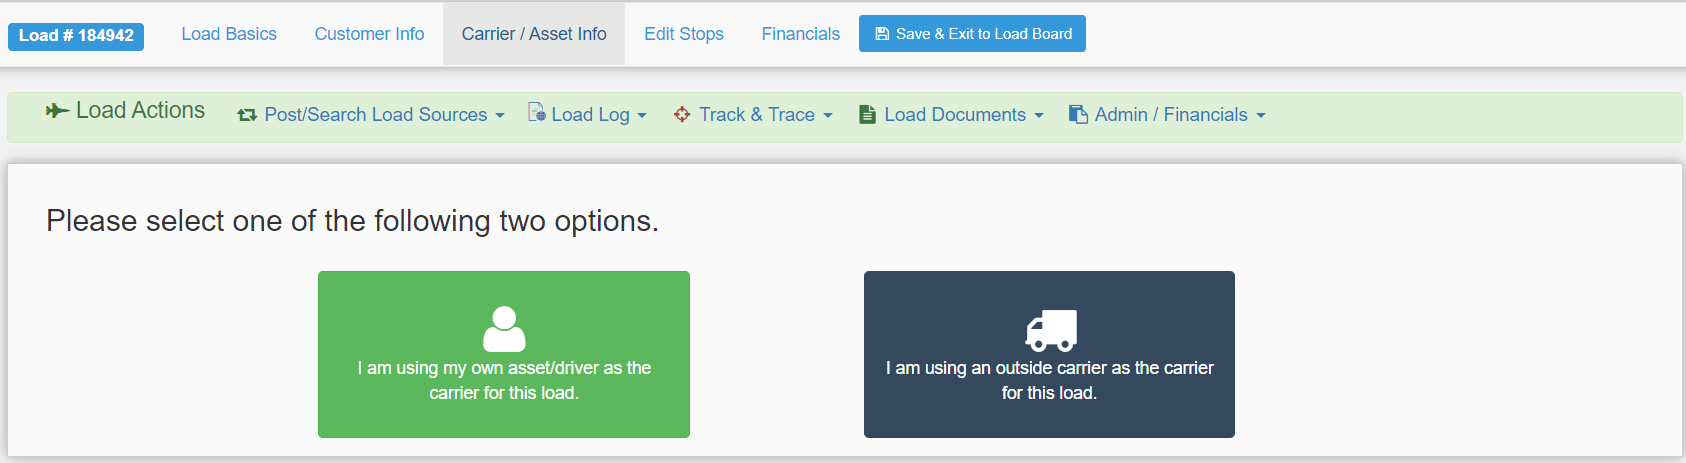
If you are using your own asset driver as the carrier for the load, click on the green button. From here, you can edit your carrier by clicking the pencil icon inside the “Carrier” field.

After the carrier information is populated, you can edit that information if necessary by clicking the pencil icons on the right-hand side of the information.
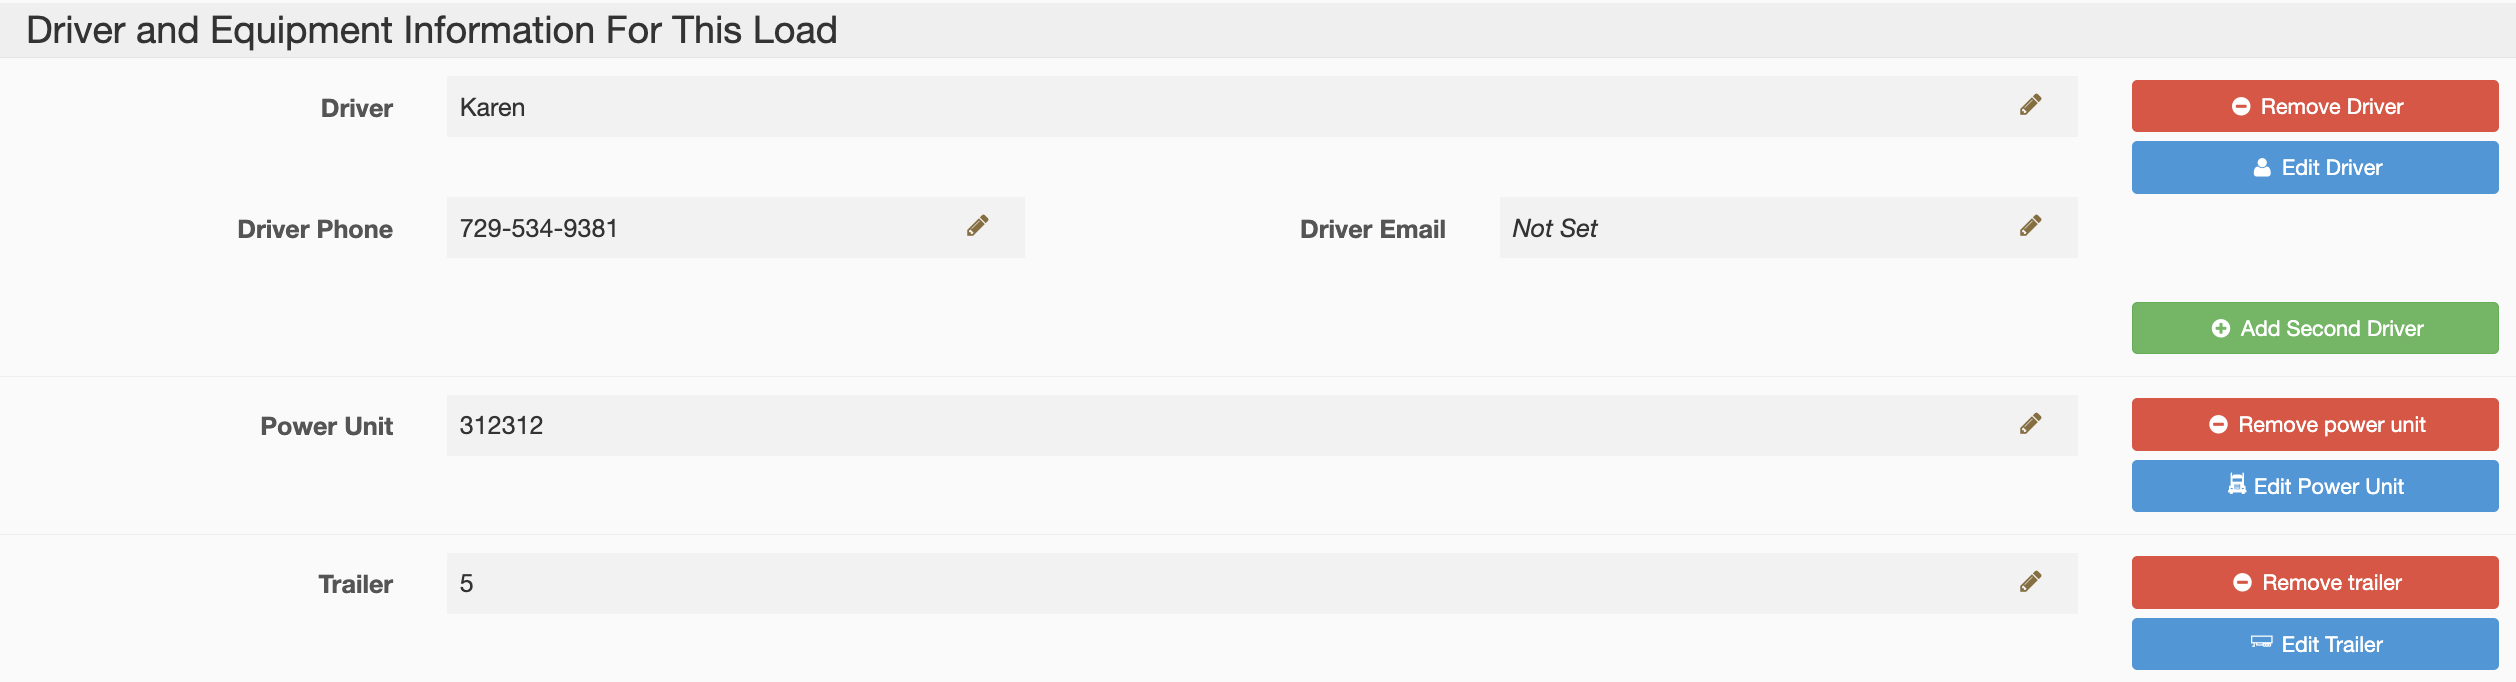
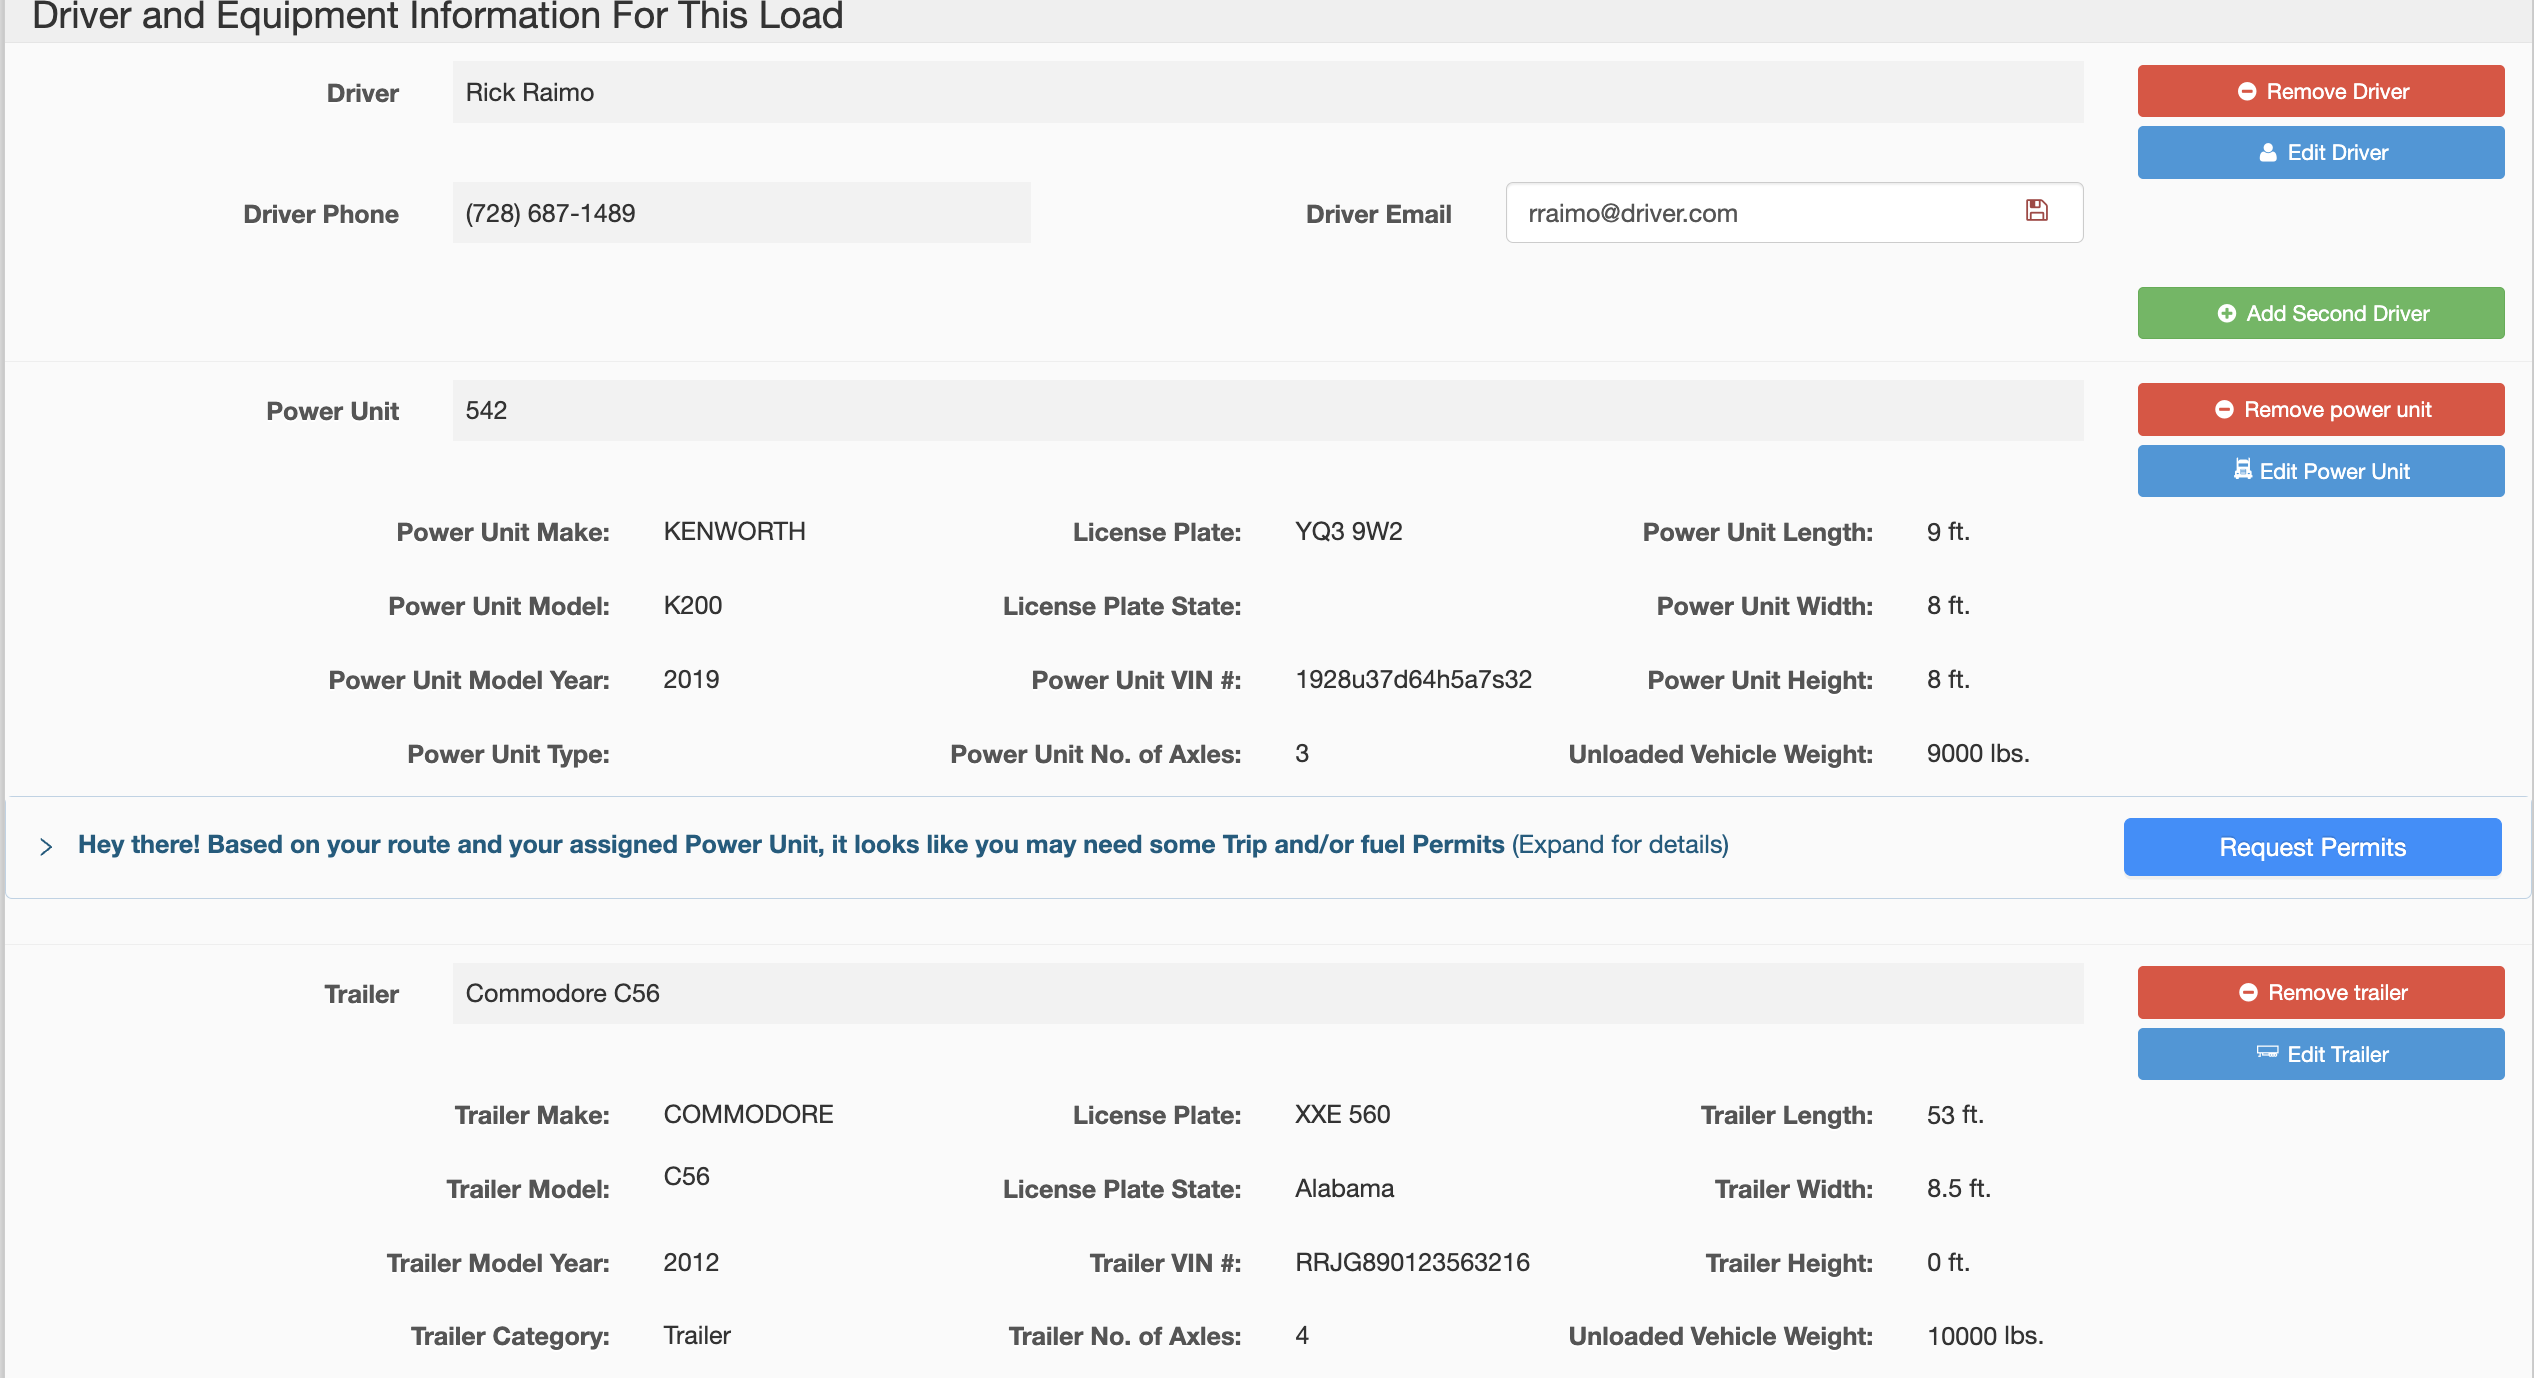
Below the carrier information is the “Driver and Equipment Information for This Load”. To set a driver, power unit, and trailer, click the pencil icon inside each field.

If you are using an outside carrier for the load, click on the navy blue button. From here you can add a new carrier by clicking the pencil icon inside the "Carrier" field.

If the carrier is not already in the database, you will have to manually enter all of the information. Fields can be edited by clicking the pencil icon. Make sure to hit the save icon after you fill in each field.
When finished entering the carrier/driver information, click the "Edit Stops" button on the lower right-hand side of the screen.
To remove a carrier or driver from the load, click the "Remove Carrier" button next to the information you need to change.

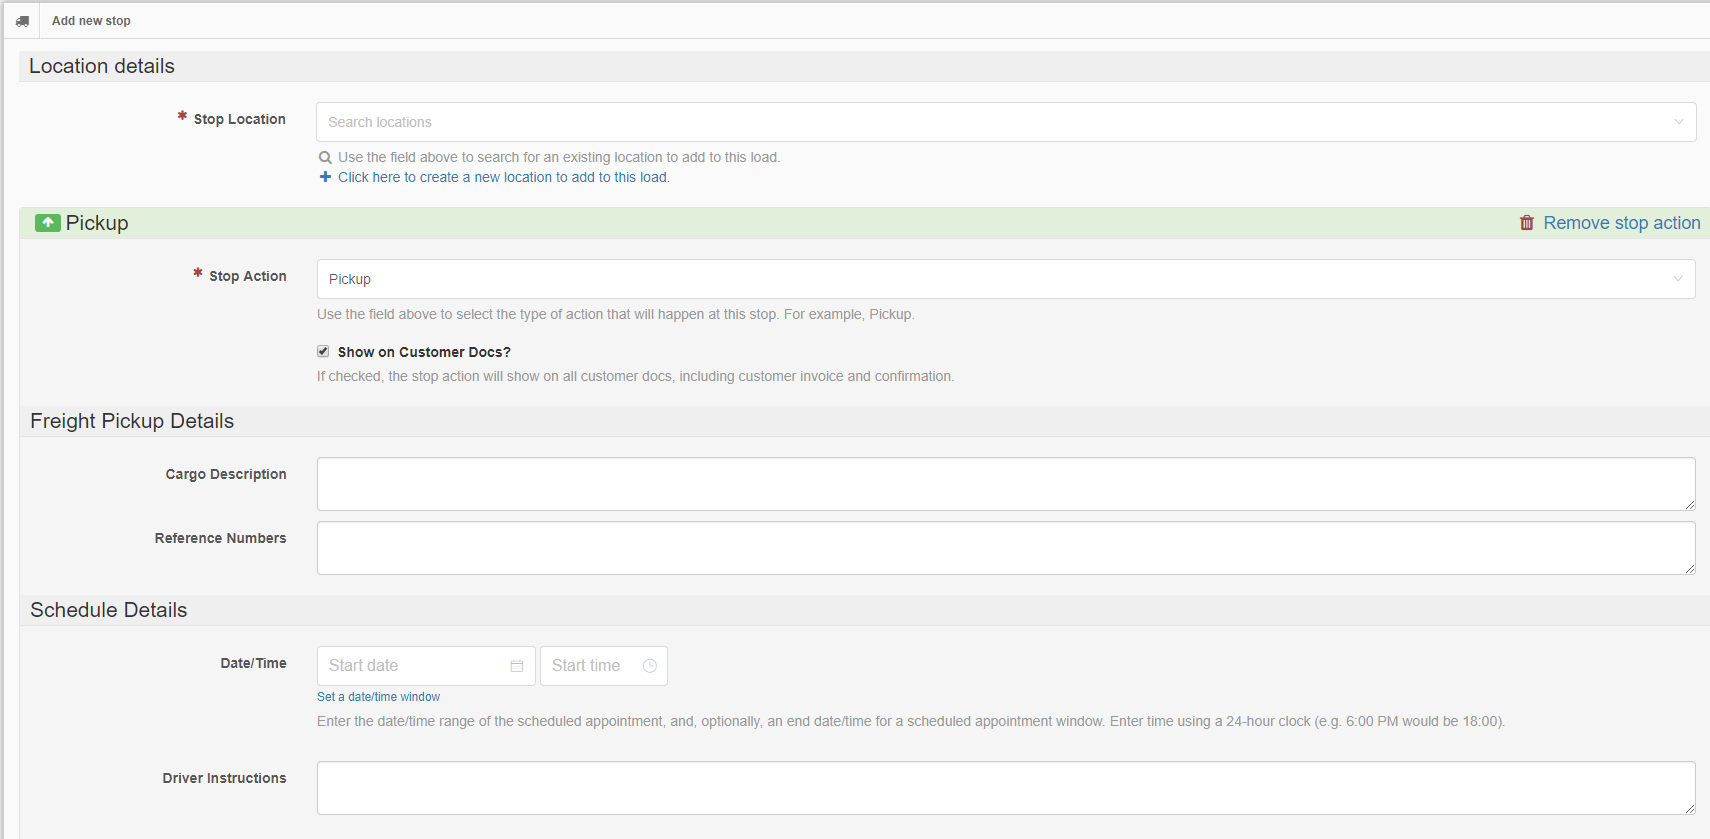
Edit Stops
This screen will allow you to enter the pickup and delivery locations, as well as any other stops that will take place during the course of the load.
To add a pickup, click the option pictured below:

You will then be taken to this screen:
From here you will first need to add a stop location. If the location is already in the system, it will populate once you start typing the name. If the location is NOT in the system, it can be added by clicking the link pictured below.
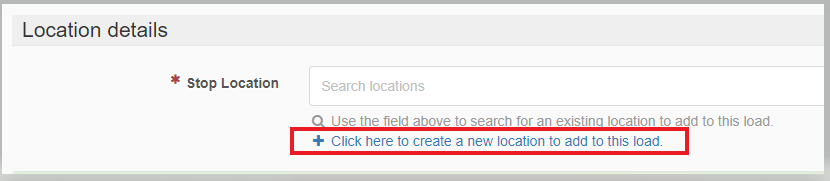
From here, you can enter a Location name or address in the “Click here to create a new location to add to this load" field. This field is powered by Google and does an internet search for you. When you search the location and Google finds it, you will then select the information and the rest of the form will populate automatically with location address and contact phone number. A new screen will open that will allow you to enter all the pertinent location information. It is important to note that the notes section at the bottom is for the location, not the specific load. Do not put notes in here unless you would like them to be included for all loads, not just this one. Notes for the current load need to be entered in a later step.
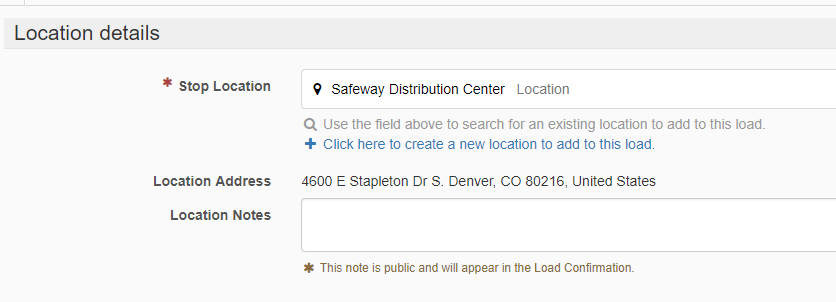
Once all the information for the location has been entered, click "Save & Return" on the bottom right of the screen. You will then be taken back to the main edit stops page where you will complete your stop location details.
From here you can now add what we call stop actions. The available options include but not limited are pickup, delivery, drop trailer, hook trailer, change asset group, change driver, change power unit, change trailer, detention, storage, and accident as well as some additional stop actions.

Every load must have at least one pickup and one delivery action in order to process correctly in accounting. However, you can have multiple actions per stop and multiple stops per load. To add another action to a pickup or a delivery, click the “Add Another Action” button as shown below:

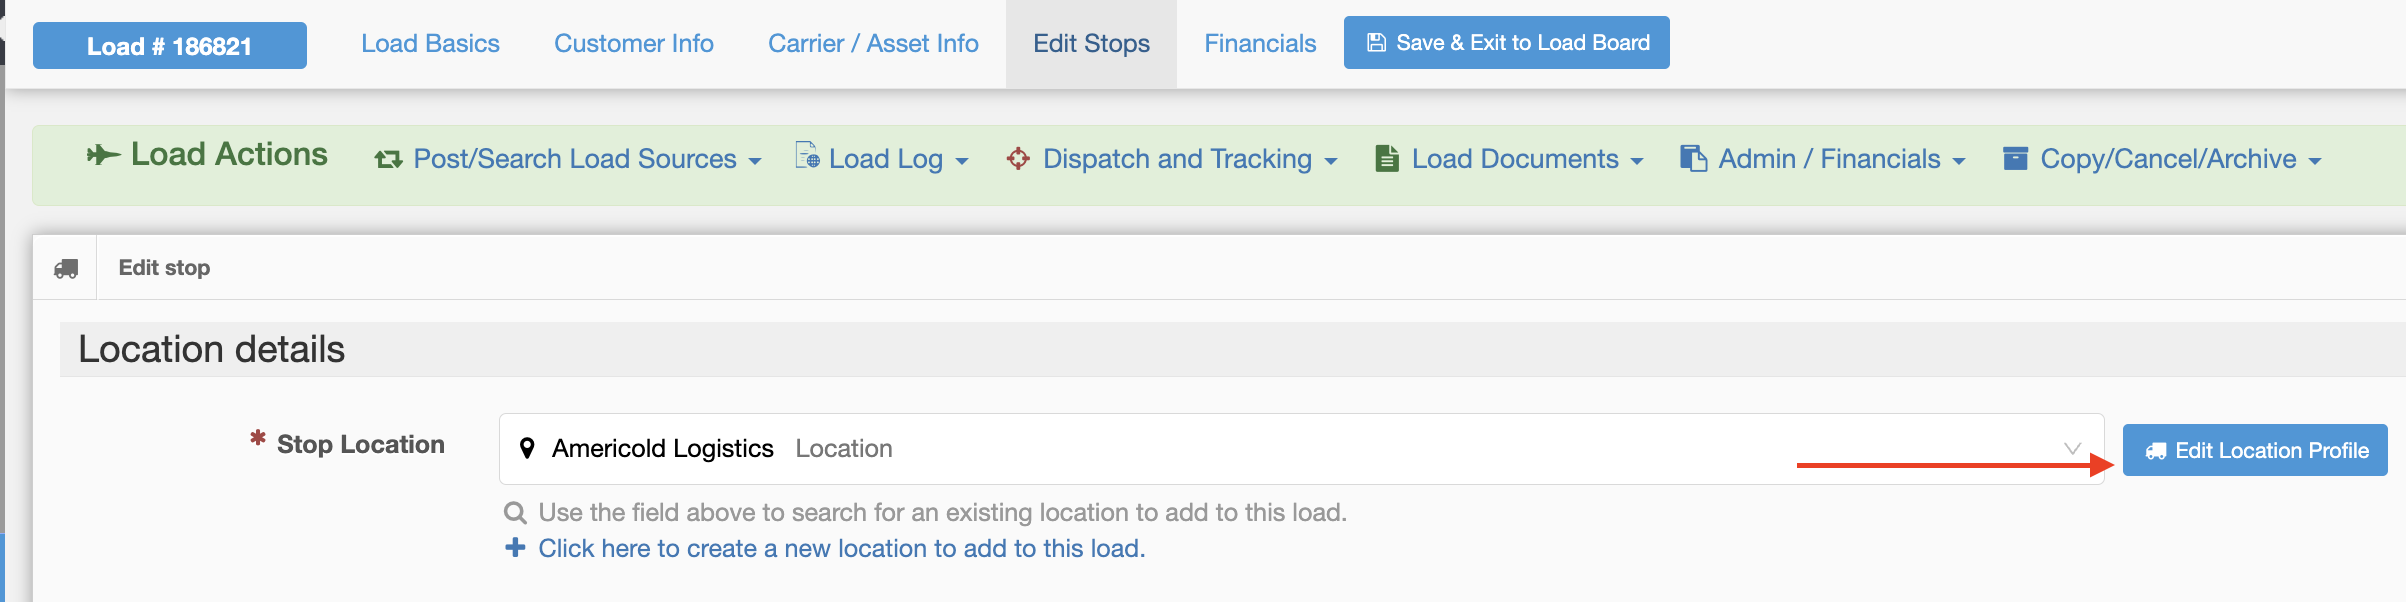
If you need to edit any entity profile, i.e. Customer, Carrier or Location, you can do so while being in the load. In each tab you will see an Edit button as shown below.
Customer Tab:

Carrier/Asset Tab:

Location Tab:
Once you click on the Edit button, a slide-out panel will appear, as shown below from the Customer tab, where you will be able to make any change in the respective profile without having to leave the load. Once you make the change, the updates will autosave in the profile as well as in the current load you are in.
***Please note, only the current/future loads will update any revised details. If you need another active load to update newly revised details, you will have to unassign that entity and then add them back to the load***
You can also update your outside Carrier details as well as your Assets, i.e. Driver, Power Unit and Trailers by choosing the button of what you wish to update as shown below.
Carrier:
Assets:
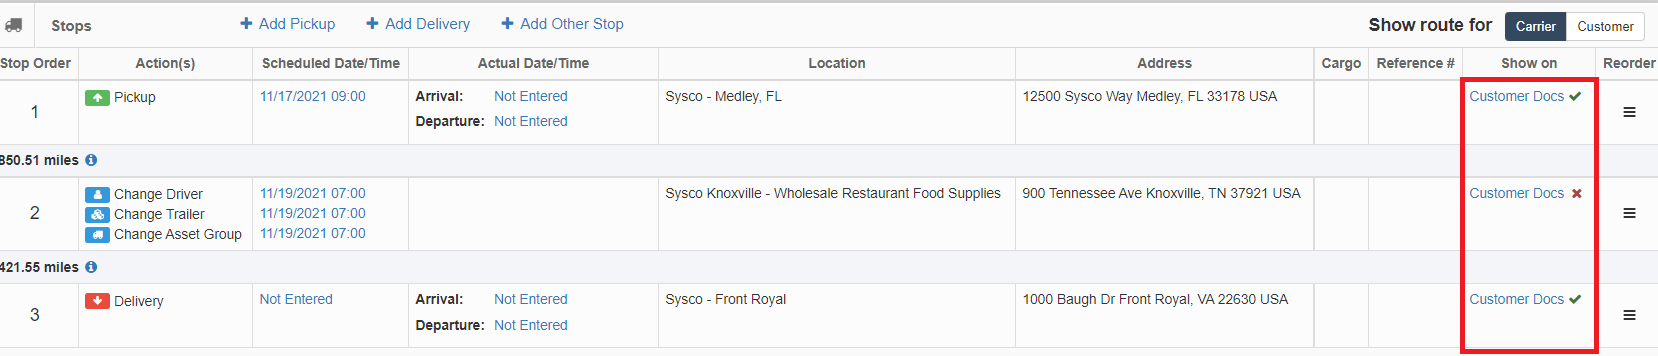
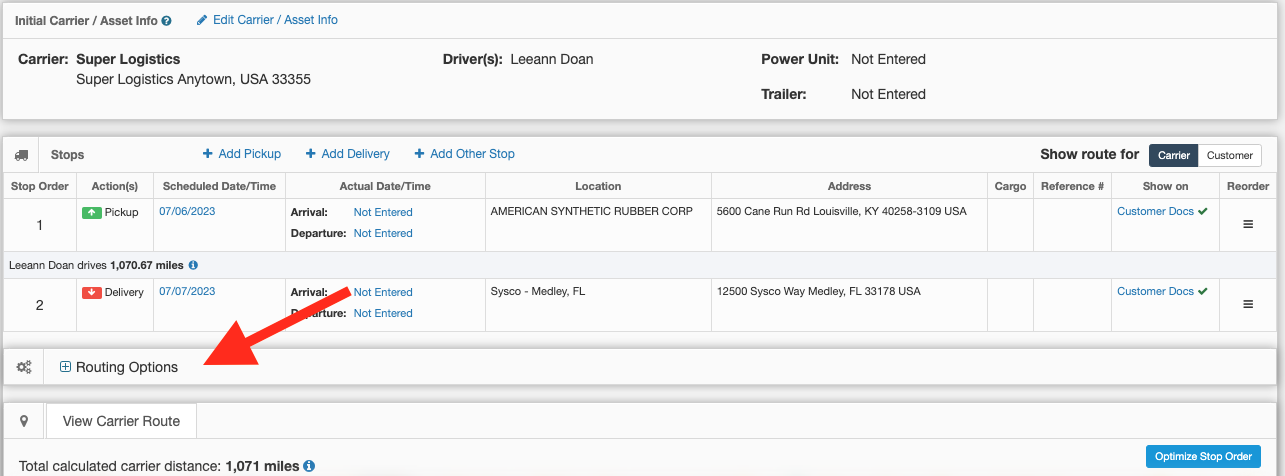
As previously mentioned, you can have several stops and in each of these stops, there could be several actions associated with them as the image below demonstrates.
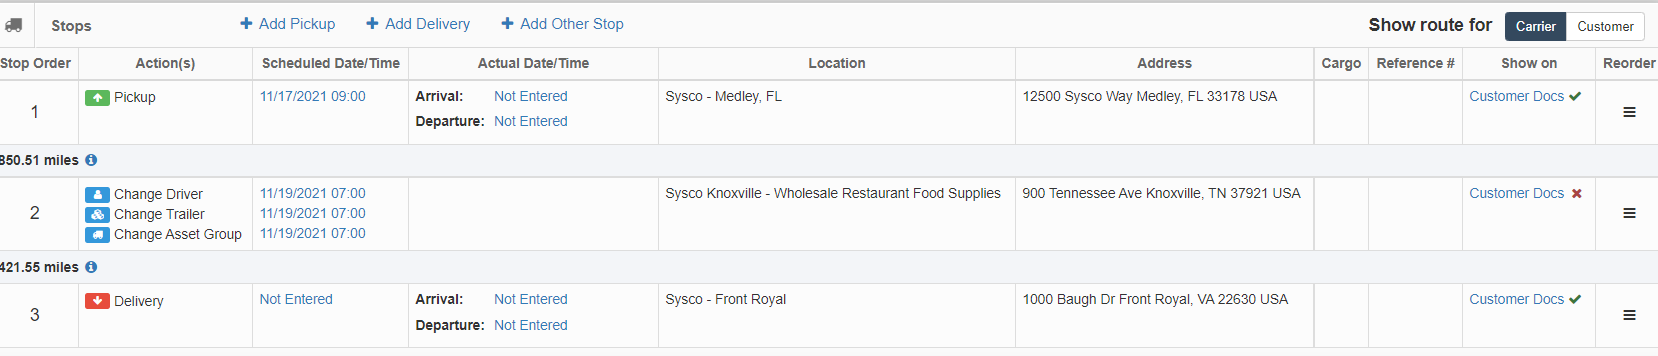
Naturally, there are stops/actions that you may not want to appear on customer documents. You are able to include or omit these stops by going to the Show on column to make the appropriate selections. Notice, also that in the image below, we are seeing the stops/actions from a carrier's perspective since the Carrier is selected by default in the toggle.
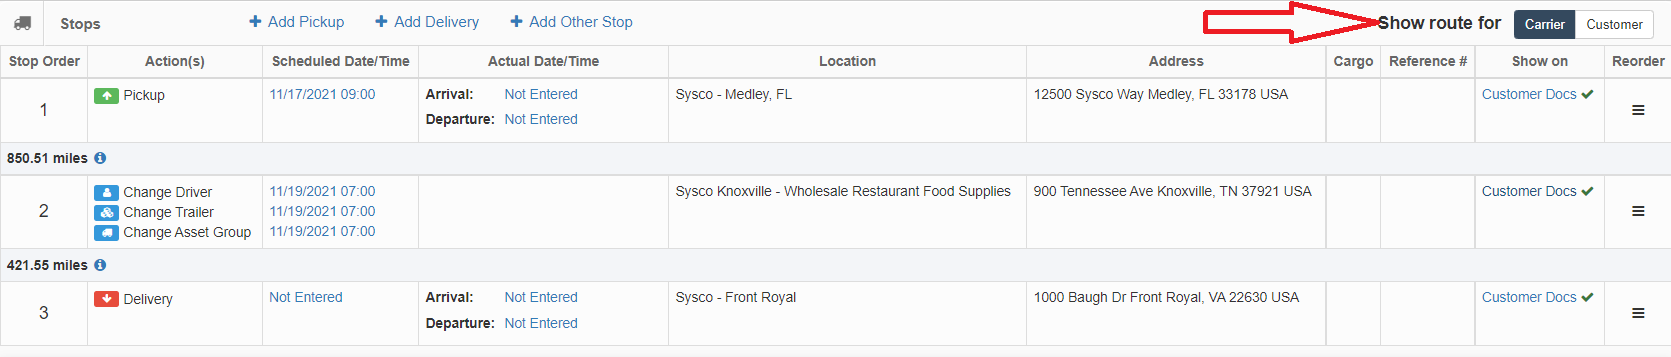
To see what the customer will see, simply select Customer in the toggle as shown in the image below. While in this view, you are still able to hide stops from the customer's view by clicking on Customer Docs. You are also able to edit the Date/Time and Driver Notes for each location on the fly by hovering over the location you want to edit under the Date/Time column.
The system will calculate the miles between stops, as well as the overall loaded miles. (This is done automatically with our integration with the PTV Group. For more information on the PTV group, please see our article here.)
Miles between stops can be found here:
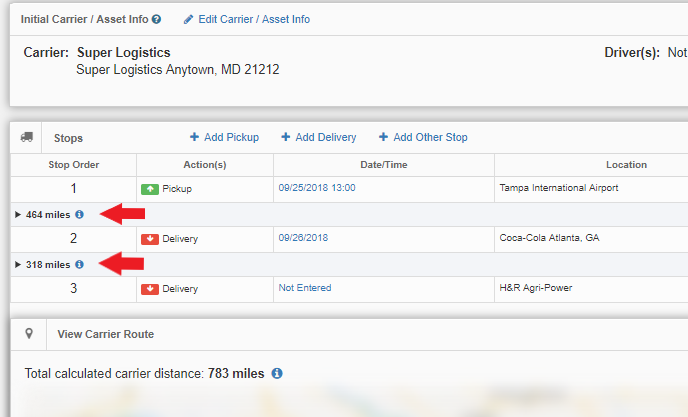
The overall miles will appear below all the stops:

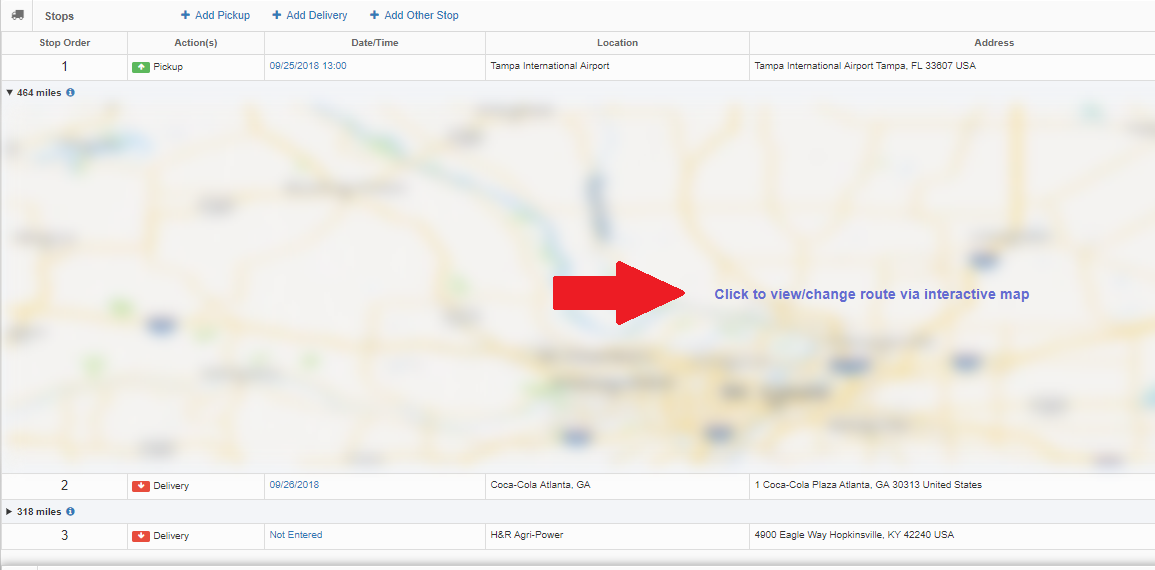
In addition to seeing the total calculated miles, Ascend shows the routes on a map. This route can be altered by viewing the route between stops. To access the map for the route between stops, simply click on the carrot next to the calculated miles, as shown below:
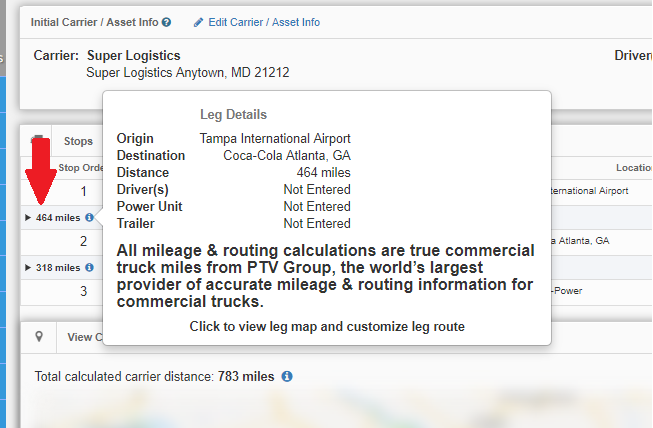
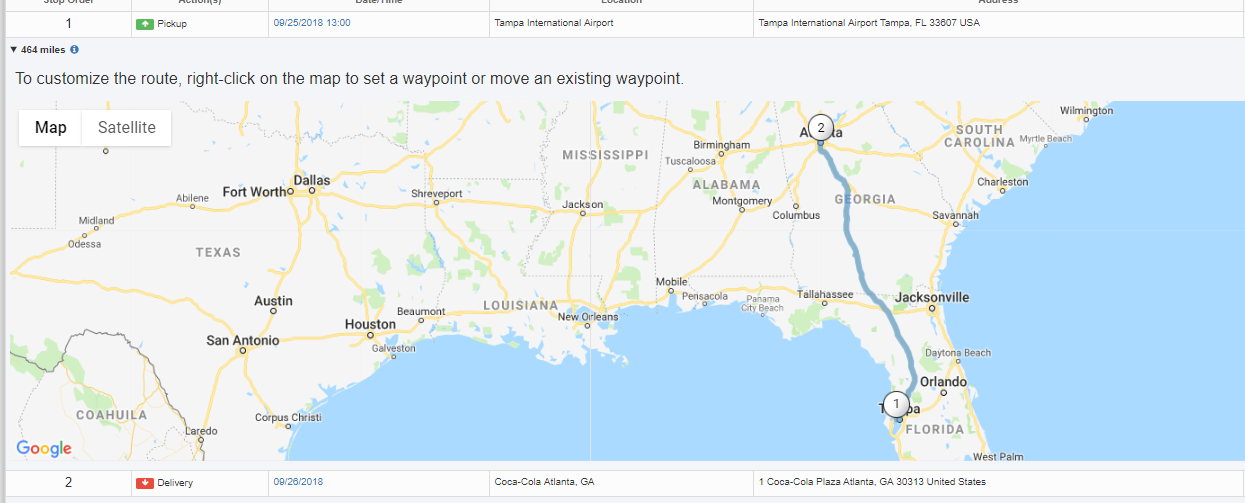
Then, you will need to select "click to view/change route via interactive map".
You will then be able to customize the route by right-clicking on the map to set a waypoint or move the existing waypoint.
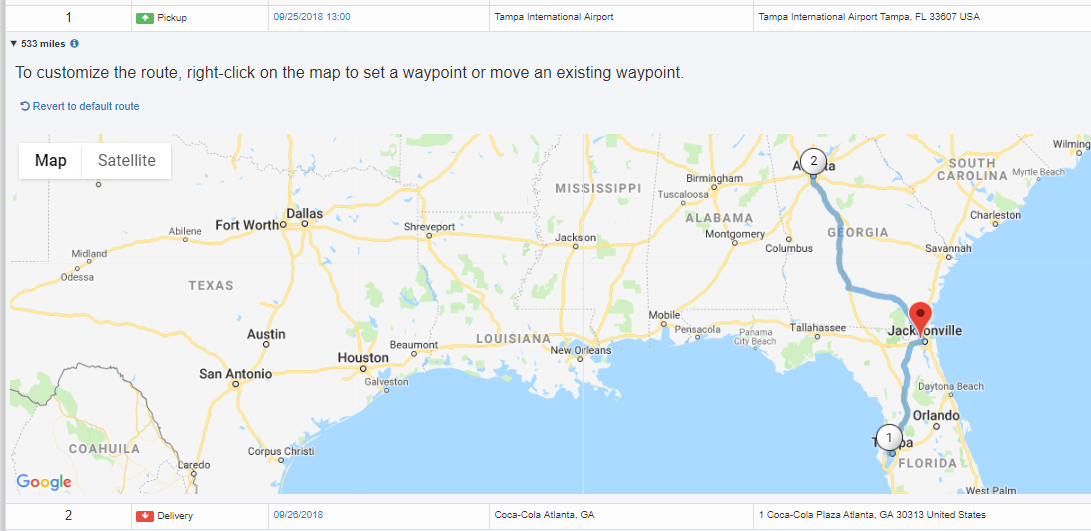
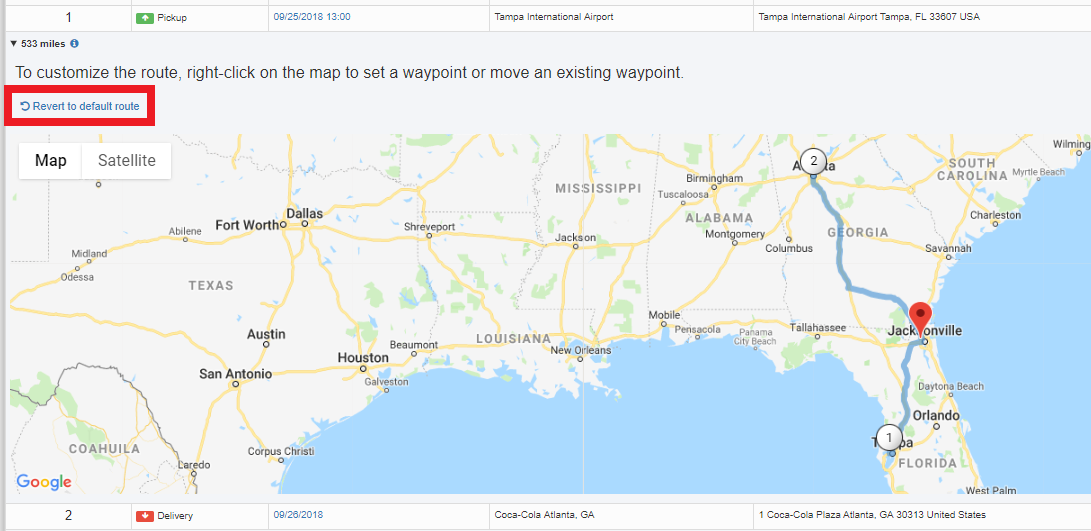
To remove these changes, simply click the "revert to default route" link.
Below the stops you can see the overview of the total route, as shown here:
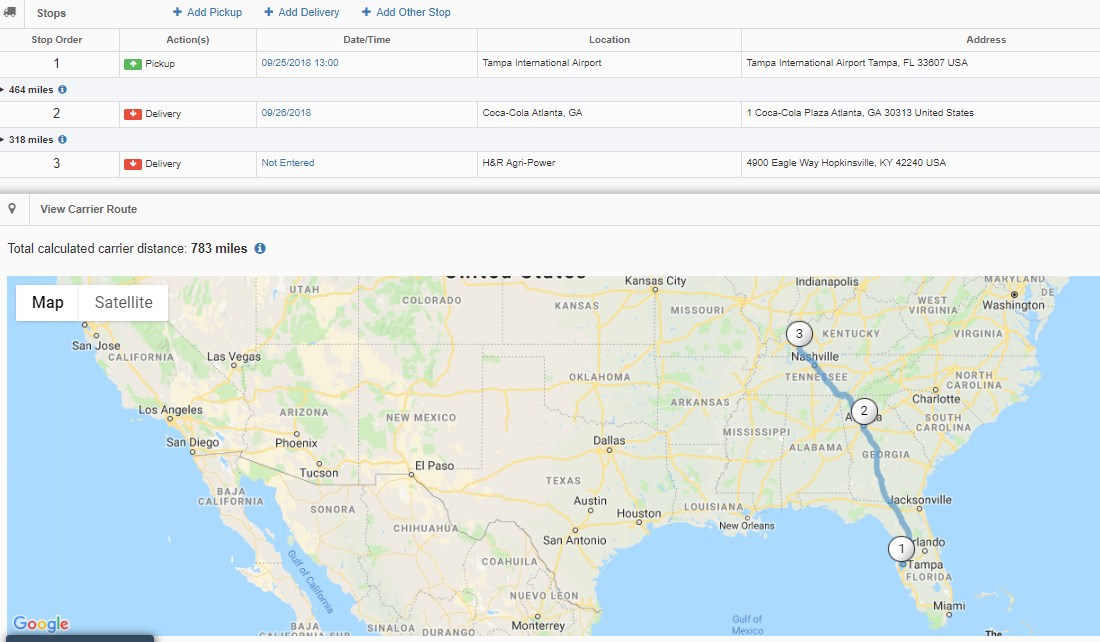
Unlike the map between stops, you cannot alter the overall route shown above. Changes may only be made on the map between each stop.
For even more routing options, click here to expand:
Once expanded, you will see options for areas to avoid, and truck routing profiles as seen below:
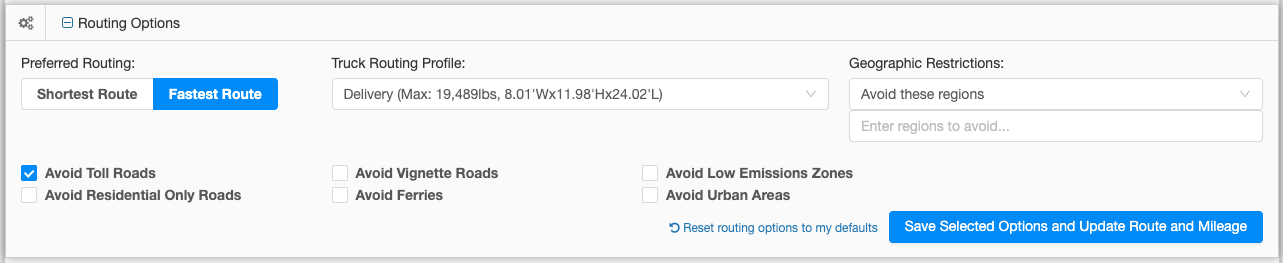
Once you hit "Save selected options and update route and mileage" the map below that shows carrier route will update to show the new route with the new selections. If you want to reset to default, simply click "reset routing options to my default".
Your default routing options can be set under "Company Settings" on the settings page.
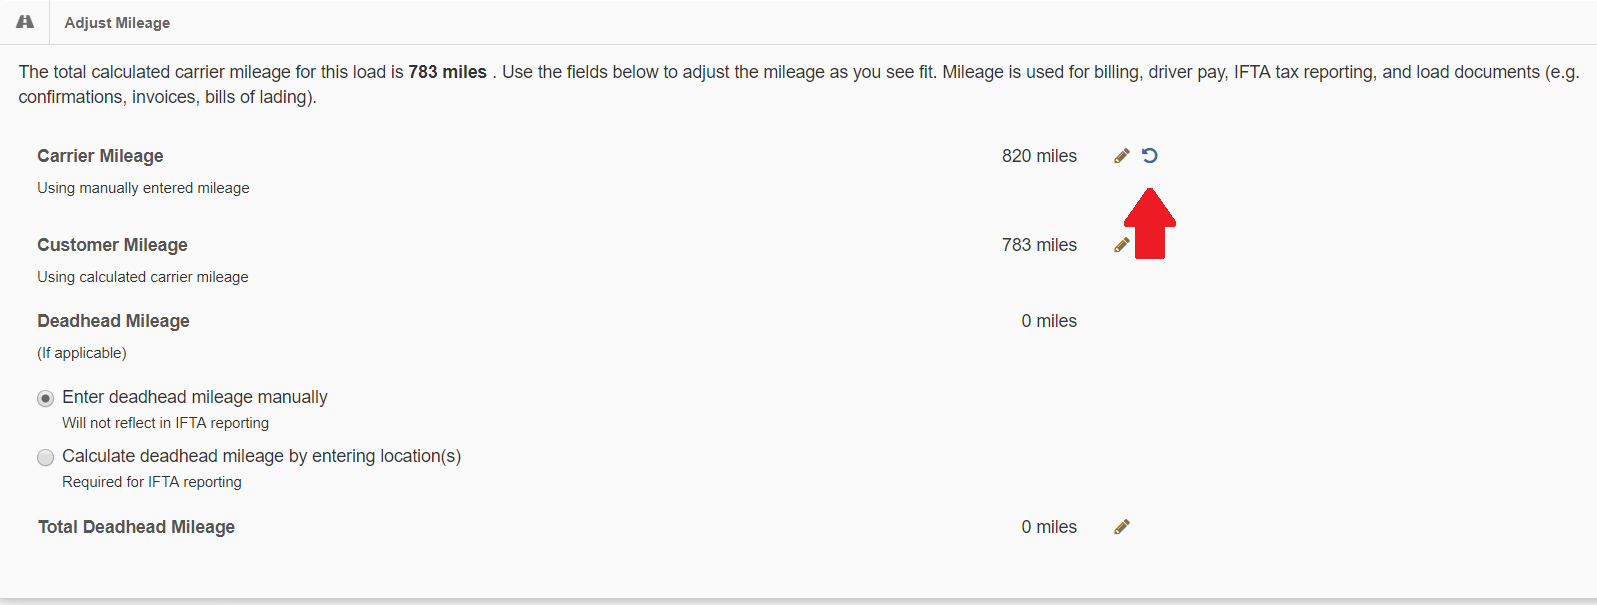
Further down this same page, there is the option to manually override the calculated mileage and enter deadhead miles.
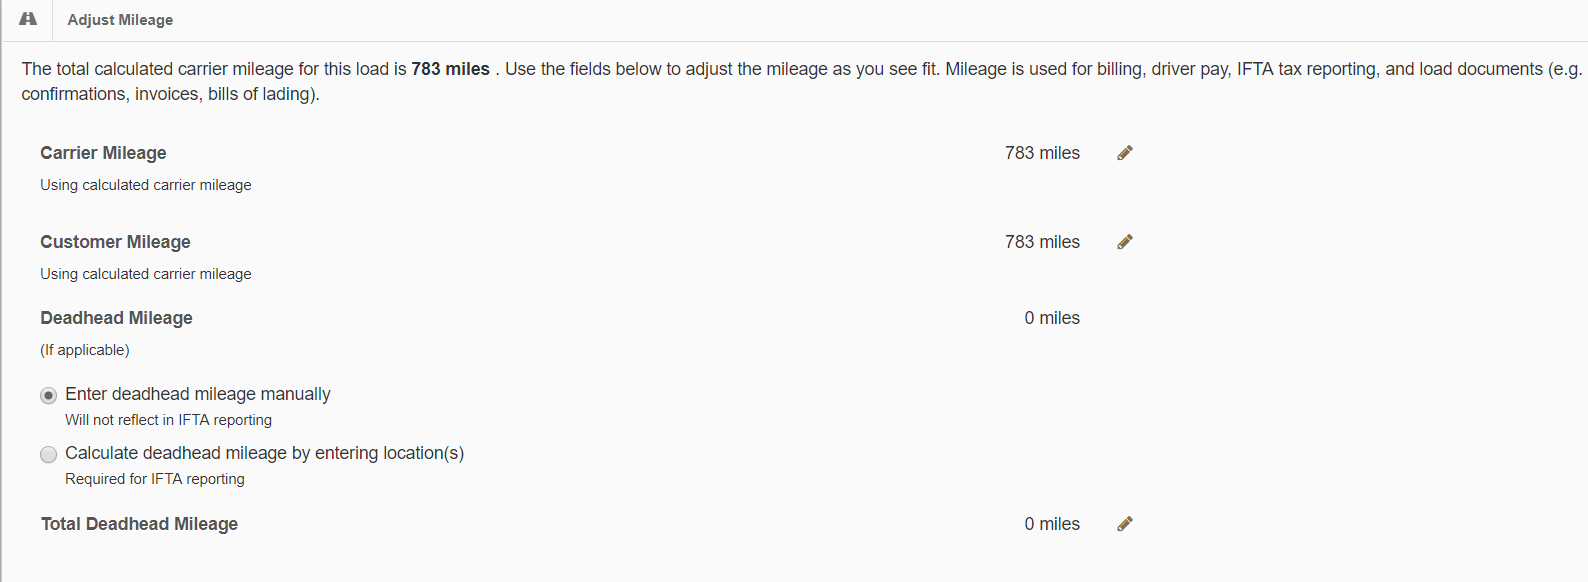
To make any changes, click the pencil beside the miles, type in the desired number and click the green save button.
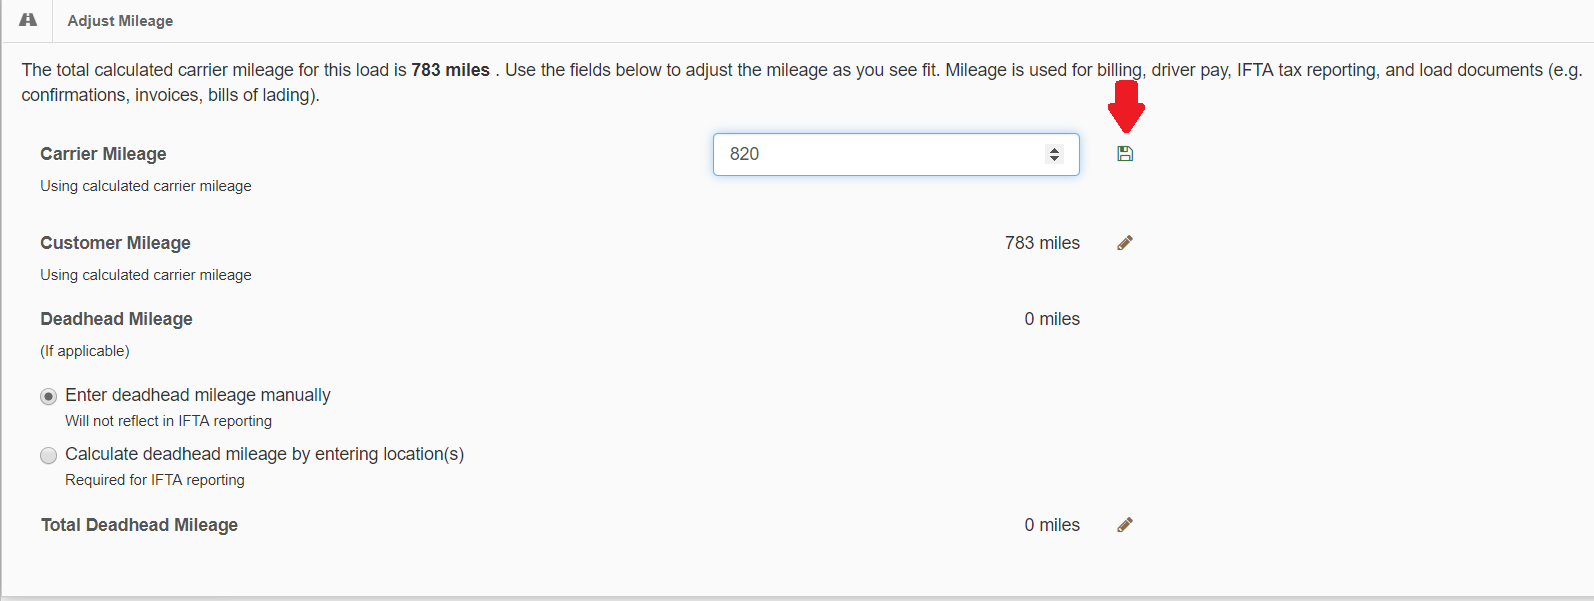
Similarly to the map, if you manually make changes but wish to revert back to the calculated miles, click the blue arrow beside the pencil.
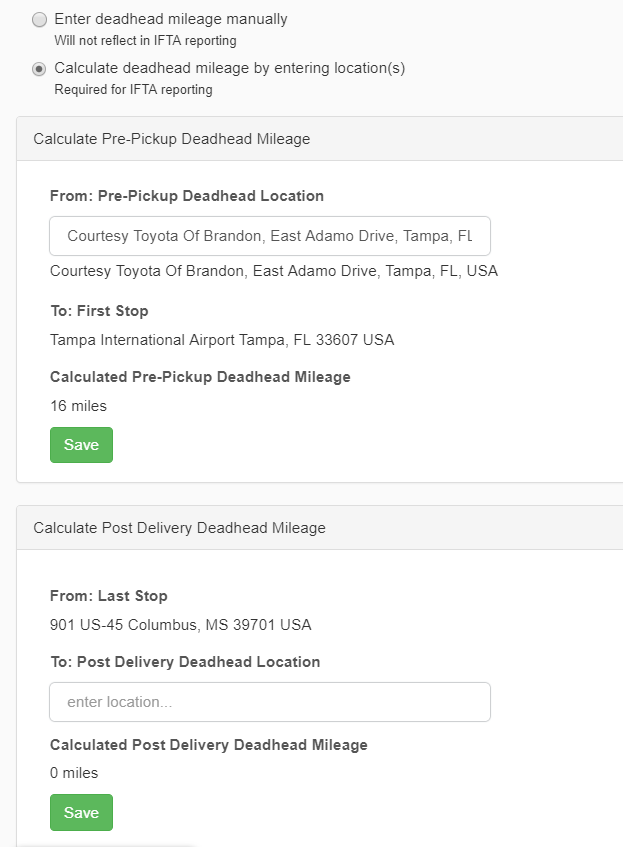
To calculate the deadhead mileage for IFTA purposes, select the radial button beside "Calculate deadhead mileage by entering location(s). Once that has been selected the options shown below will appear. Start typing in the name of the location and options will appear, select the correct option and click save to save the calculated mileage.
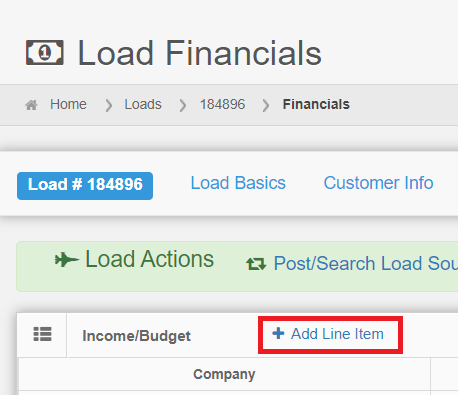
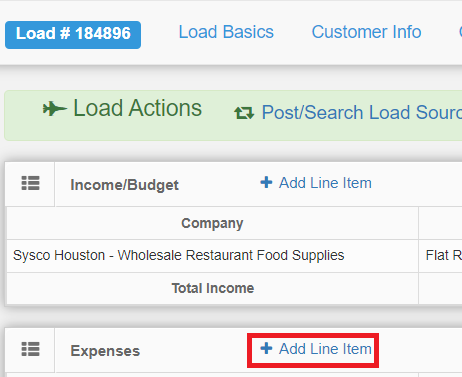
Financials
The next and last section in building a load is the financials tab. This is where you will be able to add income and expenses related to the load.
To add income to the load, which is the amount you're going to be invoicing your customer or broker, click the "Add Line Item" option.
From there, the screen pictured below will pop up:
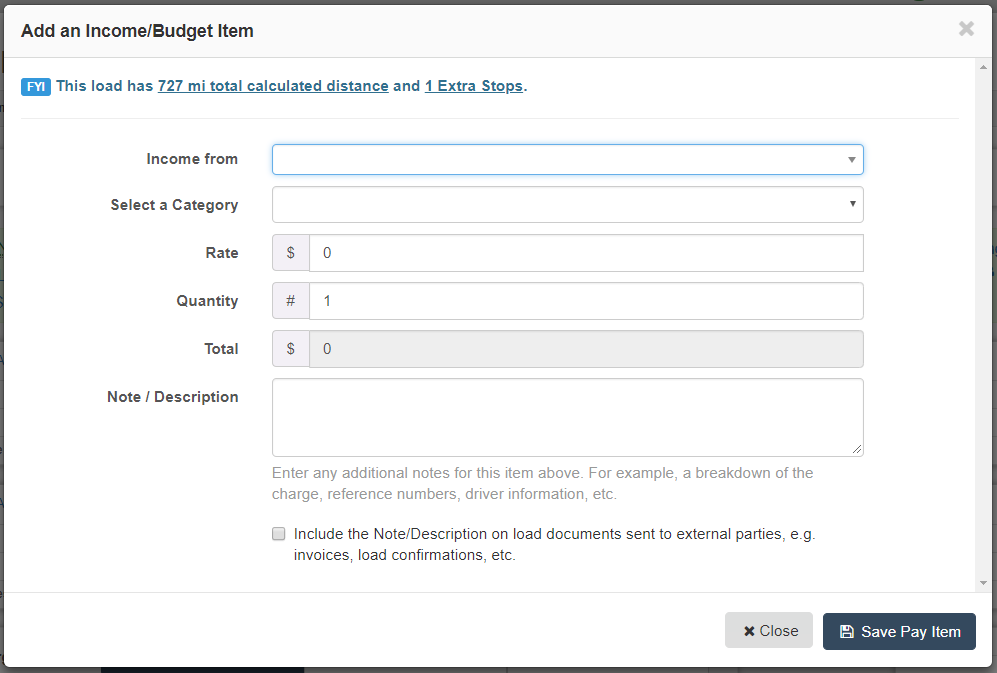
1. Select the customer from the drop-down menu from the “Income From” field and select the customer assigned to the load.
2. Select a category from the second drop-down field. (All of these categories can be customized. For more information on how to customize this drop-down, check out our article here and scroll down to pay items.)
3. Type the rate into the “Rate” field. Please note that any rate that is in the “Flat Rate” category from the previous menu needs to have the entire rate typed into this field. All other rates need to be entered per mile. For example, if the rate is $0.50 per mile, you would type 0.5.
4. Enter the quantity. Please note that if the rate is in the “Flat Rate” category, this number would need to be 1. Any other quantity would need to be the number of miles for that particular category.
5. You then have the option of adding notes for the income such as a breakdown of the charge, reference, numbers, or any other information.
6. Lastly, if you chose to add a note or description, you have the option of including it on other documents relating to your load such as invoices, load confirmations, etc. Click the “Save Pay Item” button.
To add the expenses for the load, you will click the link pictured below, and follow the same instructions as adding an income/budget item.
Chris
Comments