On the Invoices/Bills page, AscendTMS allows you to Export bills and invoices to QuickBooks, track received payments and paid bills, reconcile invoices and bills from loads, and much more.
You access the invoices/bills page from three places:
From Accounting>>AR/AP Report>>Manage Invoices:  From Accounting>>AR/AP Report>>Manage Bills:
 From Accounting>>Invoices/Bills:

Invoices Tab
The Invoices tab in AscendTMS has many useful functions.

Search:
If you’re looking for a particular invoice, you have the option of using the search field utilizing search terms such as the company name, invoice number, pick/drop address, or load status.

View More Details:
To view more details about a particular invoice, click the plus sign to the left of the company name:

As you can see from the above example, expanding the information shows a summary of the load and paperwork status. In addition, you now have new options such as viewing the invoice as a PDF, viewing the payment history, sending the invoice back to load management, and reviewing or managing supporting documents.
View Invoice as PDF:
To view your selected invoice as a PDF, click the “View Invoice as PDF” link. Your invoice will open in a new window of your browser.

View Payment History:
Click the “View Payment History” link as shown below:

You will now see the screen below pop-up:

As you can see from the above example, this pop-up summarizes the invoice total for the chosen load, the total payments, and outstanding balance.
To the right of the payment total, you are given the option of recording an invoice payment.
Record an invoice payment:
- Click the “Record an Invoice Payment” link.
- You should now be brought to this page:

- In the “Payment Date” field, change the date to reflect the date in which payment was received.
- Next, in the “Payment Method” field, select the payment method.
- In the “Reference No.” field, enter the applicable reference number to this payment.
- Next, you now need to enter the amount your company received in the “Payment Amount Received” field.
- In the “Apply Payment to Balance” field, enter the amount that needs to be applied to the balance.
- You also have the option of adding notes about the payment by entering them in the “Notes” field.
- Once you’re done, click the “Save Payment” button
Send Back to Load Management:
When you click “Send Back to Load Management”, the load will be sent back to the “View Loads” tab located under the “Loads” section.
Review/Manage Supporting Docs:
The “Review/Manage Supporting Docs” link takes you to a page which shows the documents attached to your load:

From here, you will find a list of system generated documents for the load you selected in addition to any documents that have been manually uploaded.
Upload a new doc:
- Click the “Upload a new doc” link.
- Click the “Select a document” button.
- Find and upload your document.
- Once you have filled out all of the necessary information, click the “Upload” button on the upper right corner.
- Once the status shows “Upload Complete!”, click the “Close” button on the lower right corner.
Make Paperwork OK:
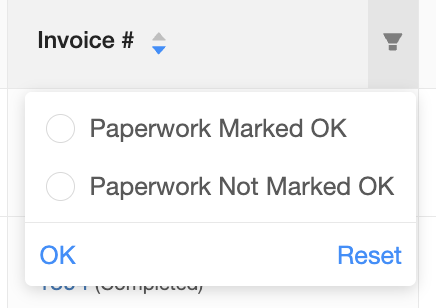
By clicking the “Make Paperwork OK” link, you’re marking the paperwork as reviewed and correct. If you have selected a document, a green check-mark appears before the document name. If you have not selected a document and click this link, all of the paperwork will be approved.
You can also see if paperwork has not been marked ok by clicking on the filter button from the Invoice column and choosing "Paperwork Not Marked OK". This will filter out all other loads where the paperwork was marked OK.
Preview/Process Doc:
1. Select the document that you want to either preview or process then click the Preview/Process Doc button.
2. To the right of the document preview, there are fields that you can fill out to process the document. You also have the option of adjusting the document settings and emailing the document.

3. If you chose to process the document, click the “Save doc” button. If you just wanted to preview the document and leave it unprocessed at this time, click the “Back to document list” button on the top left.
Download Doc:
If you want to download a selected document, click the “Download Doc” button. The document you selected will automatically download.
E-mail Doc(s):
- Select the document(s) you would like to email then click the Email Doc(s) button.
- From here, you have the choice of selecting recipients by clicking the checkbox and editing the “E-mail Body”. You also have the option of adding more recipients by clicking the “Add another recipient” button.
- When you are ready to send, click the “Send E-mail” button.
To E-mail Invoice(s):
1. Click the “E-mail Invoice” button.
2. Click the “Preview Invoice” link on the far right to ensure all of the information is correct. The invoice preview should open in another tab on your browser.
3. If everything looks correct, click the “Continue: Supporting Docs” button to move onto the next page.
4. You now have the option to attach supporting documents such as the Bill of Lading, Client Rate Confirmation, and the proof of delivery. ( Please note that each document needs to be signed)
- If the document is attached and available, you should see a link that says “Include”.
- If there are not any documents that are attached or available, you will see the message “No docs found”.
- If you want to attach the documents, click the “Learn More” link to the right of the “No docs found” message. This link will give you instructions for attaching documents to your load.
5. Click the “Continue: Recipients” button and then select the recipients for the email by clicking the small box next to their names. If you need to add another person, click the "Add Another Recipient" button. Once you click the button, to the right you should see a field called “Add Additional Recipient”. Fill out the name and address then click the “Add to Recipient List” button.
6. Click the “Continue: Body” button and you will now be brought to a page where you can edit the body of the e-mail as well as the subject line. When you are done, click the “Continue: E-mail Invoices” button. Once the email has been successfully delivered, you will see a confirmation page.
Email Invoice Statement:
You can bulk invoice your Customer in one statement. You do not have to select one customer at a time. You can choose multiple invoices and Ascend will sort the statement(s) by customer and only send those invoices out to each individual customer. Emailing a statement follows the same steps as above.
Export Invoice to QB:
The "Export Invoice to QB" link automatically downloads your select invoices into an IIF file. This type of file can later be uploaded to QuickBooks.
Receive a Payment:
- Click on the “Receive a Payment” link.
- In the “Payment Date” field, change the date to reflect the date in which payment was received.
- Next, in the “Payment Method” field, select the payment method.
- In the “Reference No.” field, enter the applicable reference number to this payment.
- Next, you now need to enter the amount your company received in the “Payment Amount Received” field.
- In the “Apply Payment to Balance” field, enter the amount that needs to be applied to the balance.
- You also have the option of adding notes about the payment by entering them in the “Notes” field.
- Once you’re done, click the “Save Payment” button.
Bills Tab
The Bills tab in AscendTMS has many useful functions.

Search:
The search tab enables you to search for a bill by using a company name, load number, bill number, pick/drop address, or load status.

To view more details about a particular bill, click the plus sign to the left of the company name:

Record a received bill:
- Click “Record a Received Bill From [Bill you selected] on Load #[your load number].
- Fill in the bill date, bill amount, reference number, payment terms, payment method, and bill notes if applicable.
- You will notice that you are able to select which pay items you want to record as being received. This makes it easier to record and export expenses that are added later to the load.

4. Click “Save Bill” when you’re done. You will now be brought back to the main bills menu and the new bill will be added.
5. If you have the same Remit To address for multiple carriers, you can multi-select all with the same remit to and record all at the same time.
You have the option of directly selecting the bill you want to work with by either clicking on the bill itself or selecting the checkbox next to the company name. Your selection will turn green and you will also see a message that says, “Selected 1 Bill”. In addition, you will now have the new options to edit the bill, export the bill to QuickBooks, and record a bill payment.

To Edit a Bill:
- Click the square with the plus sign next to the name of the bill you want to look at to expand your selection.
- Select the bill that you want to edit.
- Click “Edit Bill”.
- You can edit anything for this bill to include the date, bill amount, reference number, payment terms, payment method, and even the notes. When you’re done, click “Save Bill”.
To Export Bill To QB:
The "Export Bill to QB" link automatically downloads your select bills into an IIF file. This type of file can later be uploaded to QuickBooks.
Record a bill payment:
- Select the bill that you want to edit. Your selection should turn green. Click “Record a Bill Payment.
- Fill out the payment date, internal reference number, total payment amount, and notes if any.

3. Click the “Save Payment” button.
4. You should now be back to the main menu and the bill you just paid should be marked as “Paid”.
Reconcile and Archive Tab

Search:
The search box enables you to search for loads sent to accounting by using a company name or load number.

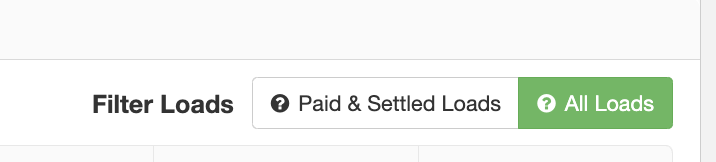
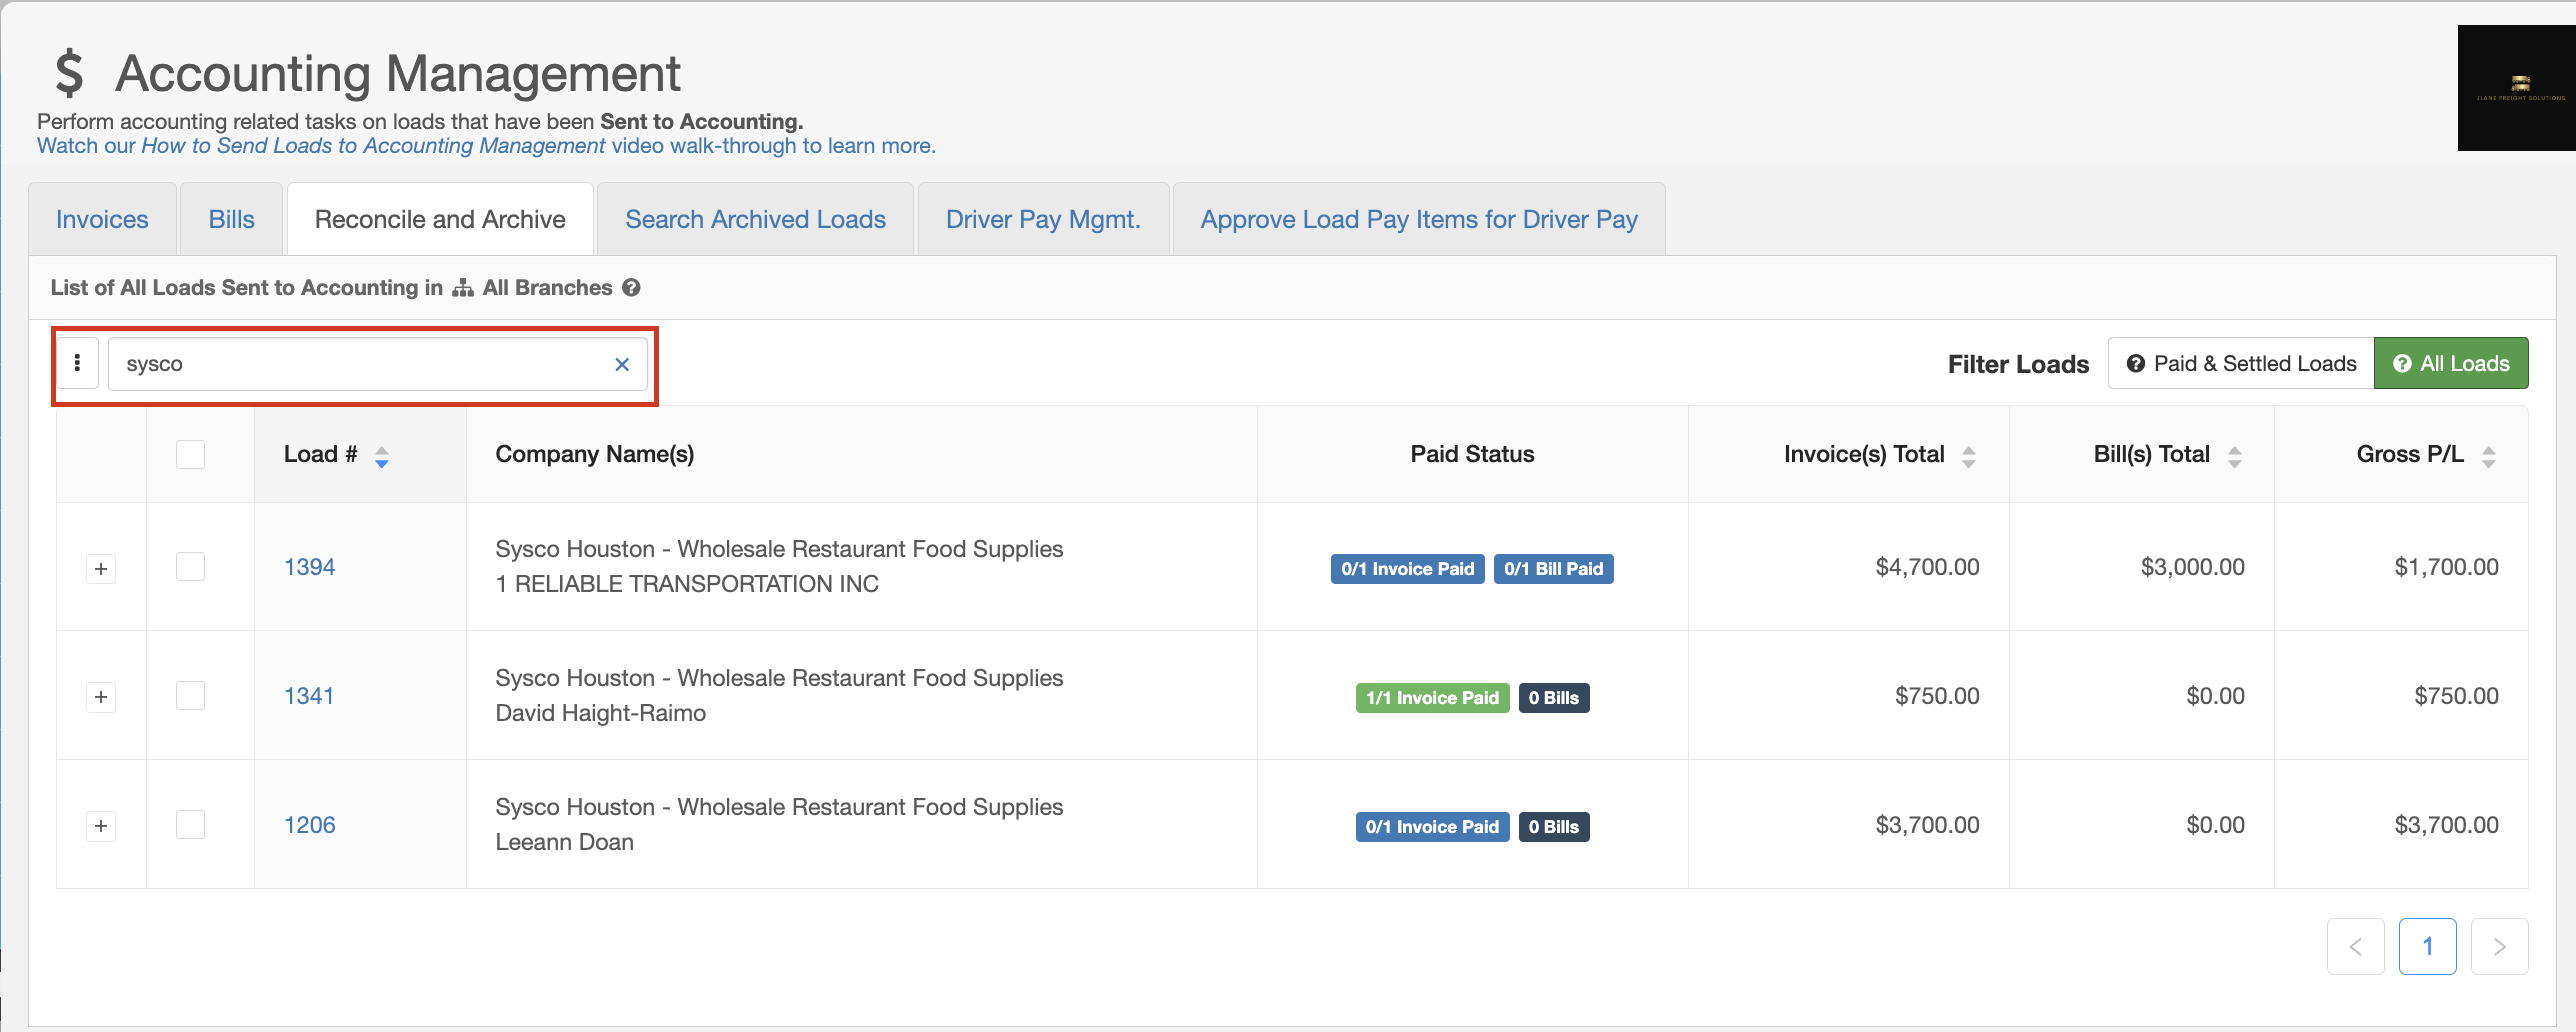 Filter Loads:
This function lets you filter the loads that have either been "paid and settled" or by showing "all loads"

To view more details about your load, click on the box with the plus sign to expand. You will now see the invoices and bills associated with your load.

You have the option of directly selecting the load you want to work with by either clicking on the bill itself or selecting the checkbox next to the load number. Your selection will turn green and you will also see a message that says, “Selected 1 Load”. In addition, you will now have the new options to archive the load or send the load back to load management.

Archive Loads:
Archiving removes your loads from accounting management and it is advisable to only archive loads that have been paid and settled. If you need to view or unarchive your archived load, you can visit the "Search Archived Loads" tab.
Send Load Back to Load Management:
Sending loads back to load management removes your selected load from accounting management. This is helpful if the load needs to be edited by users without "Accounting" permission.
Search Archived Loads Tab
The “Search Archived Loads” tab lets you search for loads that are archived. Typically, loads that are archived in our system have been paid and settled.

Search:
The search tab enables you to search for archived loads by using a company name or load number. 
To view the details of the archived load, click the box with the plus sign to expand the details. You will now see a summary of the invoices and bills associated with that load.

You have the option of directly selecting the load you want to work with by either clicking on the load itself or selecting the checkbox next to the load number. Your selection will turn green and you will also see a message that says, “Selected 1 Load”. In addition, you will now have the new option unarchive your load.

Unarchive Load:
Unarchiving your load will send your load back to account management. Use this option if you need to make any changes to the accounting details of this load.
Chris
Comments