How do I know if I am currently using the Legacy Driver Pay Management (1.0) module?
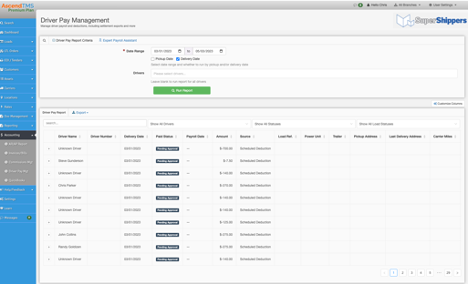
If your Driver Pay Management screen looks like the one below, you are currently using the Legacy Diver Pay Management module.
If you are currently using our Legacy Driver Pay Management (1.0) module, please read the following information carefully:
The Legacy Driver Pay Management (1.0) module isn’t going away, however, we do recommend you migrate over to the New Driver Pay Management (2.0) module as soon as you are comfortable doing so. Don’t stress, it’s really easy to migrate over and we can help you every step of the way if you would like us to. Once you migrate, you will now be using the New Driver Pay Management (2.0) module.
Why Migrate?
New Driver Pay Management has some major enhancements that will help streamline your processes today. It also offers extreme flexibility which will allow you to customize the workflow to suit your needs much better than the Legacy version. With the New Driver Pay module, we introduced new features like:
- The ability to mark driver pay items as “Paid” in bulk.
- The ability to approve driver pay items in bulk.
- Create and manage your payroll periods.
- Email your drivers their settlement sheets in bulk.
- Add one-time pay items or deductions directly from the DPM page.
- Allow users to approve driver pay items directly from the load as an option.
- Added several permissions that can grant or restrict access to multiple functions of driver pay such as approving pay items, paying pay items, closing pay periods, opening a closed pay period, and more.
- Added AWE Rules (Business Rules) that allow admins to automate the approval for pay items.
In addition to all these wonderful features, we designed the migration process to be simple and stress-free. Your previous Paid driver pay items and applied deductions will migrate over for you automatically and be placed into their appropriate pay periods based on the dates they were marked “Paid”. This is so that you can look at past payroll periods and see your pay history with ease. You will have the opportunity to migrate your scheduled pay items and deductions as you use the migration tool so that they can be used on a go-forward basis as well.
Migration Instructions:
Below are the instructions on how to migrate yourself from the Legacy Driver Pay Management (1.0) module over to the New Driver Pay Management (2.0) module.
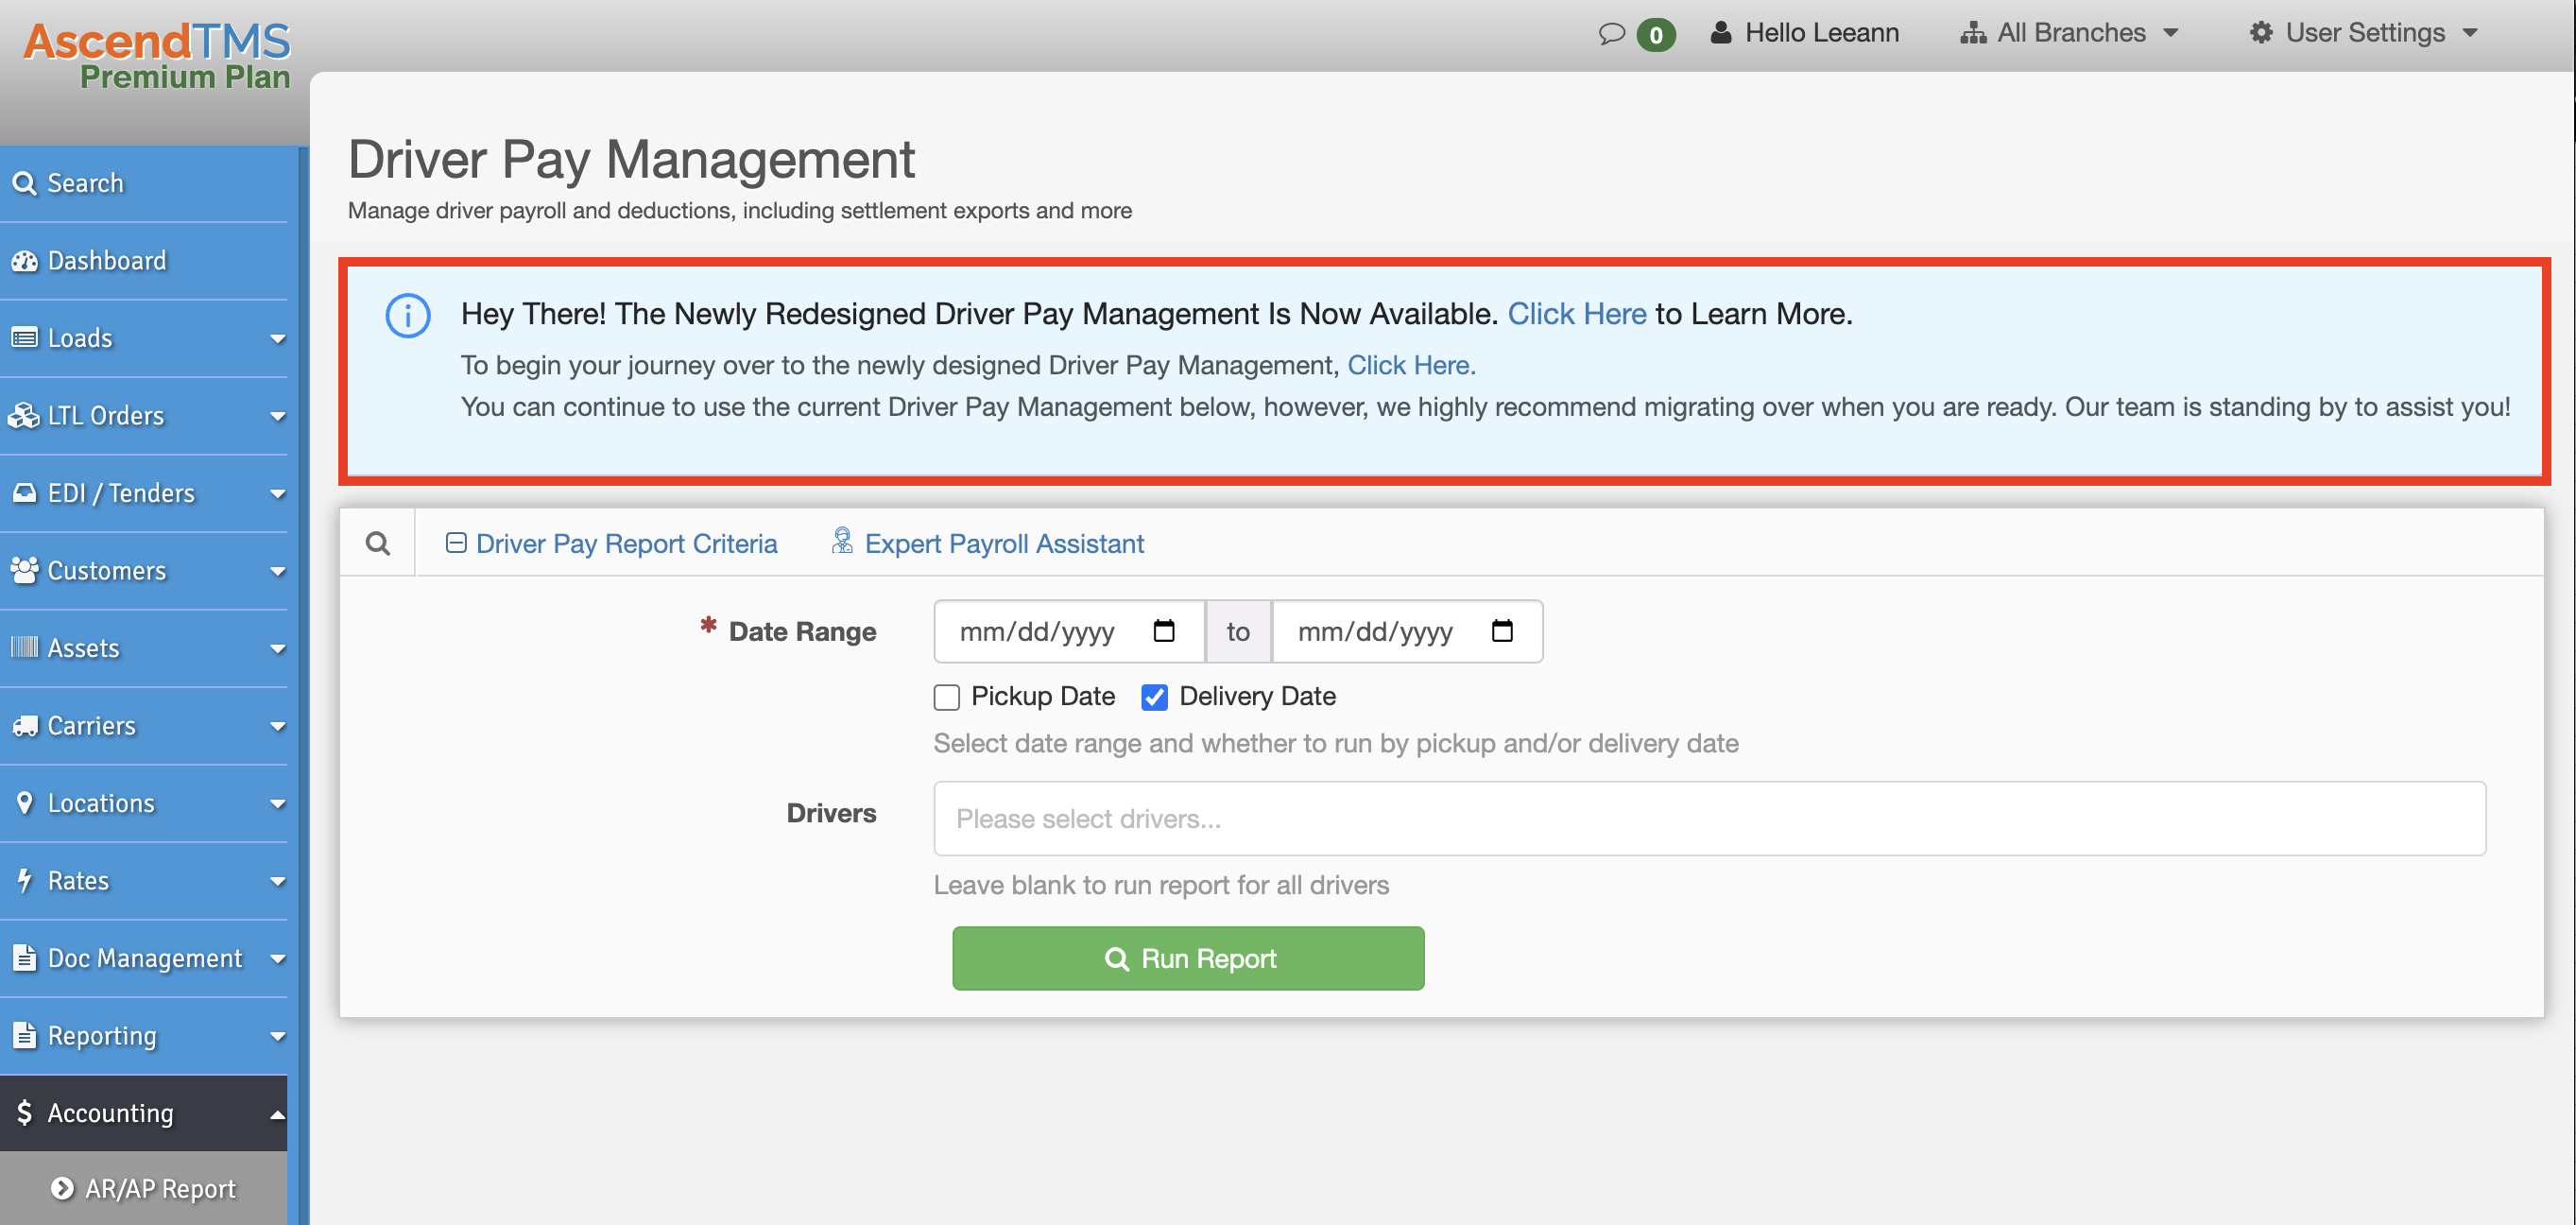
You may have noticed the message below on your Driver Pay Management (1.0) screen. Simply follow the instructions to navigate to the migration tool to begin.
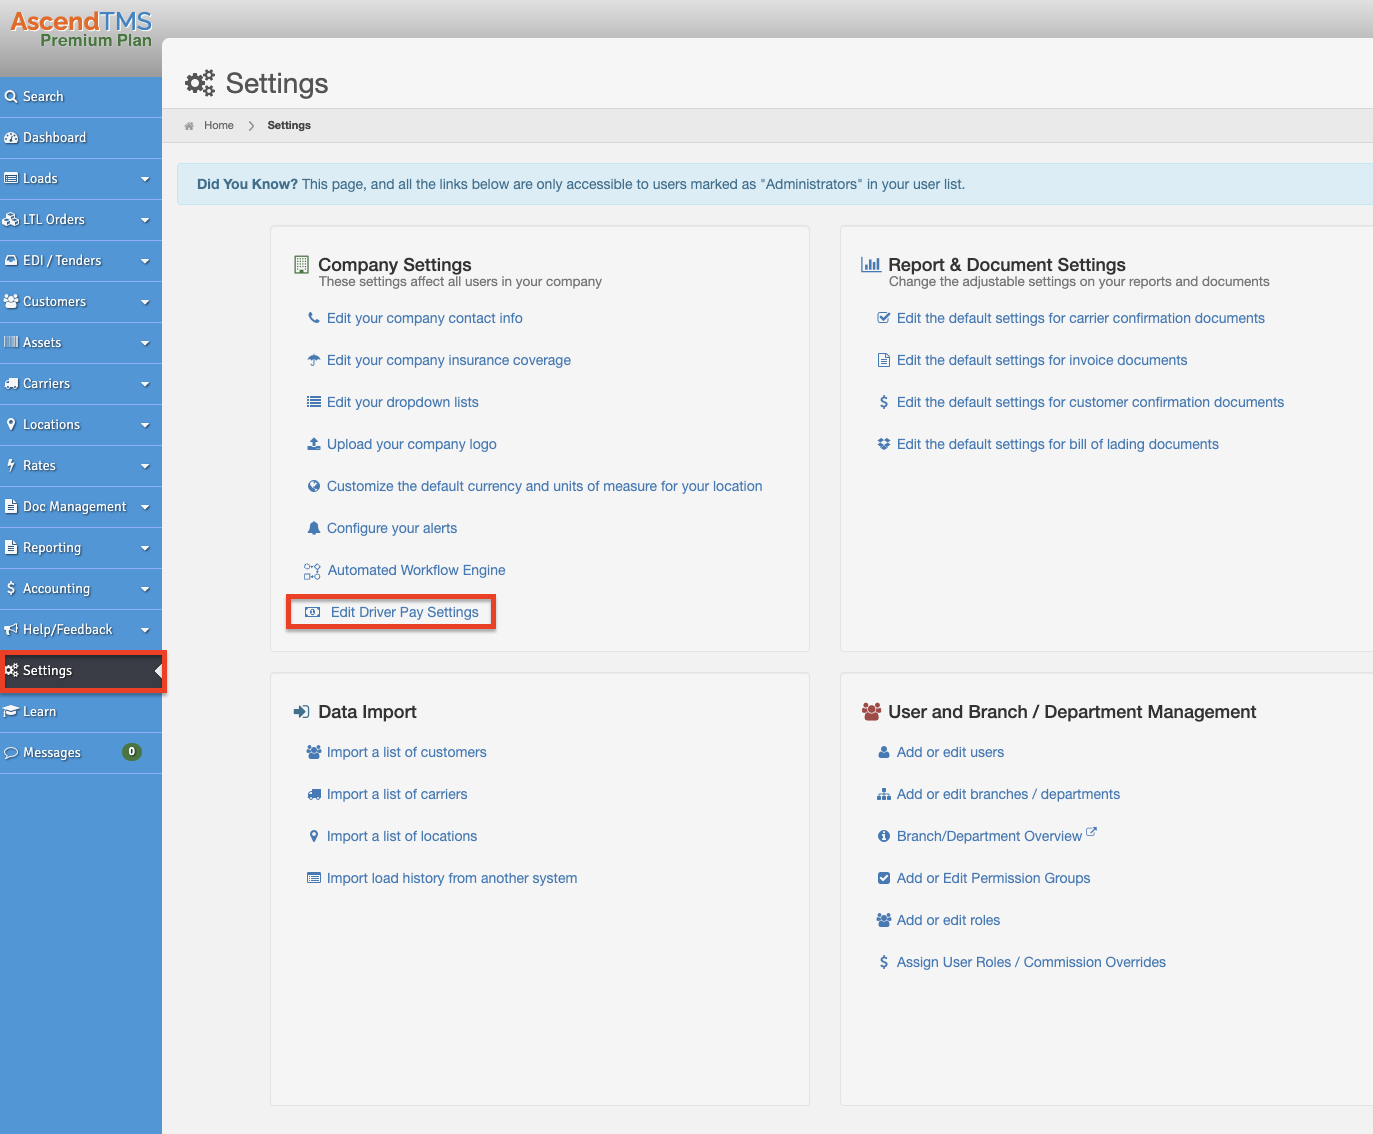
The other option is simply to go to the “Settings” page, then navigate to the “Edit Driver Pay Settings” page.
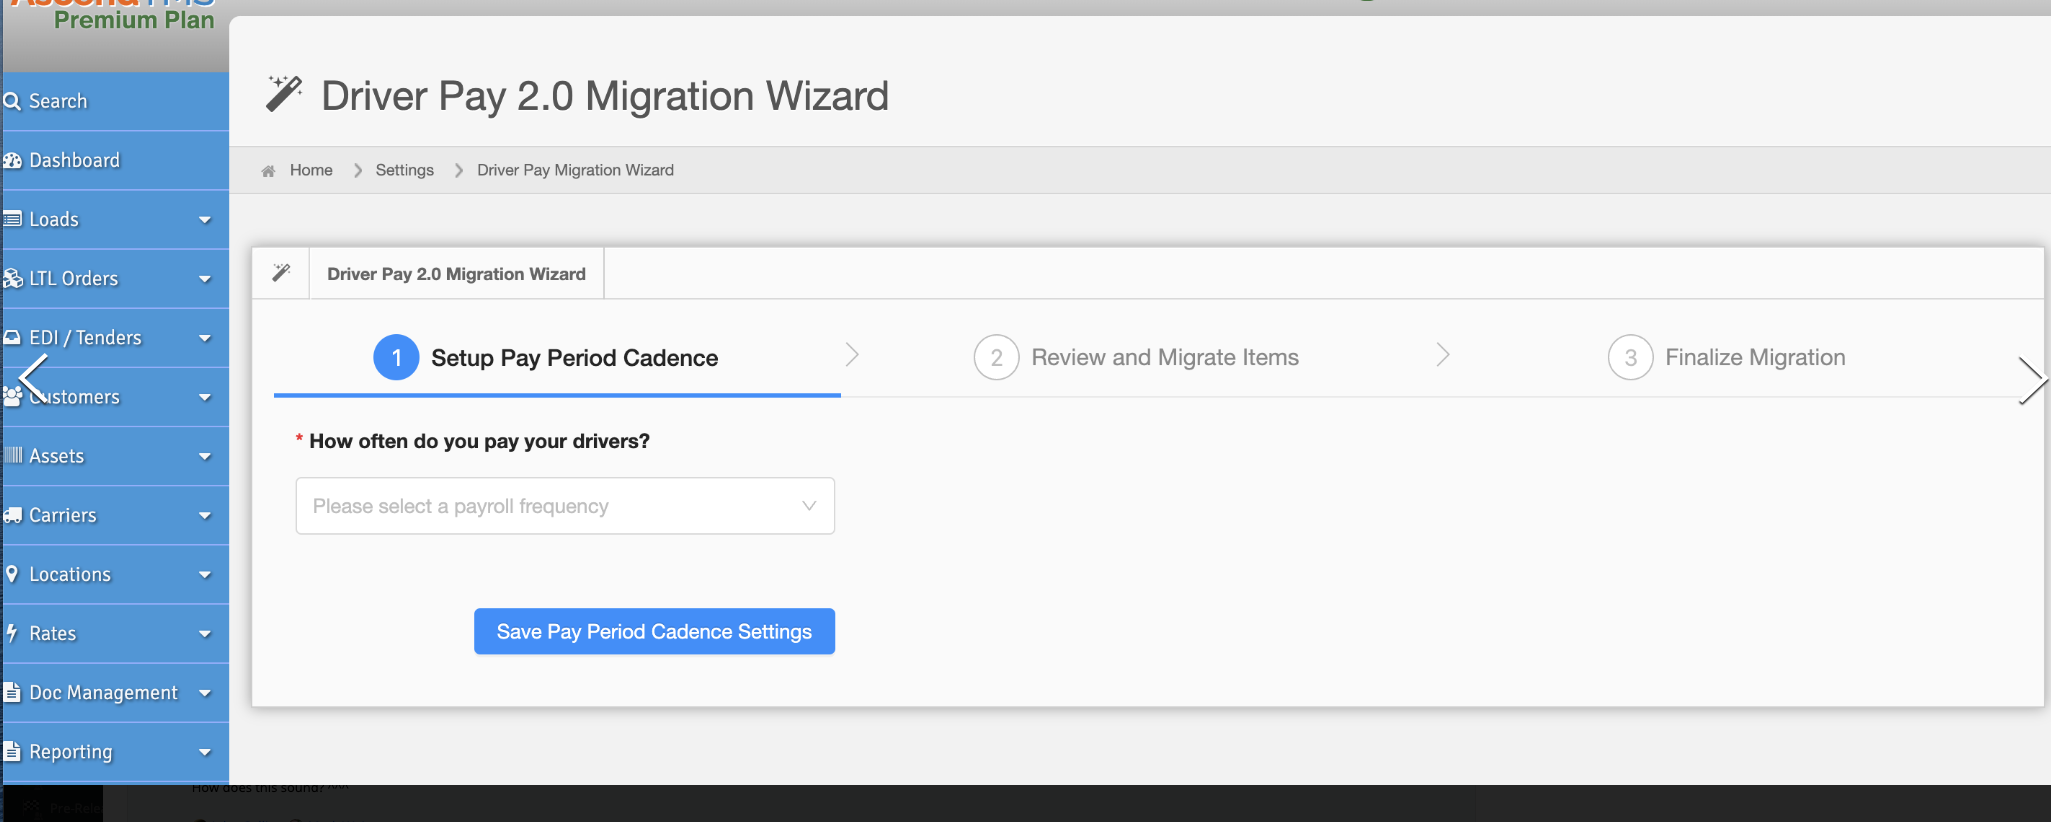
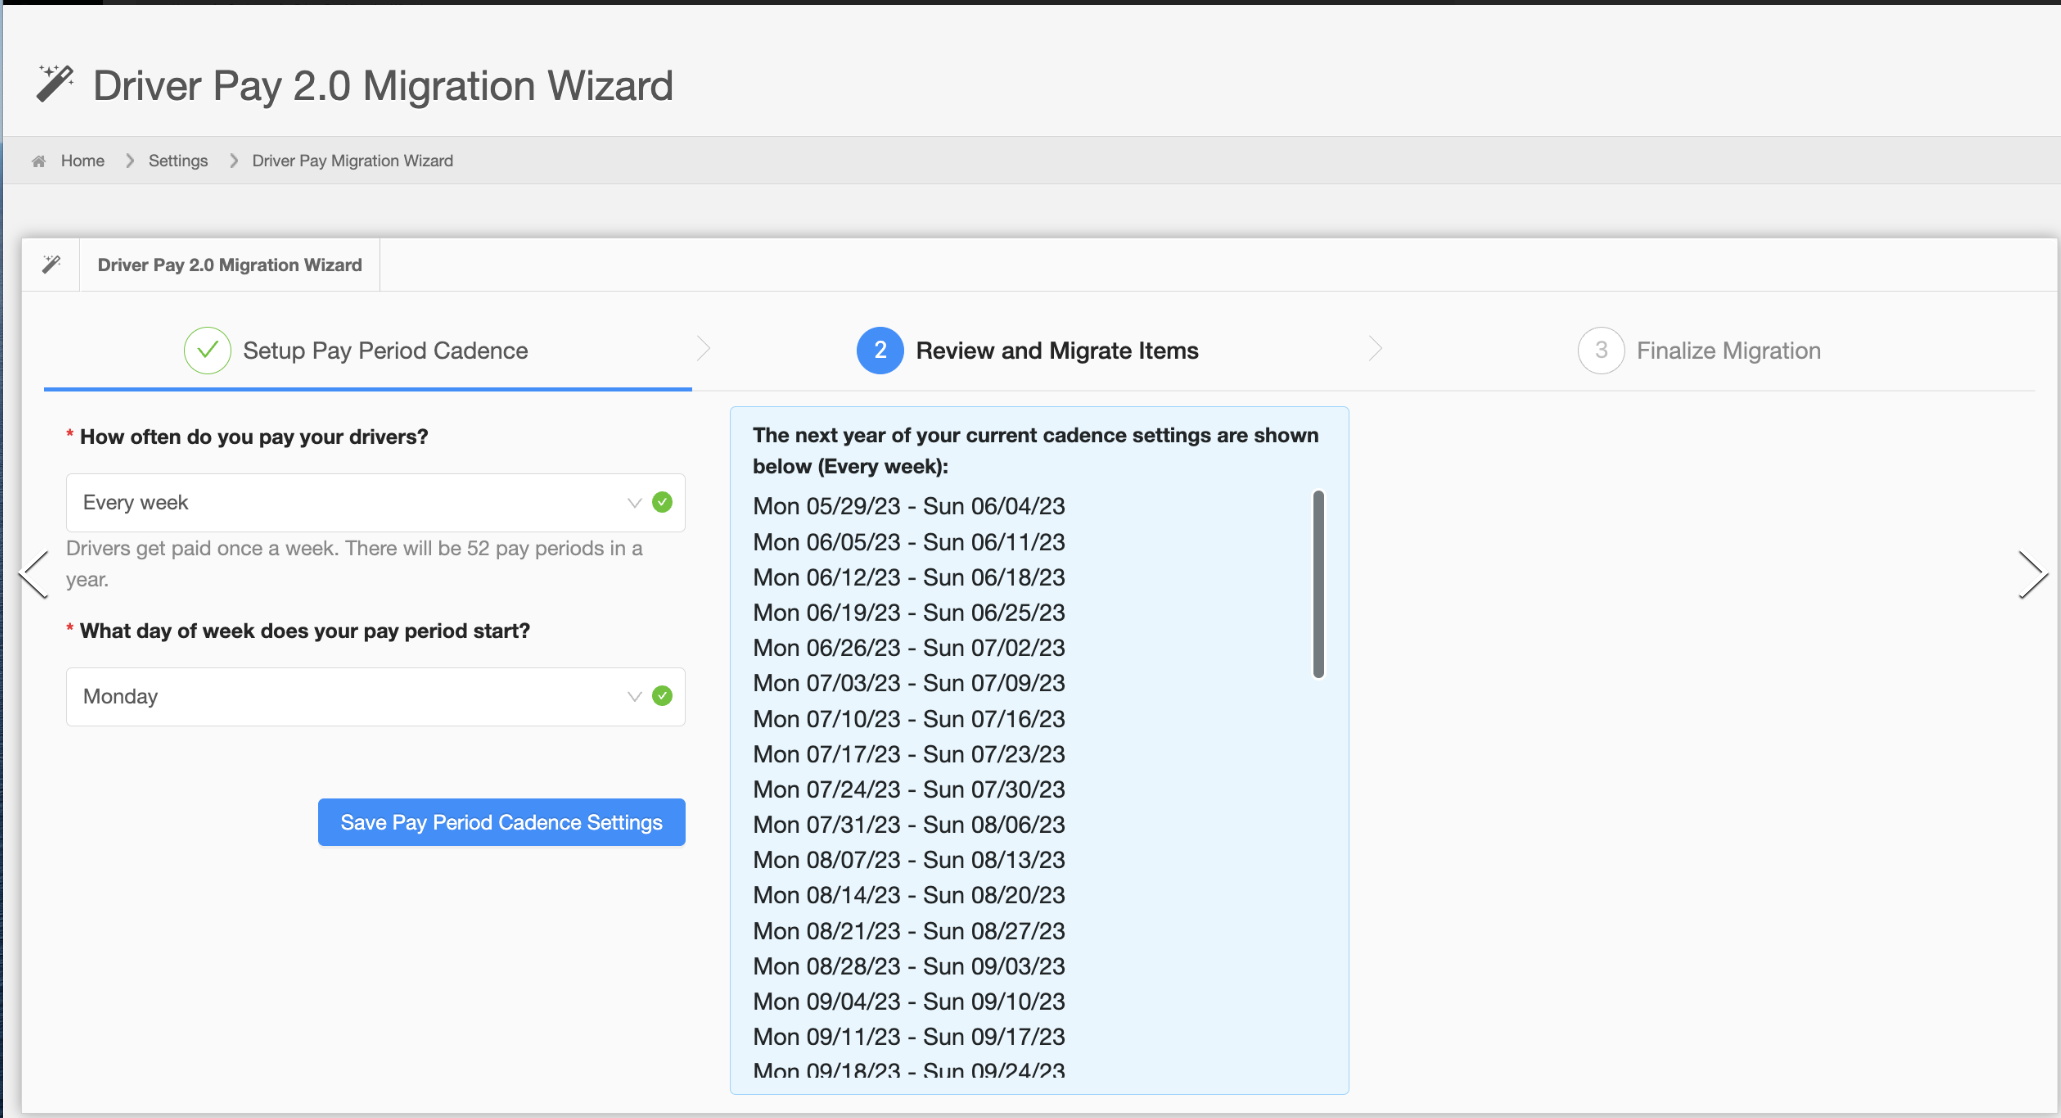
Now you can select your payroll period for your company. First, select the frequency you pay your drivers. For example, once a week. Next, select the day of the week your payroll begins. For example, Monday.
As you can see below, the system will show a preview of your payroll periods to make sure they align with your company’s payroll periods and provide you an opportunity to make any corrections, if necessary.
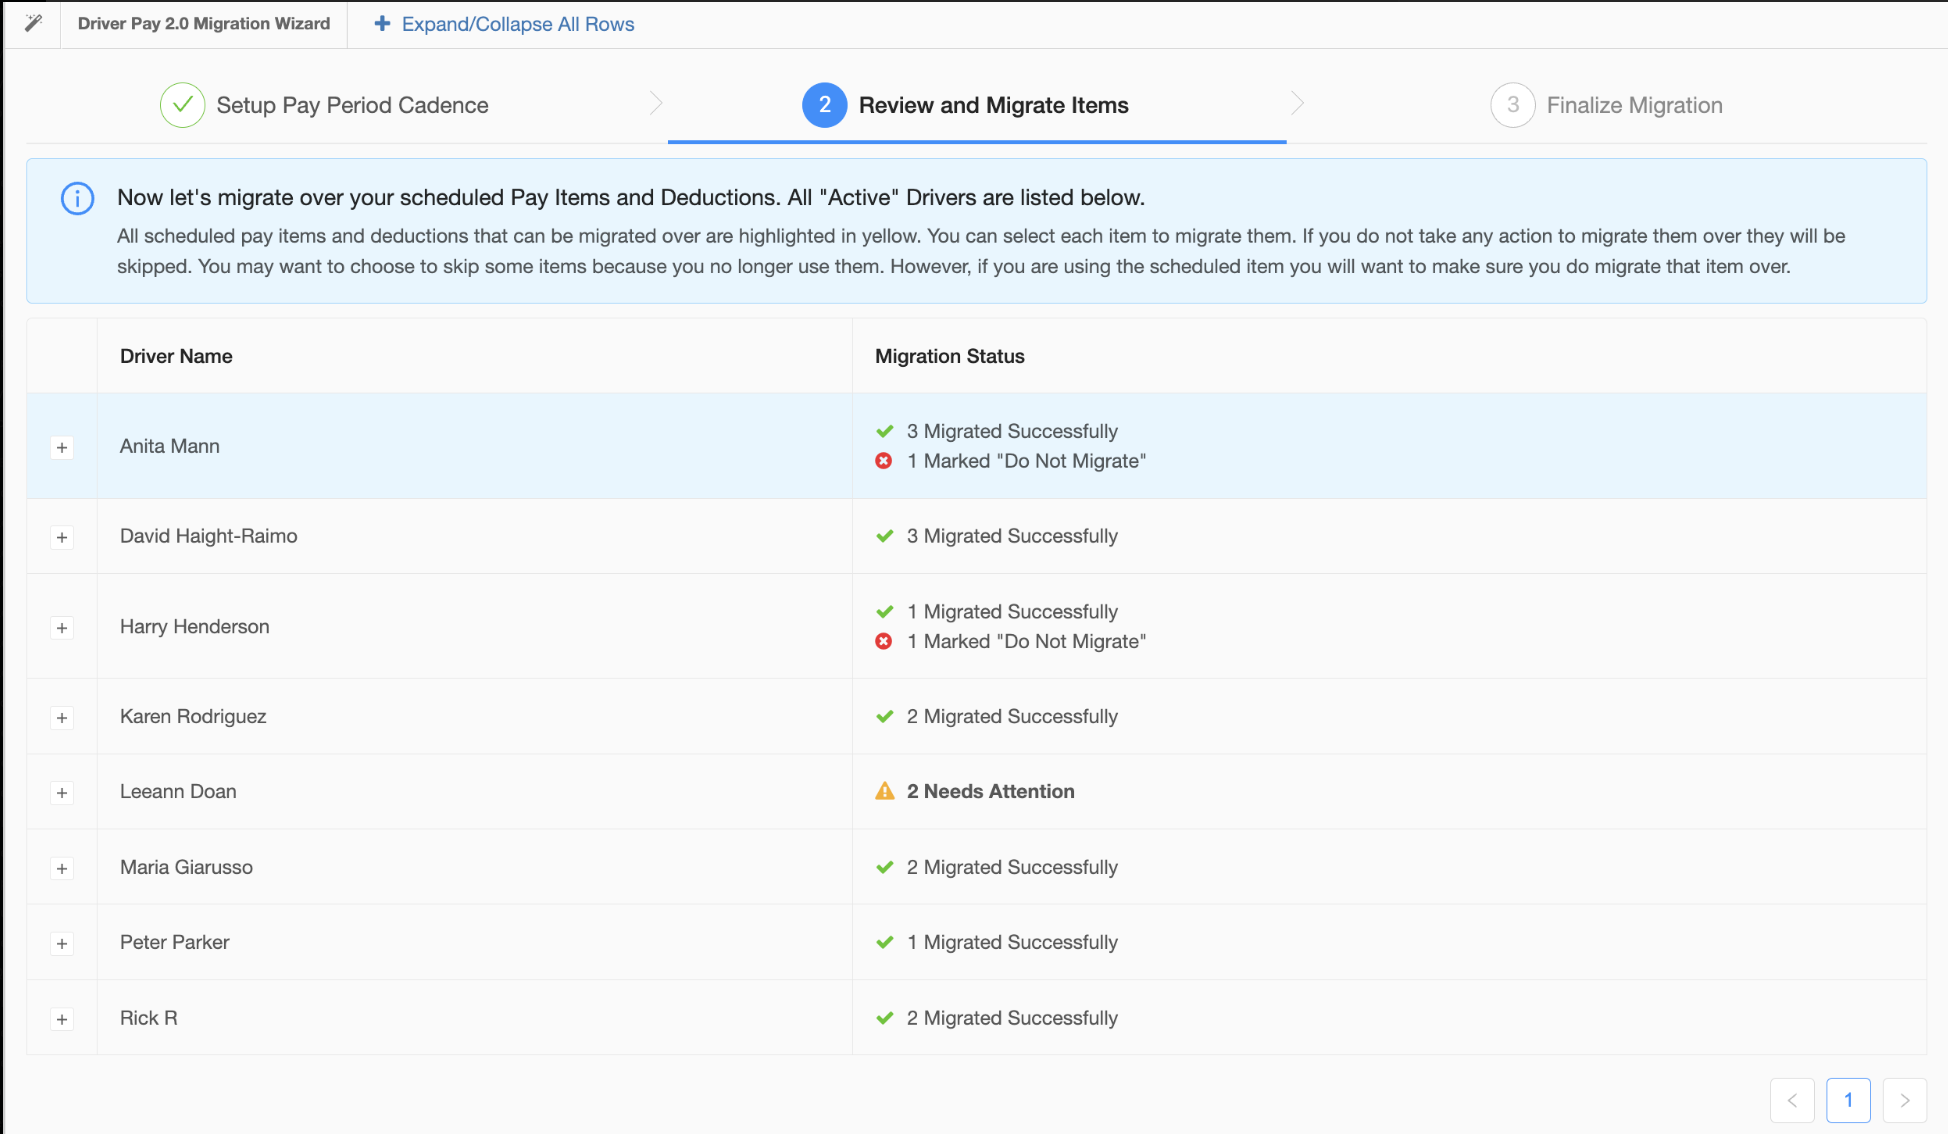
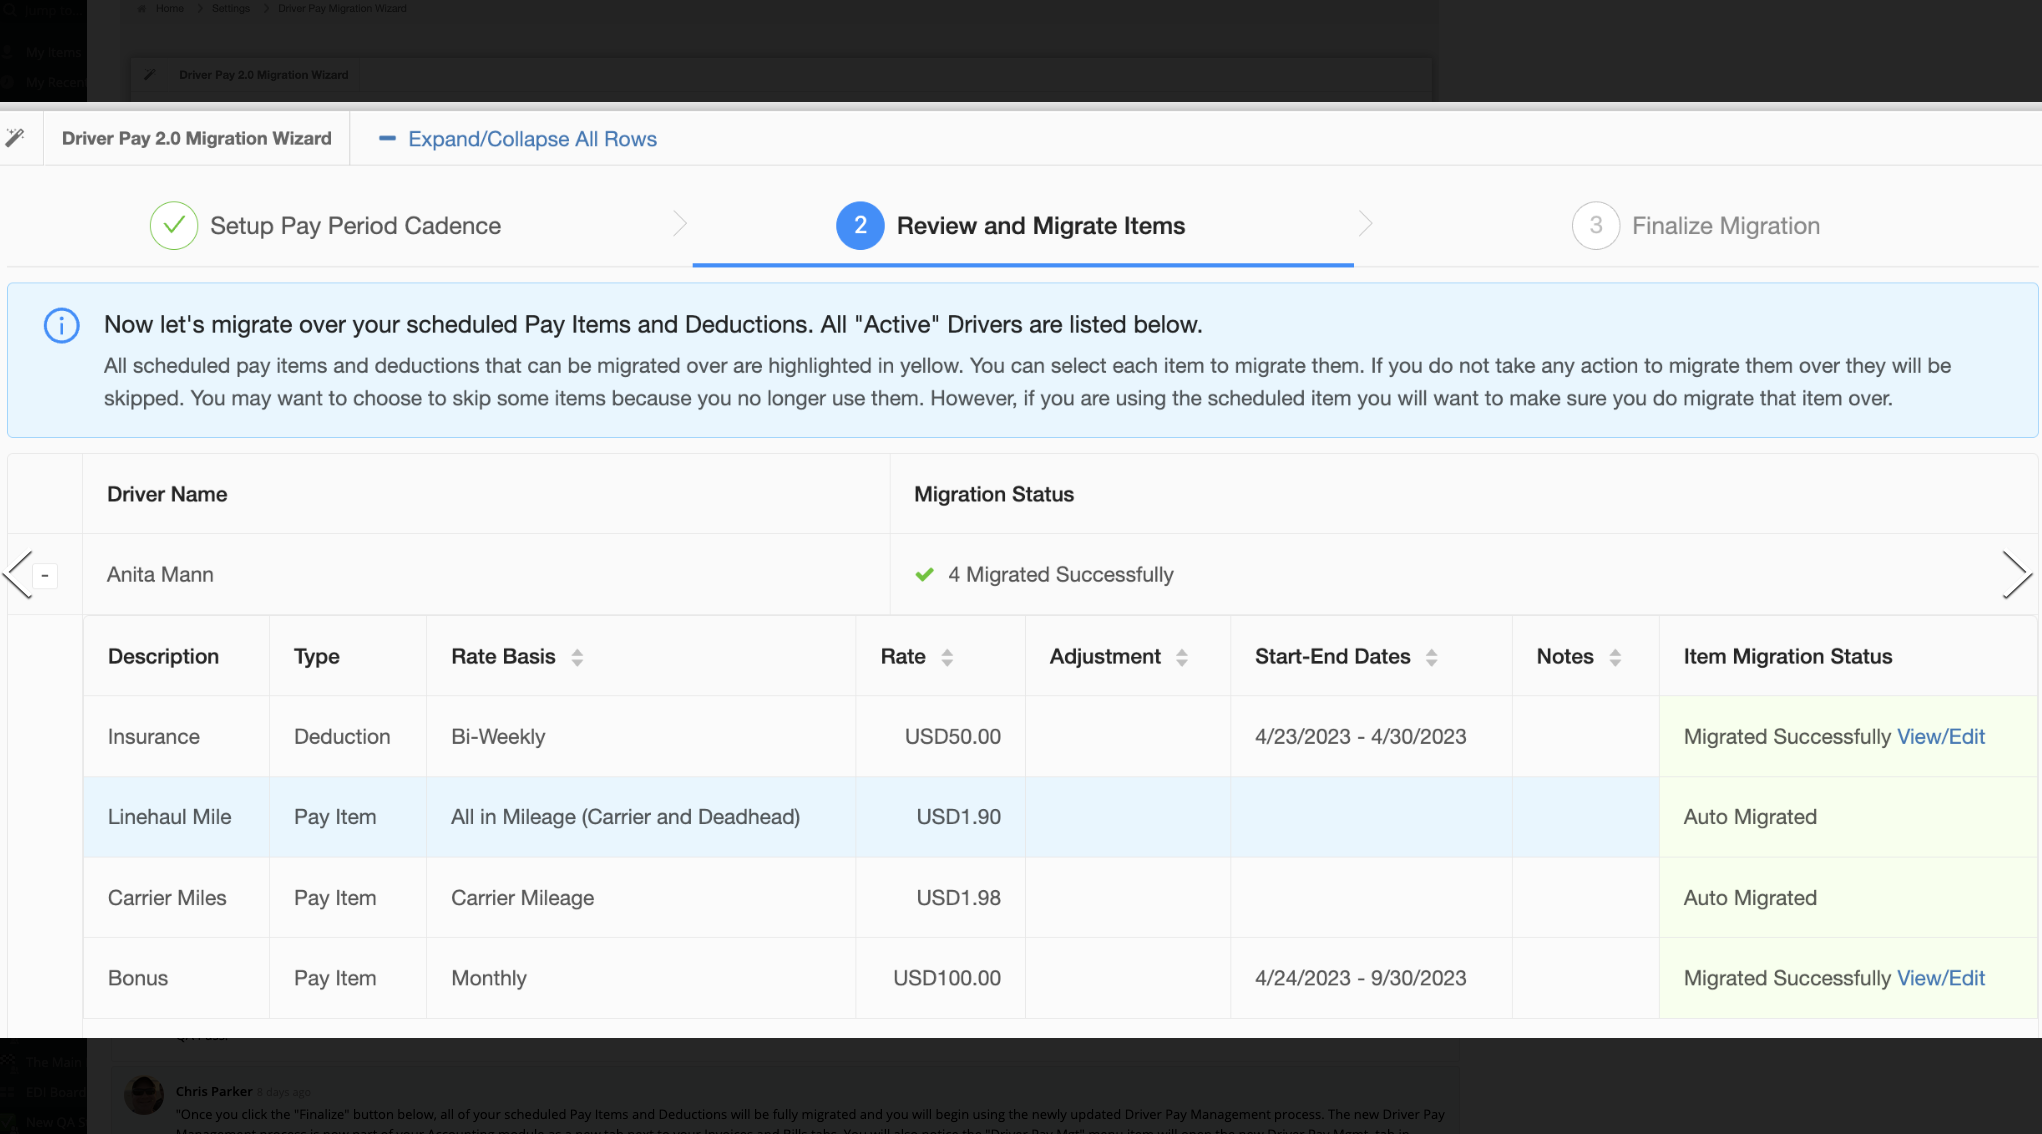
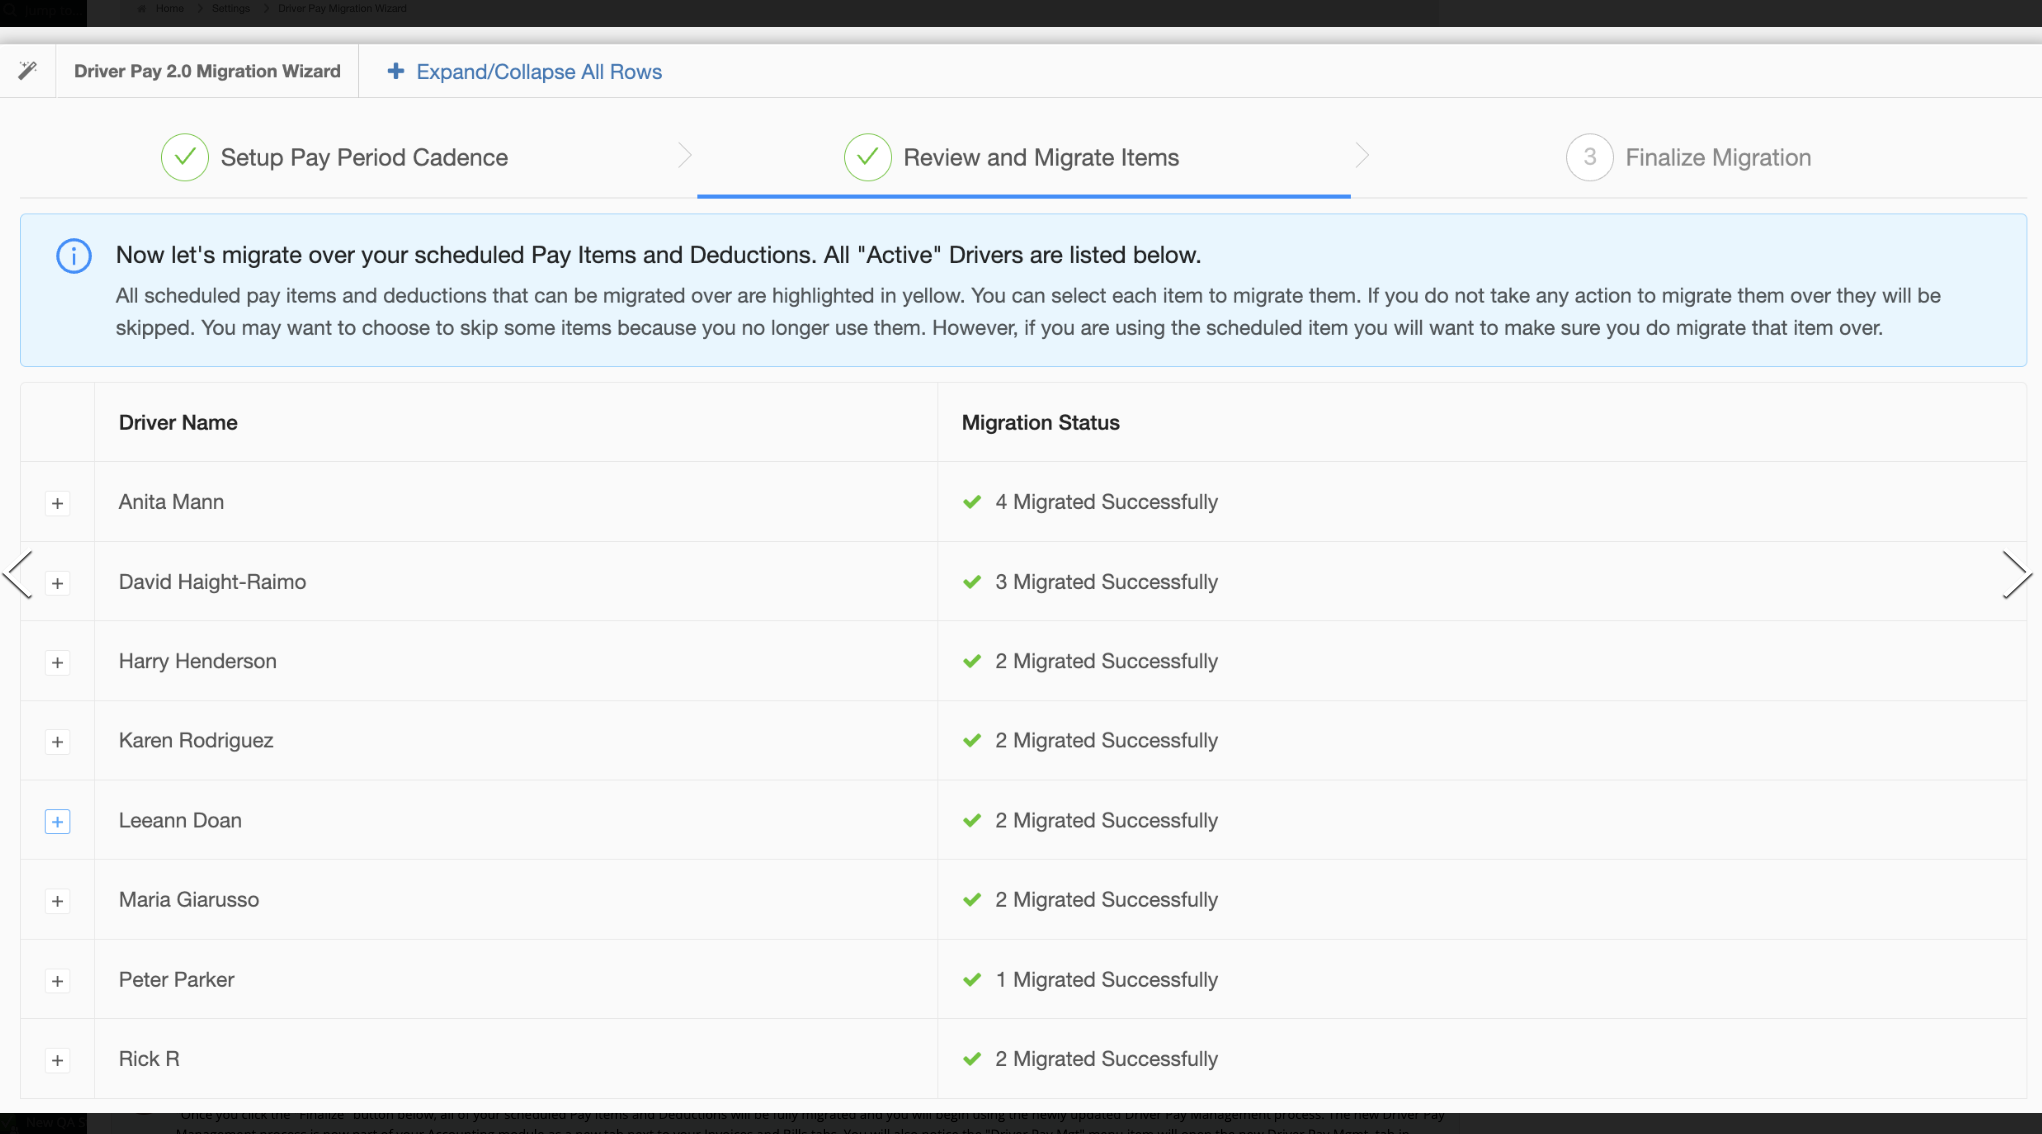
Now you can review your current driver’s pay items and scheduled deductions. You will notice that all of your drivers pay items that are “Load Pay Items” have already been migrated for you. This is indicated in the “Migration Status” column. You will also see how many scheduled pay items or deductions have not been migrated yet and may require your attention.
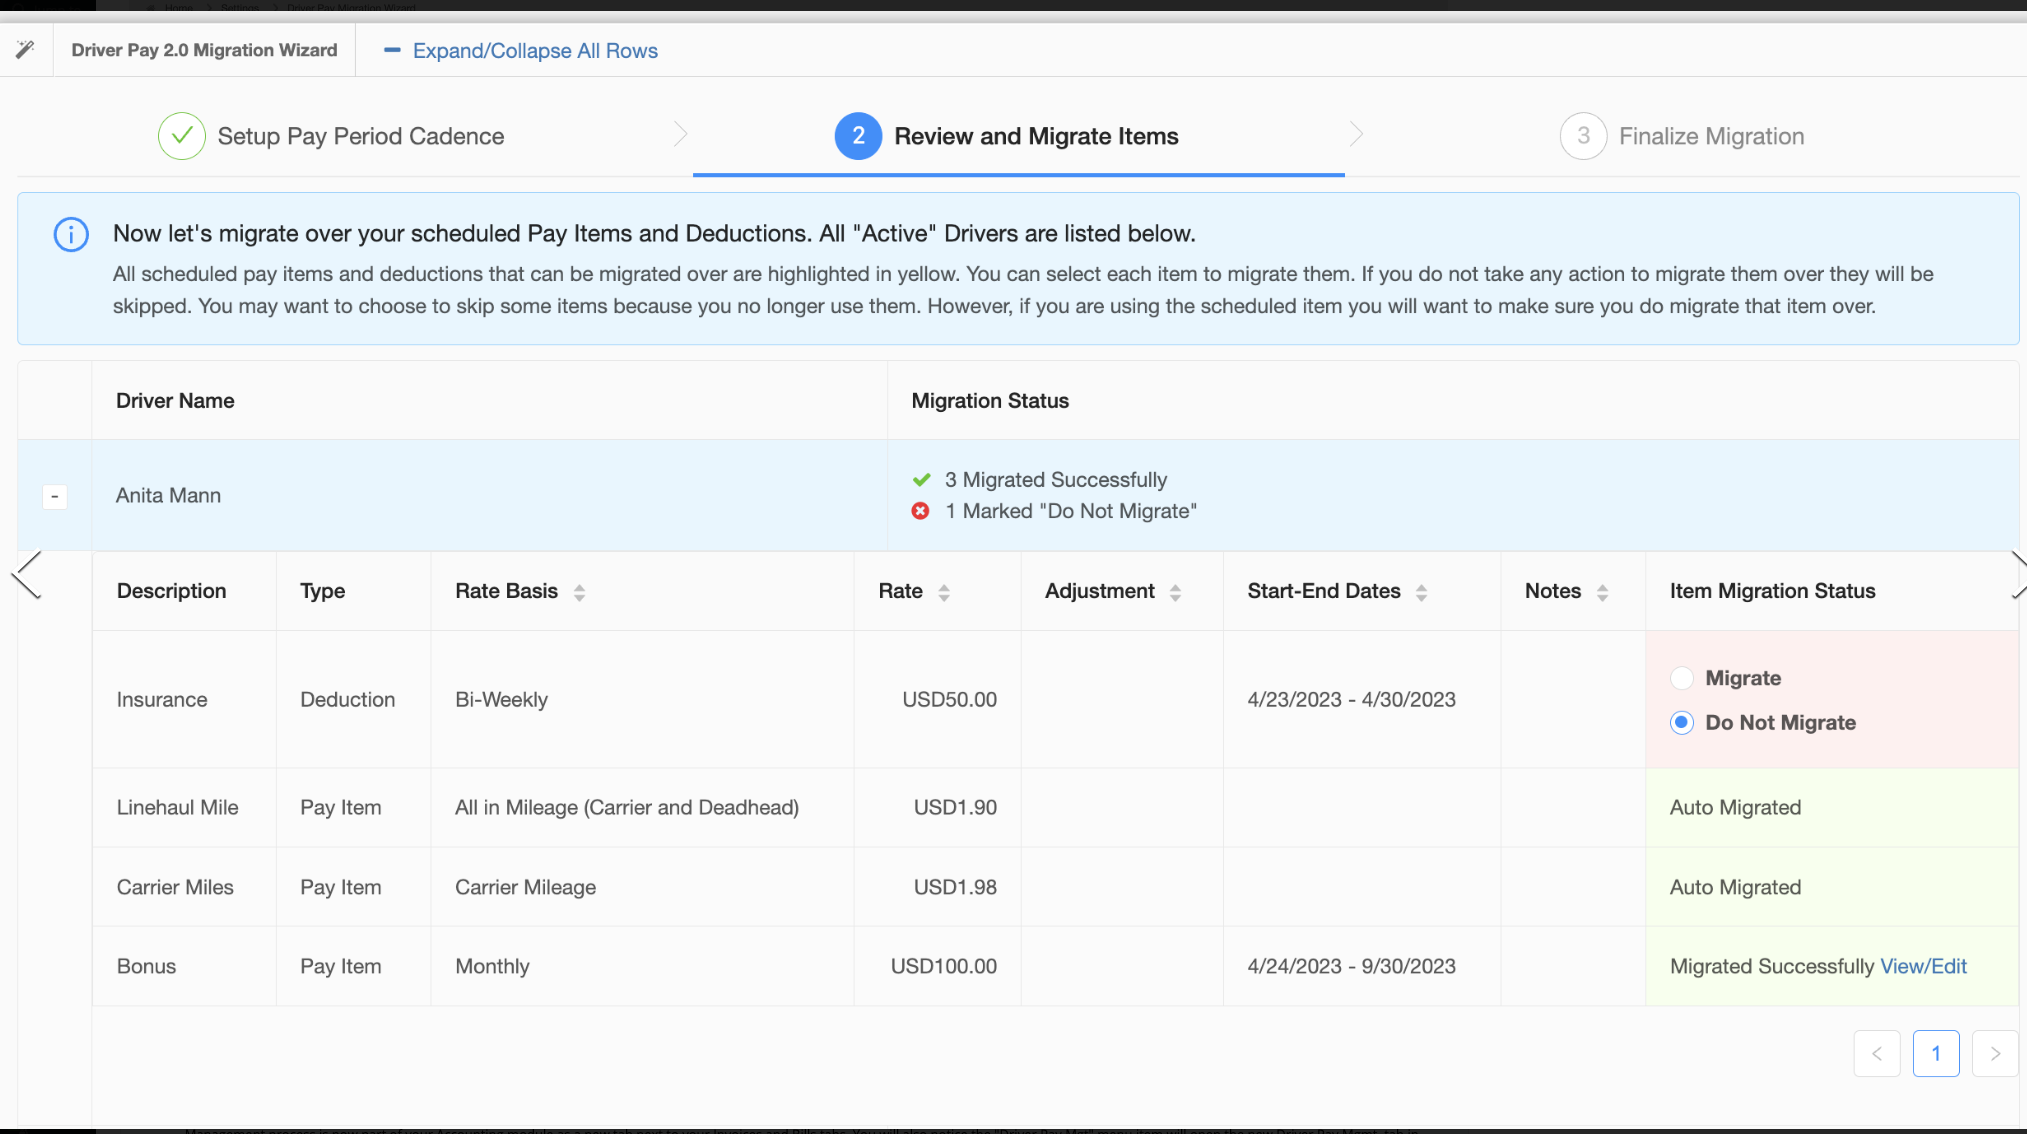
To view the details of each Load Pay Item, scheduled pay item, and scheduled deduction, simply click the plus sign to the left of the driver’s name to expand the row. You can now select the pay items, or deductions, that have not been migrated yet to begin the migration process. To complete the migration of a scheduled pay item or deduction, select the “Migrate” option. Or, if you wish not to migrate an item because you may no longer use that particular one, just select the “Do Not Migrate” option as shown below.
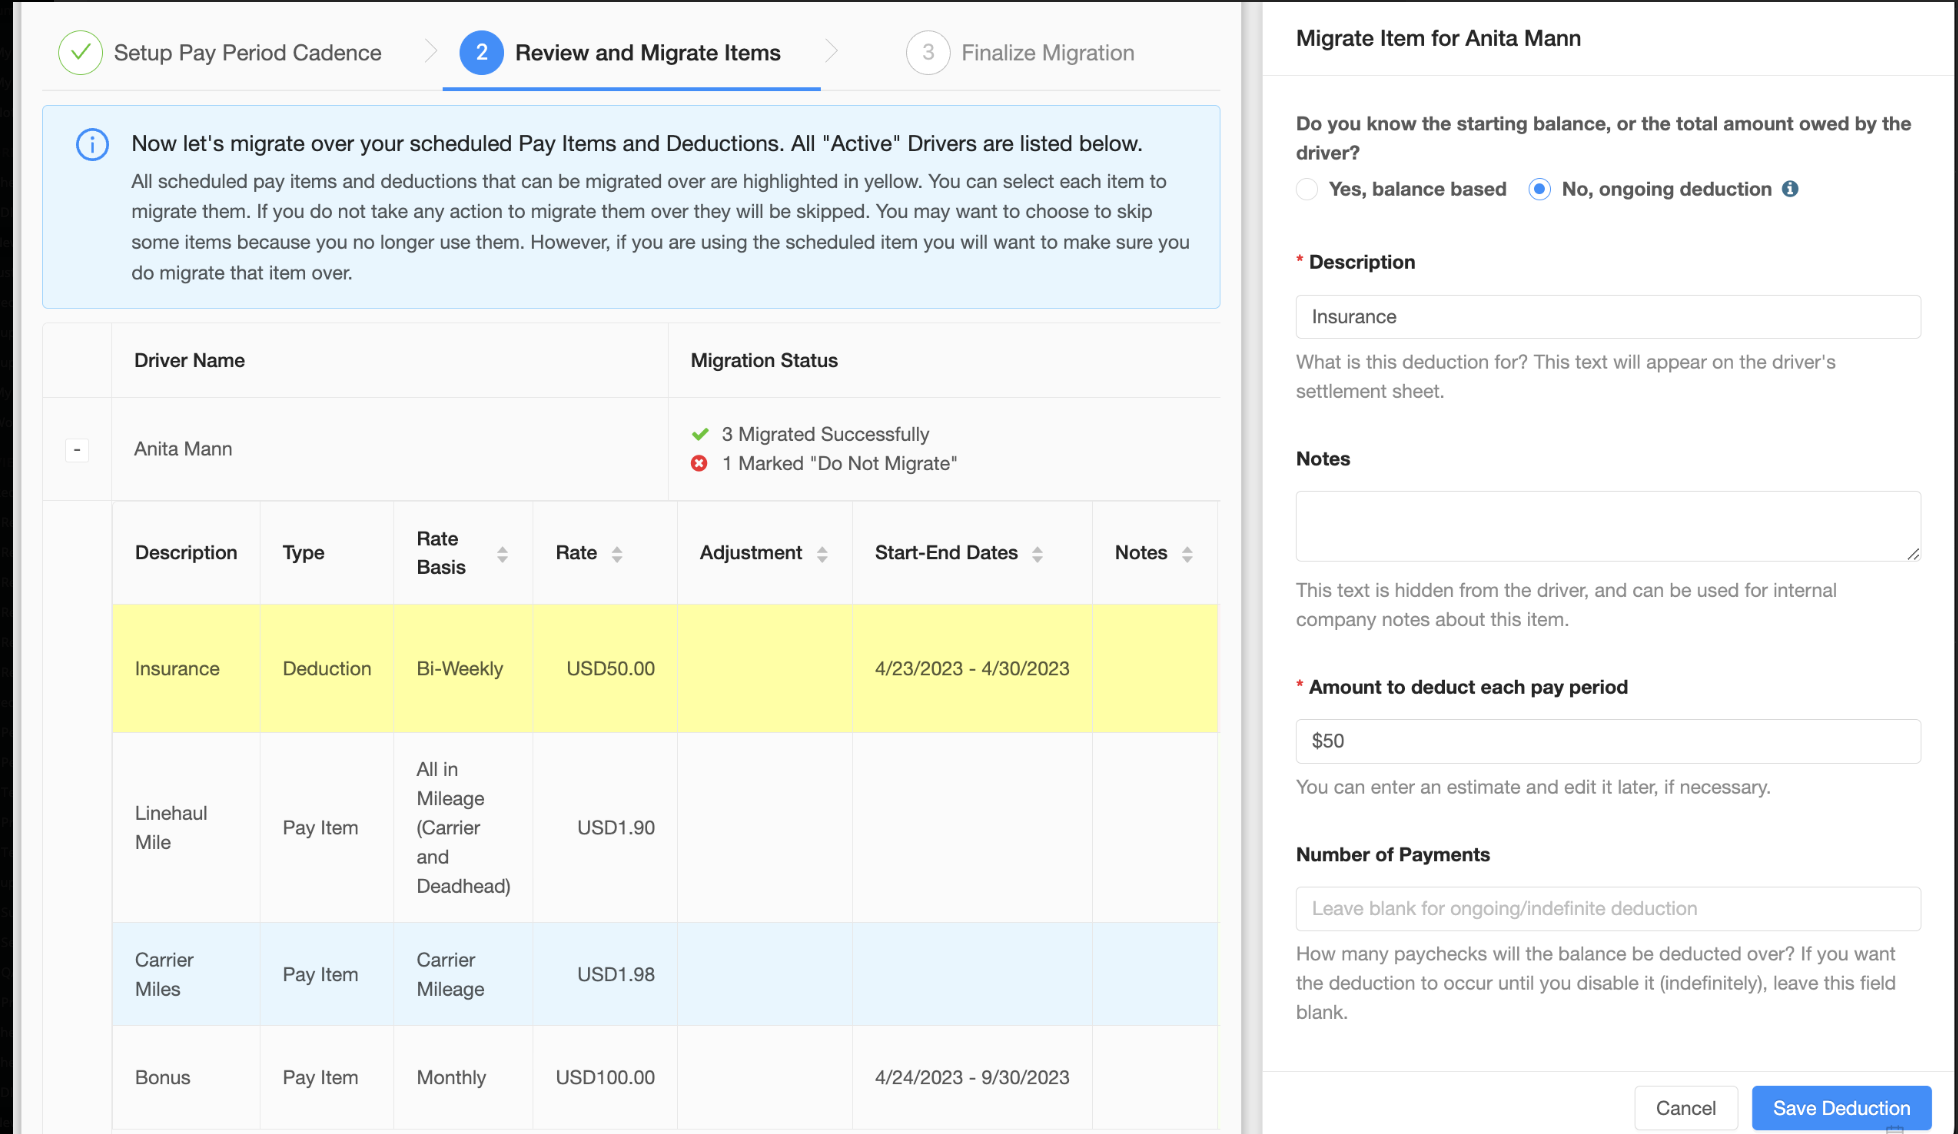
A new form will appear to the right of the screen. Most of the information will be filled in for you. Simply review the information, make any changes if necessary, and click on the “Save Deduction” button at the bottom of the page. Repeat this step as necessary.
Once you have saved the scheduled pay item or deduction, it will show you “Migrated Successfully” in the “Item Migration Status” column. You may view or edit the line item if needed.
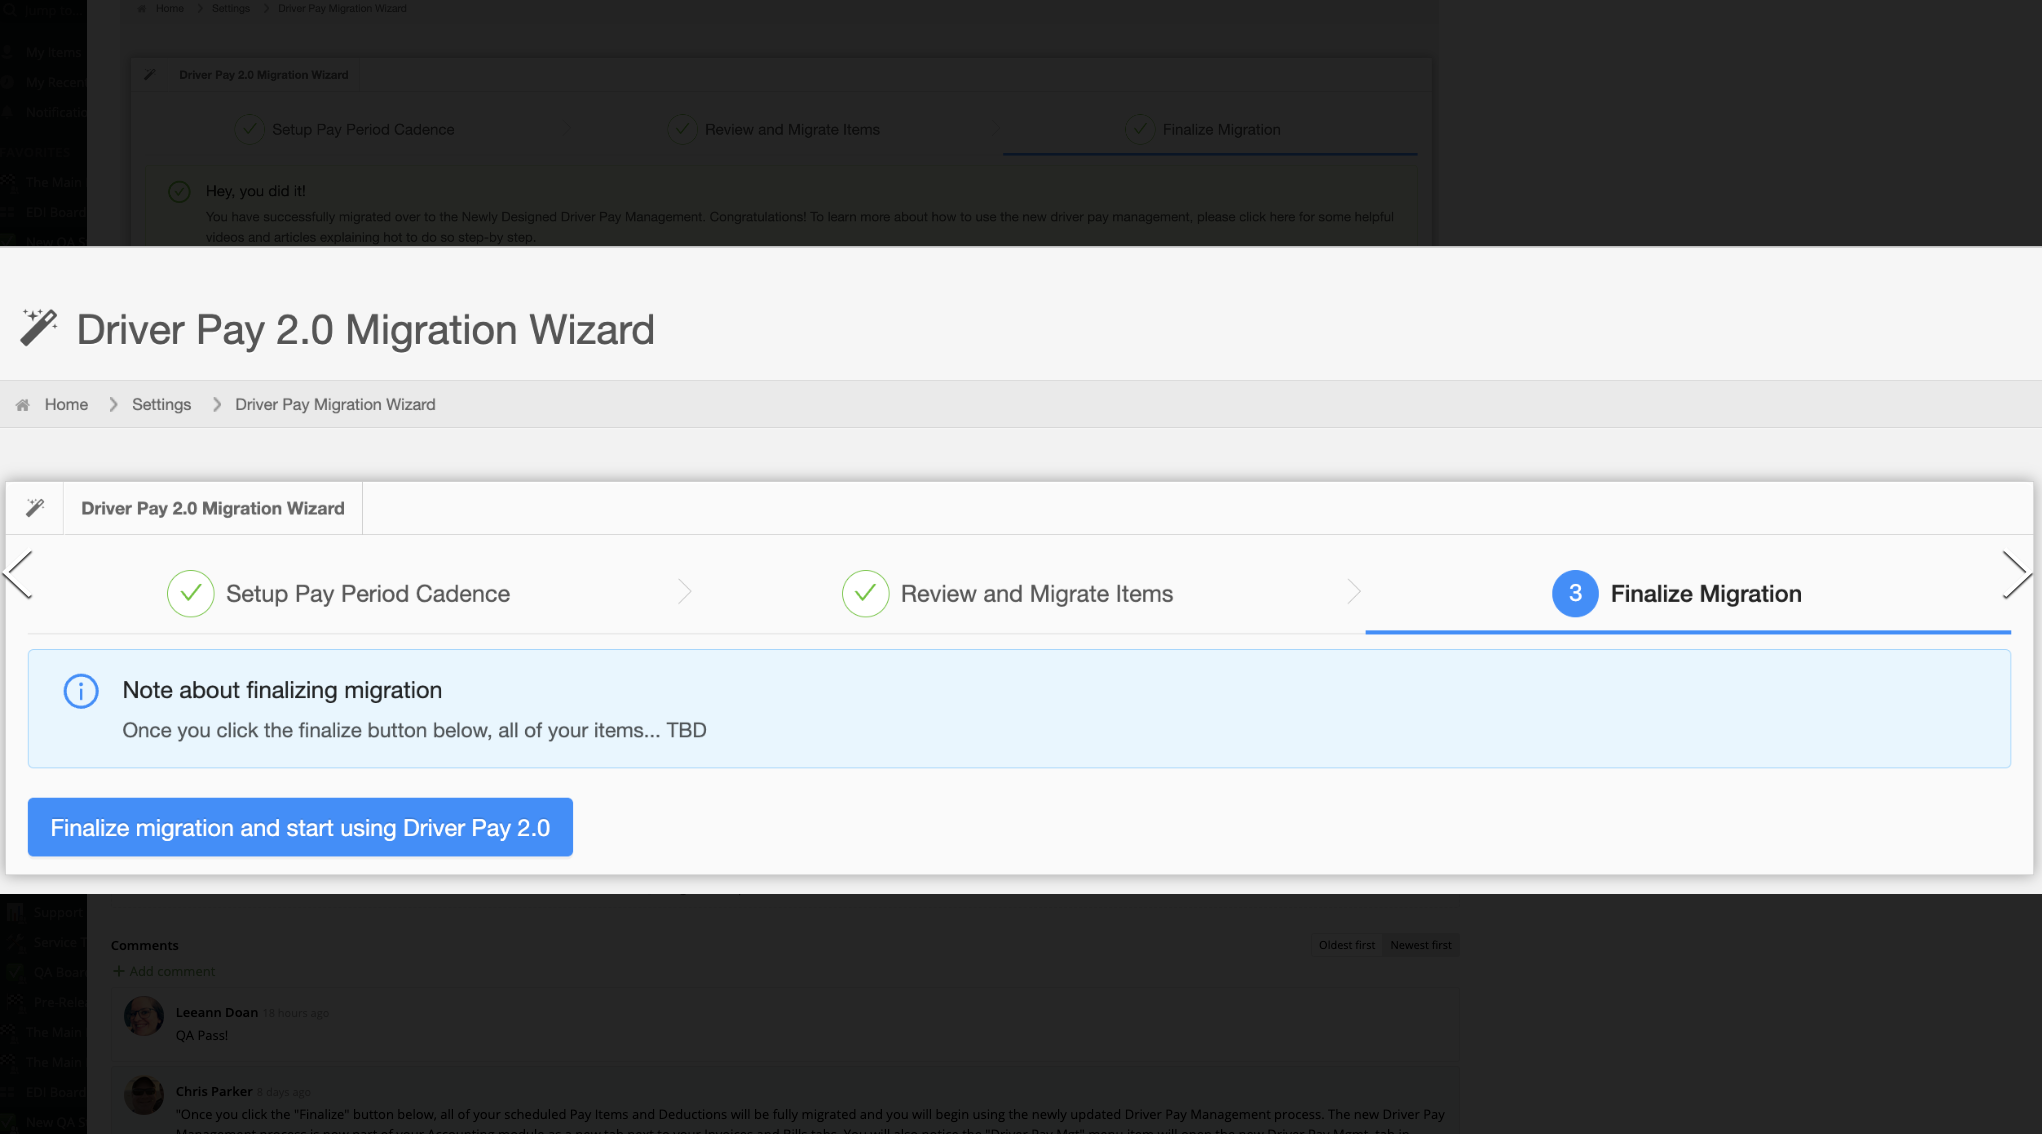
The only thing left to do is click on the “Finalize migration and start using Driver Pay 2.0” button. IMPORTANT: This action will complete your migration and the Legacy Driver Pay Management (1.0) process will no longer be available to you. However, if you exit out of the migration process before you click on the “Finalize……” button, you can come back later and pick up where you left off.
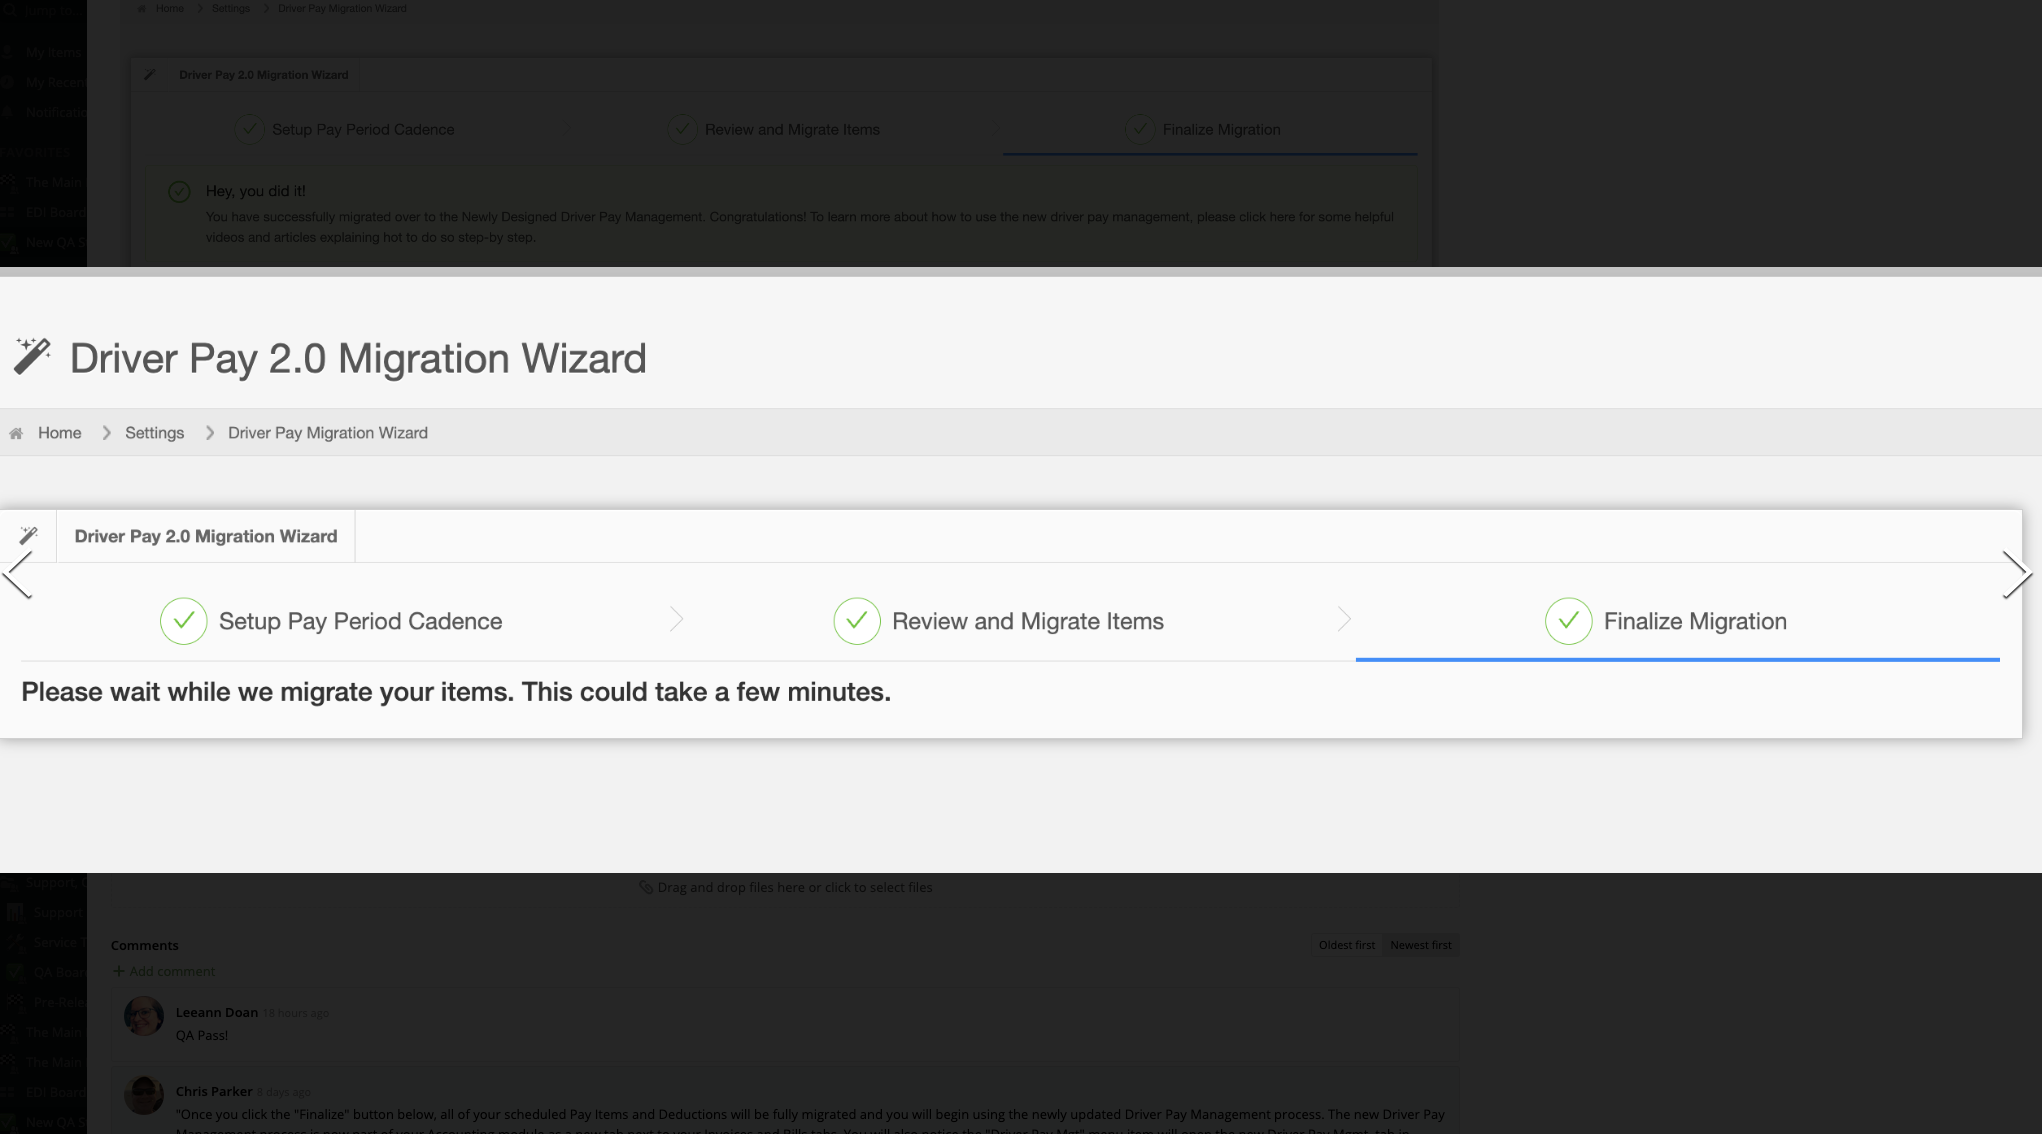
The migration process may take a couple of minutes to complete so please be patient.
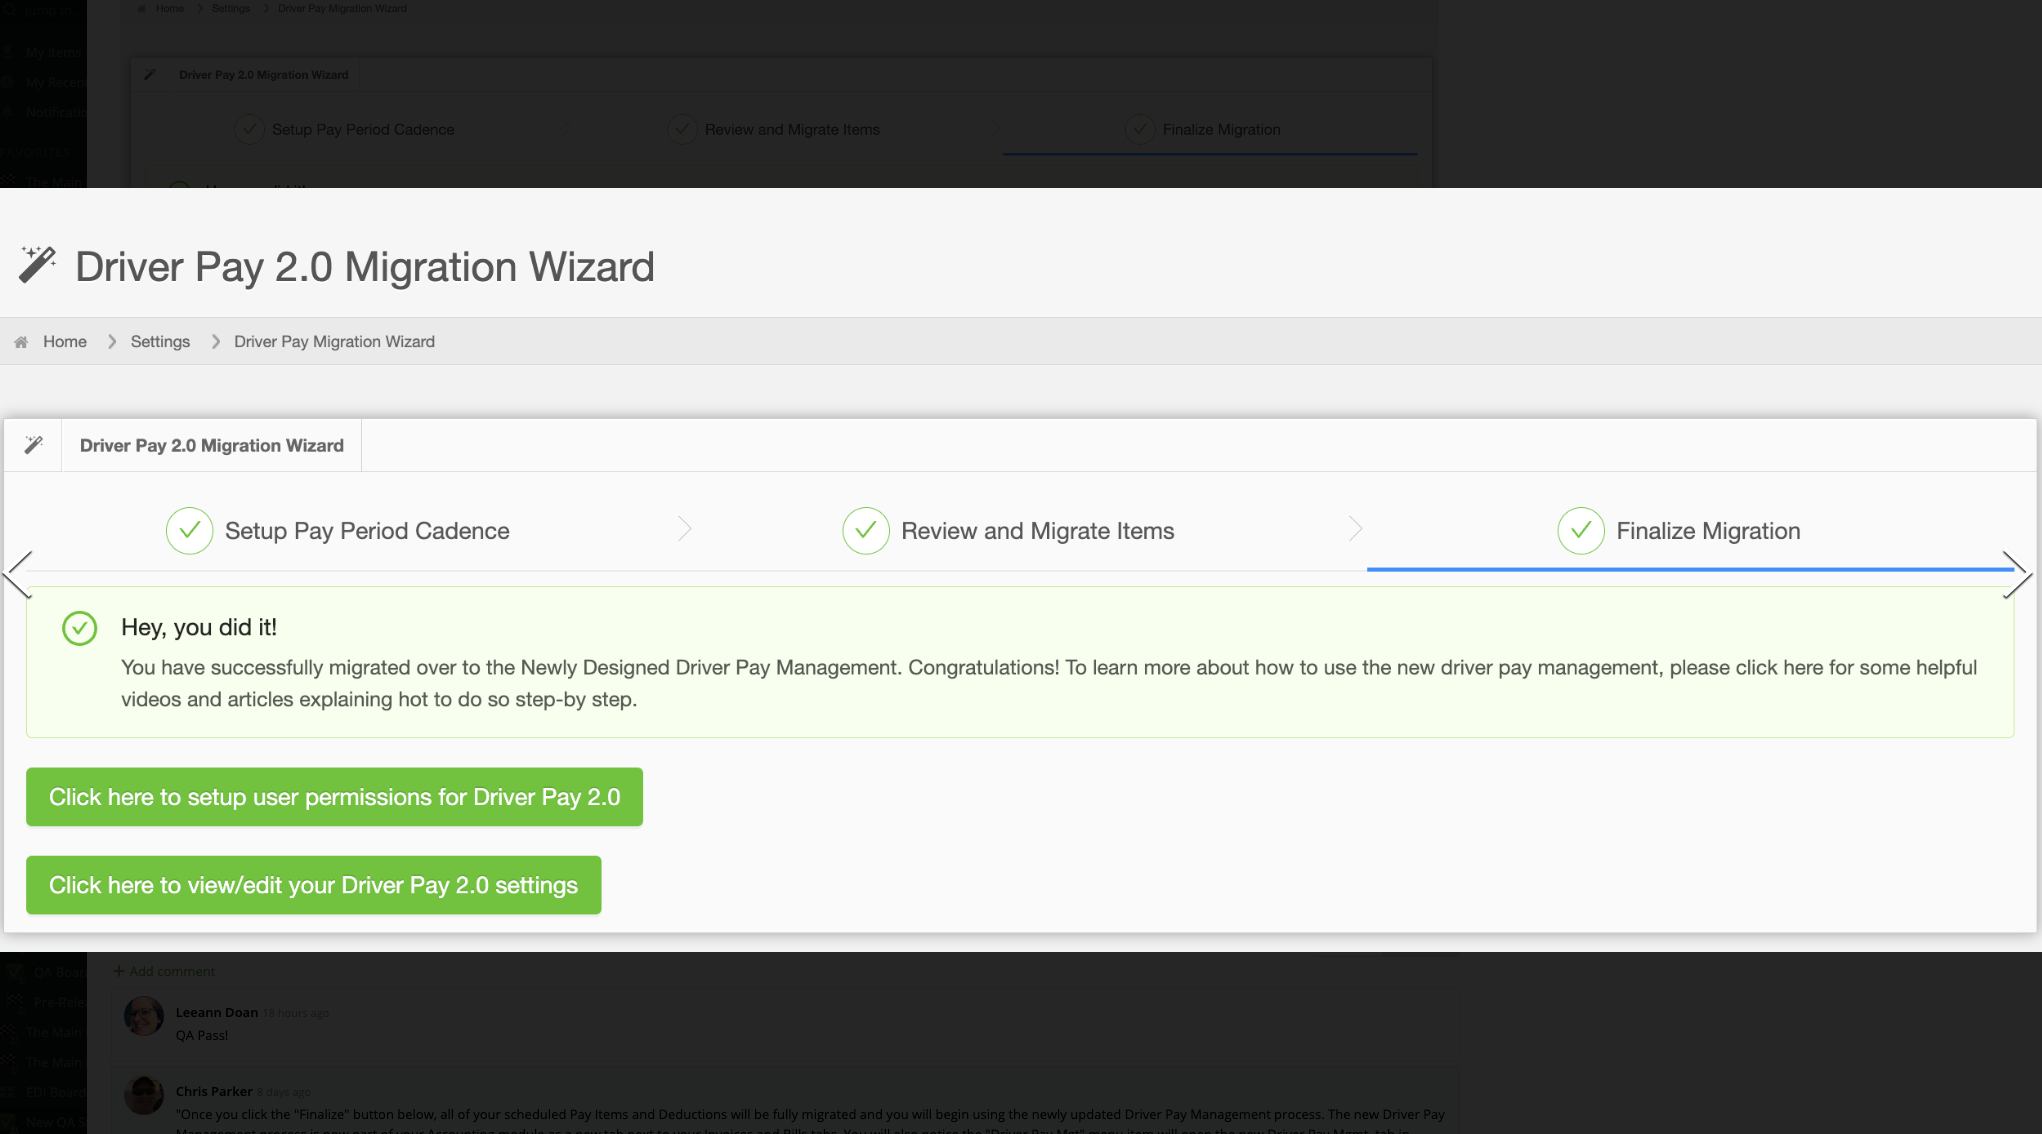
Once you have been fully migrated you will see the screen below. If you are interested in setting your user’s permission for Driver Pay Management (we highly recommend you do) please click on the “Click here to set up user permissions for Driver Pay 2.0” button. If you would rather review your new Driver Pay Management settings, simply click on the “Click here to view/edit your Driver Pay 2.0 settings”
Chris
Comments