Introduction
In this article, we are going to review how to set up and schedule your driver's pay items in AscendTMS. There are a couple of different types of pay items you can use to track your driver's pay. There are "load pay items" that will be used during the load pay process and will display on your driver's confirmation sheet (used when dispatching a driver) and "scheduled pay items" that can be used for a variety of reasons. You can also schedule payroll deductions as well that can be applied on a per-payroll basis.
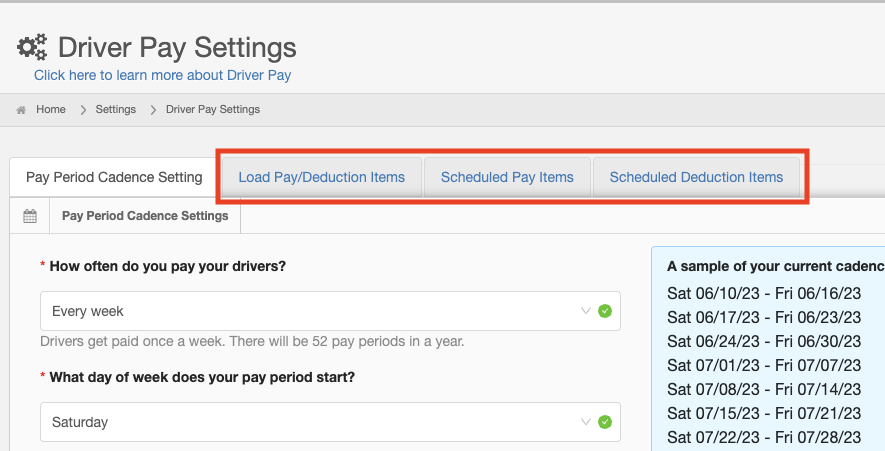
Navigating To Your Driver Pay Settings Pages
There are three ways you can navigate to this area of AscendTMS
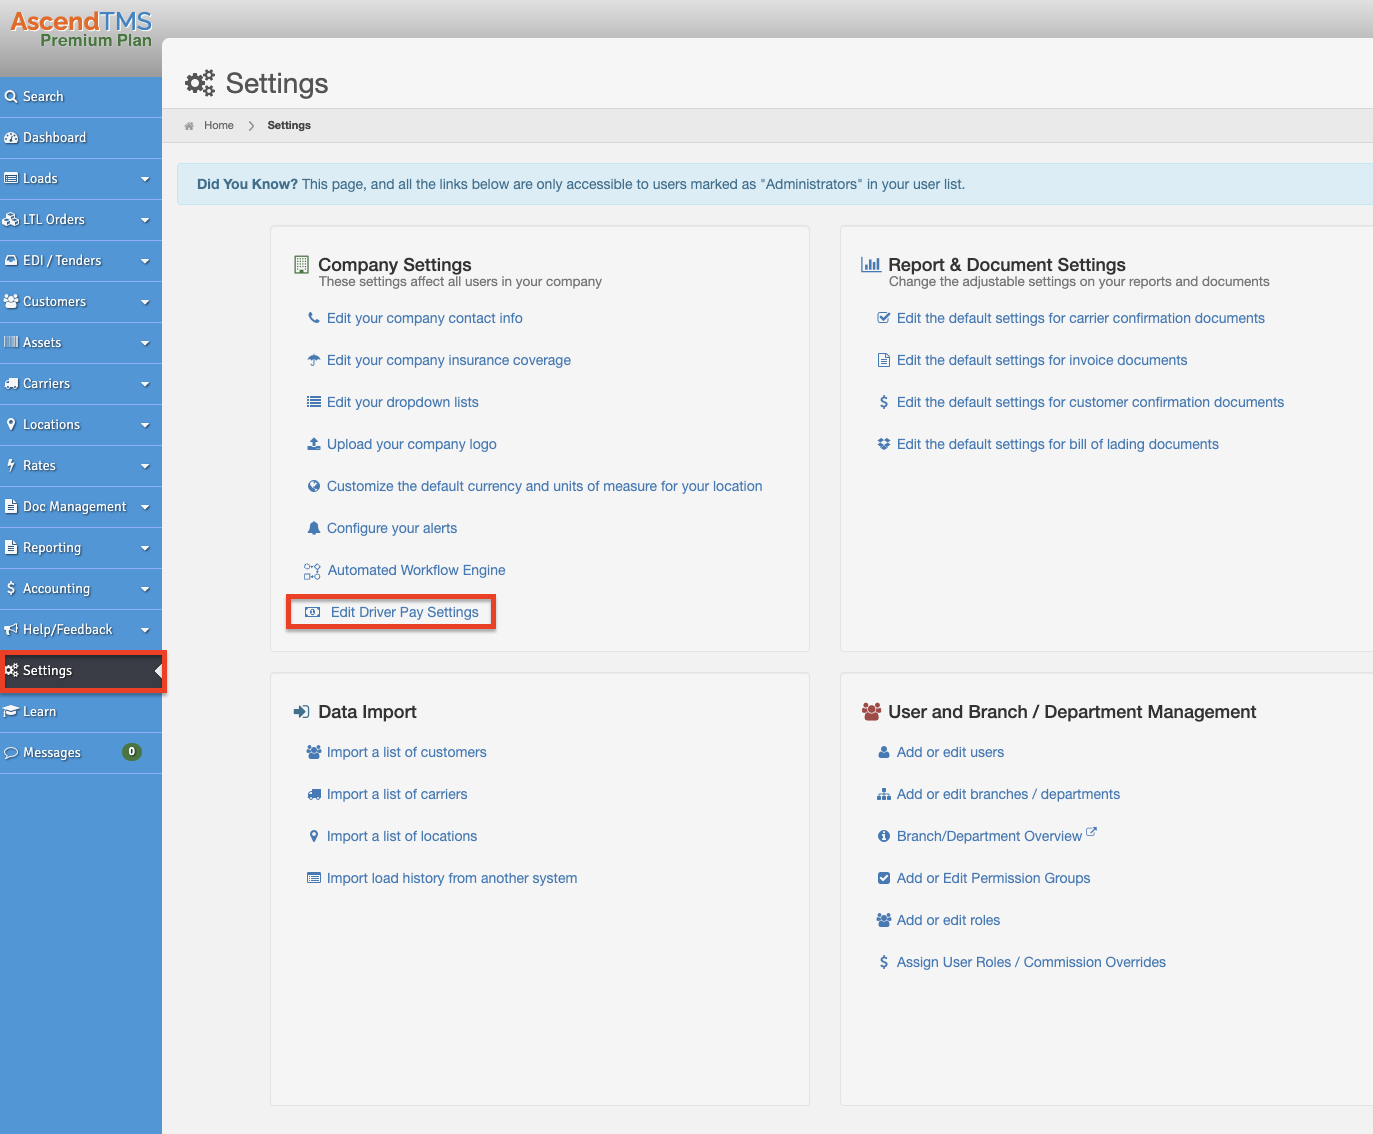
1. You go to the Driver Pay Settings area by going to the "Settings" menu then selecting "Edit Driver Pay Settings" and selecting one of the tabs.
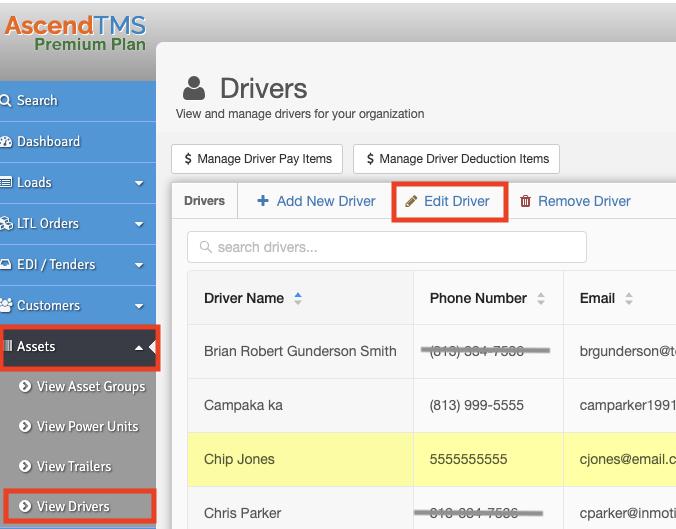
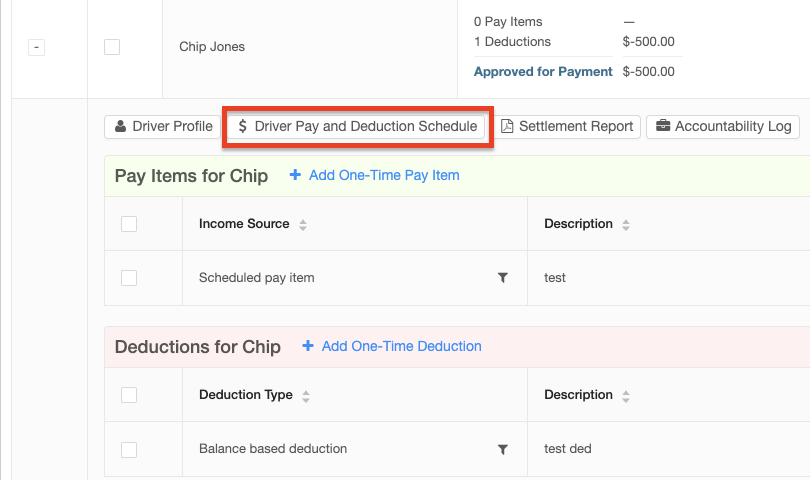
3. You can also select the "Driver Pay and Deduction Schedule" button directly from the Driver Pay Management screen in Accounting.
No matter which method you choose to navigate there, the methods used to view/add/edit your driver pay items are basically the same and are updated throughout the system.
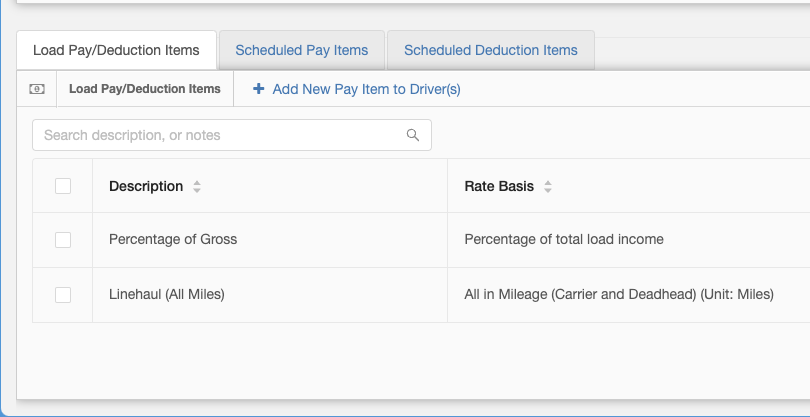
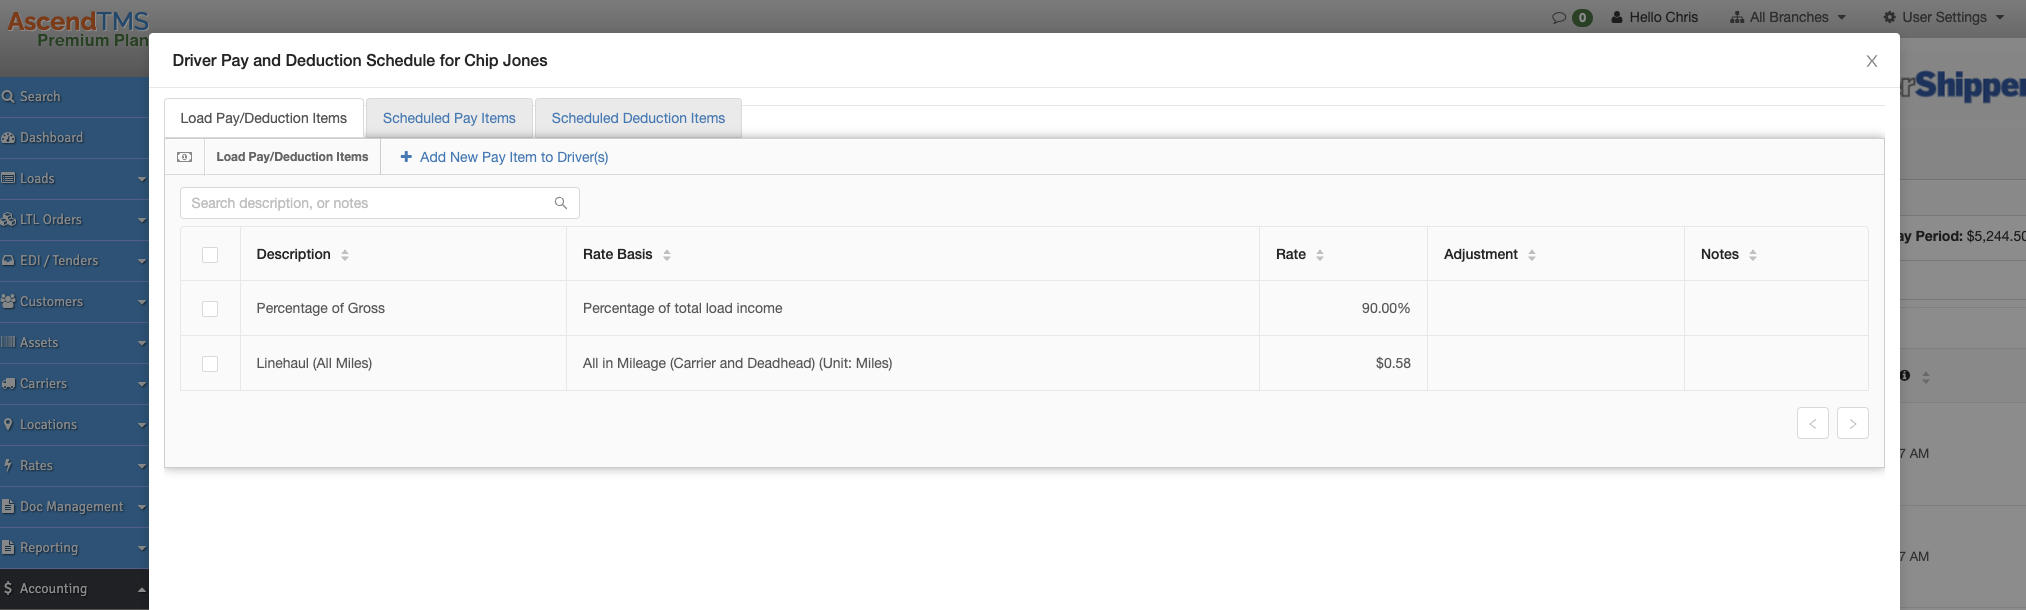
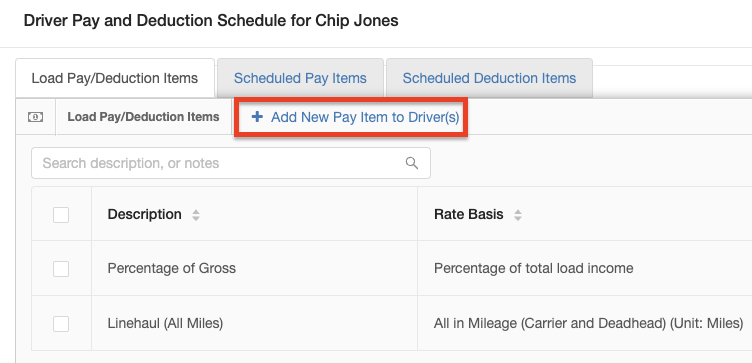
Adding a New Driver Pay Item for Load Based Pay
Click on the "Add New Pay Item to Driver(s)" button.
Choose a "Rate Basis" which can be based on load miles, weight, number of stops, etc. In this example, we selected "Carrier Mileage" (the calculated load miles).
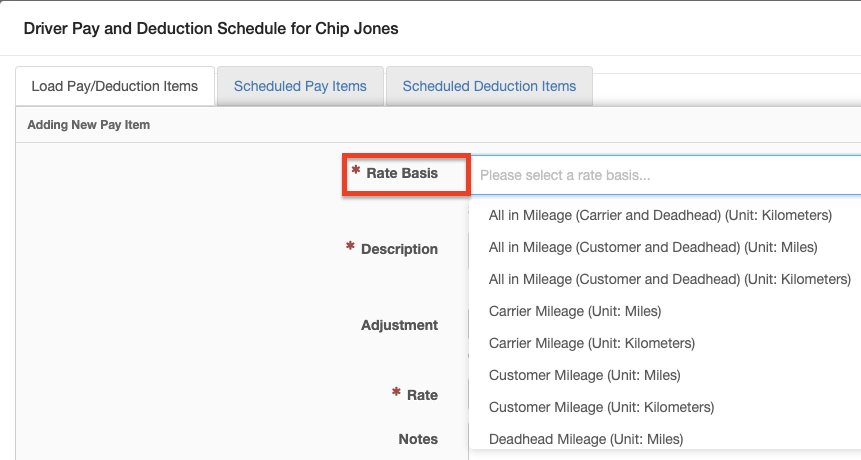
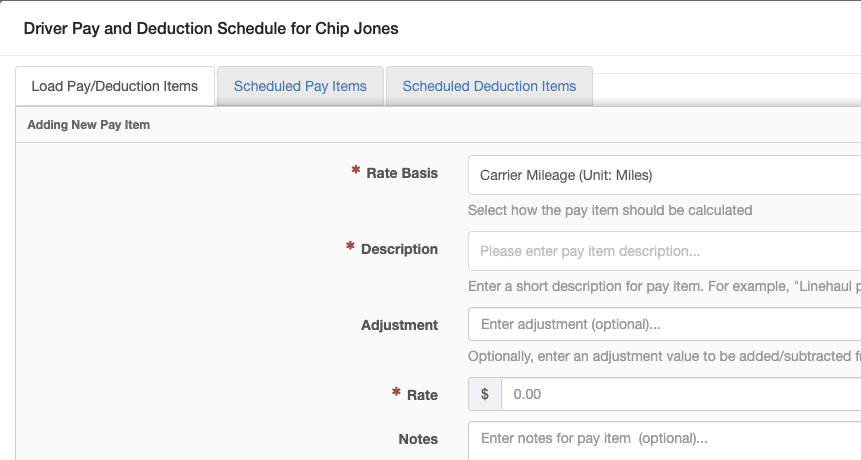
Next, fill in your "Description" and "Rate". "Adjustment" is primarily used for additional stop-based pay and is completely optional. "Notes" are handy to use but are optional as well.
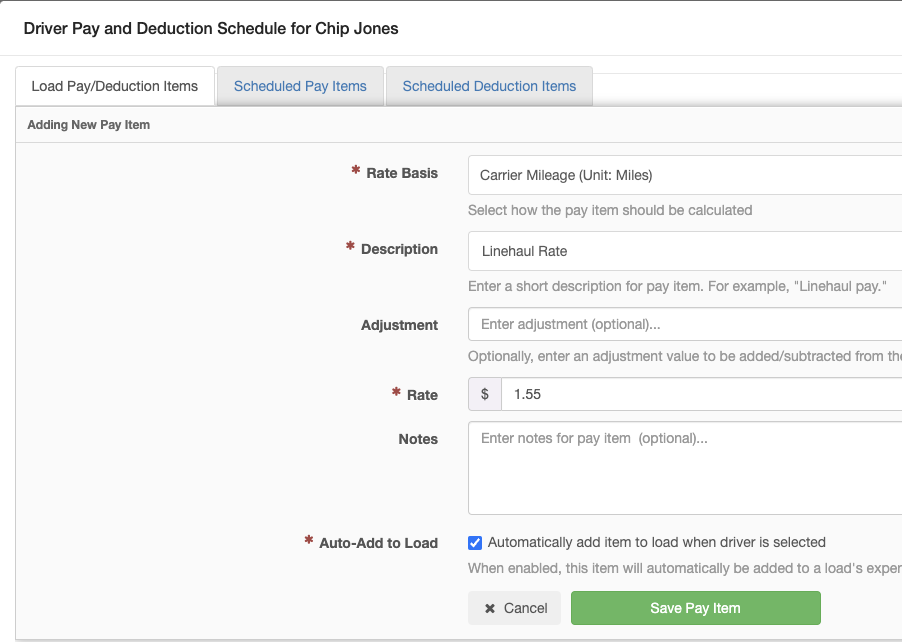
In the example below we used Linehaul Rate as the Description and entered in a rate of 1.55. This equates to a rate of $1.55 per mile for your driver.
We also selected the "Auto-Add to Load" option. This means that any time this driver is assigned to a load, the system will add the $1.55 per mile rate based on the calculated Carrier Miles on the load. When done, just click the big green "Save Pay Item" button.
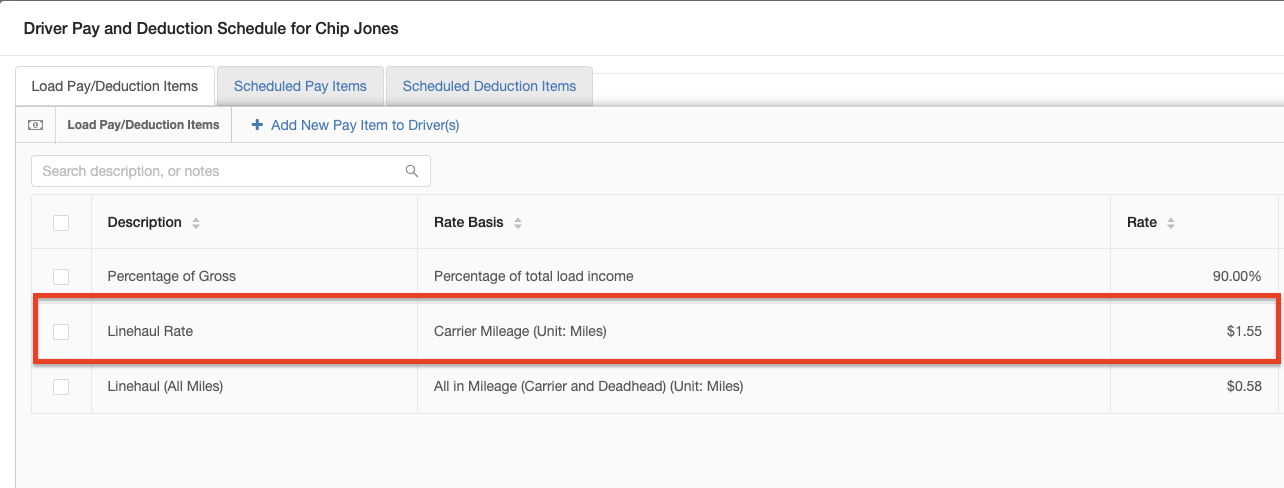
Here you can see the new Driver Pay Item you just added for this driver.
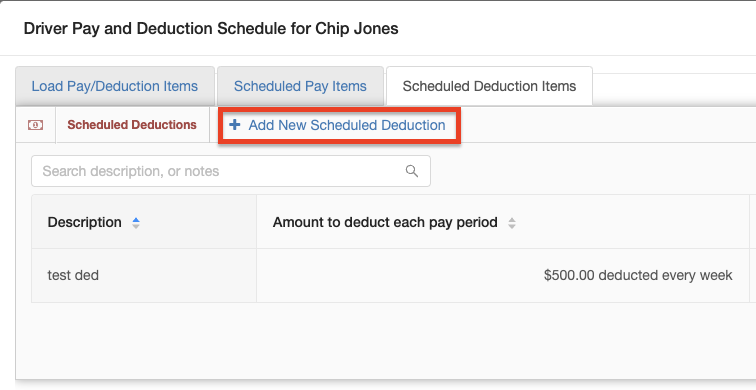
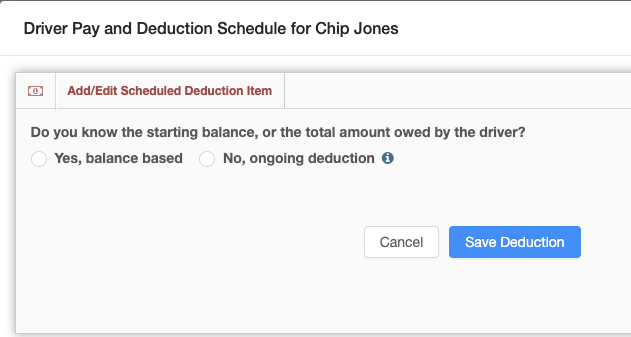
Adding A New Scehduled Deduction or Pay Item
Click on the "Add New Scheduled Deduction" button.
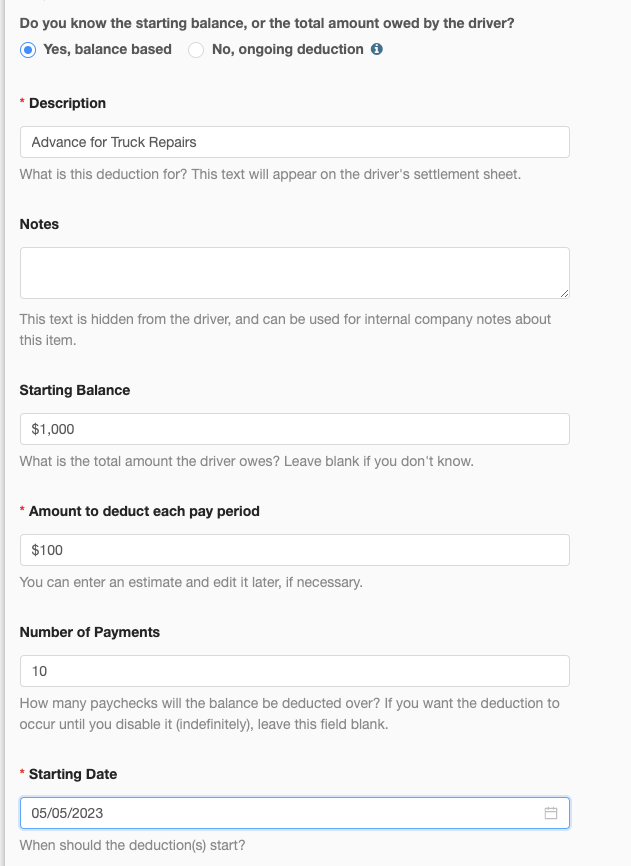
Choose whether the deduction is "balanced based" or "ongoing". Balanced-based deductions have an opening balance that you going to spread out over a set number of deductions (like paying back a loan). An ongoing deduction is just a set amount you want to deduct every pay period and exists until you remove it (just a basic payroll deduction).
Here is an example of a balanced-based deduction. In this example, $100 per payroll period will be able to be deducted for up to 10 payroll periods, or until the balance has reached $0. The "Starting Date" determines the first payroll period that this deduction can be applied.
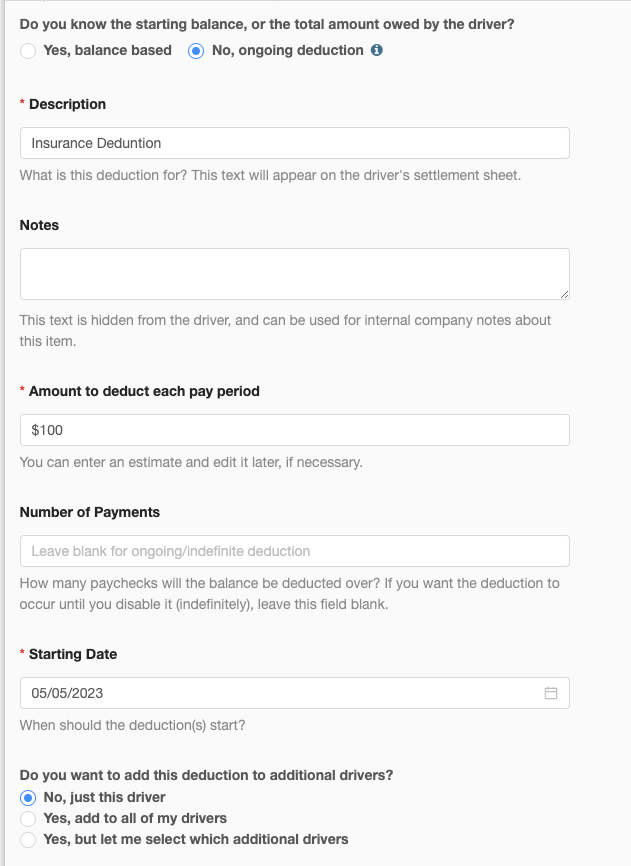
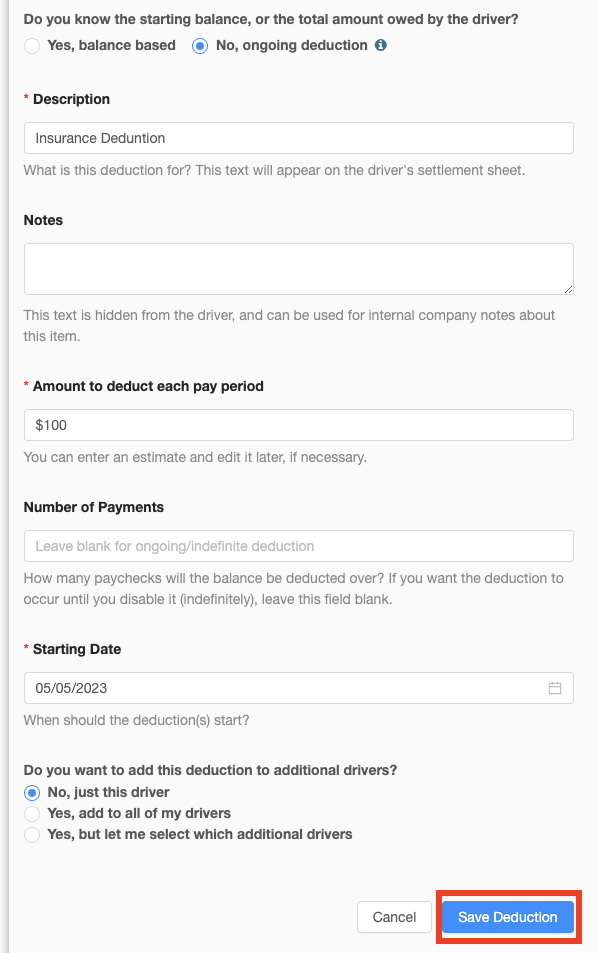
Here is an example of an ongoing deduction. Note that the "Number of Payments" is blank. You can restrict these to a number of payments if you wish but that is completely optional. If left blank, it will be a weekly deduction until you deleted the scheduled deduction or the driver is no longer active in your AscendTMS. The "Starting Date" determines the first payroll period that this deduction can be applied.
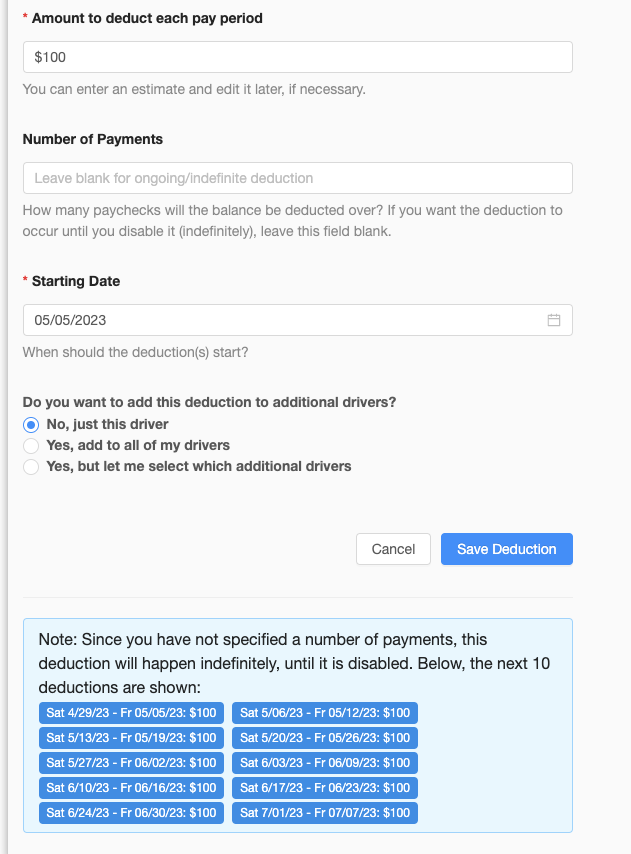
If you scroll down to the bottom of the page you can preview the deduction schedule.
When you are satisfied with everything, simply click the blue "Save Deduction" button.
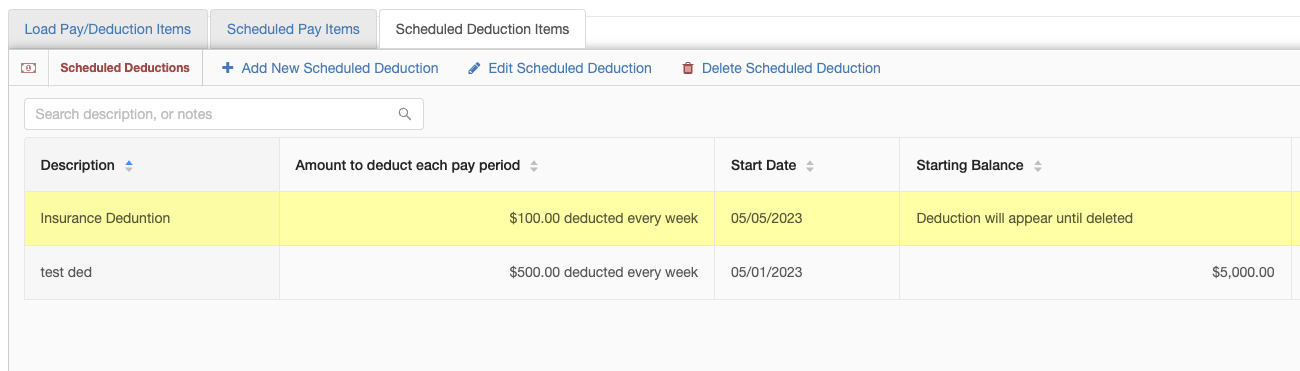
Below is the new deduction we just added.
Adding a new "Scheduled Pay Item" is essentially the same as a scheduled deduction. However, in this case, you are scheduling a pay item that pays your driver versus a pay item that deducts an amount from the driver's pay.
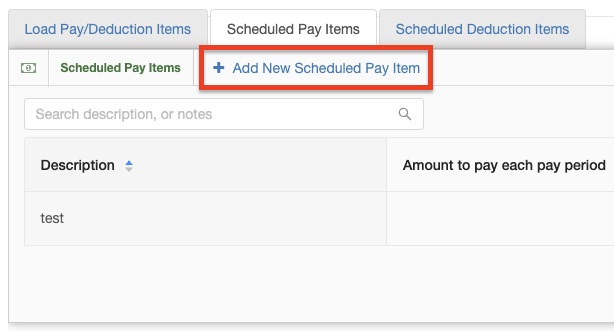
To begin, just click the "Add New Scheduled Pay Item" button.
Fill in the "Description", the "Amount", and the "Starting Date". The "Starting Date" determines the first payroll period that this pay item can be paid. When you are satisified with everything, click the blue "Save Pay Item" button.

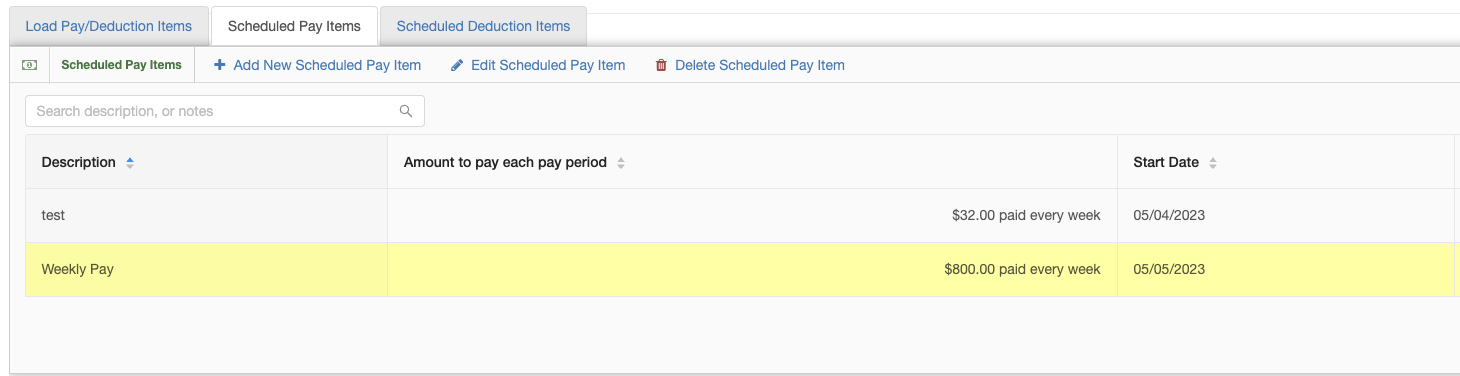
Here is the new Scheduled Pay Item we just added.
Now that you have your pay items and scheduled deductions added for your drivers, you can begin using the Driver Pay Management module. To learn more on how to manage your driver pay, please read the article below.
How to use Driver Pay Management
Chris
Comments