The Load Reports option in AscendTMS allows you to report on active, canceled and archived loads created by you or anyone in your operations team. Now, you can even save any report that you run regularly. That's right, accounting, upcoming revenue, monthly reports and more - it truly is that simple! You can search for multiple search terms at once, creating truly dynamic reporting!
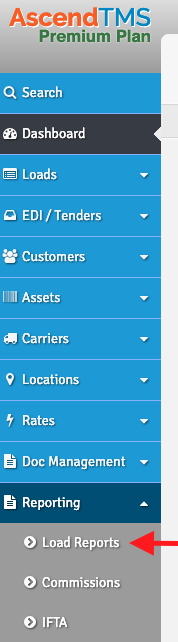
You can reach the load reporting / load search page here:
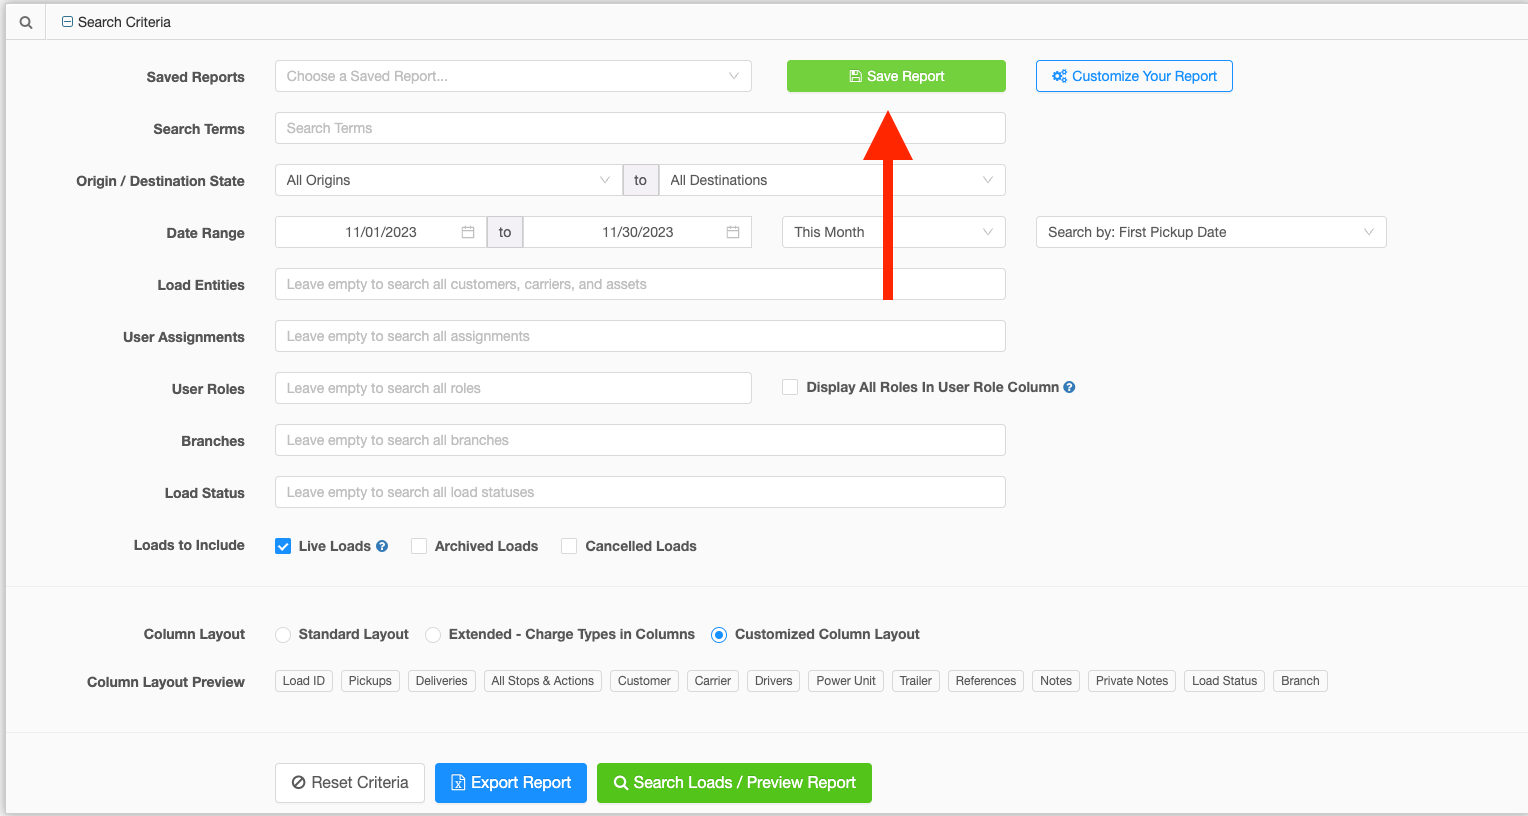
That will bring you to your dynamic reporting tool shown here:
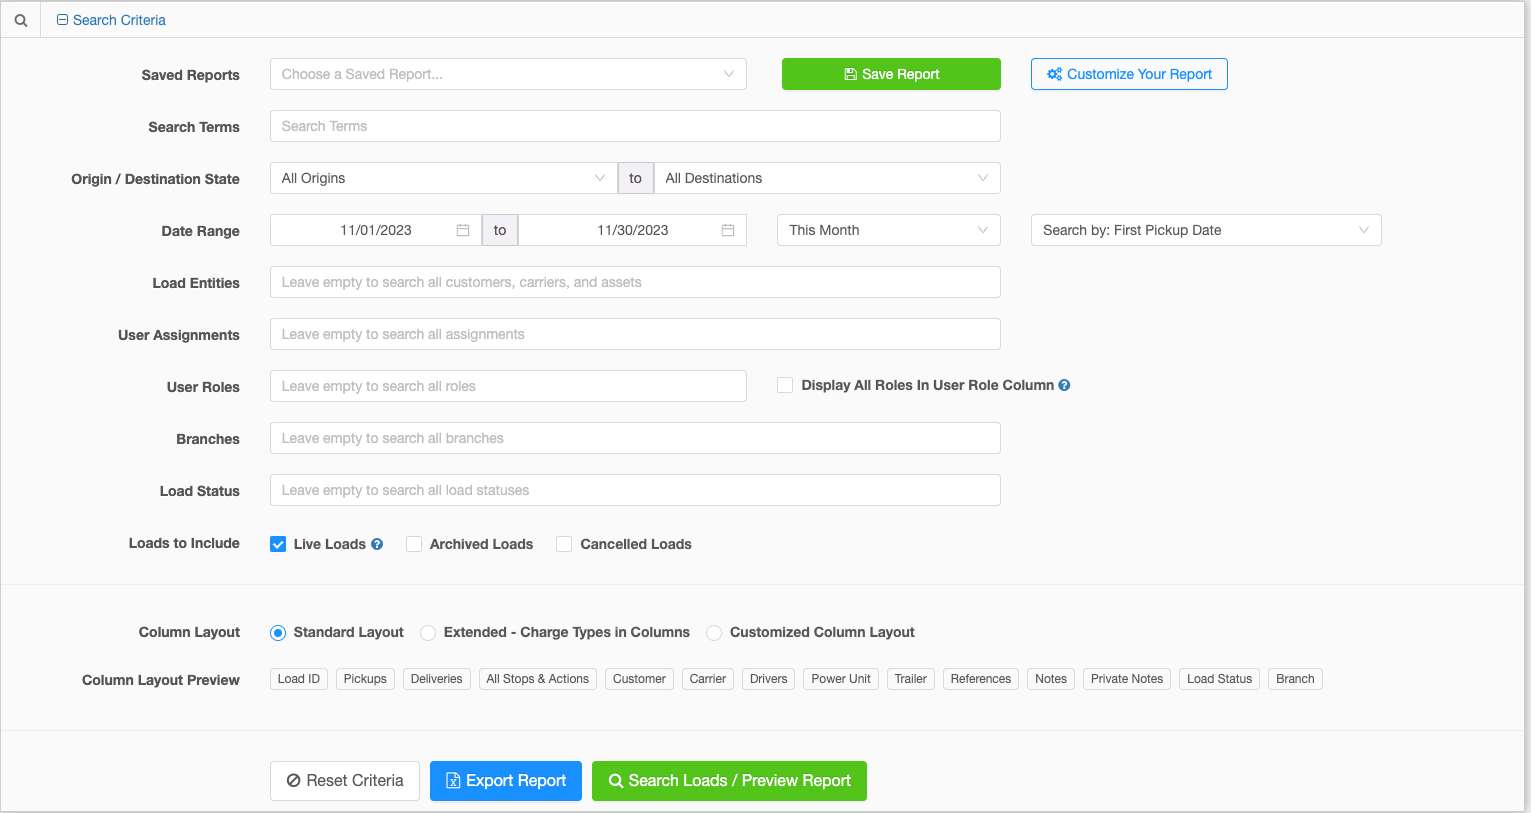
In the 'Search Terms' field, you can type anything related to the load such as location, carrier name, driver name, customer name, etc. To narrow down your search, you can choose to enter other information, such as origin or destination state, beginning or end date, branches, user assignments, user roles, and load status.
You also have the ability to choose if you would like to Display all Roles in the User Role column of the report, and if you would like to include live loads, archived loads, cancelled loads, or any combination of the three options.
The column layout options allow you to choose a Standard layout for the report (default), Extended layout that shows the charge types in the columns, and a third option which brings us to the options on customizing your report.
Customizing Your Report
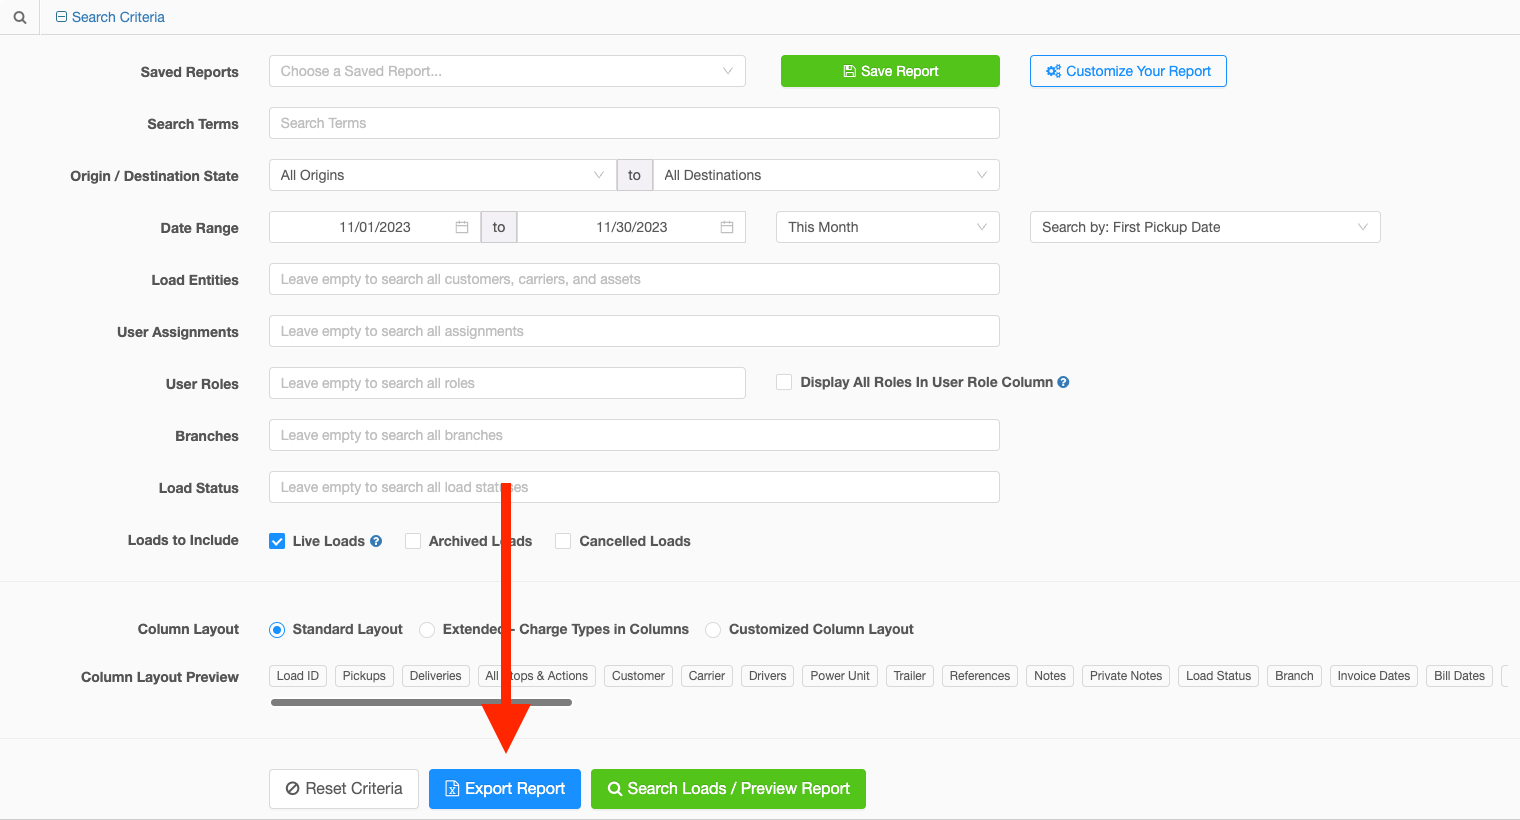
There are two ways to view the options for customizing your report. You can click the "Customize Your Report" button at the top of the screen, or select "Customized Column Layout" option under the Column Layout section, both outlined in red below:

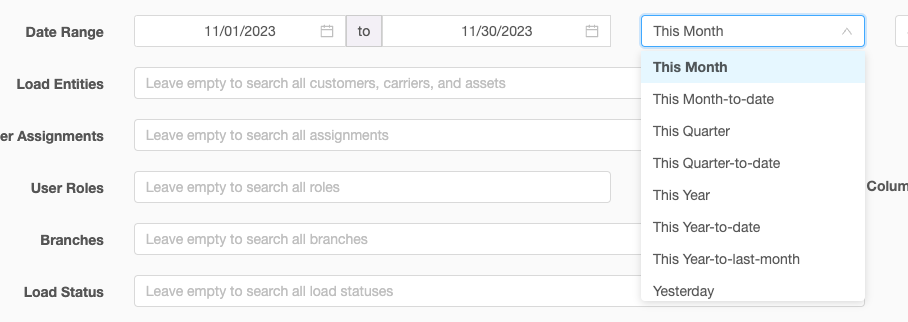
All Date Based fields allow you to freely enter dates of your choice, or you have the ability to choose from many selections on the dropdown next to the Date Range. These options include but are not limited too: This Month, This Month-to-Date, This Quarter, This Quarter-to-Date, This Year, This Year-to-Date. etc.
Going further down you will then see the option to customize your column layout. The Column Layout Preview allows you view a preview of the order your columns will show up on your report, as well as drag and drop the columns into a different order.

Moving along, you have options for including and excluding columns from the report altogether. Columns that you want included should be moved to the green grouping on the left, and columns you want excluded should be moved the red grouping on the right. You are able to drag and drop between the groupings, or click the check mark to move a column to the exclude group, and click the "Include" button to move columns to the include group.
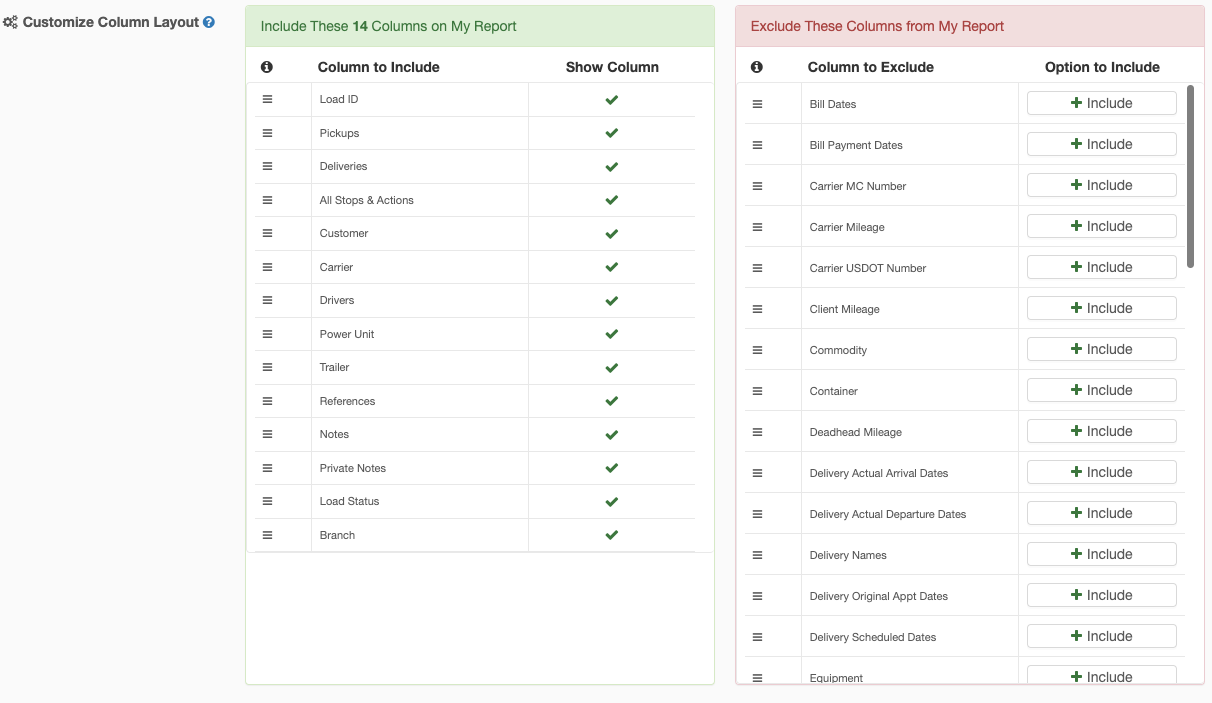
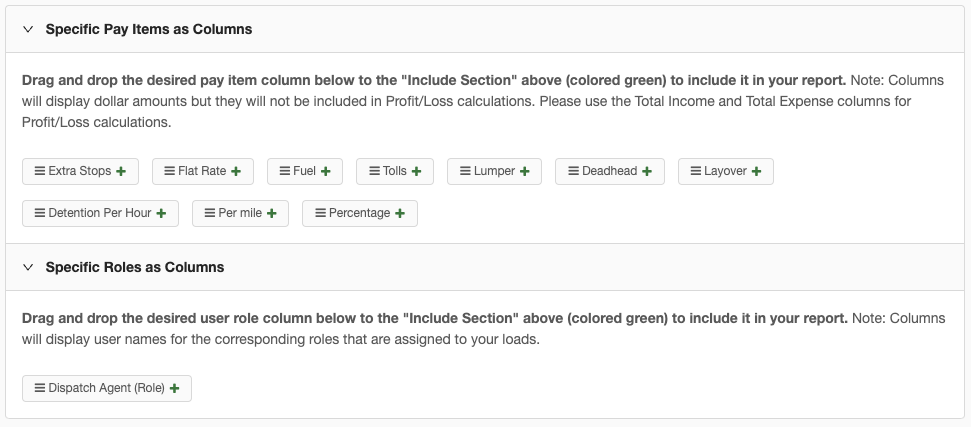
Adding specific Pay Items as columns on the report, as well as Specific User Roles as columns is also an option, and you will see them just below the green and red column groupings. Simply click the plus next to the Pay Item name or Role to have it added to the "Include" group, or drag and drop it.
Saving Reports
You can now save any reports that you run regularly for quick and easy access to them and choose which users have the ability to run said report. To save a report, simply do the following:
- Enter your report criteria.
- Once all of my criteria is entered, I will then select the "Save Report" tab in green here:
- You will then see this modal appear (shown below) and you can enter a Name for your report and choose which users are able to view and use the report:
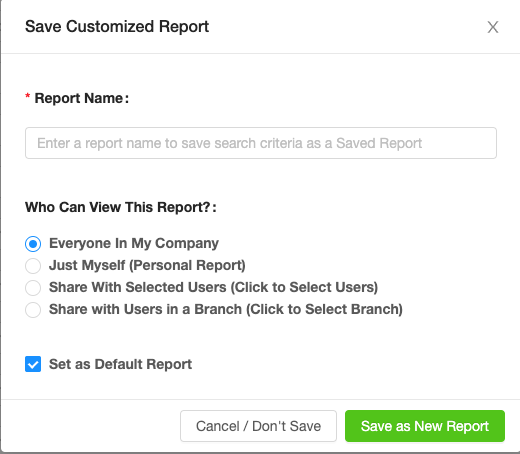
You have the options to share with every user, save it for just yourself to view, share with select users, or all users of a specific branch or branches.
The "Set as Default Report" will make it so that this is the report that shows up automatically any time you open the Load Reporting Tool.
Repeat steps 1 through 3 as many times as you want / need!
Selecting Saved Reports
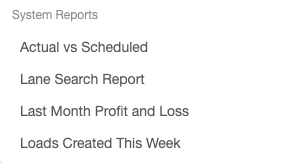
As you add saved reports to your system, you will be able to access them from the drop down menu at the top of the Load Reporting Tool. Each report will be categorized by who is able to view the reports. You will have "Shared with Me Reports", "Company Reports", and "System Reports". The System Reports have been added by us for your company use, however they are not able to be edited or deleted. You can view the System Reports below:
Export Load Data
You also have the option to export the load data results into a spreadsheet. Exporting your data into a spreadsheet allows you a myriad of options in terms of segmenting and charting. See how to Export the date below:
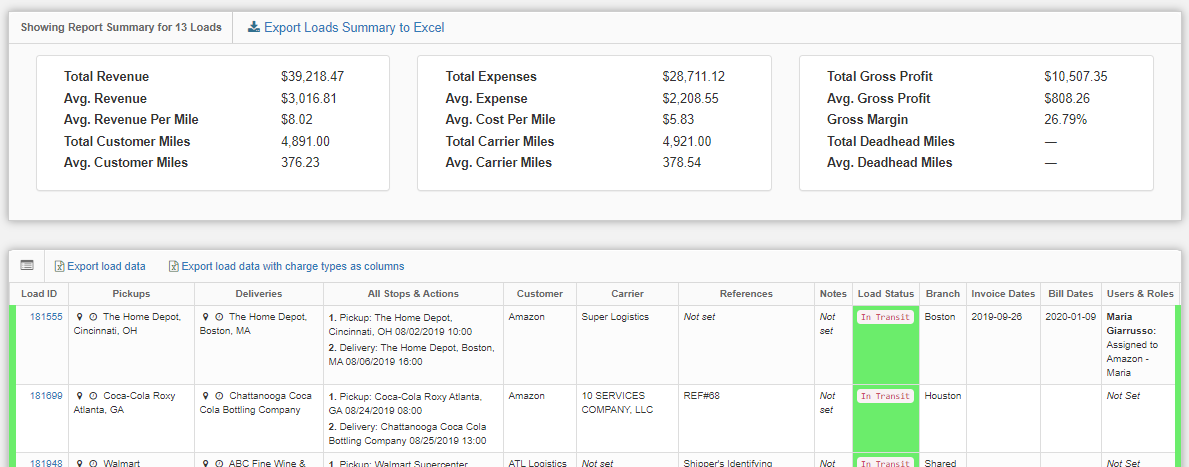
- Export Loads Summary to Excel - This will export a .csv file containing Revenue, Expense and Profit information.
- To export the entire report, simply click the blue "Export Report" button at the bottom of the page, as seen below:

Permissions
With all of these new reporting abilities, comes a new permission that you can set for your users. Under the "Reporting" section in "Add or Edit Permissions", you will now see a Permission that reads "Allow users to save, edit, and delete saved reports in reporting." If awarded this permission, the user will be able to add new saved reports, edit any existing, and delete any existing that they have access too.
If the permission is not given to a user, they will still be able to run any system reports, or reports shared with them by other users. They will also be able to customize a one off report, they just will not be able to save it for future use.
Chris
Comments