AscendTMS is fully integrated with MyCarrier Portal for carrier onboarding, monitoring, risk assessments, and more. With this integration, you can link your AscendTMS account to your MyCarrier Portal account, invite carriers to your MyCarrier Portal carrier network, import your MyCarrier Portal carriers (which will build a Carrier profile in AscendTMS if the carrier does not already exist), import your carrier documents, monitor your carriers, and request updated carrier packets and other documents, all from your AscendTMS!
This article will walk you through the setup process step by step. As well as highlight some key features that come along with this exciting integration.
Initial Setup / Getting Connected:
Let's get started!
To begin, you need to be a user of MyCarrier Portal. So, as long as you have a MyCarrier Portal login and password, you are good to go. (Please note: Even though you may already have a MyCarrier Portal login, you are required to follow these steps.)
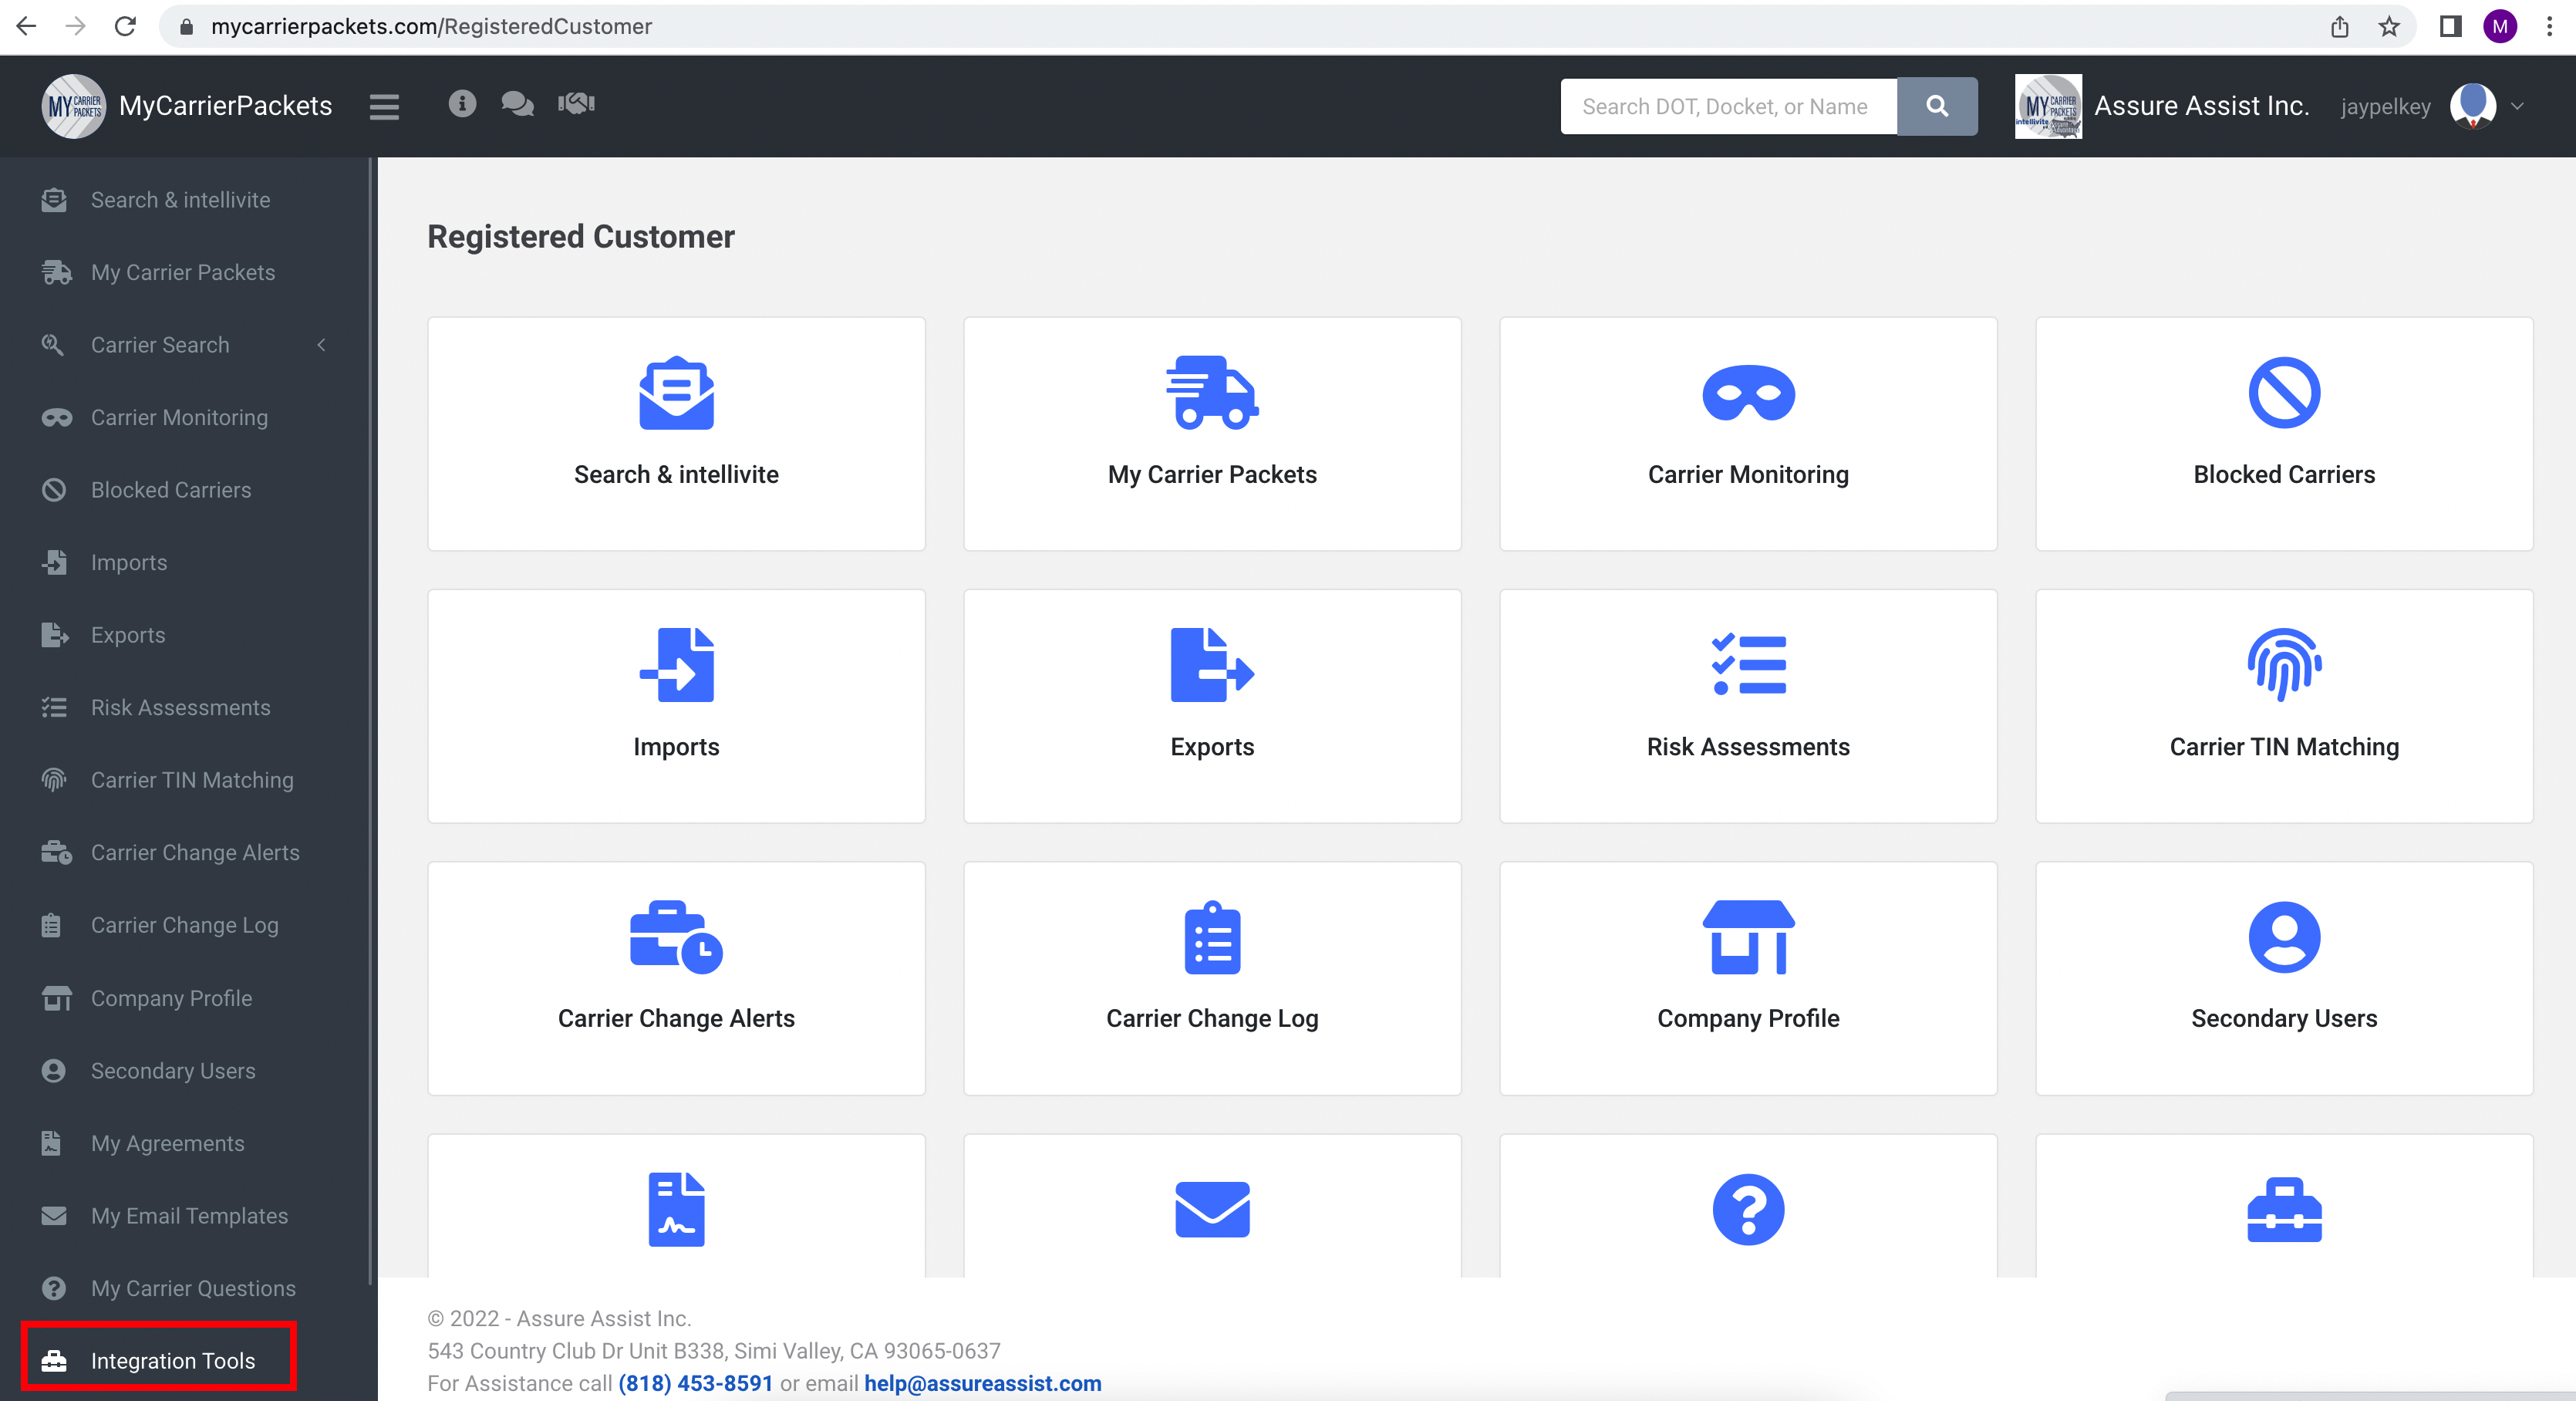
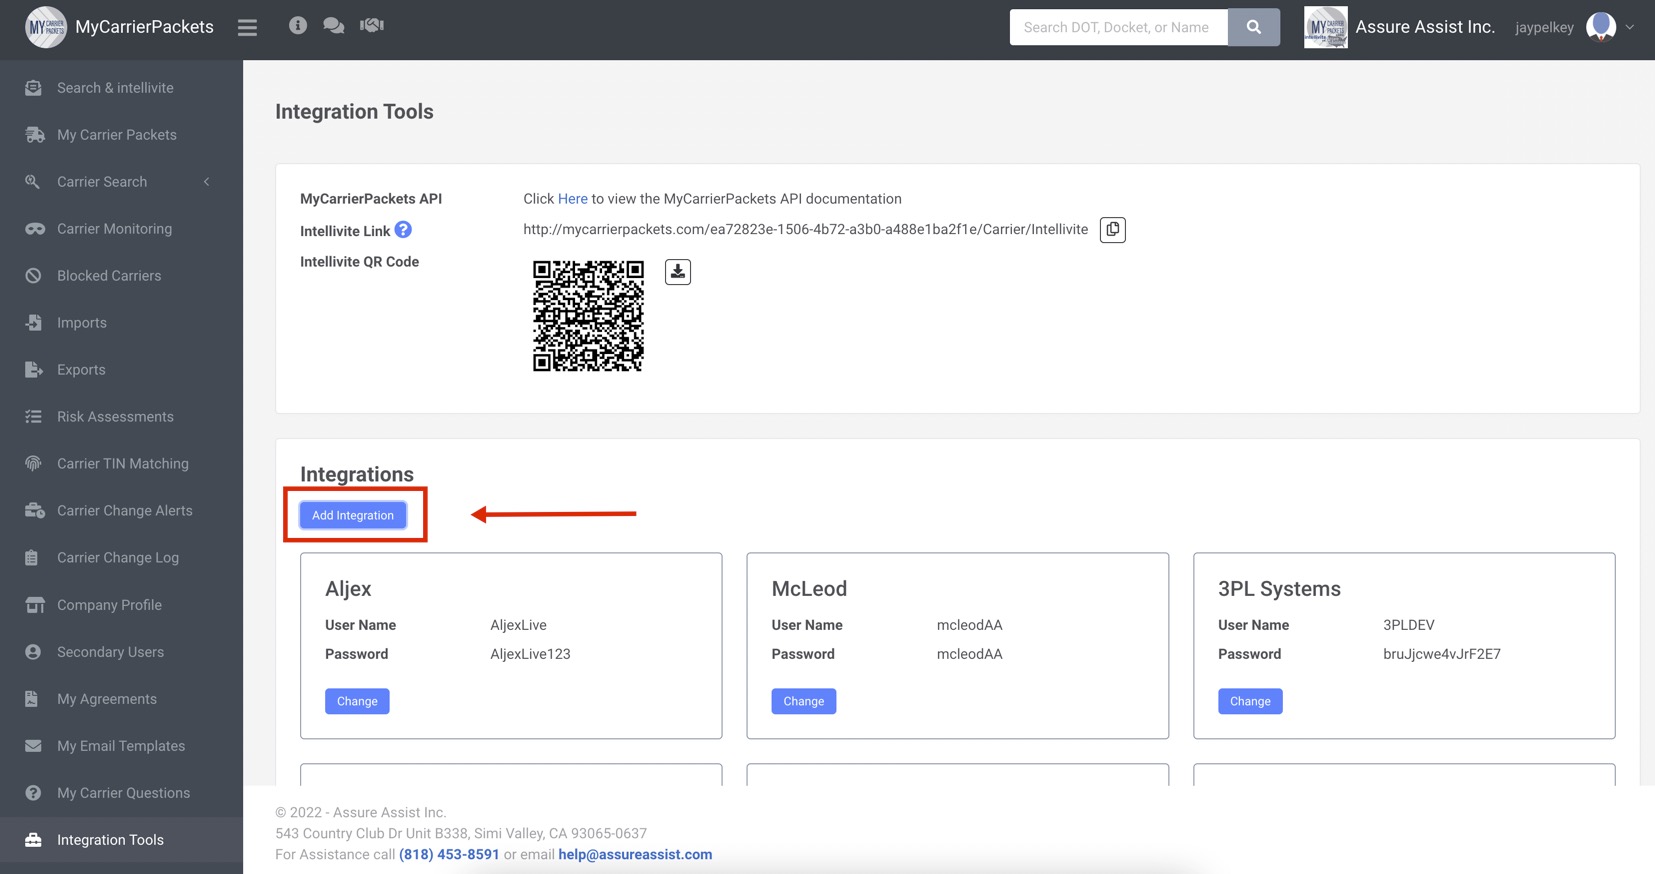
Log into your MyCarrier Portal account and click on the "Integration Tools" menu item.
Click on "Add New".
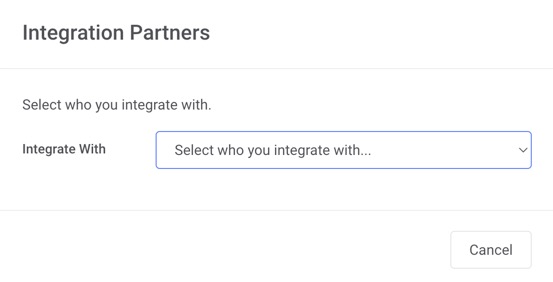
Select "AscendTMS".
Create your integration Username and Password, and click "Save".
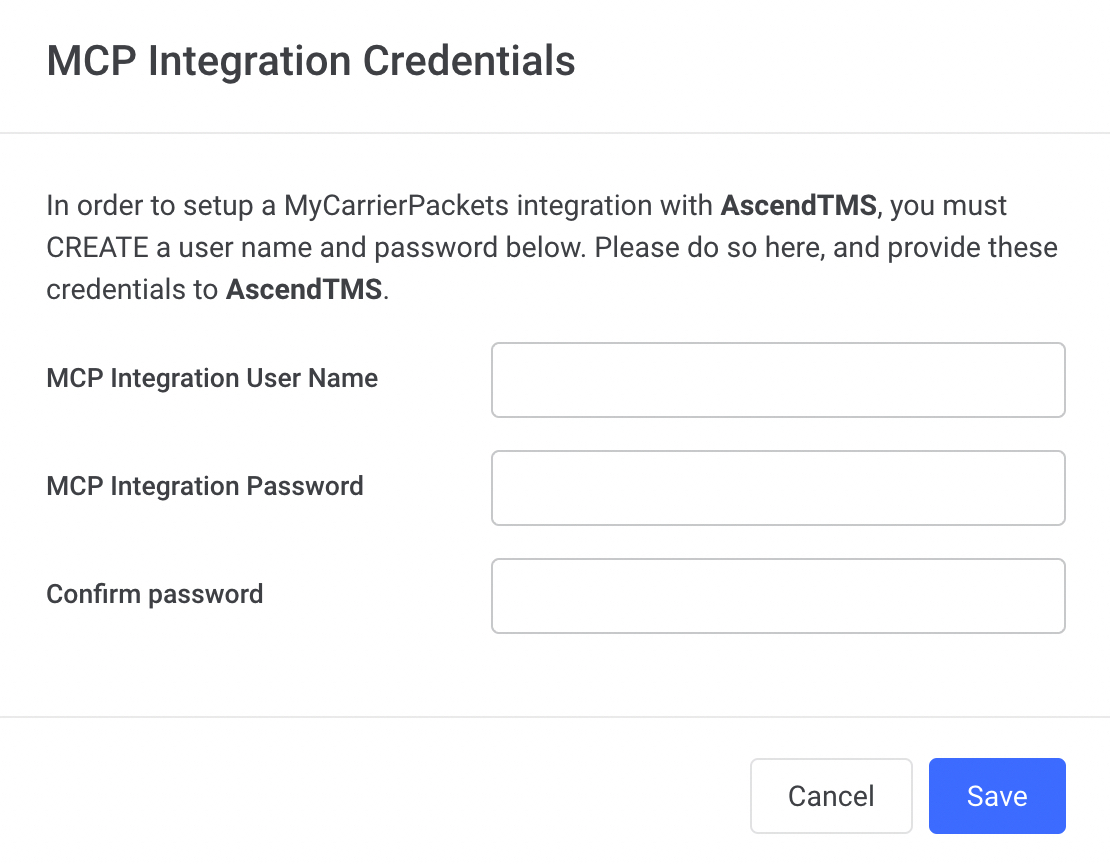
This is the Username and Password you must use for the instructions below. Please know that once connected, all users will have the ability to use this integration which means you only have to do this entire process one time. Please be aware that the username for the integration setup cannot be an email address.
Go to the "Settings" menu.
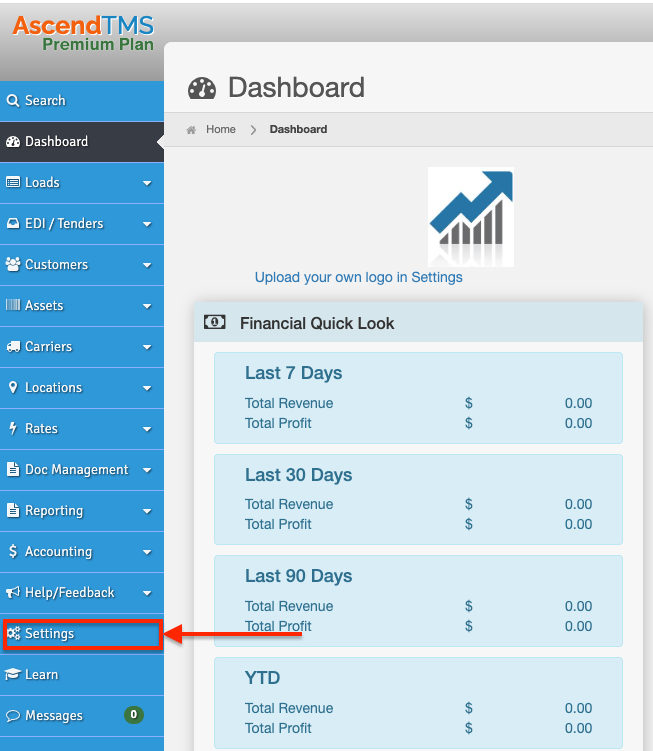
Go to "Add or Edit your Carrier Onboarding/Monitoring Settings" under "Premium Features and Billing Details".

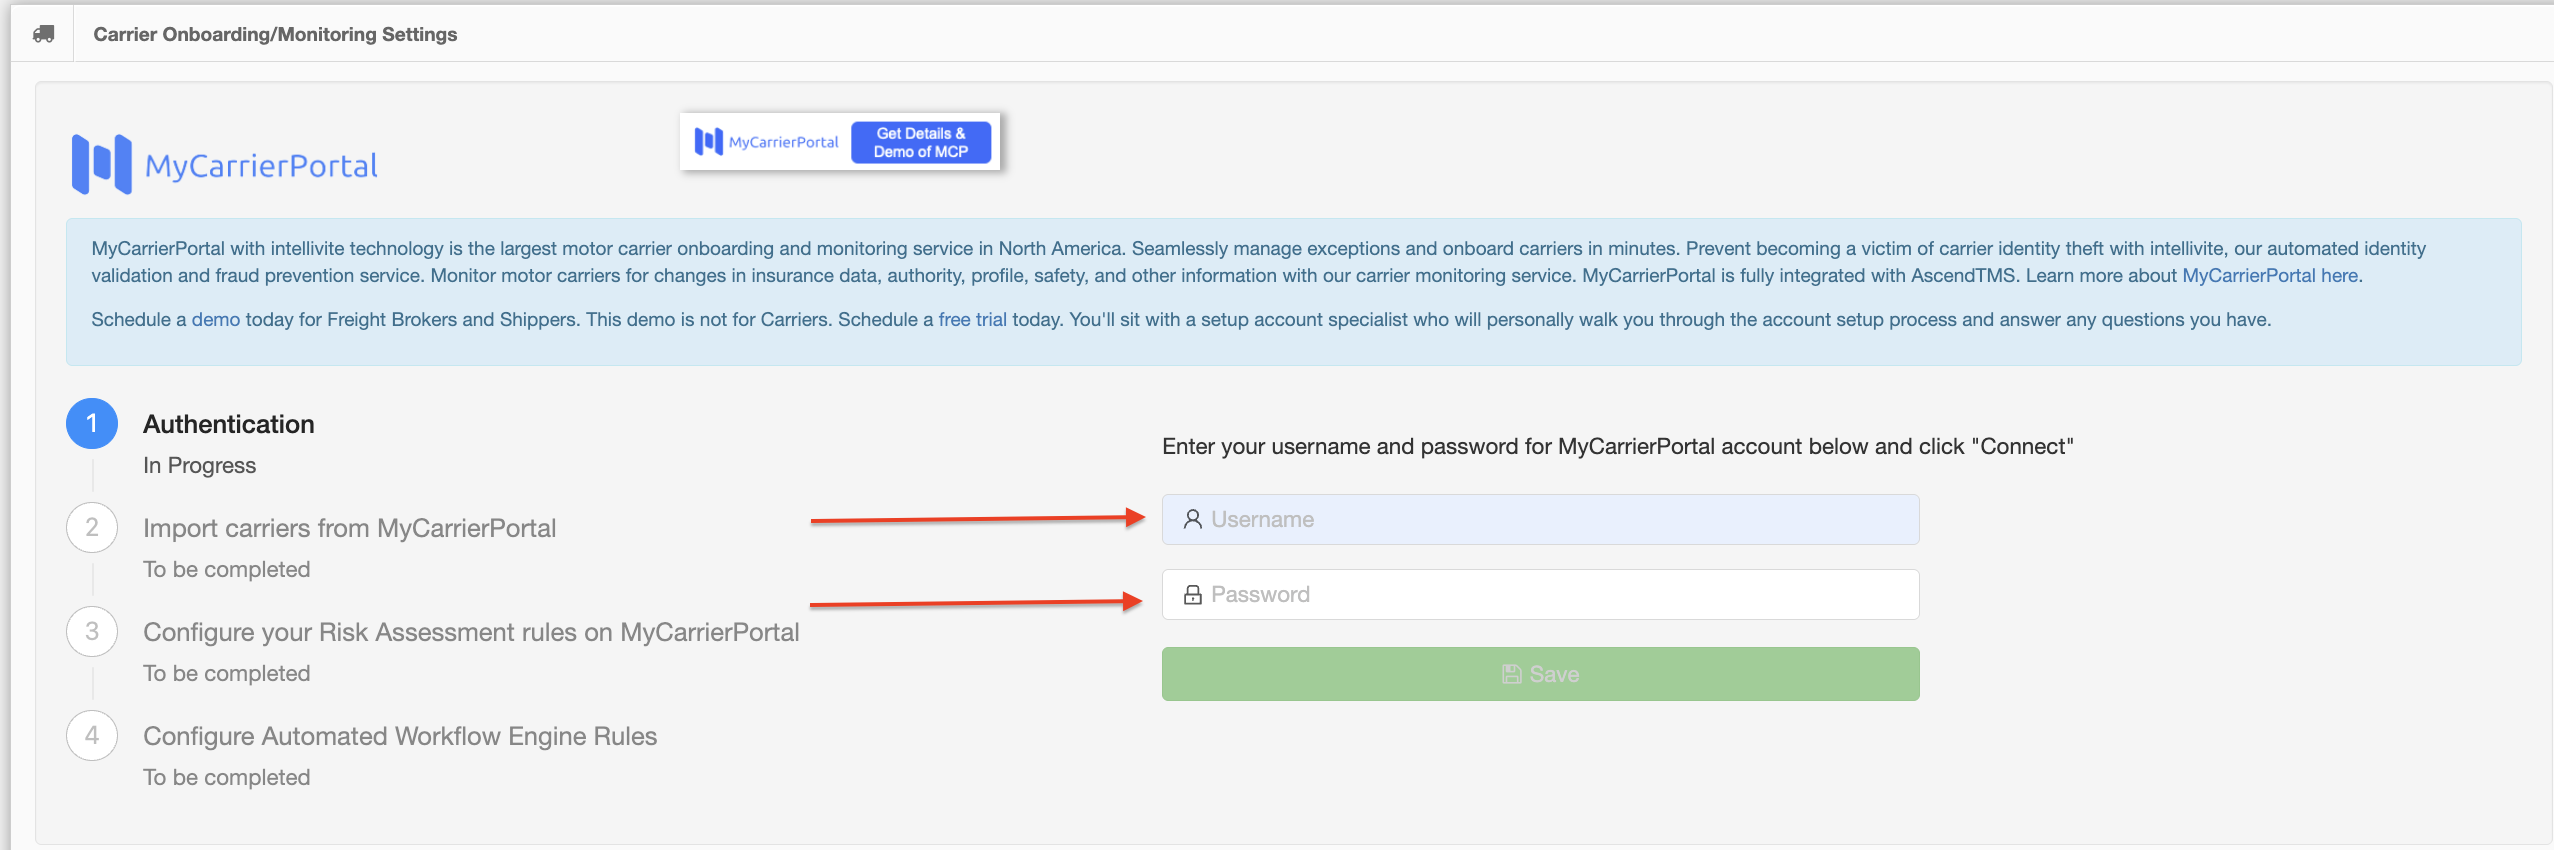
Step 1: Enter your MyCarrer Portal login and password and click on the Save button.
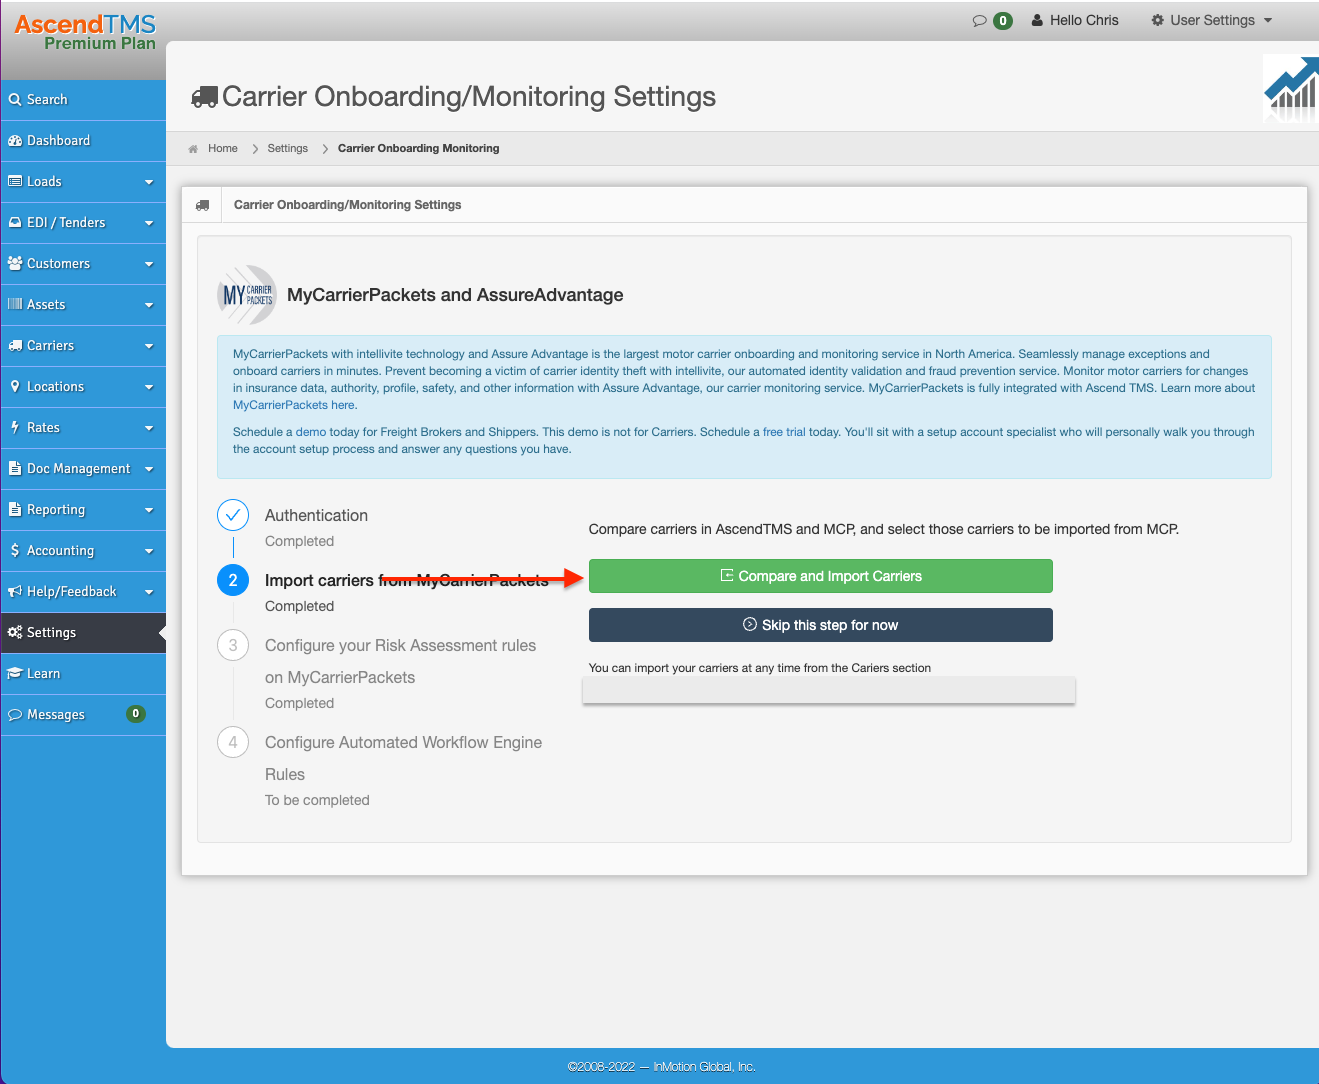
Step 2: Import your carriers over from MCP. (Please note: If you already have carriers in AscendTMS, the integration will not allow you to import the same existing carriers to prevent duplicate carrier profiles in your AscendTMS. This is based on the carrier's DOT Numbers. However, the system will import any documents for your existing carriers from MCP to make sure you have the most up-to-date ones in AscendTMS).
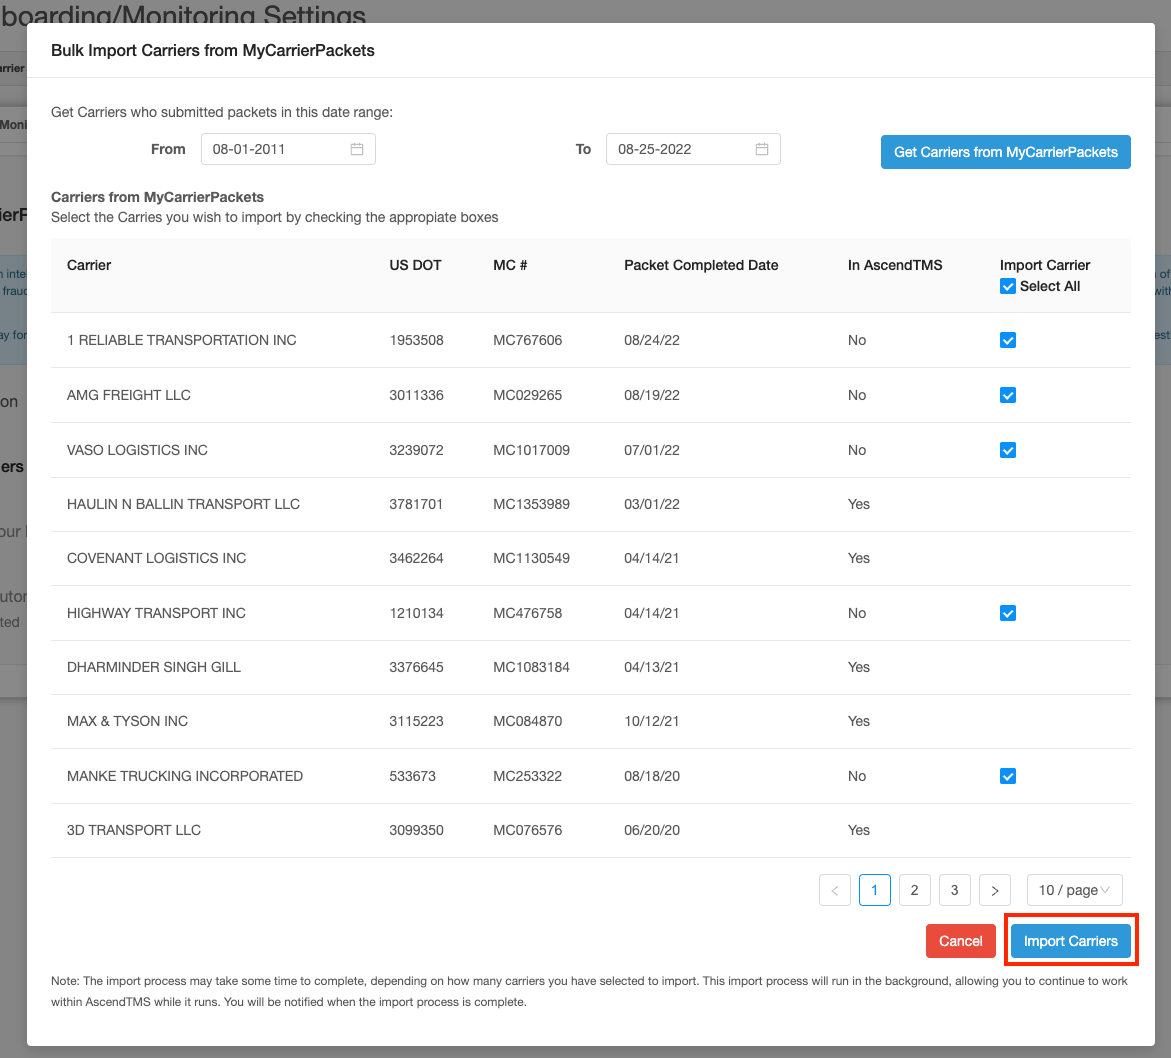
Click on the "Compare and Import Carriers" button. (You may choose to skip this step and import your carriers later if you would like).
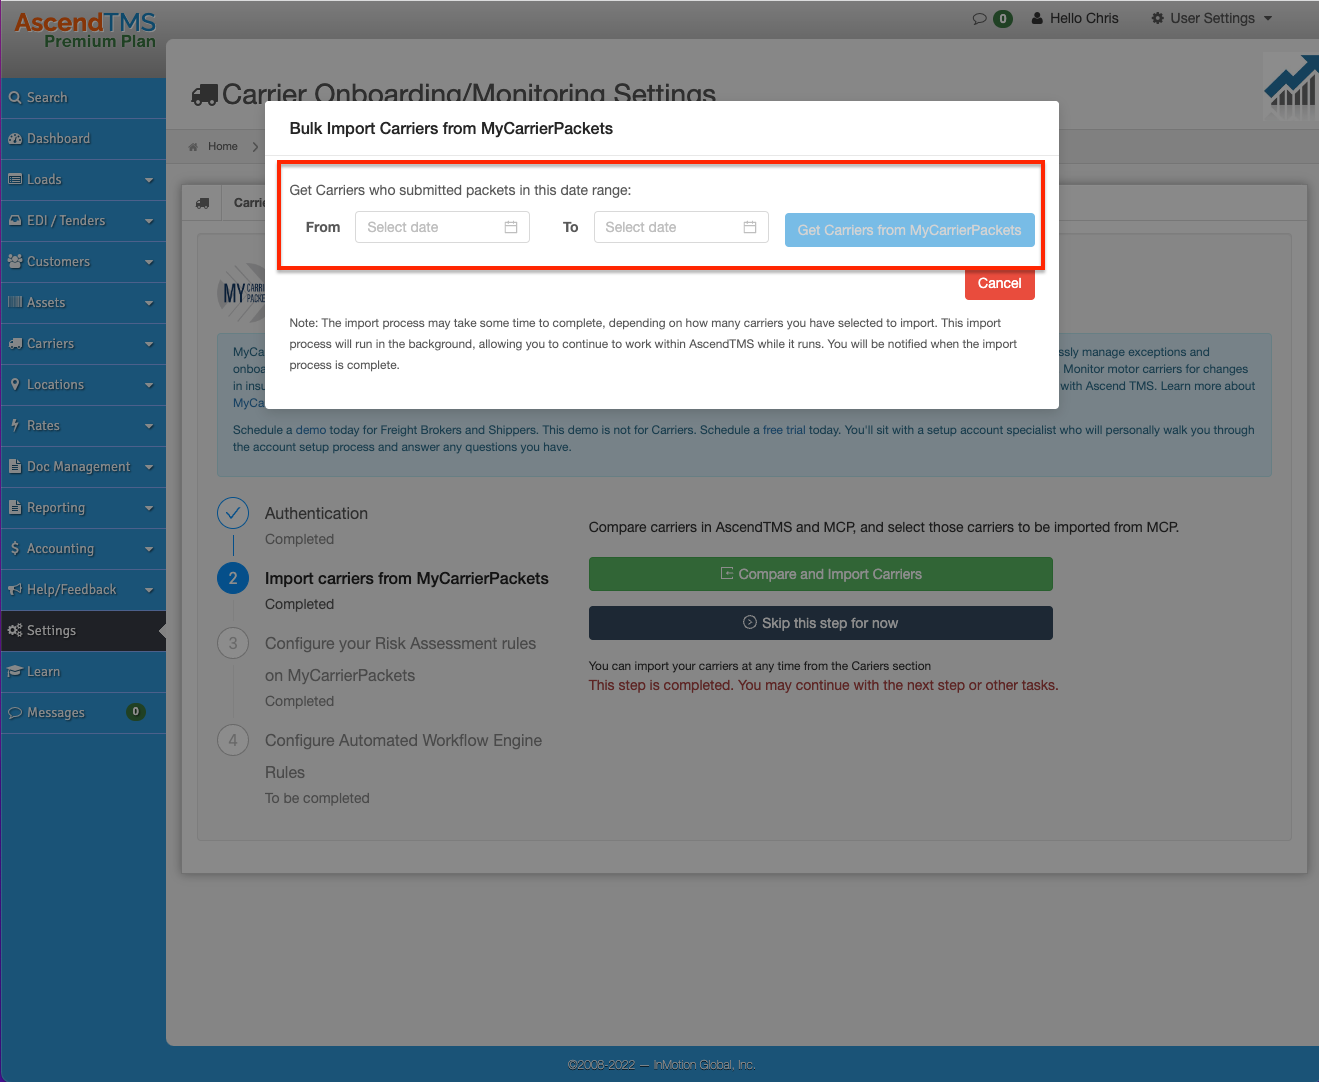
Select the Date Range to pull the list of carriers over from MyCarrier Portal. This date range is based on the date your carrier completed their carrier packet in MCP.
Once you have selected your date range, click on the "Get Carriers from MyCarrier Portal" button.
Now just "Select All" to import all your carriers, or just select the ones you would like. This will create the carrier profiles for you in AscendTMS as well as import the documents that are stored in your MyCarrer Portal for those carriers. You will notice that it does display which carriers already exist in your AscendTMS and that you cannot select those. However, the latest documents will be imported over from MyCarrer Portal for those carriers as well.
Now that you have selected your carriers, click the "Import Carriers" button.
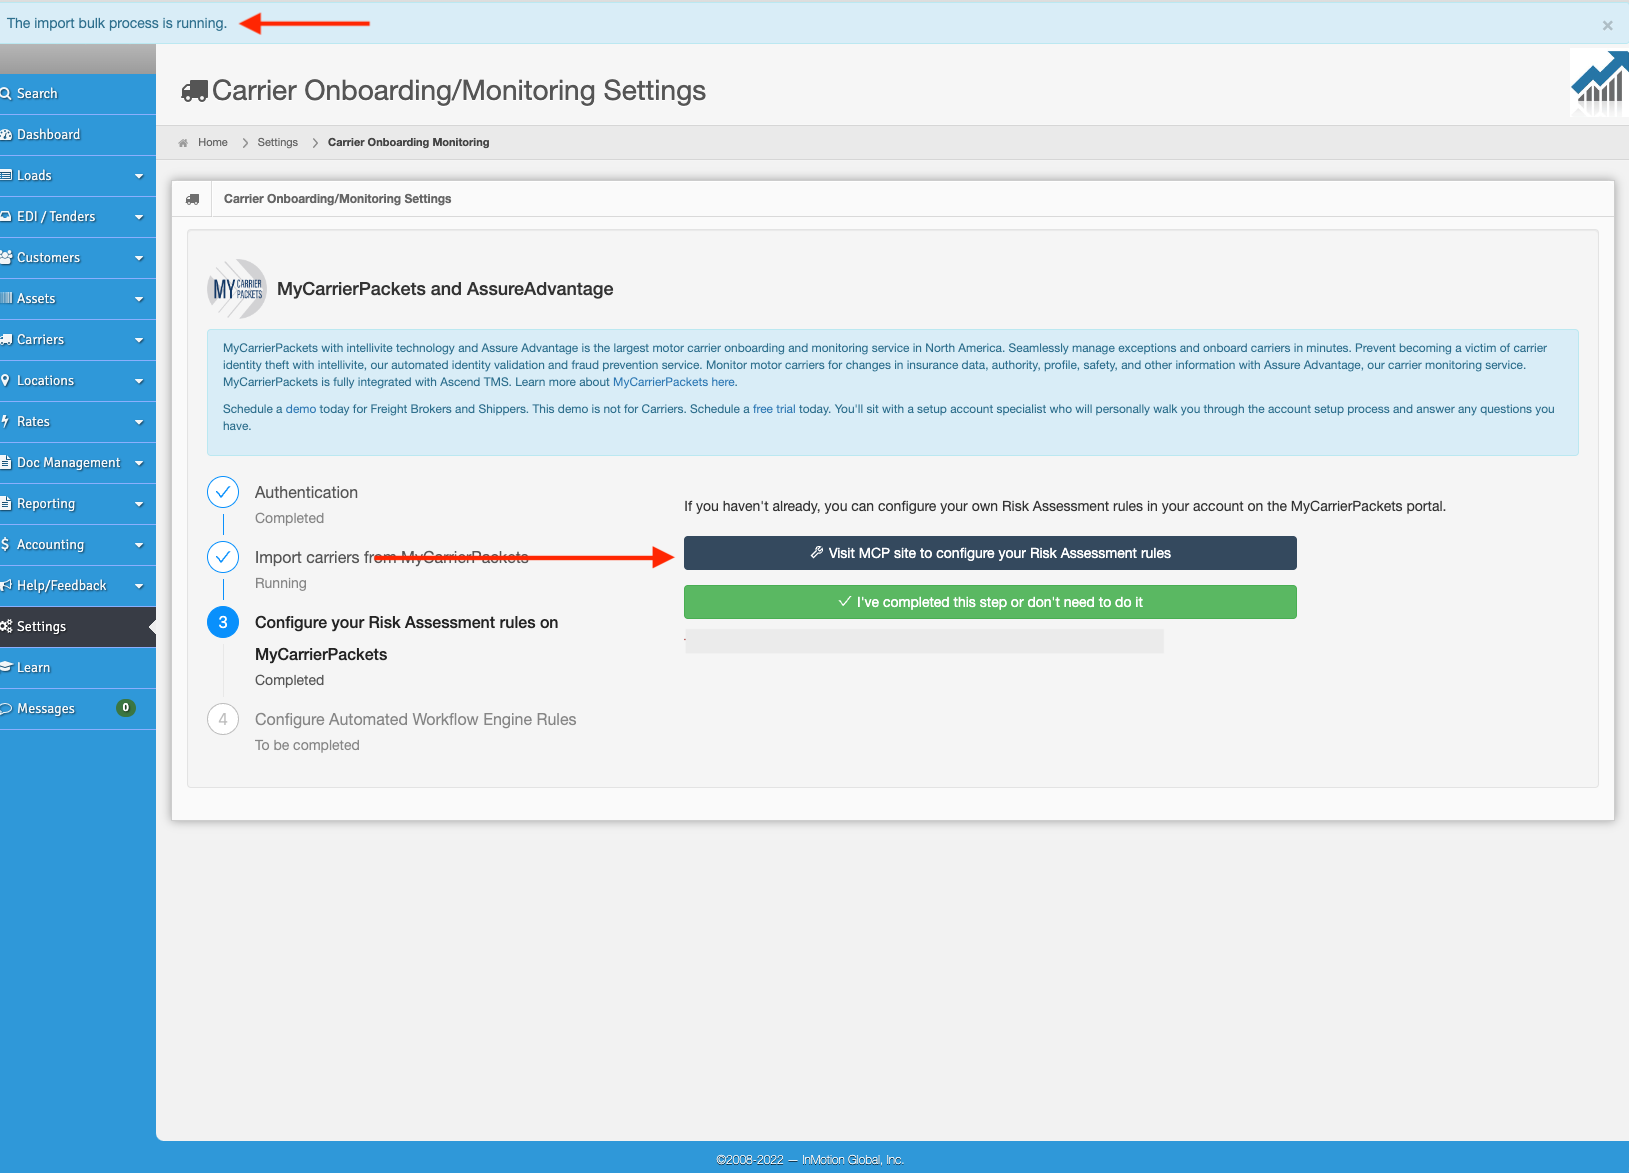
You will notice a blue banner that appears at the top of your screen. This is to let you know that your import process has begun and is running in the background. Once completed, AscendTMS will alert you. See the image below.

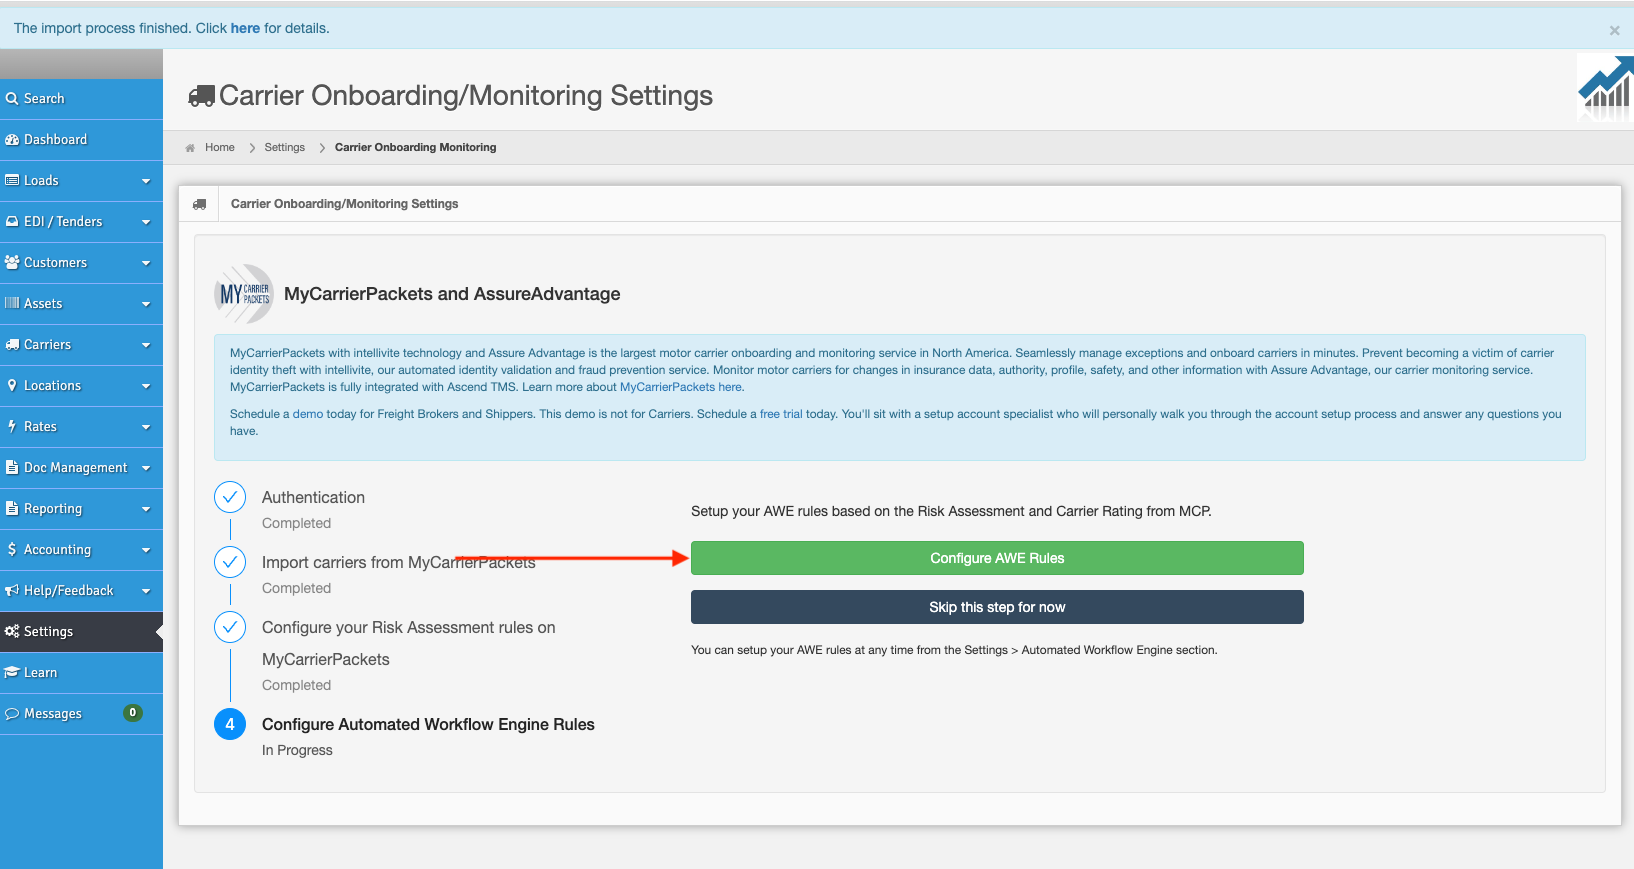
Step 3: Manage your Risk Assessments in MyCarrier Portal (Optional)
If you would like to go to MyCarrier Portal and manage your Risk Assessments, you may do so by clicking on the "Visit MCP site to configure your Risk Assessment rules" button.
If you already have these rules in place, you may skip this step.
Step 4: Set up your business rules in the "Automated Workflow Engine (AWE)" based on your MyCarrier Portal carriers. (Optional)
Click on the "Configure AWE Rules" button.
Scroll down to the two rules that mention "MyCarrier Portal" in their titles.
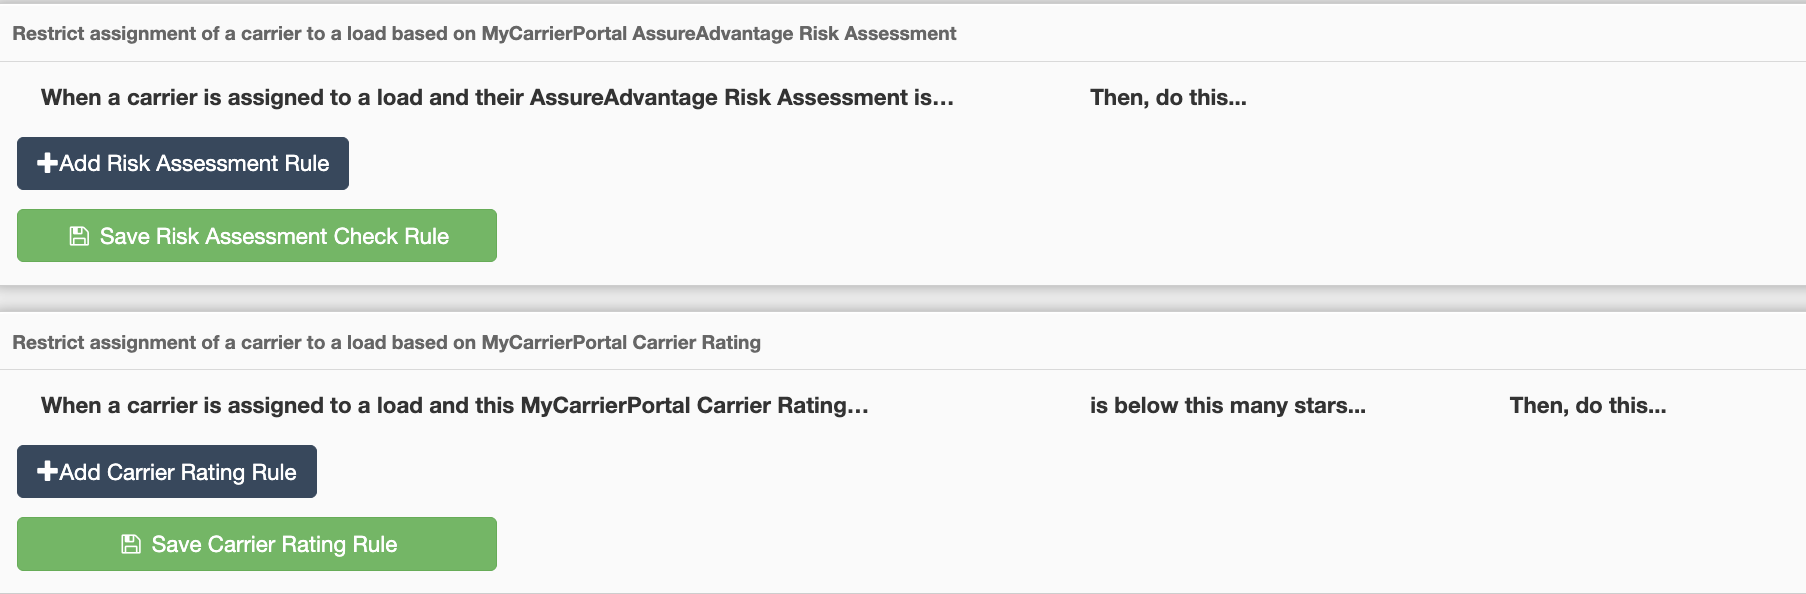
The first rule pertains to the MyCarrier Portal Risk Assessments.

The second rule pertains to the MyCarrier Portal Carrier ratings.

To learn more about setting up these rules, click HERE.
So, that's it! Seems like a lot, we know, but trust us...it's really simple and the whole process takes just minutes to set up.
Now that you have completed (or stepped through) the 4 steps you will see this banner appear at the top of your screen in a few moments. When you see it, all of your carriers and your documents have been imported.
You can click the "here" link to view a summary of the carriers that were imported or simply close the banner. When you visit your Carriers List from "View Carriers" you will see all of your imported carriers.
Below is a list of more helpful articles that will guide you through other features of the MyCarrier Portal integration:
Configuring your AWE rules for your MyCarrier Portal carriers
Importing your MyCarrier Portal carriers from AscendTMS
Chris
Comments