AscendTMS is fully integrated with RMIS for carrier onboarding, monitoring and more. With this integration, you can link your AscendTMS account to your RMIS account, invite carriers to your RMIS carrier network, import your RMIS carriers (which will build a Carrier profile in AscendTMS if the carrier does not already exist), import your carrier documents, monitor your carriers, and request updated carrier packets and other documents, all from your AscendTMS!
This article will take you through the setup process, as well as highlight some key features that come along with this exciting integration.
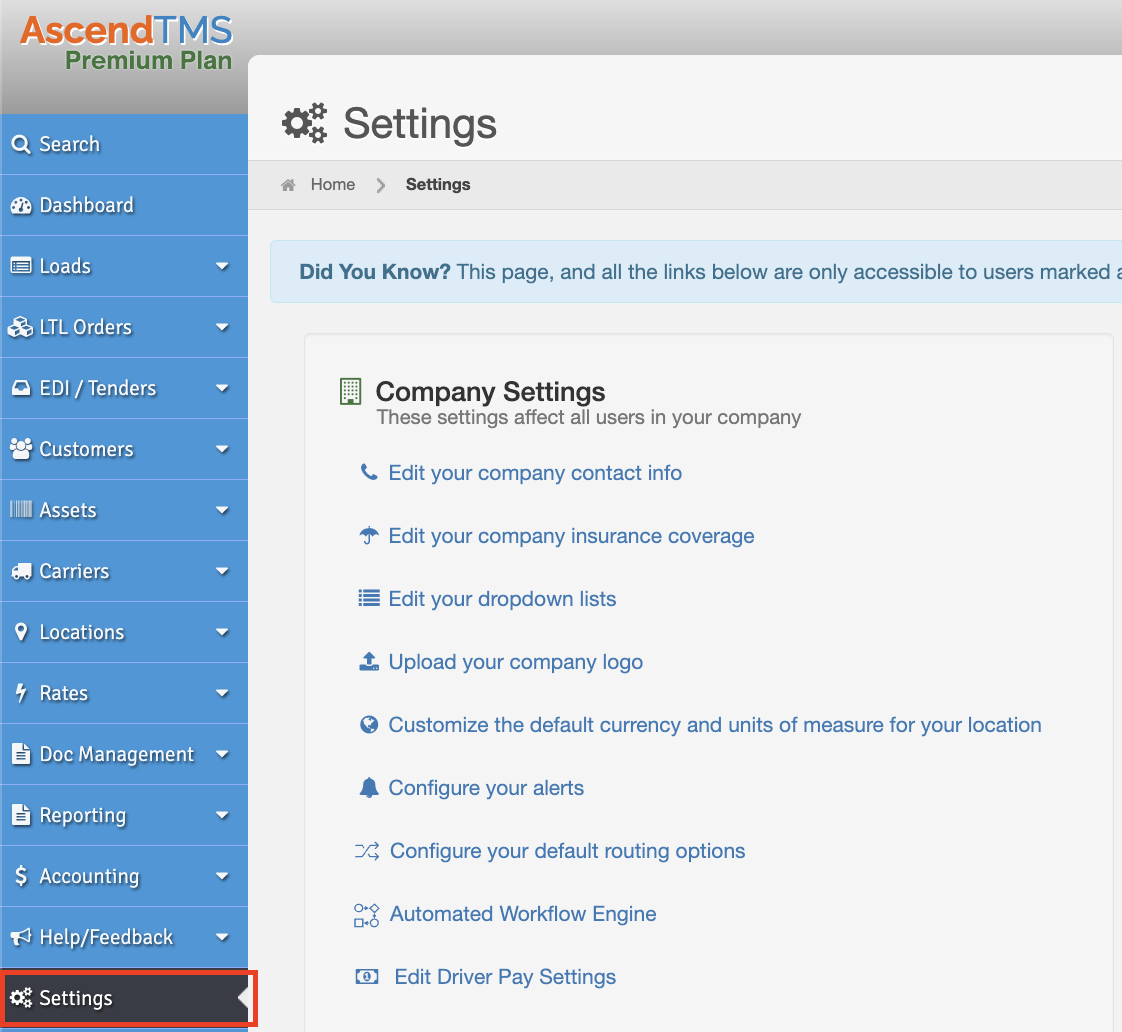
To get started, go to your Settings tab.
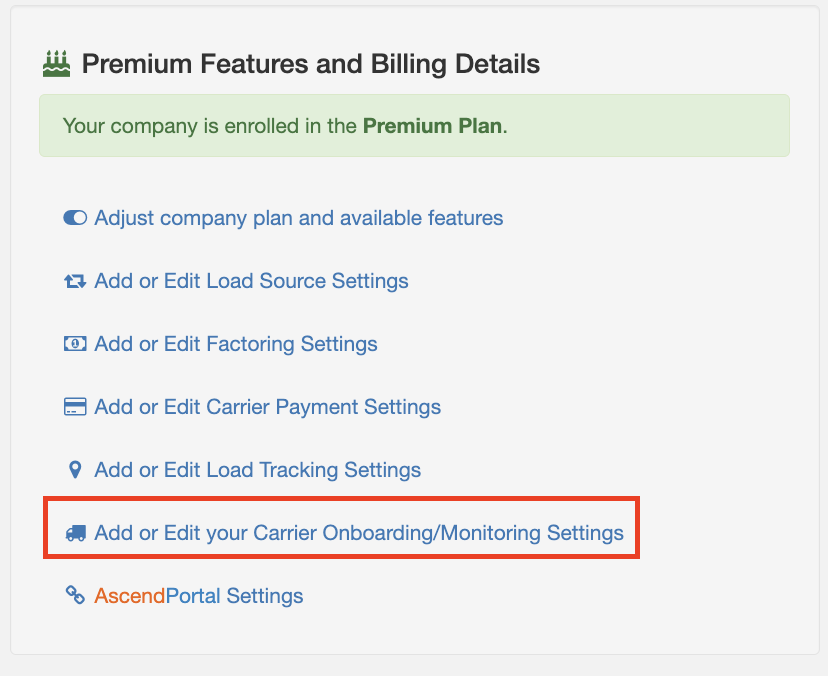
Once there, go to the Premium Features area and click on Add or Edit your Carrier Onboarding/Monitoring Settings.
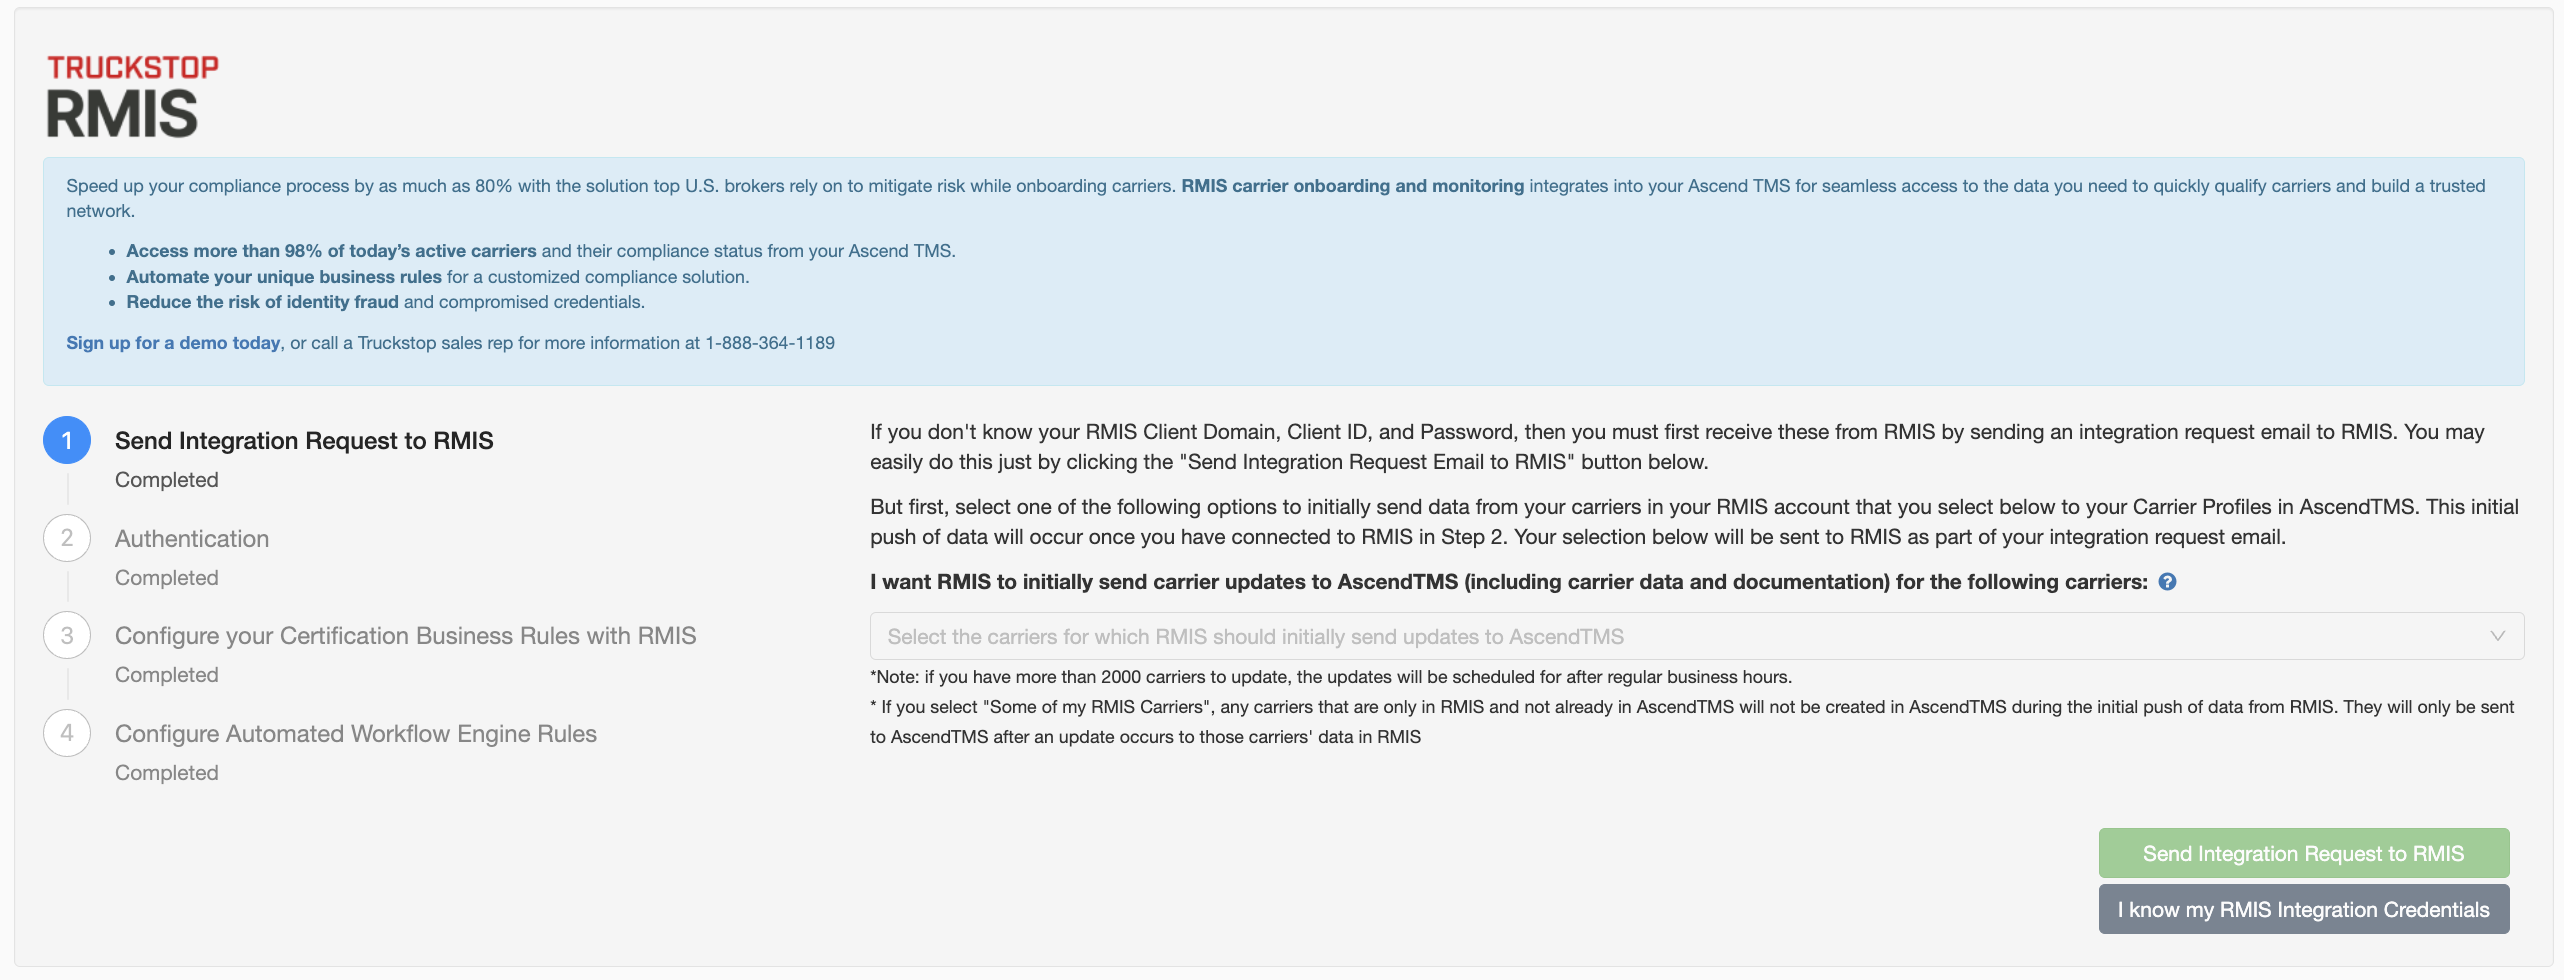
Here you will see the Truckstop RMIS setup area.
The first step is to send a request to RMIS for them to setup your integration on their end, as they have to complete certain setup steps for your account in order to enable the integration. You will need to already have an RMIS account in order to request the integration setup from RMIS.
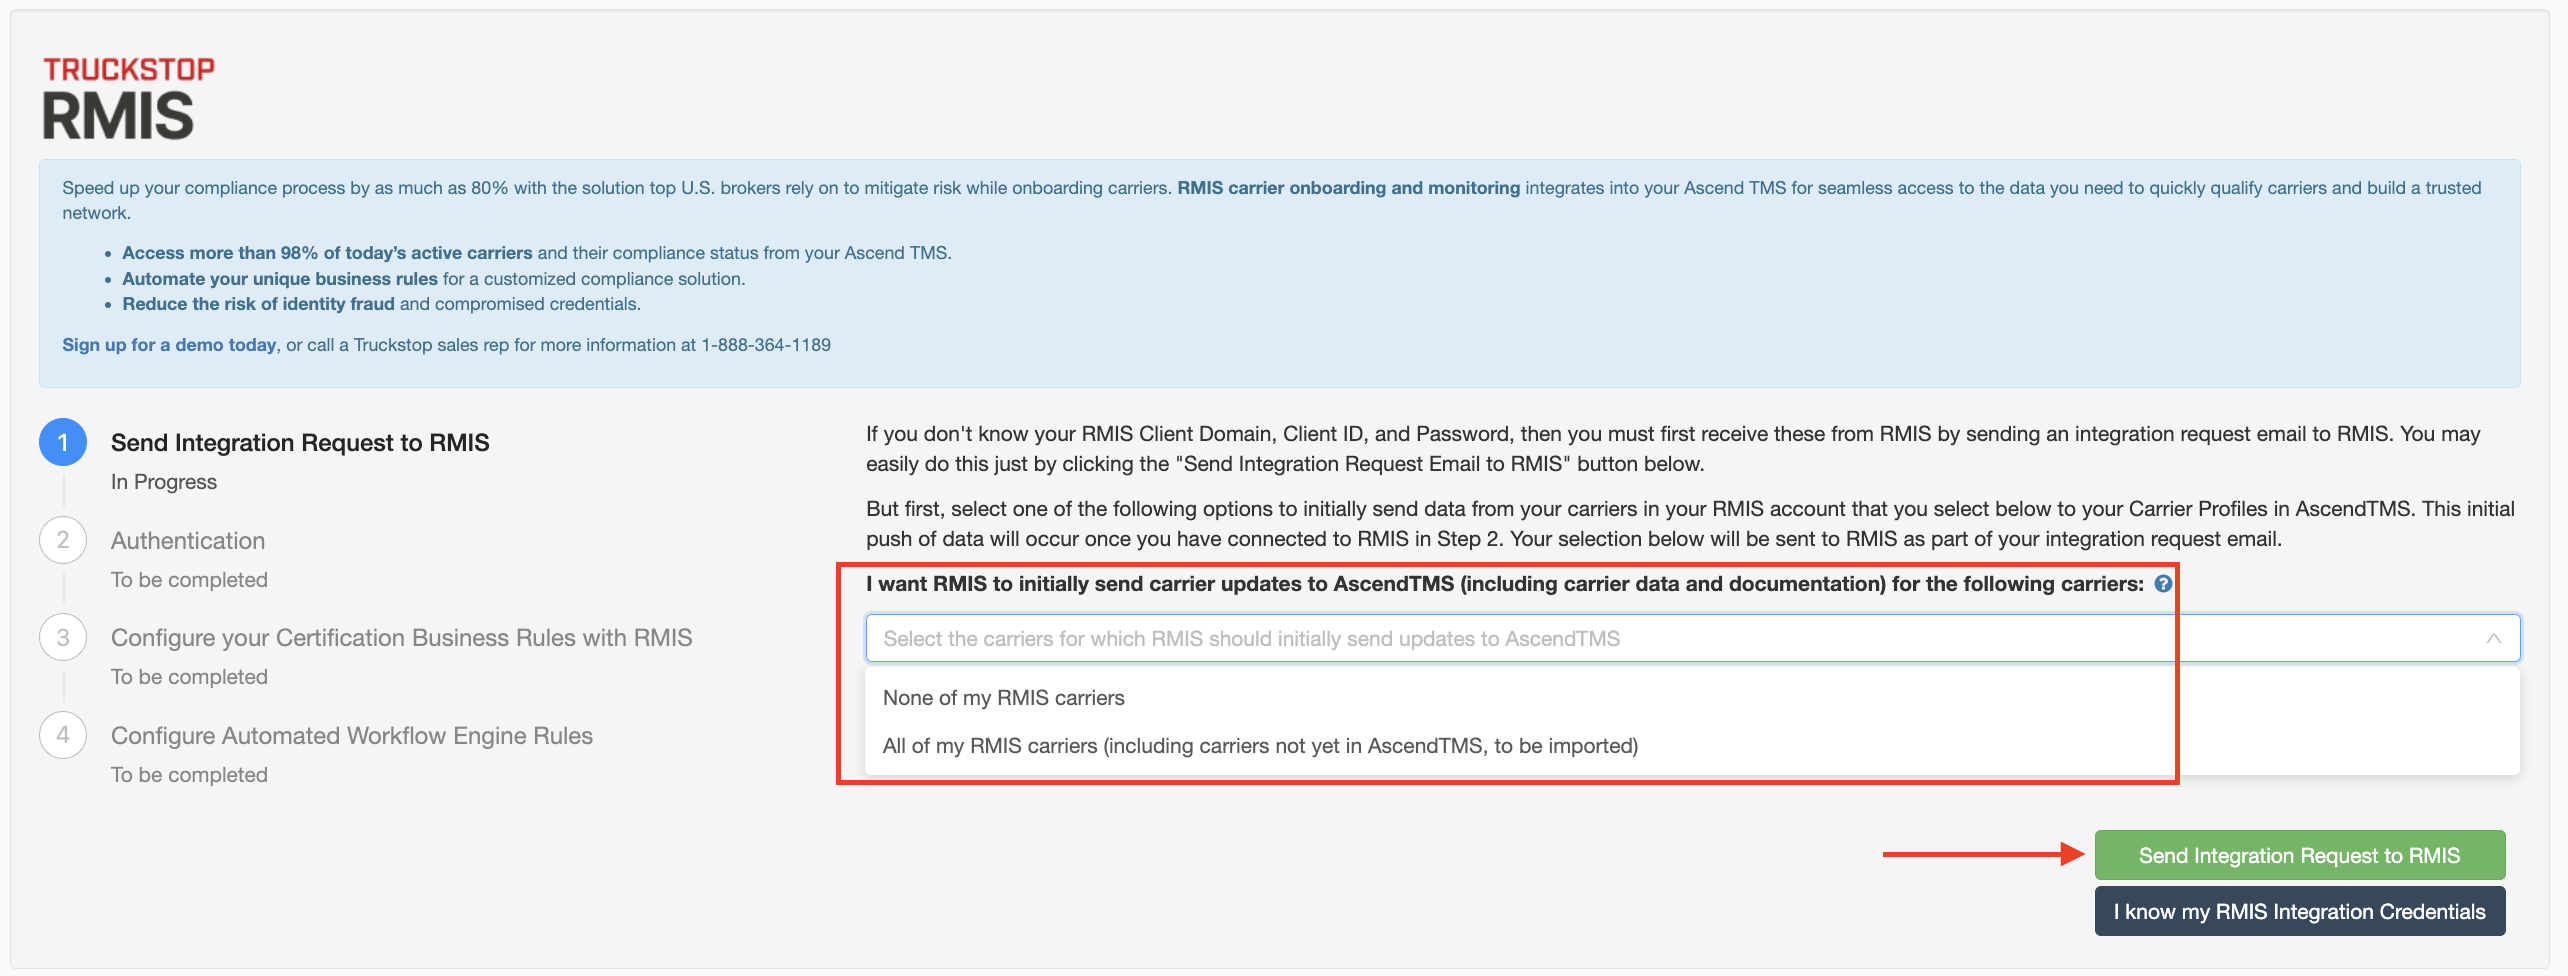
One of the options when requesting the setup from RMIS is selecting which carriers in your RMIS account you would like "pushed" from RMIS to AscendTMS once the integration is setup. You can select "All my carriers" from the drop-down list as seen in the screenshot below, which will push all the carrier data from all of your RMIS-monitored carriers to AscendTMS as soon as the integration setup is complete - any carriers not already in AscendTMS will be created for you automatically. The other option is to select "None of my carriers" - useful if you already keep your AscendTMS carrier list up-to-date with most of the information that you already use. In either case, when data changes on any of your carriers in RMIS, then that data will be transmitted to and update your data in AscendTMS.
Once you have made your selection of which carriers should be pushed to your AscendTMS account when the integration setup is complete, click on the button "Send Integration Request to RMIS". RMIS will then complete the setup steps on their end and send a confirmation email with your integration setup credentials, which you will enter on the next step: Authentication. (Note: RMIS will send your integration credentials to the email address they have on record for your account, not necessarily to your AscendTMS login email.). It may take up to 24-48 hours for RMIS to respond with your integration confirmation email.
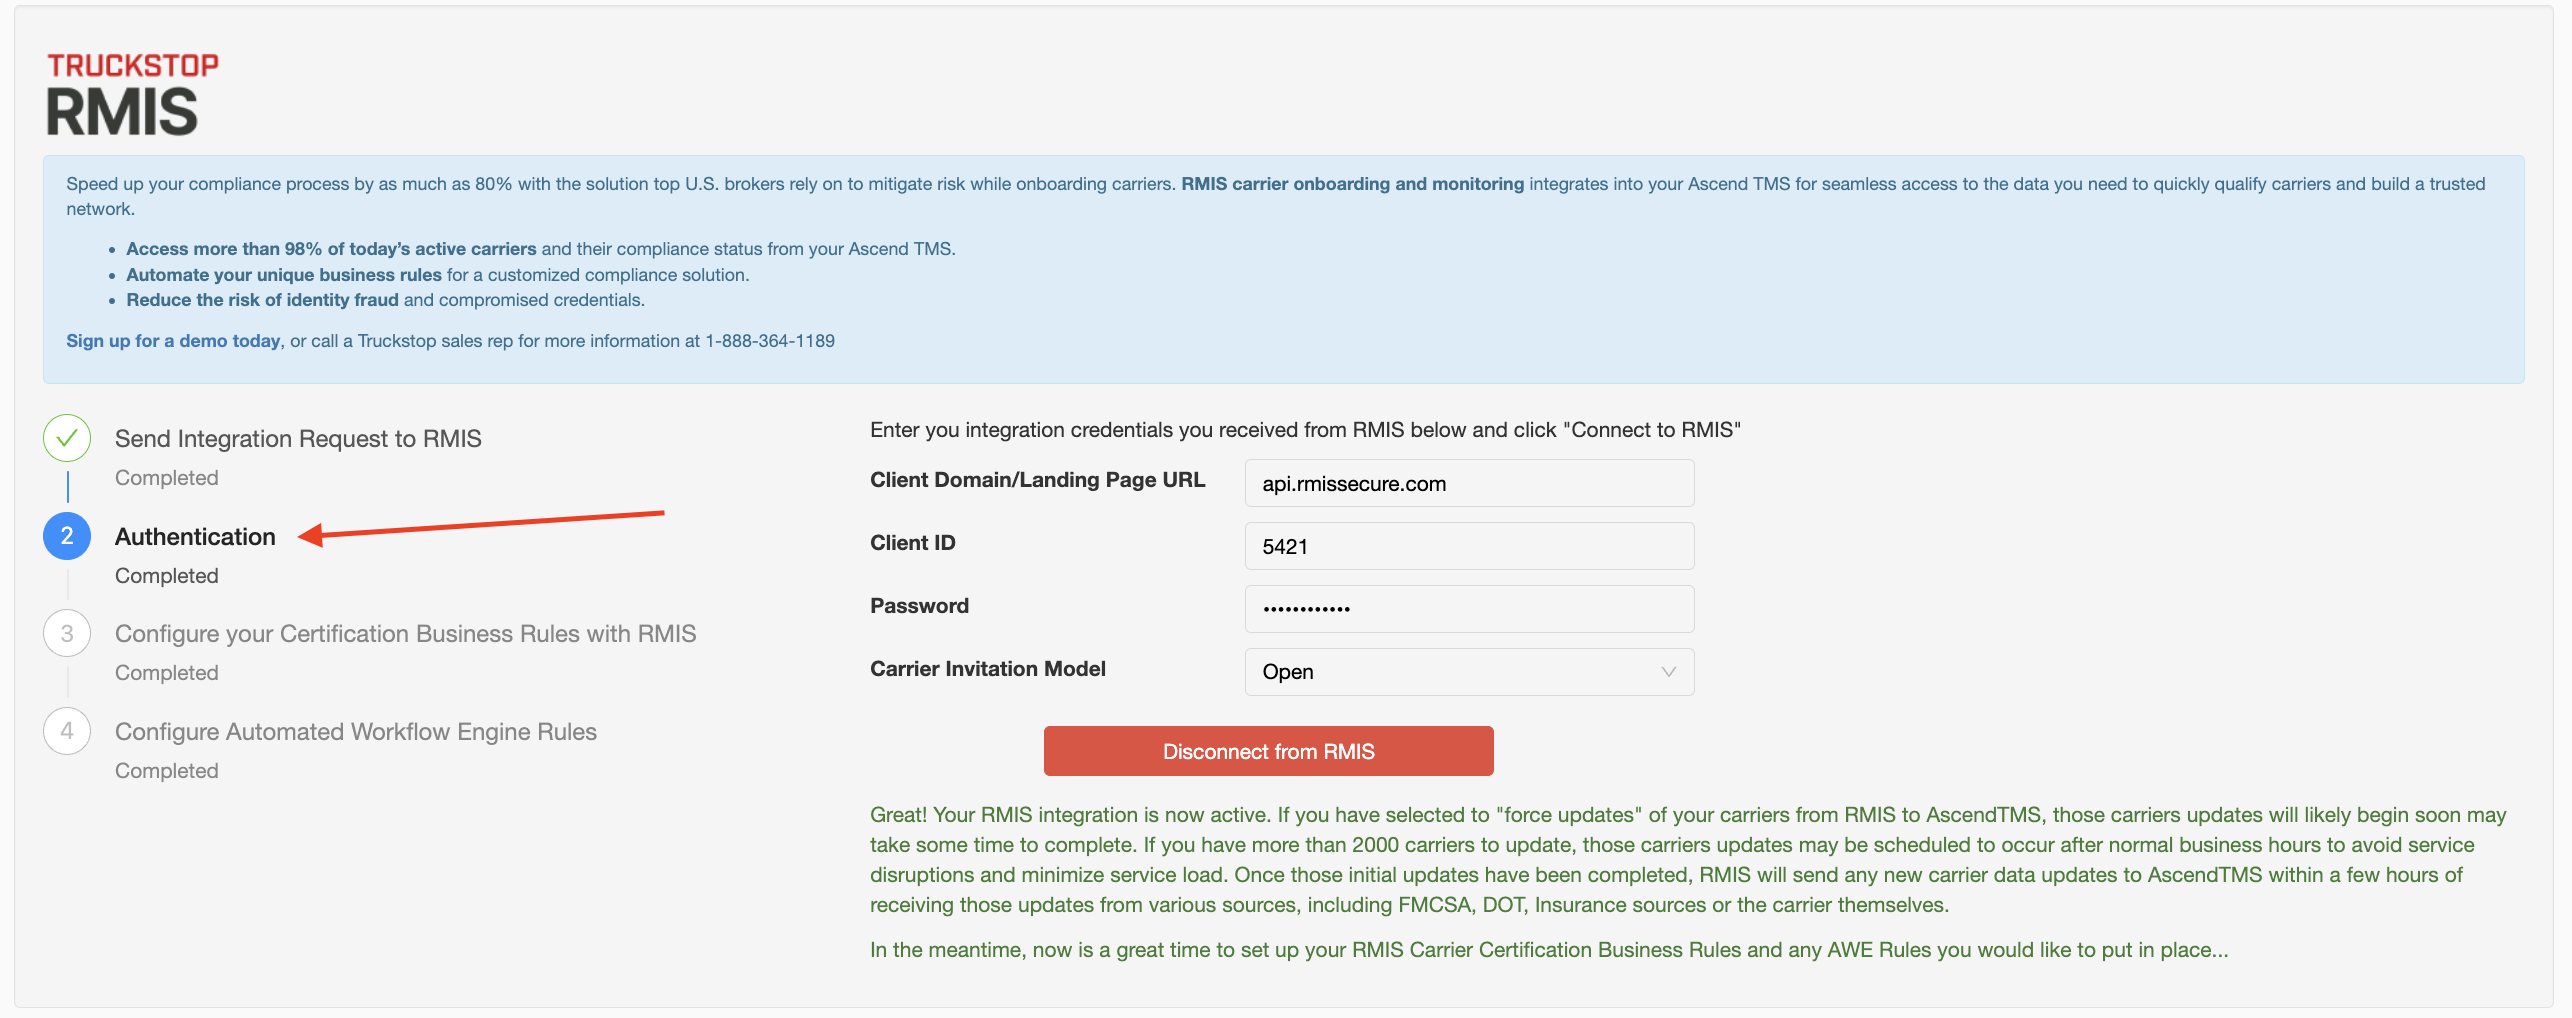
Once you receive the integration confirmation email from RMIS with your login credentials, you can return to this setup screen and fill in the information on Step 2: Authentication.
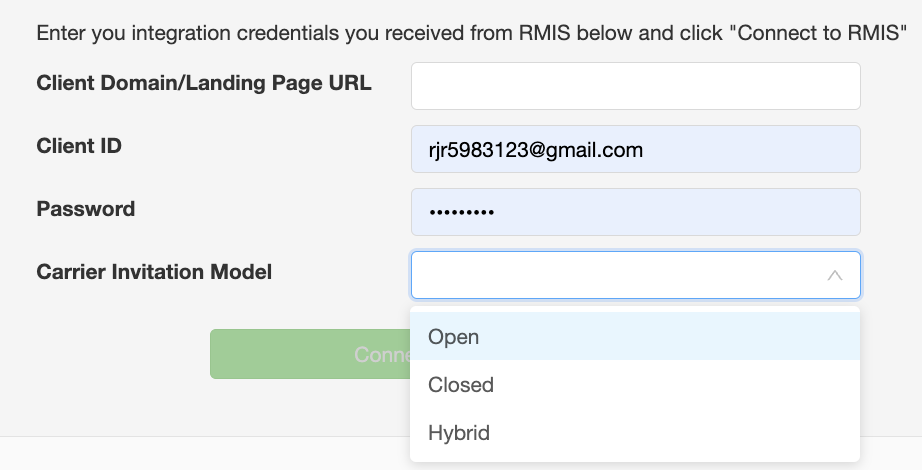
Included in the setup process is selecting which Carrier Invitation Model your RMIS account is configured to use: Open, Closed or Hybrid. (Open allows any carrier to submit their onboarding packet via your RMIS web portal, whereas Closed requires the carrier to have a validation token generated by and sent to the carrier by RMIS.) The model you use will be included in your integration confirmation email sent by RMIS along with your login details. If you are not sure, please reach out to RMIS support for further assistance.
Once you click on Connect to RMIS, the system will ensure you are connected properly, and will then start receiving carrier data from RMIS within 15 minutes. Updates to your carrier data will occur in the background.
***Please note, if you have more than 2000 carriers to update, the updates will be scheduled after business hours***
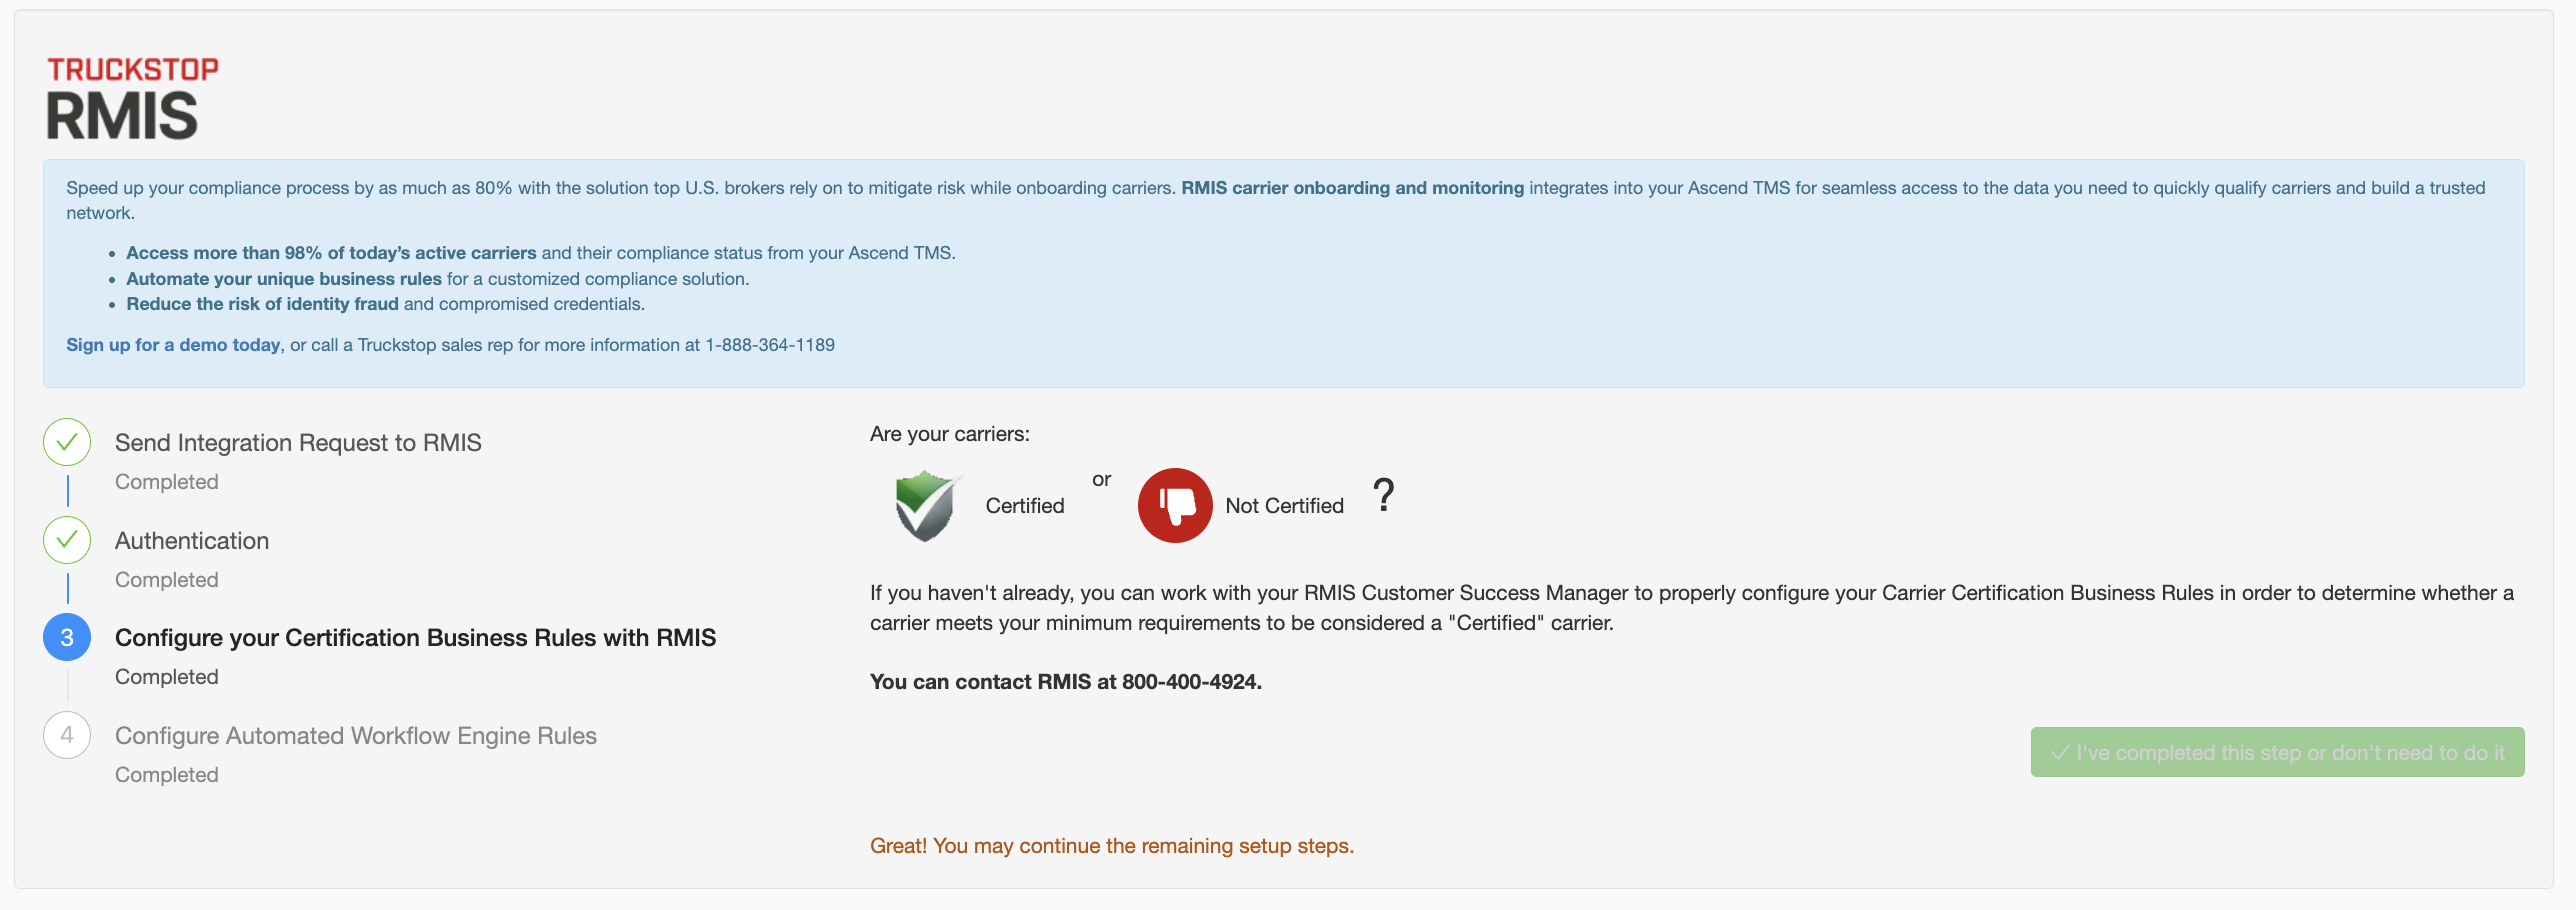
An important part of the process is setting up your RMIS Certification Business Rules. For existing RMIS accounts, you have probably already setup your business rules. If not, this must be completed with your RMIS Customer Account Manager by contacting them at 800-400-4924 and they will work with you to get this part set-up.
The last step in setting up your RMIS account is to set your AWE Rules (Automated Workflow Engine) within AscendTMS. To set-up your AWE rules, click on "Configure my AWE Rules" and you will be redirected to the RMIS specific AWE rule as seen below.
Once you have completed the above steps, you are now all set-up to start monitoring your carrier base.
Adding/Certifying Carriers from RMIS
Now that you have successfully set-up your RMIS integration with AscendTMS, the below will walk you through adding and certifying your carriers.
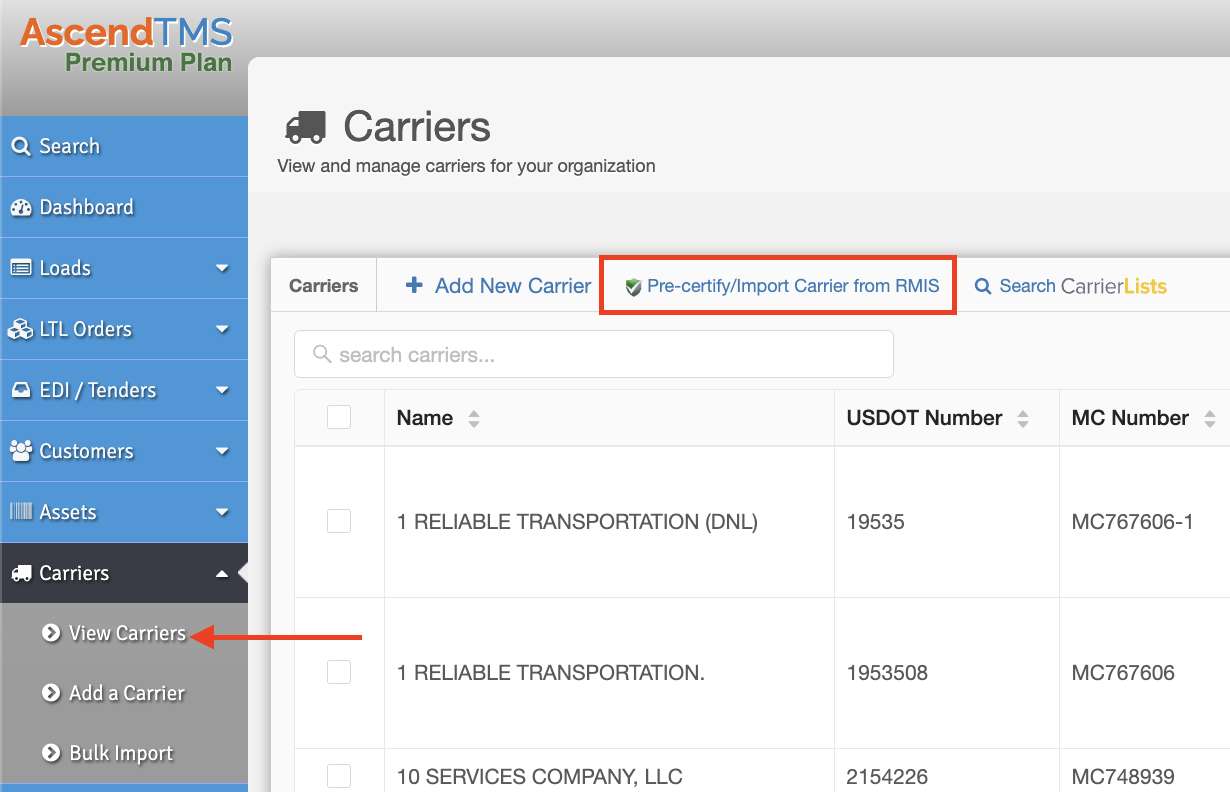
Navigate to your View Carriers List and click on the "Pre-Certify/Import Carrier from RMIS" button.
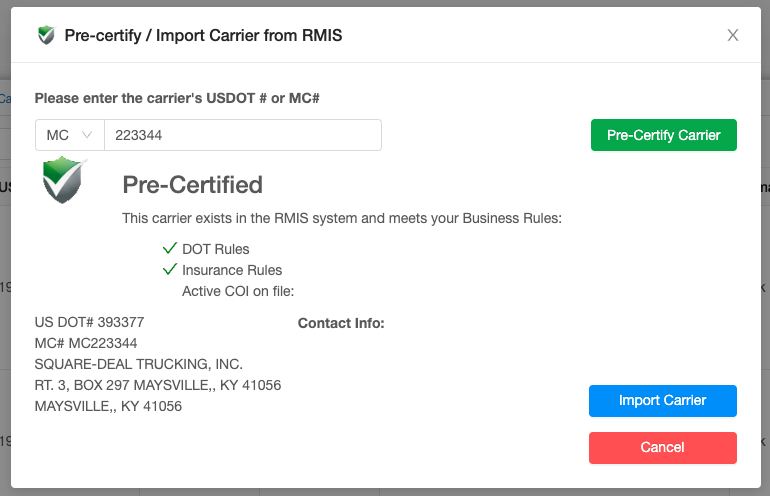
Once you click on the Pre-Certify/Import Carrier from RMIS button, you will get a modal where you can add either the carrier's MC# or DOT# to certify your carrier. Once you enter, click on the Pre-Certify Carrier button.
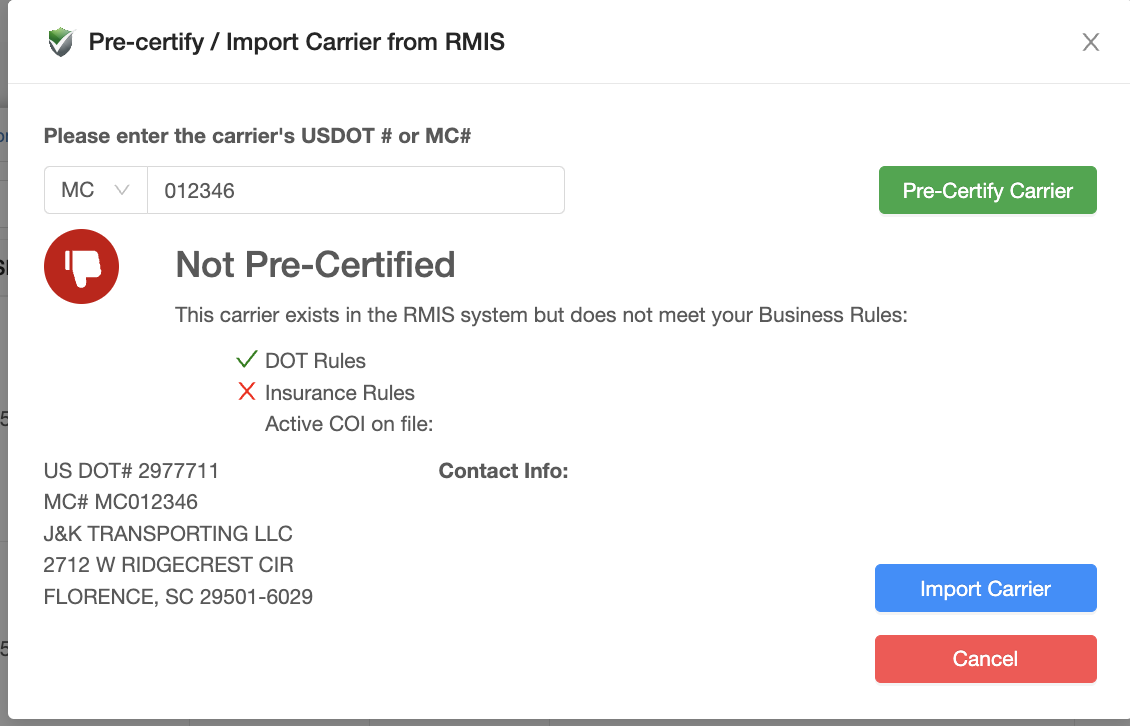
This will bring up another modal that will show all carrier details and whether the carrier is pre-certified or not pre-certified from RMIS and allow you to import them into your Carrier List by clicking the Import Carrier button.
You can also Pre-Certify carriers from the Carrier Verification area within the carrier profile if they have already been created in AscendTMS.
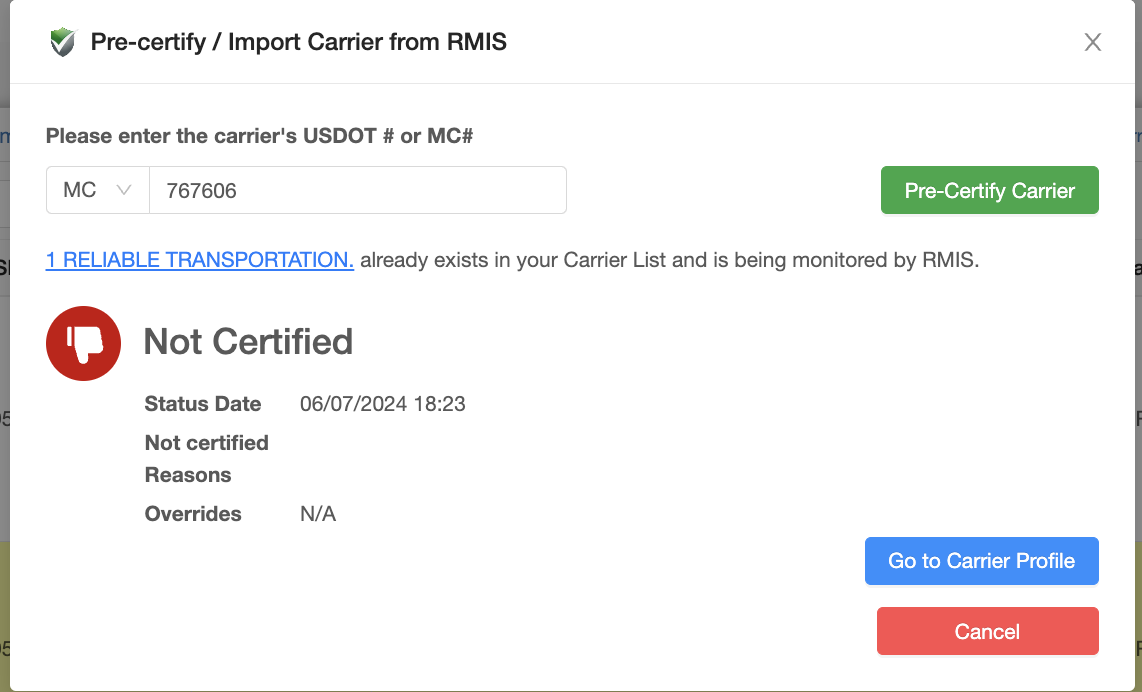
If you try to pre-certify a carrier that is already in your carrier list, you will get the below message advising that the carrier is already being monitored by RMIS. You can choose to view the carrier's profile in AscendTMS by clicking the Go To Carrier Profile button.
Inviting Carriers to RMIS
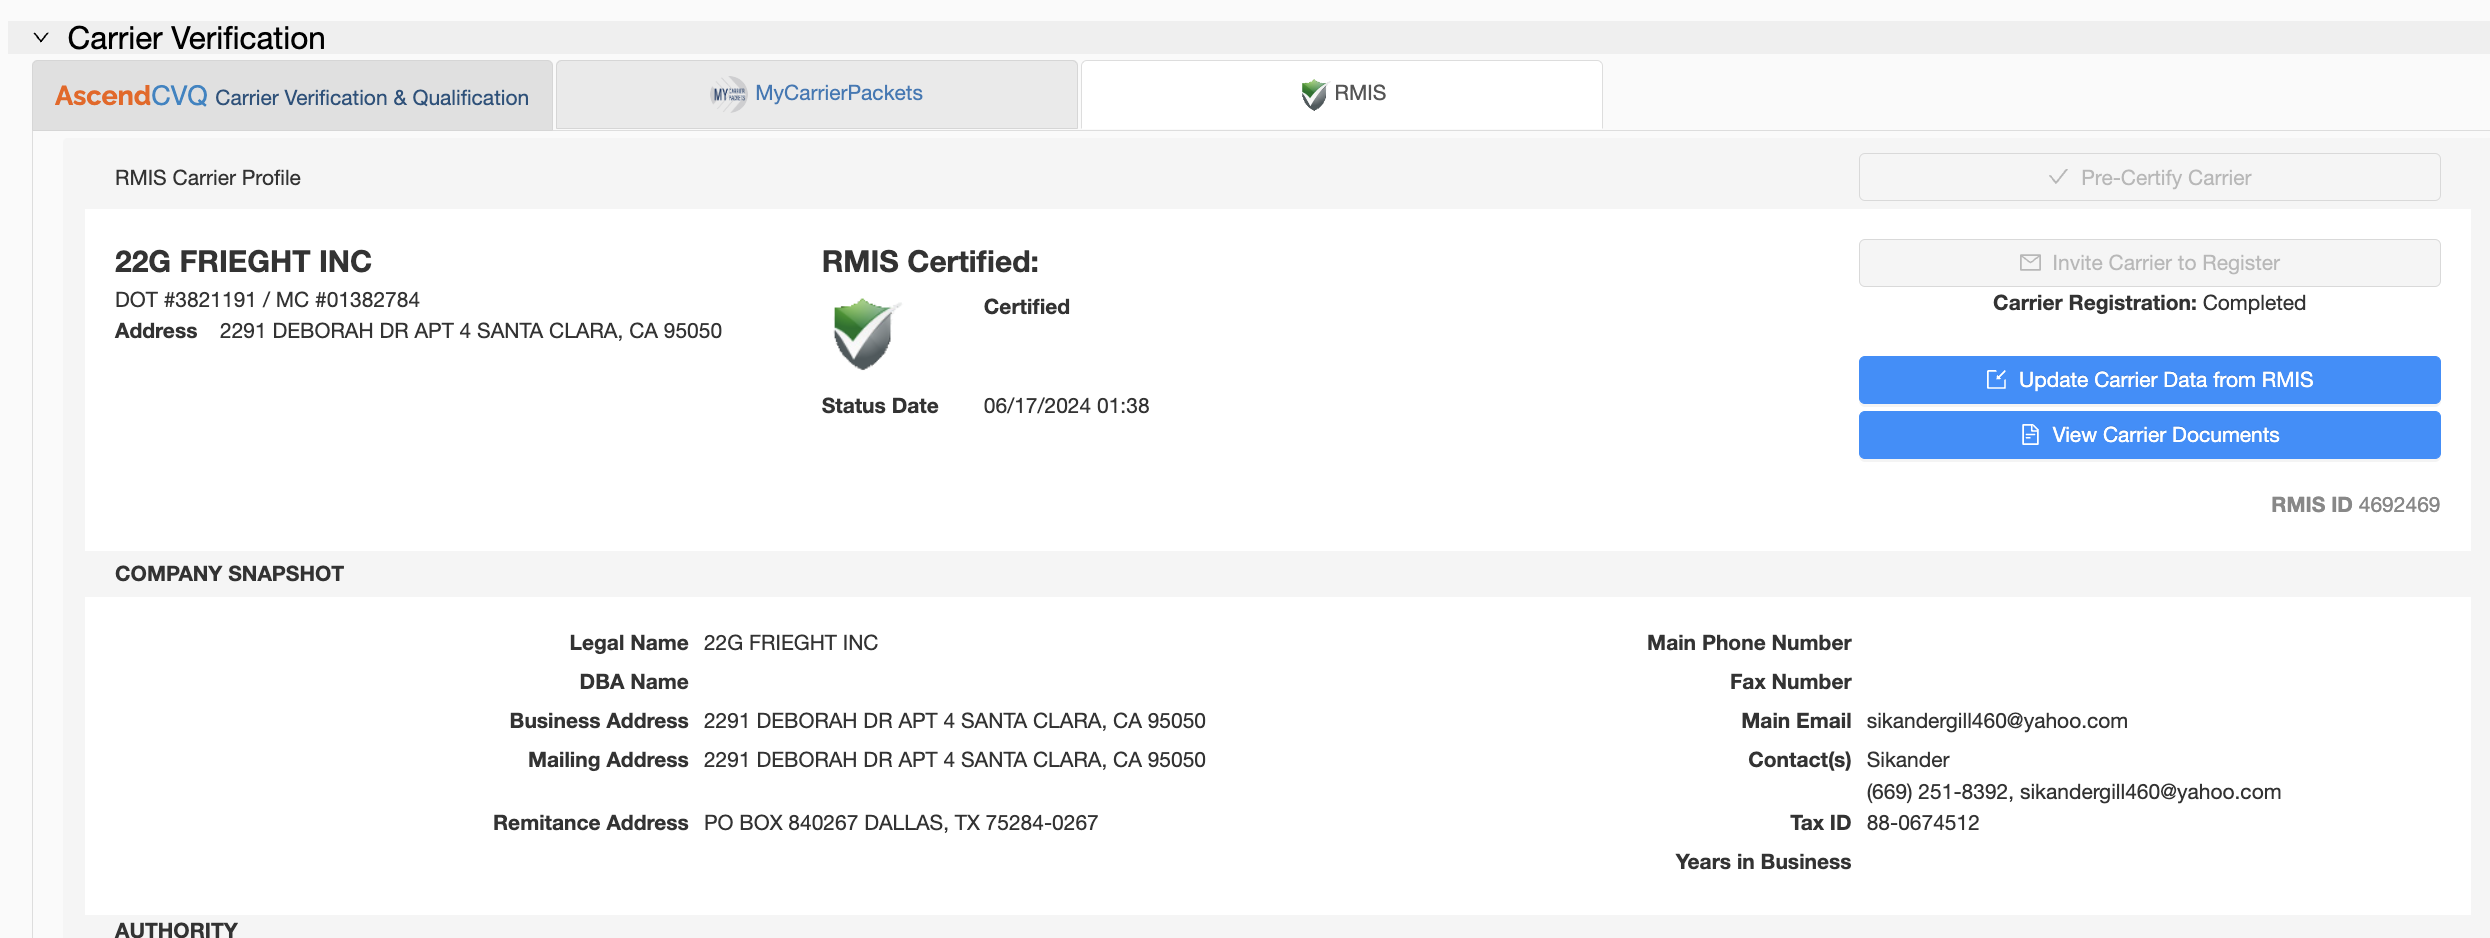
If you have a carrier that is not currently being monitored by RMIS, you can invite that carrier to register with RMIS. From within the carrier profile, scroll down to the Carrier Verification area to the RMIS tab. Here you will see a button to invite carriers to register.
Once invited, you will see the current progress of the carriers registration process as they are vetted. You may see 3 options as far as their registration. They are Not Invited, Invited - Registration in Progress and Complete when they are fully onboarded.
Monitoring Carriers from RMIS
Monitoring your carriers from RMIS within Ascend is beyond easy! Once you have a carrier fully onboarded, any new information that is entered into the Carrier's RMIS profile, will automatically be added to their profile in Ascend. Ascend checks for new information from RMIS every ten minutes, so rest assured that you will always have the most up to date info. It's as easy as that!
Something else that we added to make monitoring your carriers even easier is a new column on the Carrier list page. You can now add a column that will show you which of your carriers are being monitored with RMIS, and their status. Example below:
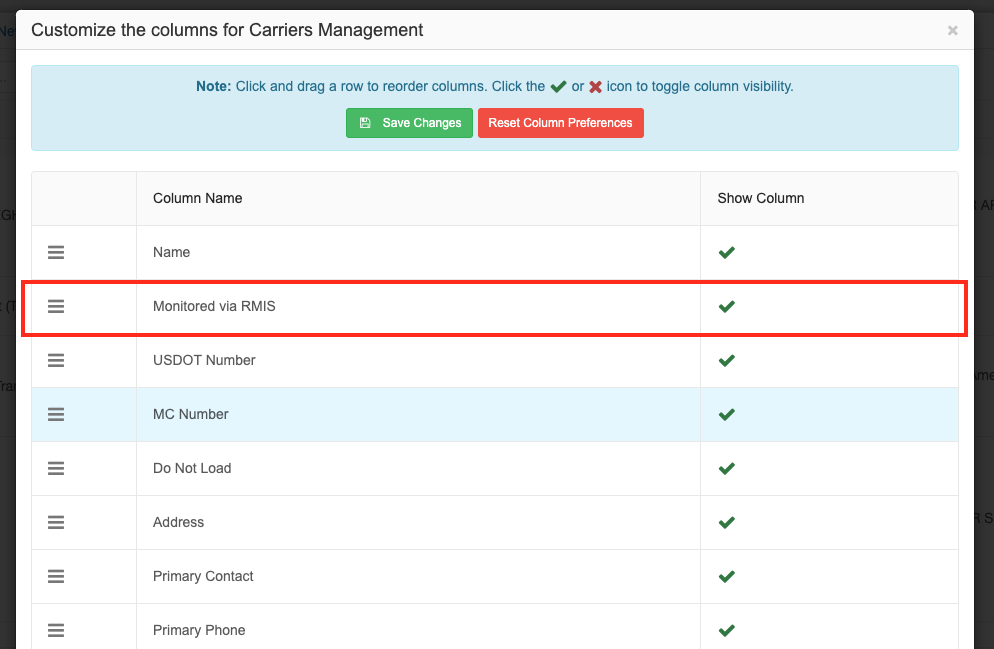
You can add this column to your carrier list by clicking the "Customize Columns" button on the top right, and then making sure there is a green check mark next to the "Monitored via RMIS" option:
From within the Carrier Profile, if you scroll down to the bottom, you will see a tab titled RMIS. When you click the tab, there will be further information that may not have a spot within the profile within Ascend, but is in the RMIS profile, such as the carrier's registration status. See below:






Rick Raimo
Comments