To integrate to QuickBooks Online:
1. Please make sure that you have a QuickBooks Online account and that you are using QuickBooks Plus. This will allow you to take full advantage of the integration.
2. Please make sure that you have added your Products & Services to your QuickBooks Online Account. Your Products and Services should look like this:
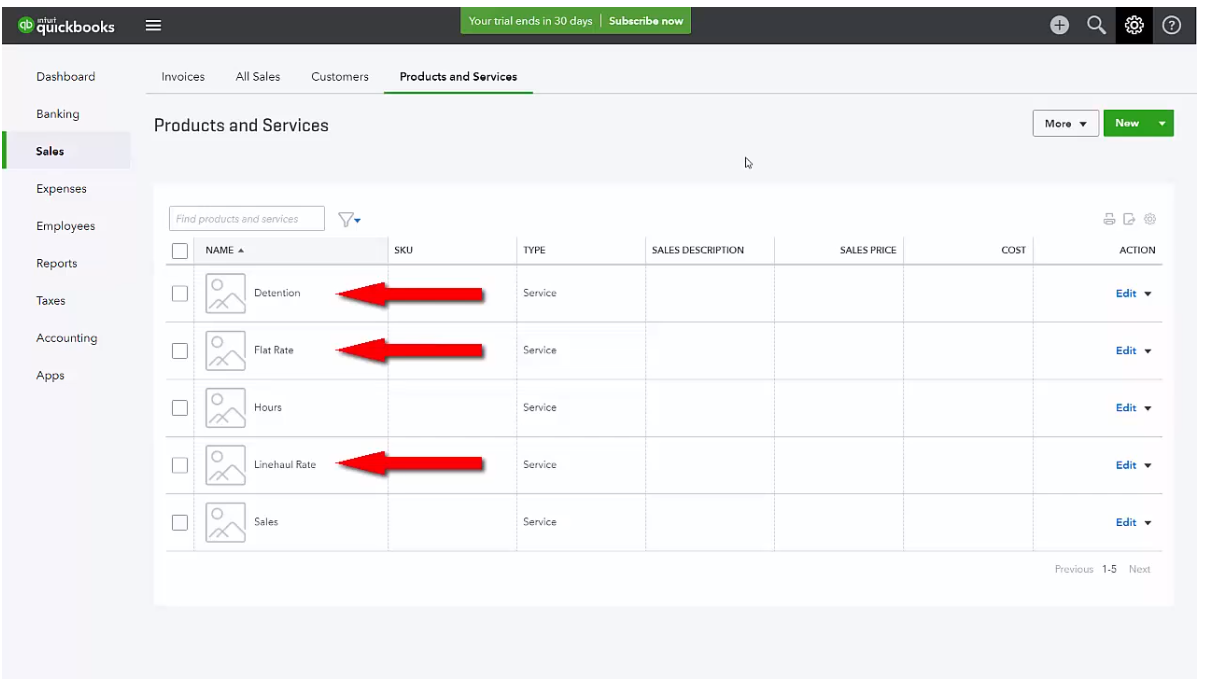
The Product and Services are basically a list of the pay items in AscendTMS.
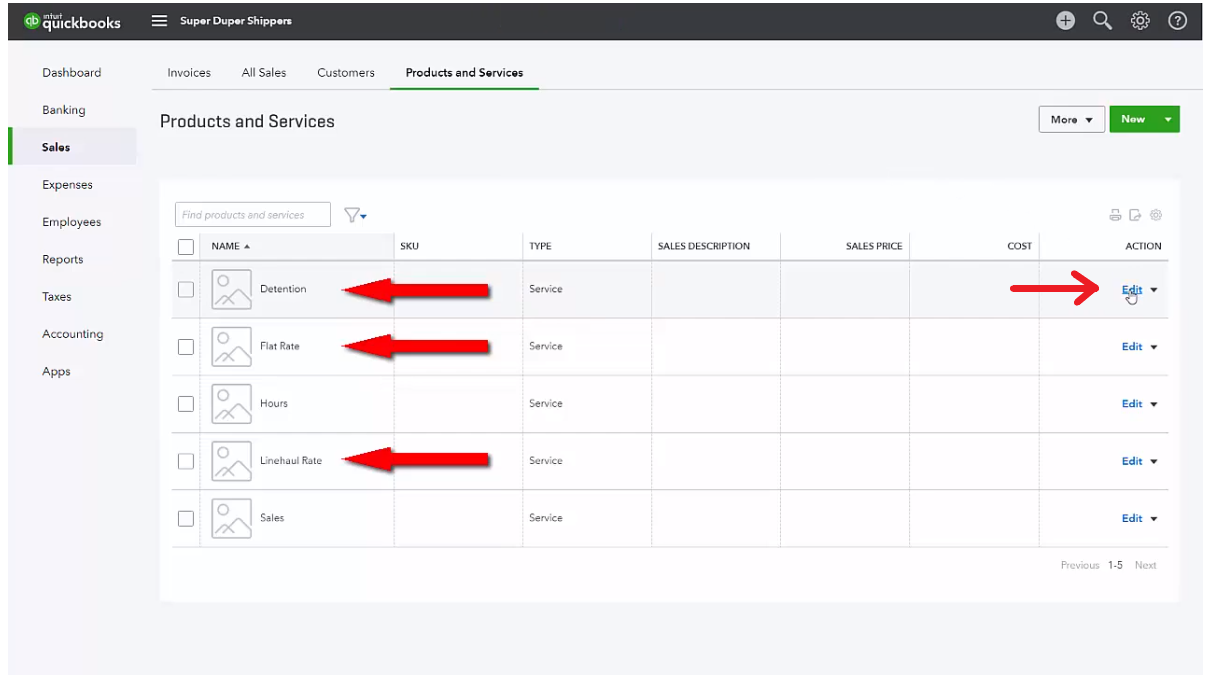
3. You will also need to edit each of your Products & Services here:
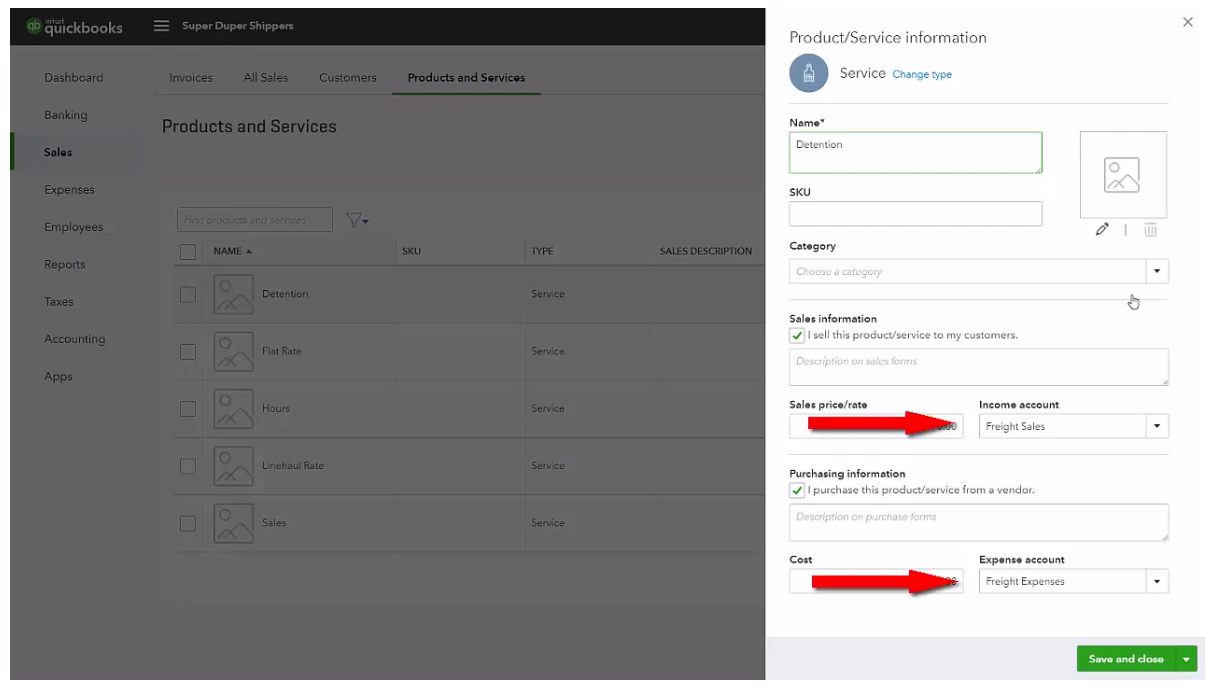
This will let QuickBooks know which income and which expense account you would like each one of these items to associate with. (This is extremely important to do prior to setting up the integration)
Once this is completed, your Product & Services in your QuickBooks Online have been mapped successfully to your Income and Expense accounts. Meaning, when an invoice or bill is sent over with a pay item on it, it will now be sent to the appropriate income or expense account.
Now that you have completed the necessary set up and mapping in your QuickBooks Online account, you can now move over to AscendTMS to finish your integration.
Follow these simple steps below:
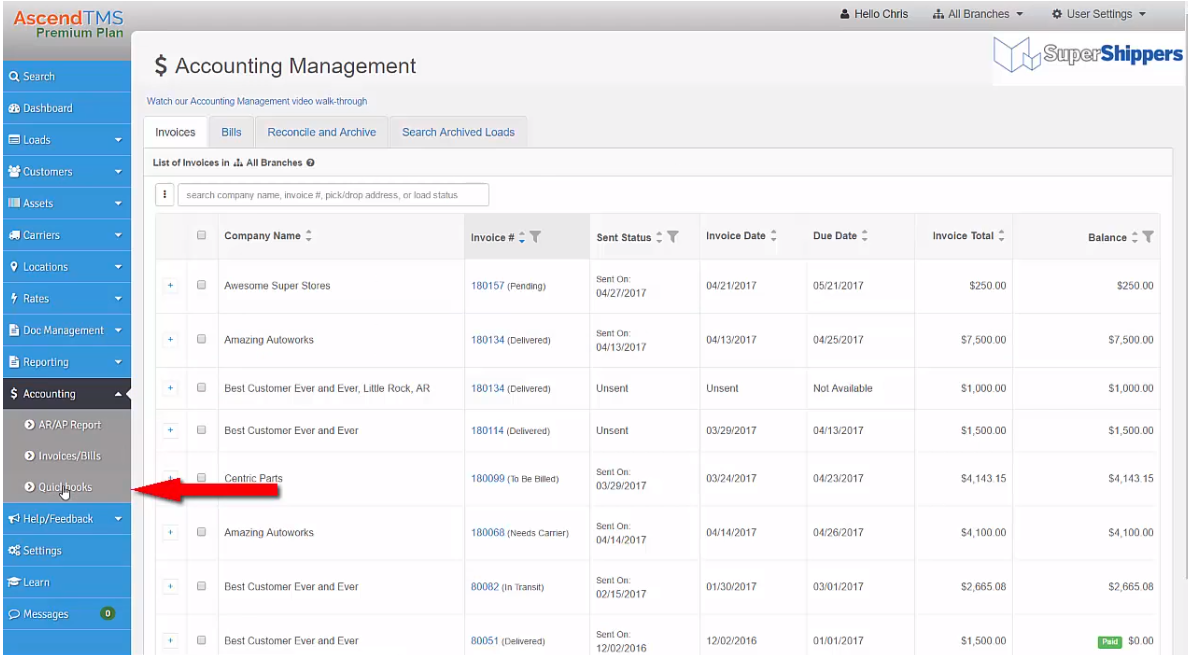
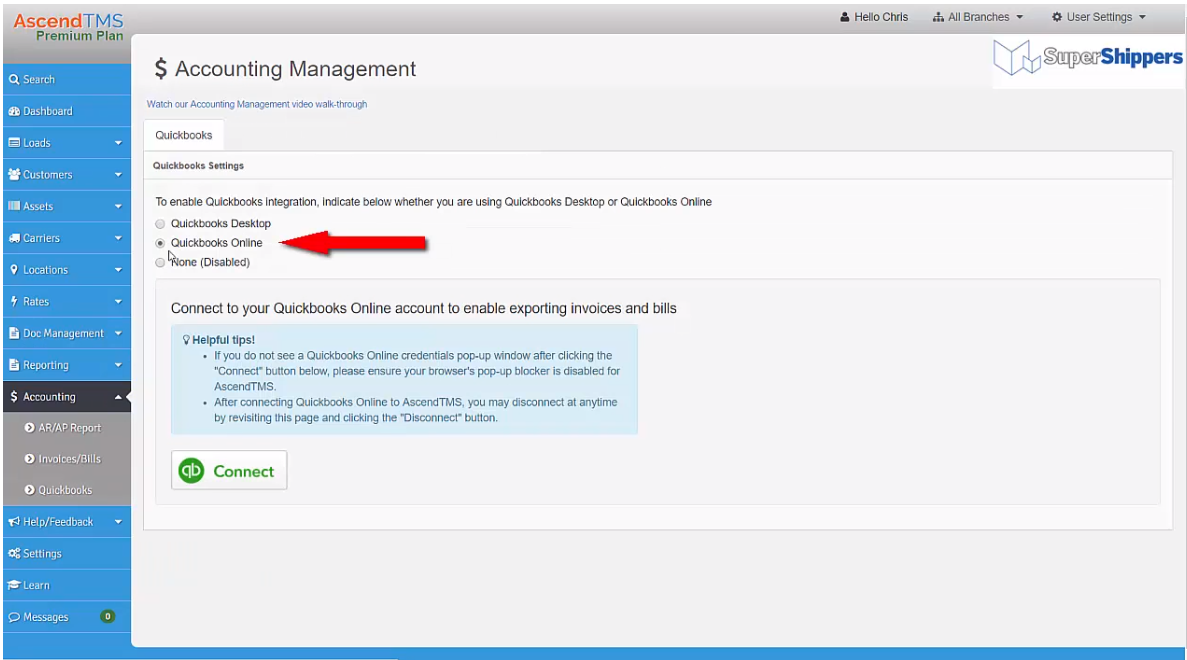
1. Navigate to your Accounting Menu and then click on "QuickBooks."

2. Next, select QuickBooks Online here:
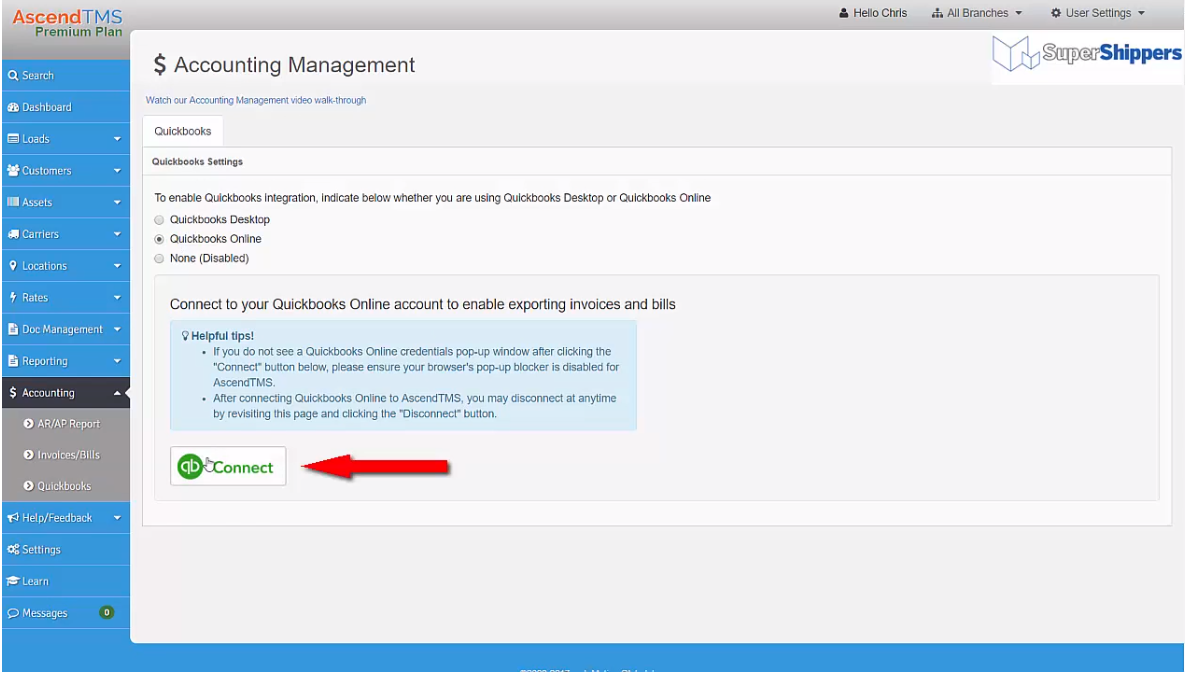
3. Then, click on the "QuickBooks Connect" button here:
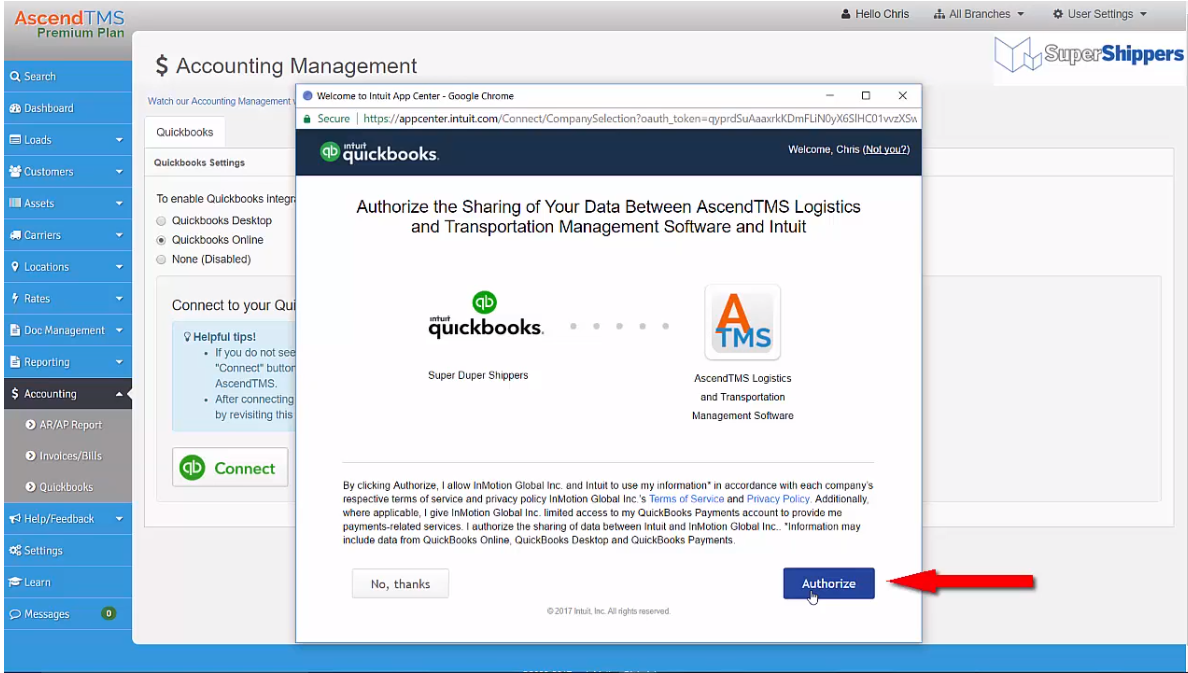
4. Now you will need to enter your login information for QuickBooks (However, if you're already logged into QuickBooks Online you will not need to do this step)
5. You will now need to select "Authorize" to give AscendTMS permission to connect to your QuickBooks Online account.
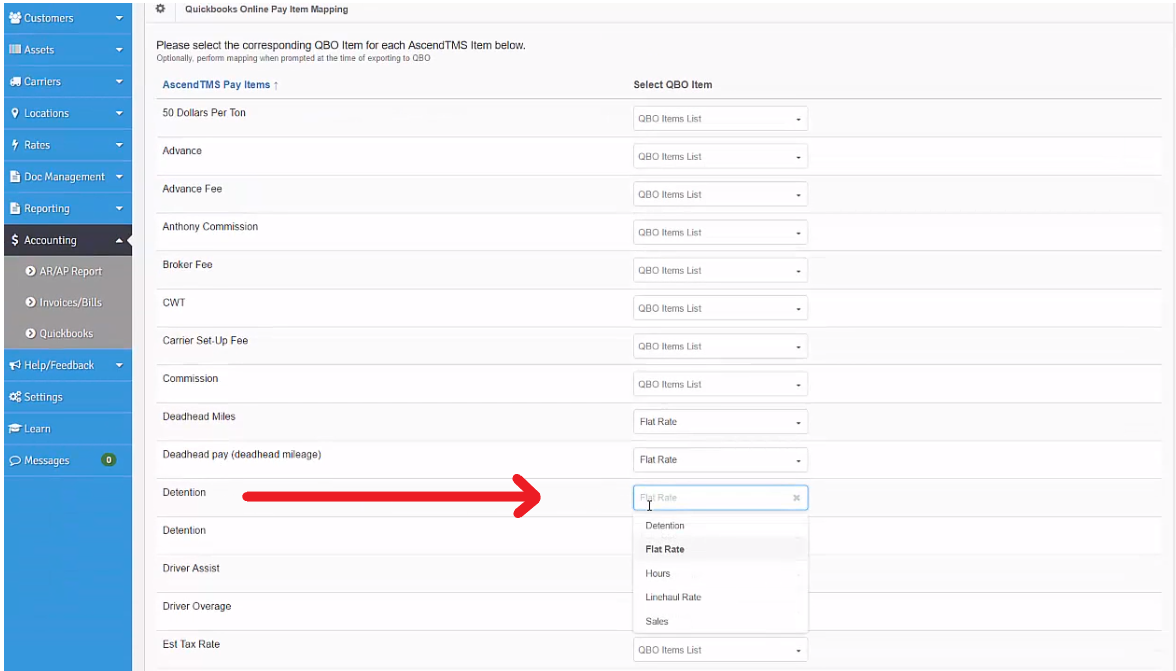
Once the connection has been established, you will see three new tabs on this screen; Map Pay Items, Map Customers and Map Vendors. These tabs are used to match items such as your pay items, to that of your QuickBooks Online items.
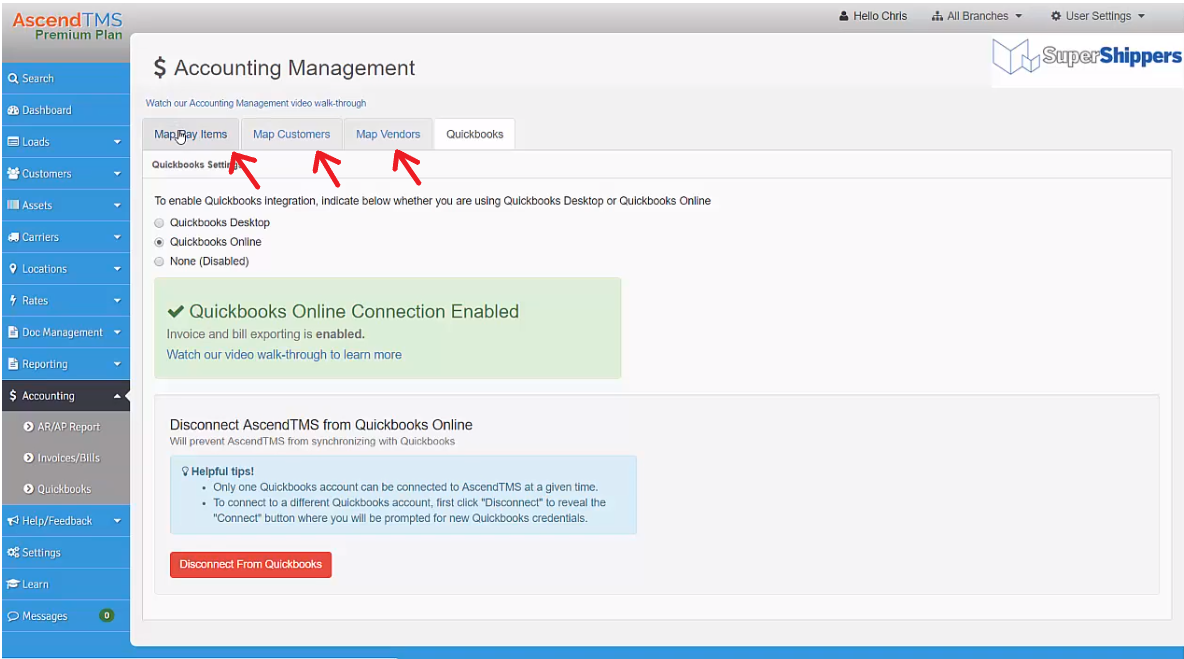
To match these items, find your pay items and simply select the Product and Service item from the drop-down list from your QuickBooks Online account.
You can do the same for your vendors and customers if you wish.
(If you decide not to do so now, you will have this option when you export your first invoice or bill)
Export Invoices/Bills to QuickBooks Online:
1. Go to Account > > Invoices/Bills
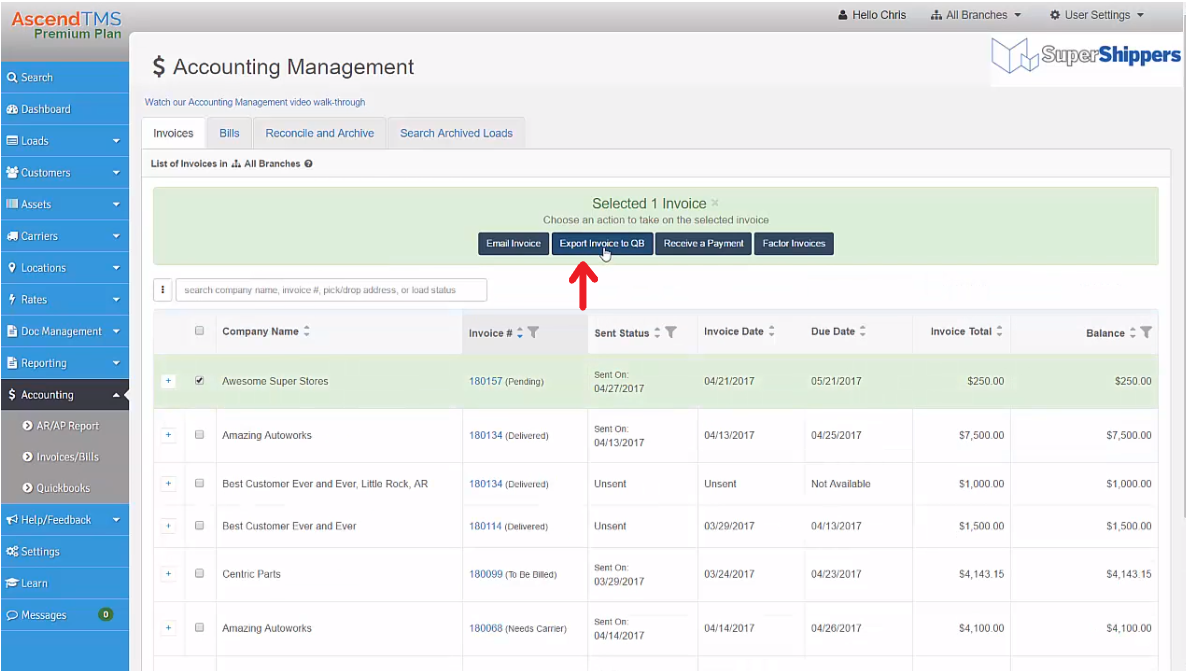
2. Select the invoice that you want to export. You also have the option of selecting multiple invoices.
3. Click the "Export Invoice to QB" button found here:
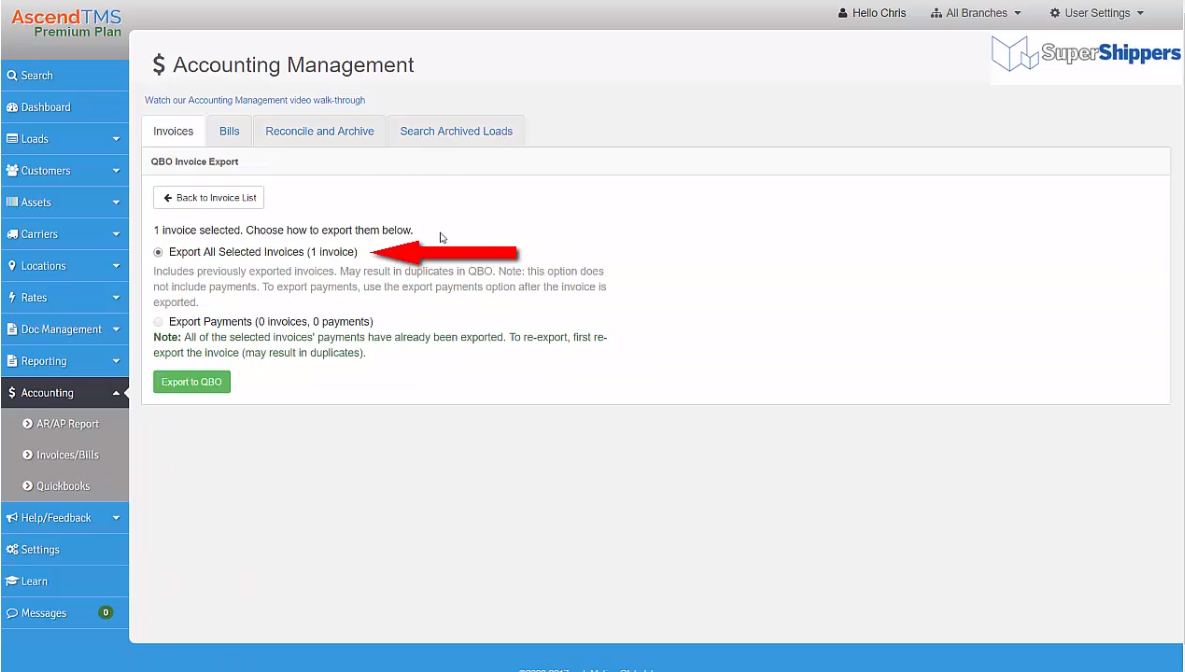
4. Select the top option to Export to QuickBooks Online.
**NOTE** You are also able to Export the Payments you have recorded in AscendTMS as well. This feature is only available for QuickBooks Online users. This is the same process as exporting your invoices, with one exception - Just click the second option to Export the Payments you have received here:
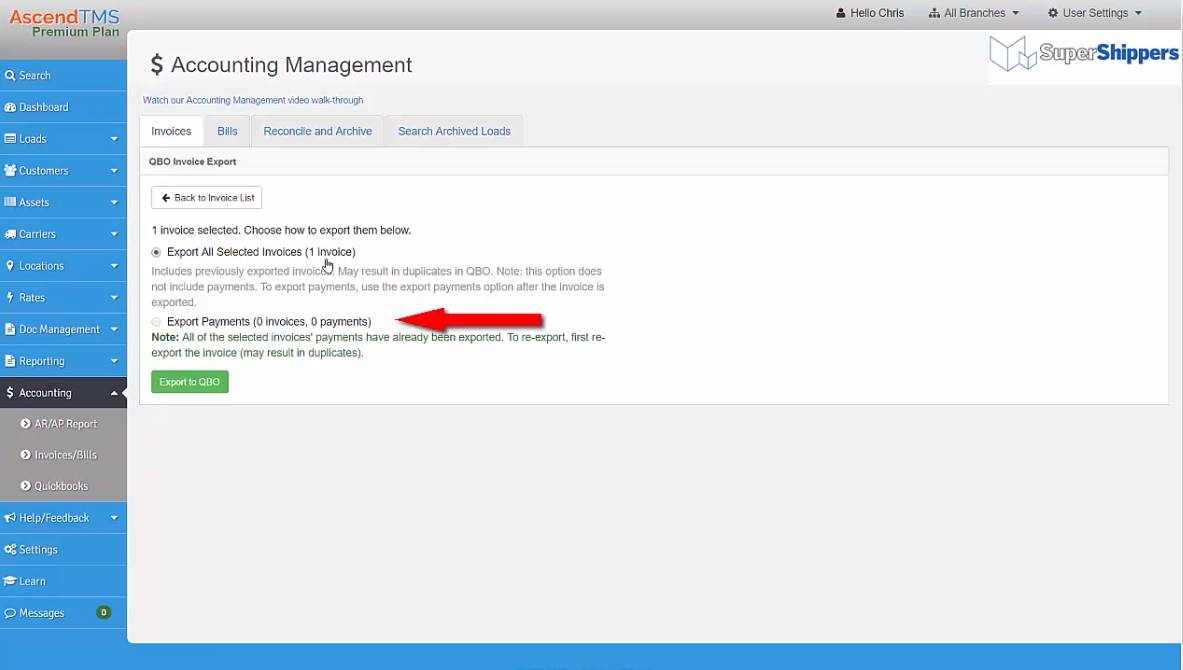
As long as the invoices have been exported first, you can export the payments that you have recorded after.
You have now completed the export of Invoices and Payments Received to your QuickBooks Online account.
To Export your Bills:
1. Go to Account > > Invoices/Bills
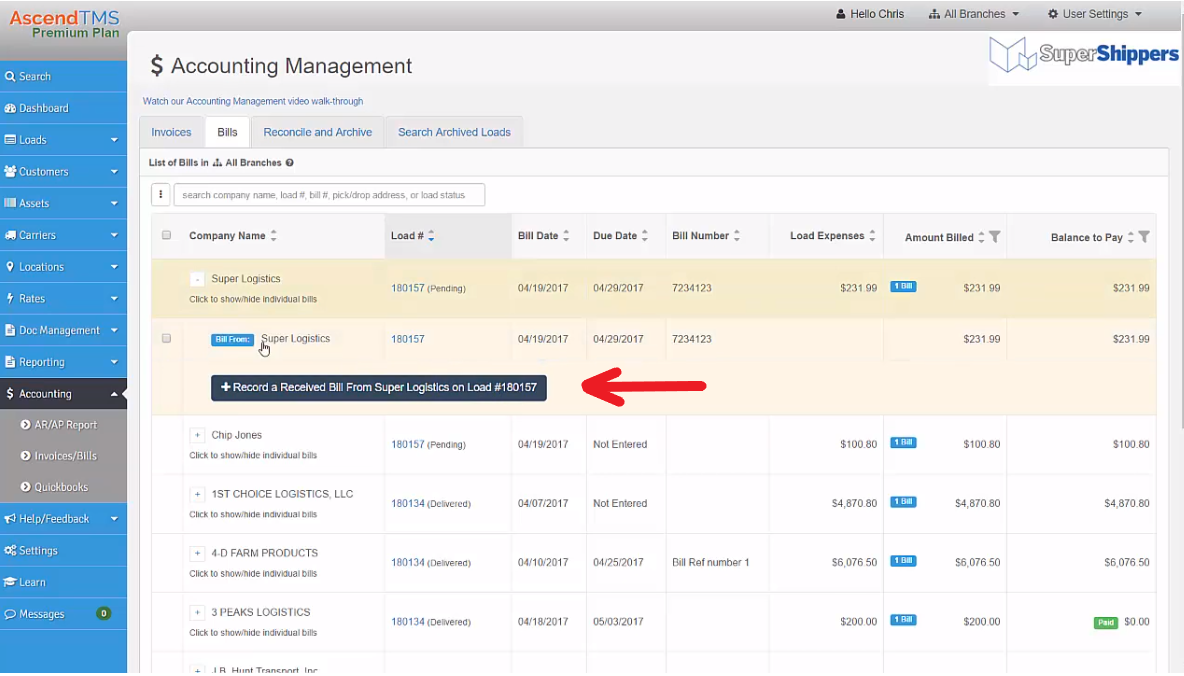
2. Select the Bills Tab.
3. Make sure that you have Recorded a Received Bill first here:
4. Select the bill or bills to be exported.
5. Then click on Export to QB button.
Now you have exported your bills, invoices and payments recorded to invoices easily and successfully to QuickBooks Online.
Maria
Comments