The Automated Workflow Engine or "A.W.E" is designed to make your day to day life easier and less stressful by setting up workflow rules that will trigger under certain events. Load statuses, check calls, driver updates, credit hold and a plethora of other options will exist for you to be able to setup.
First where can you find the Automated Workflow Engine options?
Find the "Settings" menu option on the left-hand blue menu and click on the tab.
You will be taken to your AscendTMS settings area.
In the Settings menu, under "Company Settings" you will see the option for "Automated Workflow Engine".
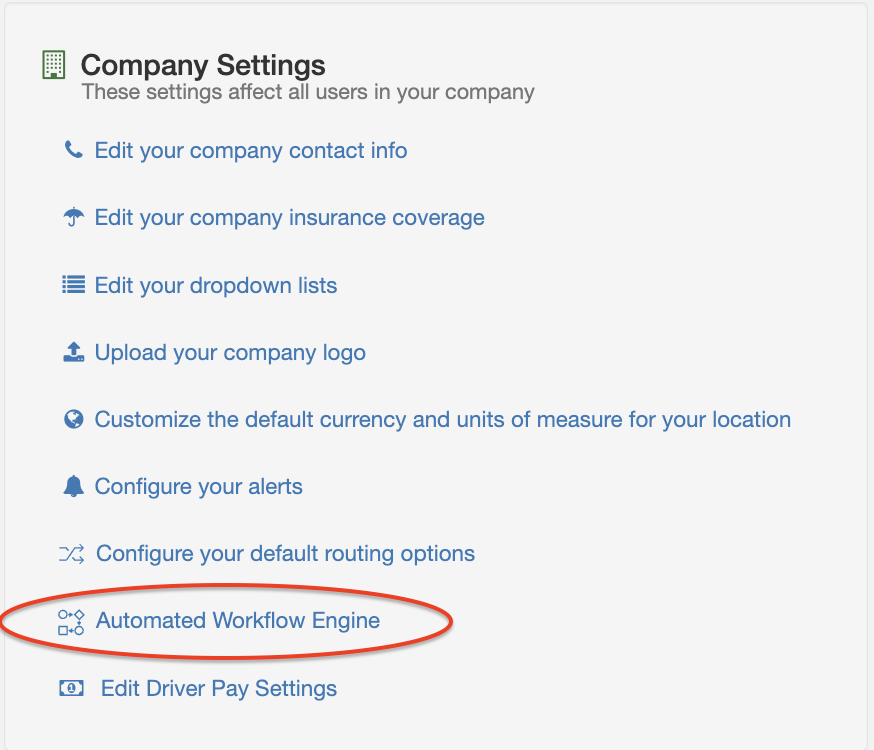
Click the Automated Workflow option and set up your new workflow rules.
Note: When setting up Automated Workflow Engine settings that involve Load / Truck Status updates: Consider ALL of your settings that may affect Load / Truck status changes (ie. AscendPortal and Automated Workflow Engine) and remember.....
The status updates will be processed in the order in which they were created and appear in AscendTMS. When a rule is triggered, it will stop going through the remainder of the rules. So, i.e., the first rule in the list WINS!
Assigning Current User and Roles upon Creating Load/Adding Entity to Load
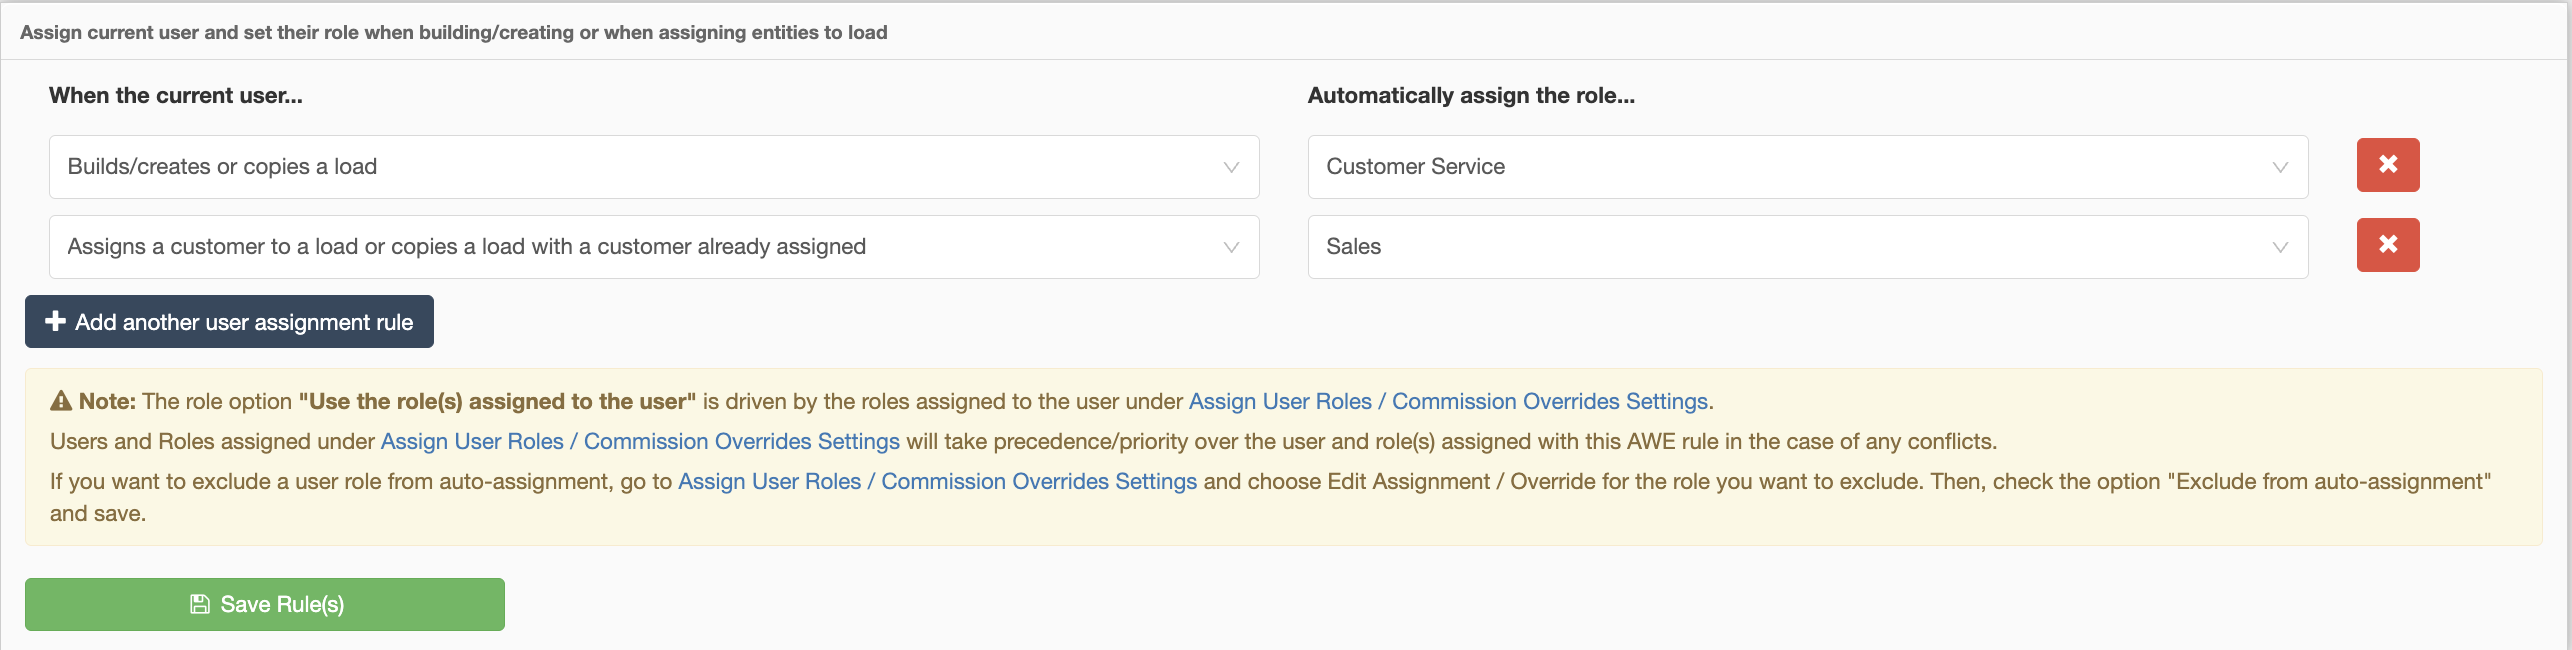
The first rule you will come across allows you to set an automatic User Role assignment to the user who created/built the load or when an entity is assigned.
This means any time a load is built or a customer, carrier or even a location (ie: Using the New Load Wizard, Template, Copy Load, EDI, etc.), the user who created/built the load will automatically be assigned the role selected.
Don't forget, every user has access to their very own "My Loads" tab within Load Management - that displays any/all loads with a role assigned to them for easy access / organization!
Automatically Mark Commissions Approved
This rule allows you to set automatic approvals on Commissions. You have a few options to set but note, you can only set one of these rules to apply. You can auto-approve commissions when all invoices on a load are marked paid in Accounting, when the load is sent to Accounting or when a load is changed to a certain Load Status.

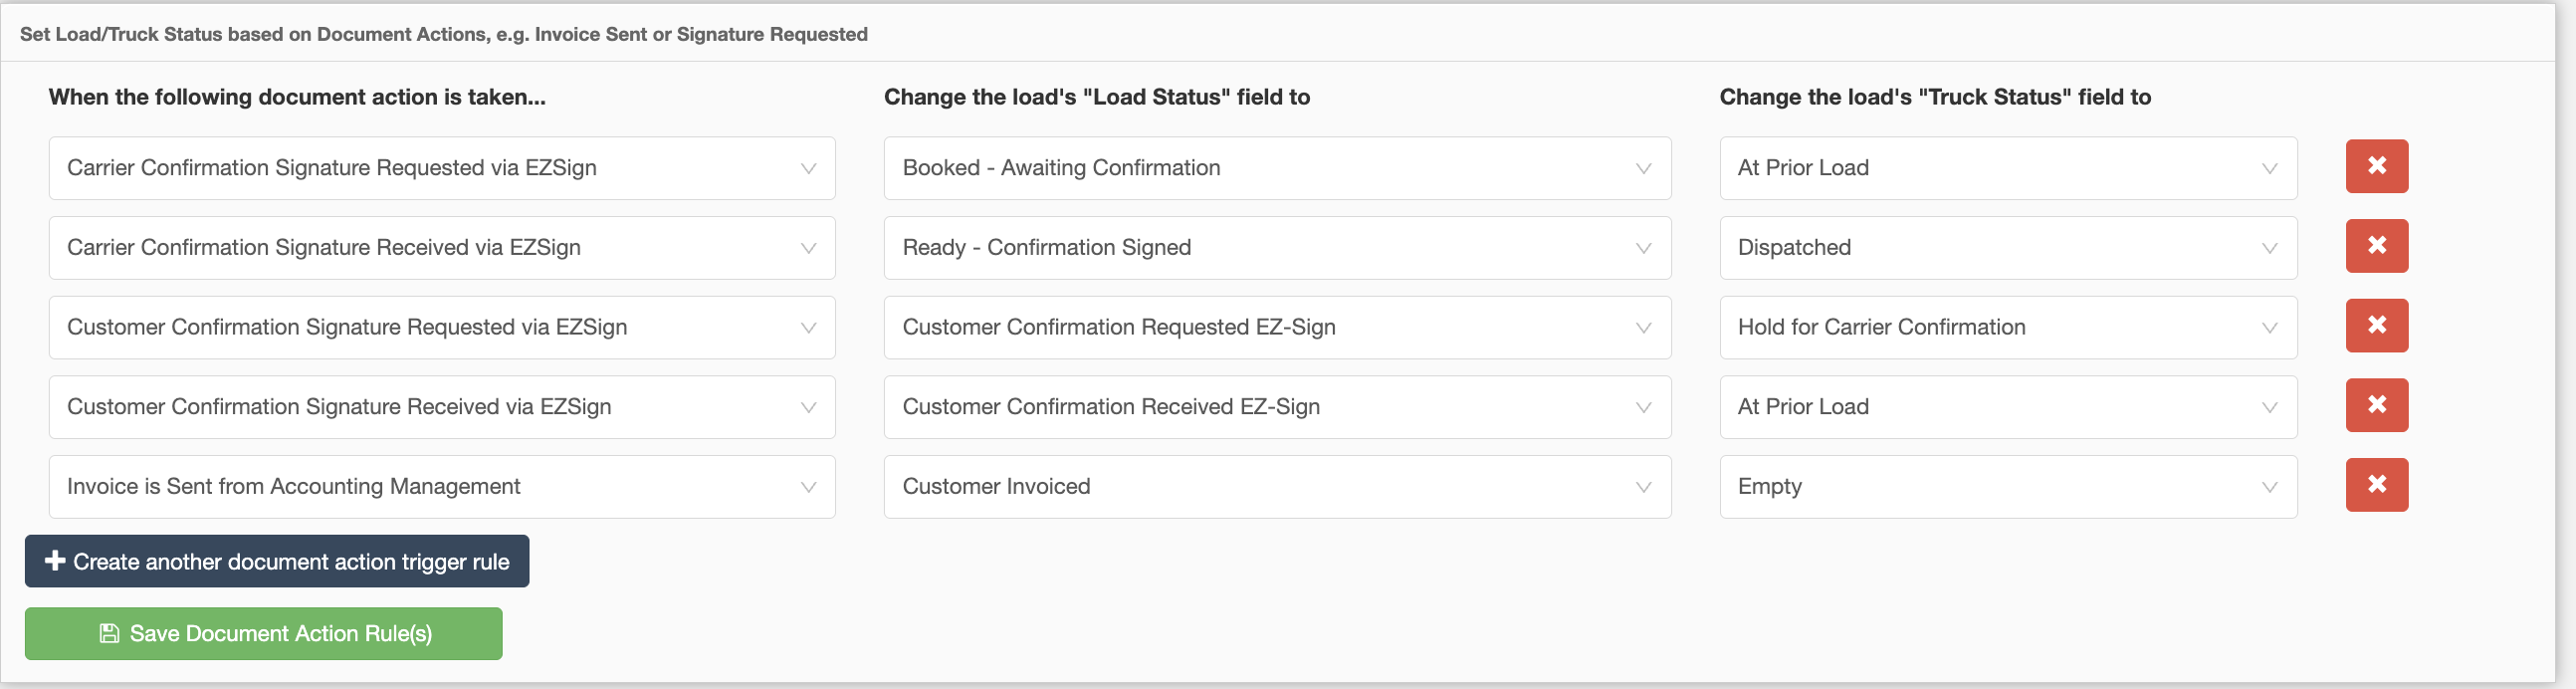
Assigning Load/Truck Status Based on E-Signature Document Action
This rule allows you to automatically set a load or truck status based on an action when using E-Signature. You have many options to choose from such as when a carrier confirmation is requested/returned signed, customer confirmation is requested/returned signed or when an Invoice is sent from Accounting.
Load Status Changed Based On Check Calls
This rule lets you control automatic Load/Truck statuses updates based on a check call updates.
This means any time you or a member of your team make a check call, the load or truck status will change automatically based on the check call type that was logged.

For the example above, when you log a check call and select "Arrived at pick up" the load status will change to "In Transit" and your truck status will change to "At Pick up".
Notice this rule also has an "At the stop type" option as well.
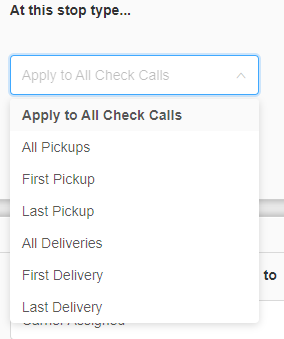
For the rule we have set here, "Apply to All Check Calls" is selected. This means the rule will trigger every time you log a check call at a pick up location.
You can also choose from the additional rule options above. For instance, if you have built a load with 2 loading locations and 1 delivery location and you wanted the rule to trigger on the first pick up check call but not the second, you would choose the "First Pickup" option.
Carrier Assigned/Removed/Replaced On A Load
The next rule is setting load/ truck statuses when a carrier is assigned/removed/replaced on a load.
Again, click the blue button to create a new rule.

In this example, when the carrier is assigned to the load the load status will change to "Carrier Assigned" and the truck status will change to "At Prior Load".
When the carrier is replaced on a load, the load status is changed to "Needs Driver" and the truck status is changed to "Dispatched".
When the carrier is removed from the load, the load status will change to "ATTENTION" and we don't have truck status selected so it would stay the same as it was.
Restrict a Carrier From Being Assigned To A Load
This rule will allow you to block a carrier from being placed on a load if one of the following parameters apply:
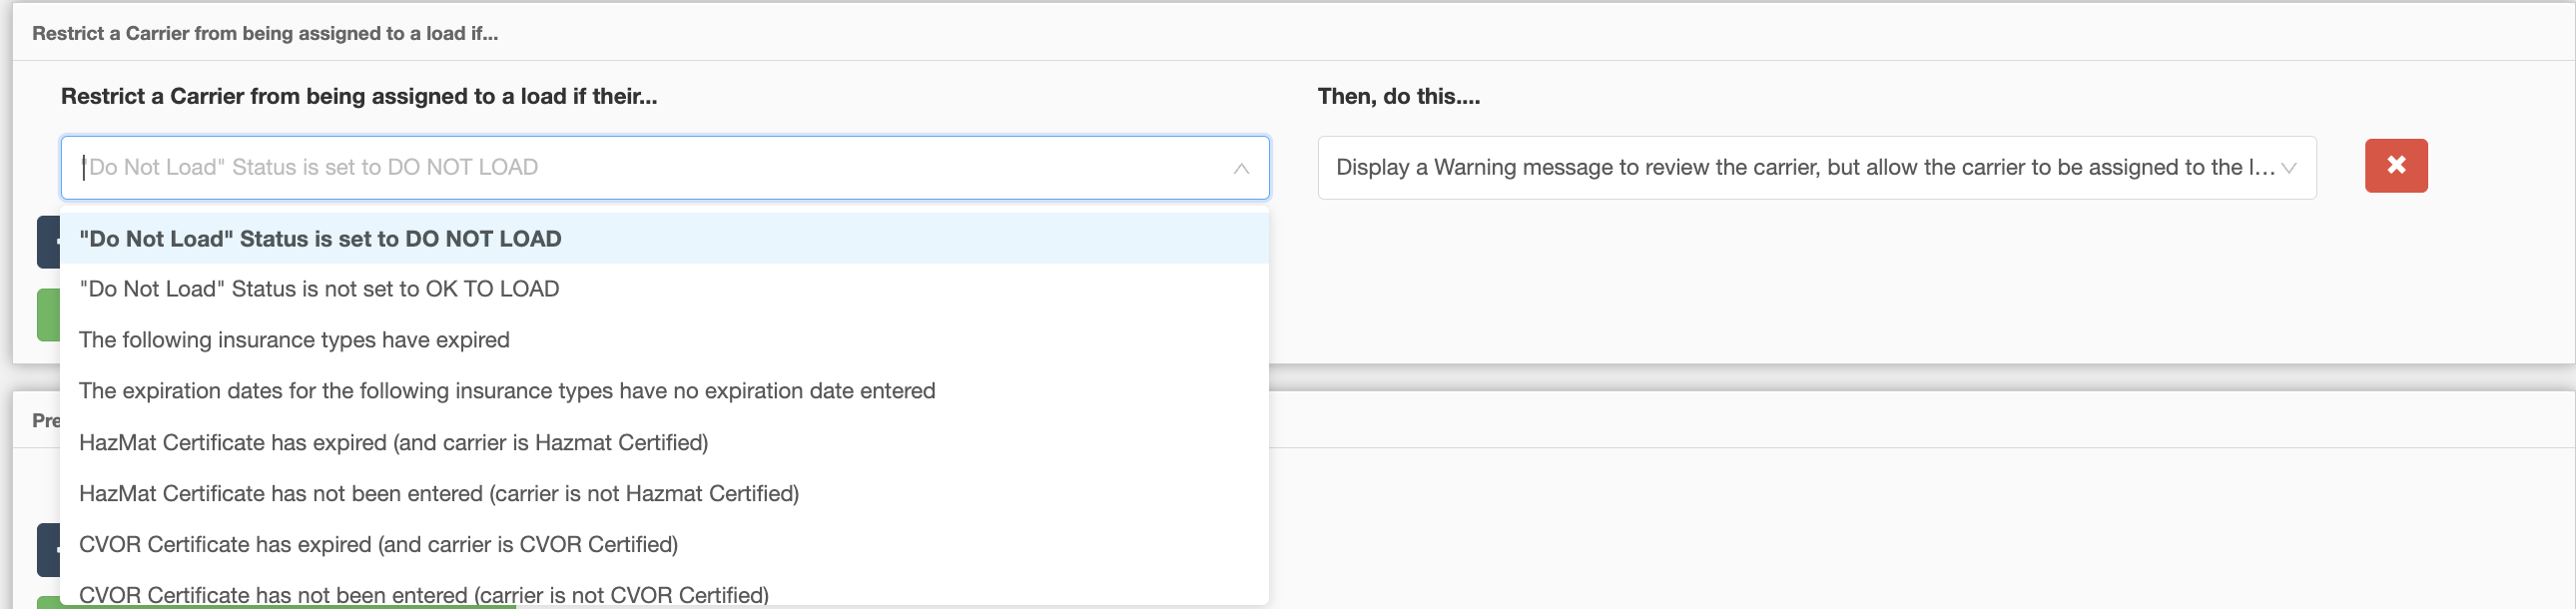
"Do Not Load" status is set to "Do Not Load"
"Do Not Load" status is not set to "OK to Load"
Primary insurance has not been entered in the carrier profile
Primary insurance has expired
Cargo insurance has not been entered in the carrier profile
Cargo insurance has expired
These are just a few options to choose from. You can see the full list when you click on the dropdown in the rule.
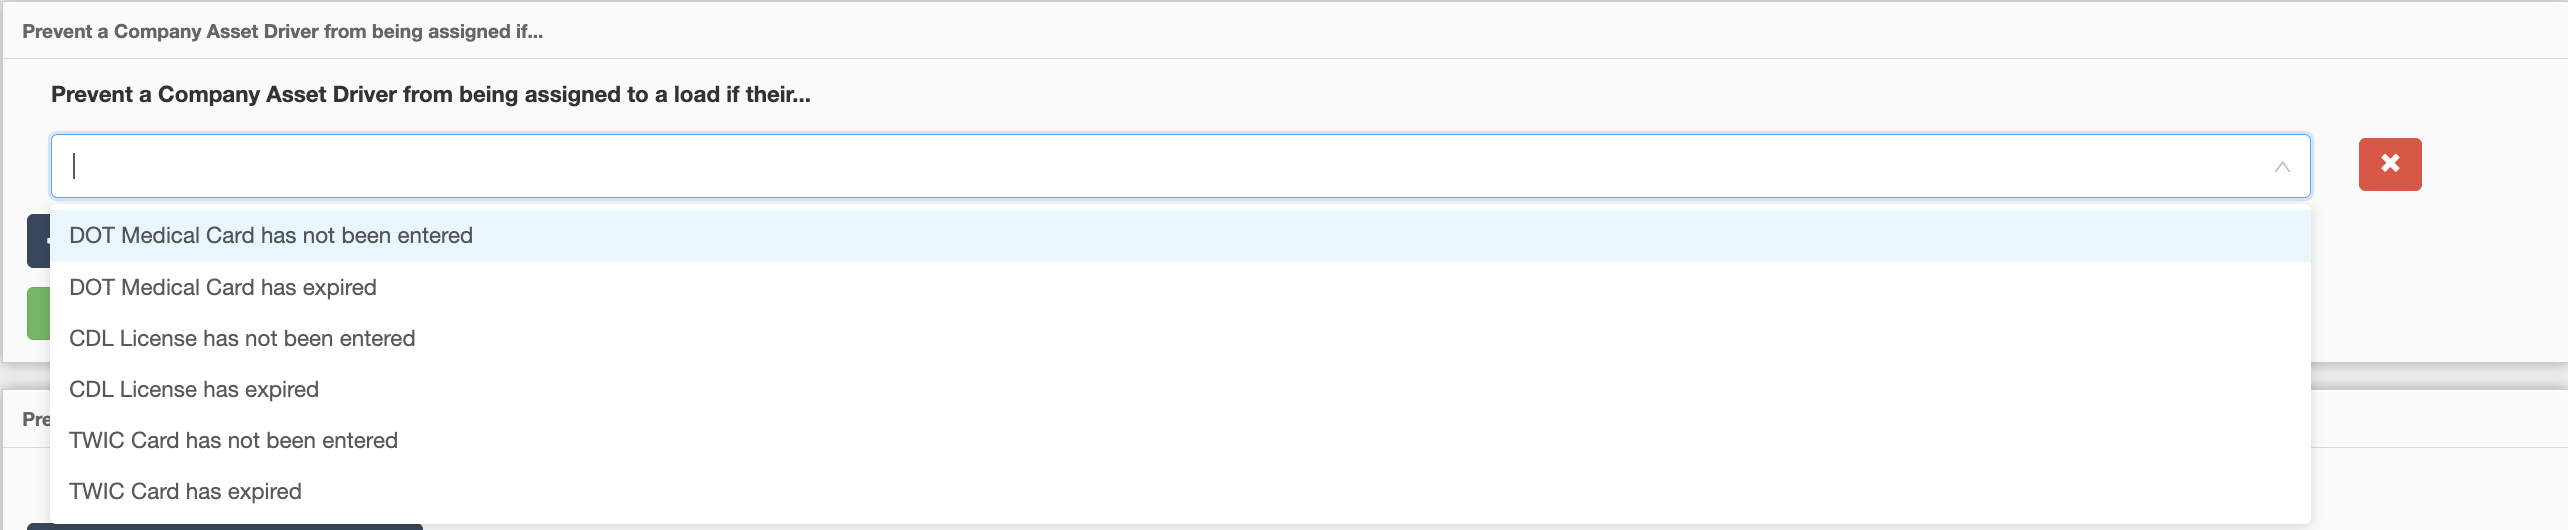
Prevent an Asset Driver from being Assigned to Load
This rule prevents an asset driver from being added to a load based on if their DOT Medical, CDL or TWIC card have either not been entered in their driver profile or if the date on their card has expired.
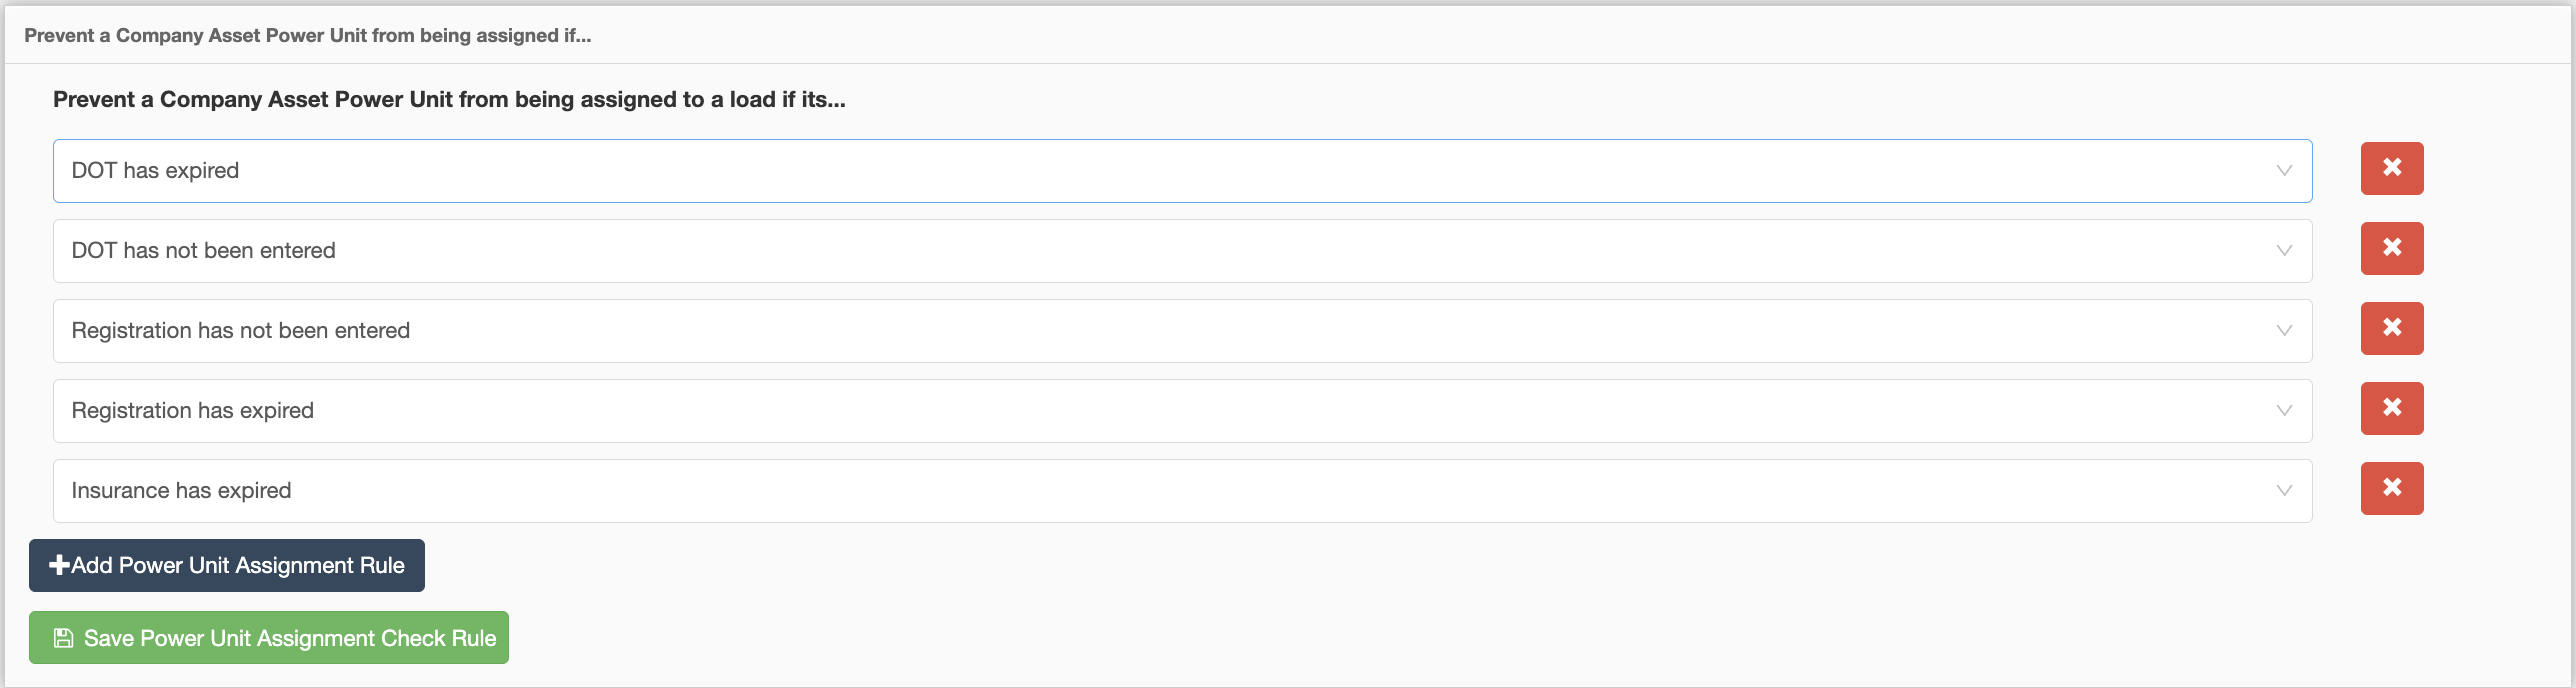
Prevent a Company Asset Power Unit from being Assigned to Load
This rule prevents a company asset power unit from being added to a load based on if their DOT, Registration, Insurance as well as other options that have either not been entered in the power unit profile or if the date has expired.
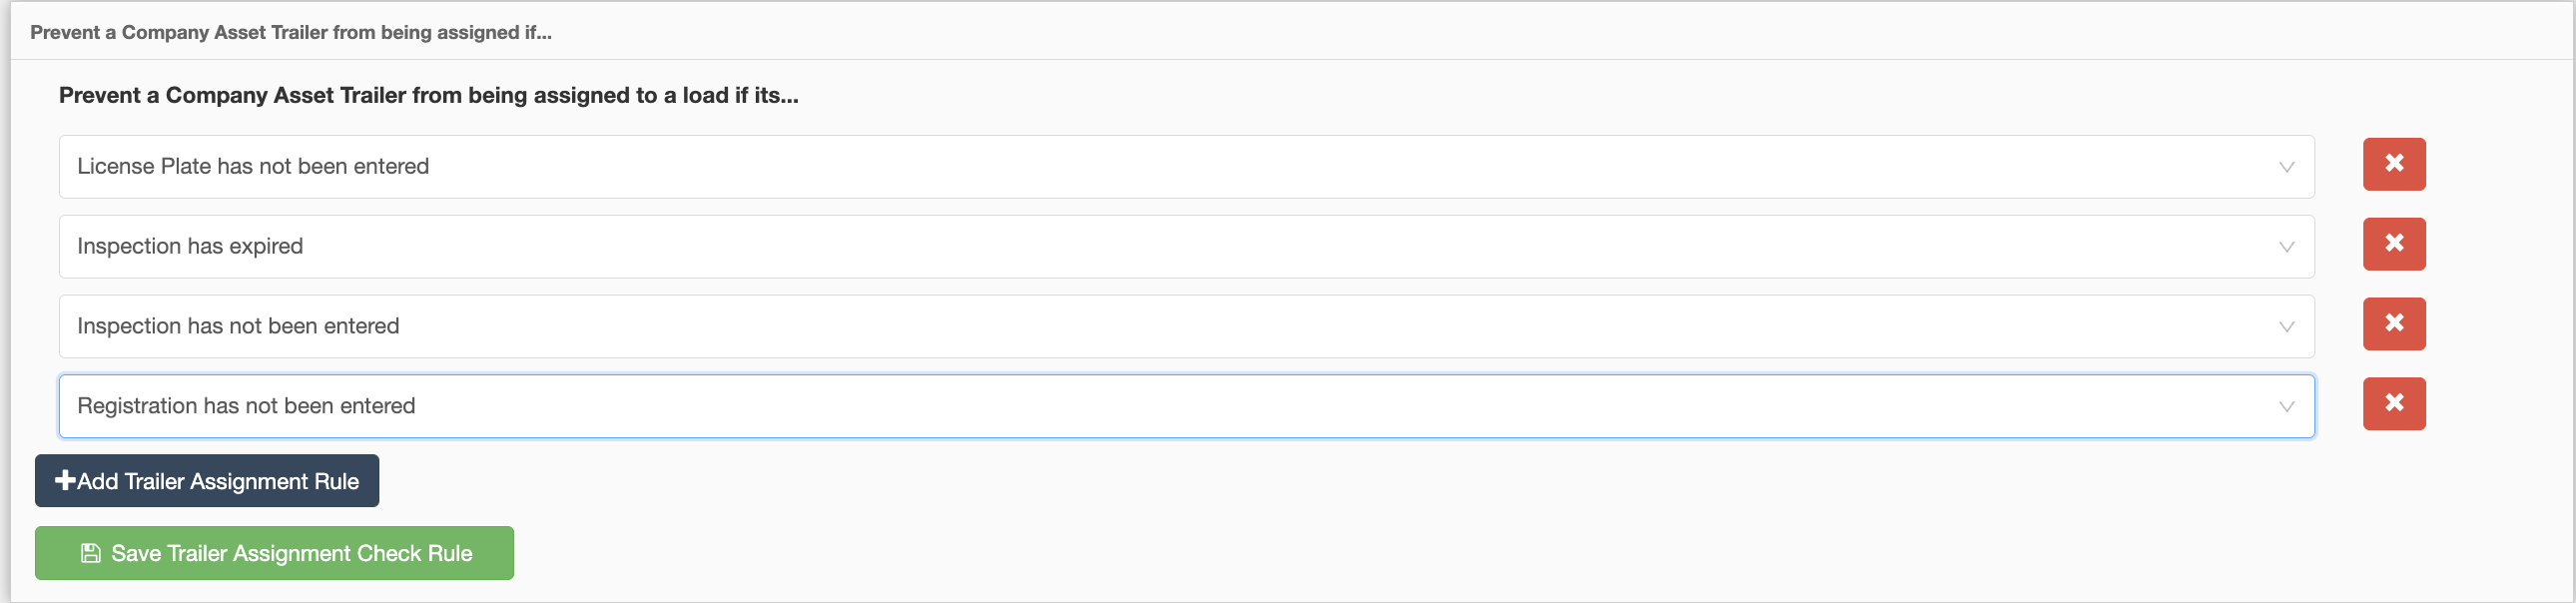
Prevent a Company Asset Trailer Unit from being Assigned to Load
This rule prevents a company asset trailer from being added to a load based on if their DOT, Registration, Insurance as well as other options that have either not been entered in the trailer profile or if the date has expired.
Preventing Load Statuses Being Set Based On Load Financials
You can set up a rule that can prevent certain load statuses from being set based off the load's income or expenses.
A good example of this would be before you are sending a load to Accounting Management, you maybe want to set the load status to "To be Billed" or "Completed".

This example would prevent the load status from being changed to either one of those load statuses if the total income was equal to zero.
Automatically set Credit Hold Enabled on Customers
This rule allows you to automatically set "Credit Hold Enabled" on any new Customers created.

Preventing A Customer From Being Added To A Load Based On Credit Hold
In AscendTMS you can place your customers on a credit hold if they are over their credit limit. This rule would allow you to block a customer from being assigned to a load if the customer credit hold is enabled.

In AscendTMS, you can add a credit limit for each of your Customer's within their profile. Once you have, you can also set a rule to prevent a Customer or Income item for a Customer, based on their credit limit.

By setting this rule, whenever you or your users attempt to add a Customer and/or Customer Income Item who falls below the increment you set, you will receive a warning that explains why this cannot be done.
Set Load Status When "No Activity" Occurs On A Load For A Specified Period Of Time
This rule will trigger a load status update if a load has had no activity for a certain amount of time set by you.
Note: "Activity" on a load is anything that updates the "Last Contact" column in the load list. This includes check calls, tracking message responses and Ascend Portal updates.

This example shows after 1 hour of no "Activity" the load status will change to "ATTENTION" but only if the load status was in "Booked - Awaiting Call".
The second part of this rule is REQUIRED because not every load will be impacted. Only the load statuses that may be time sensitive will update.
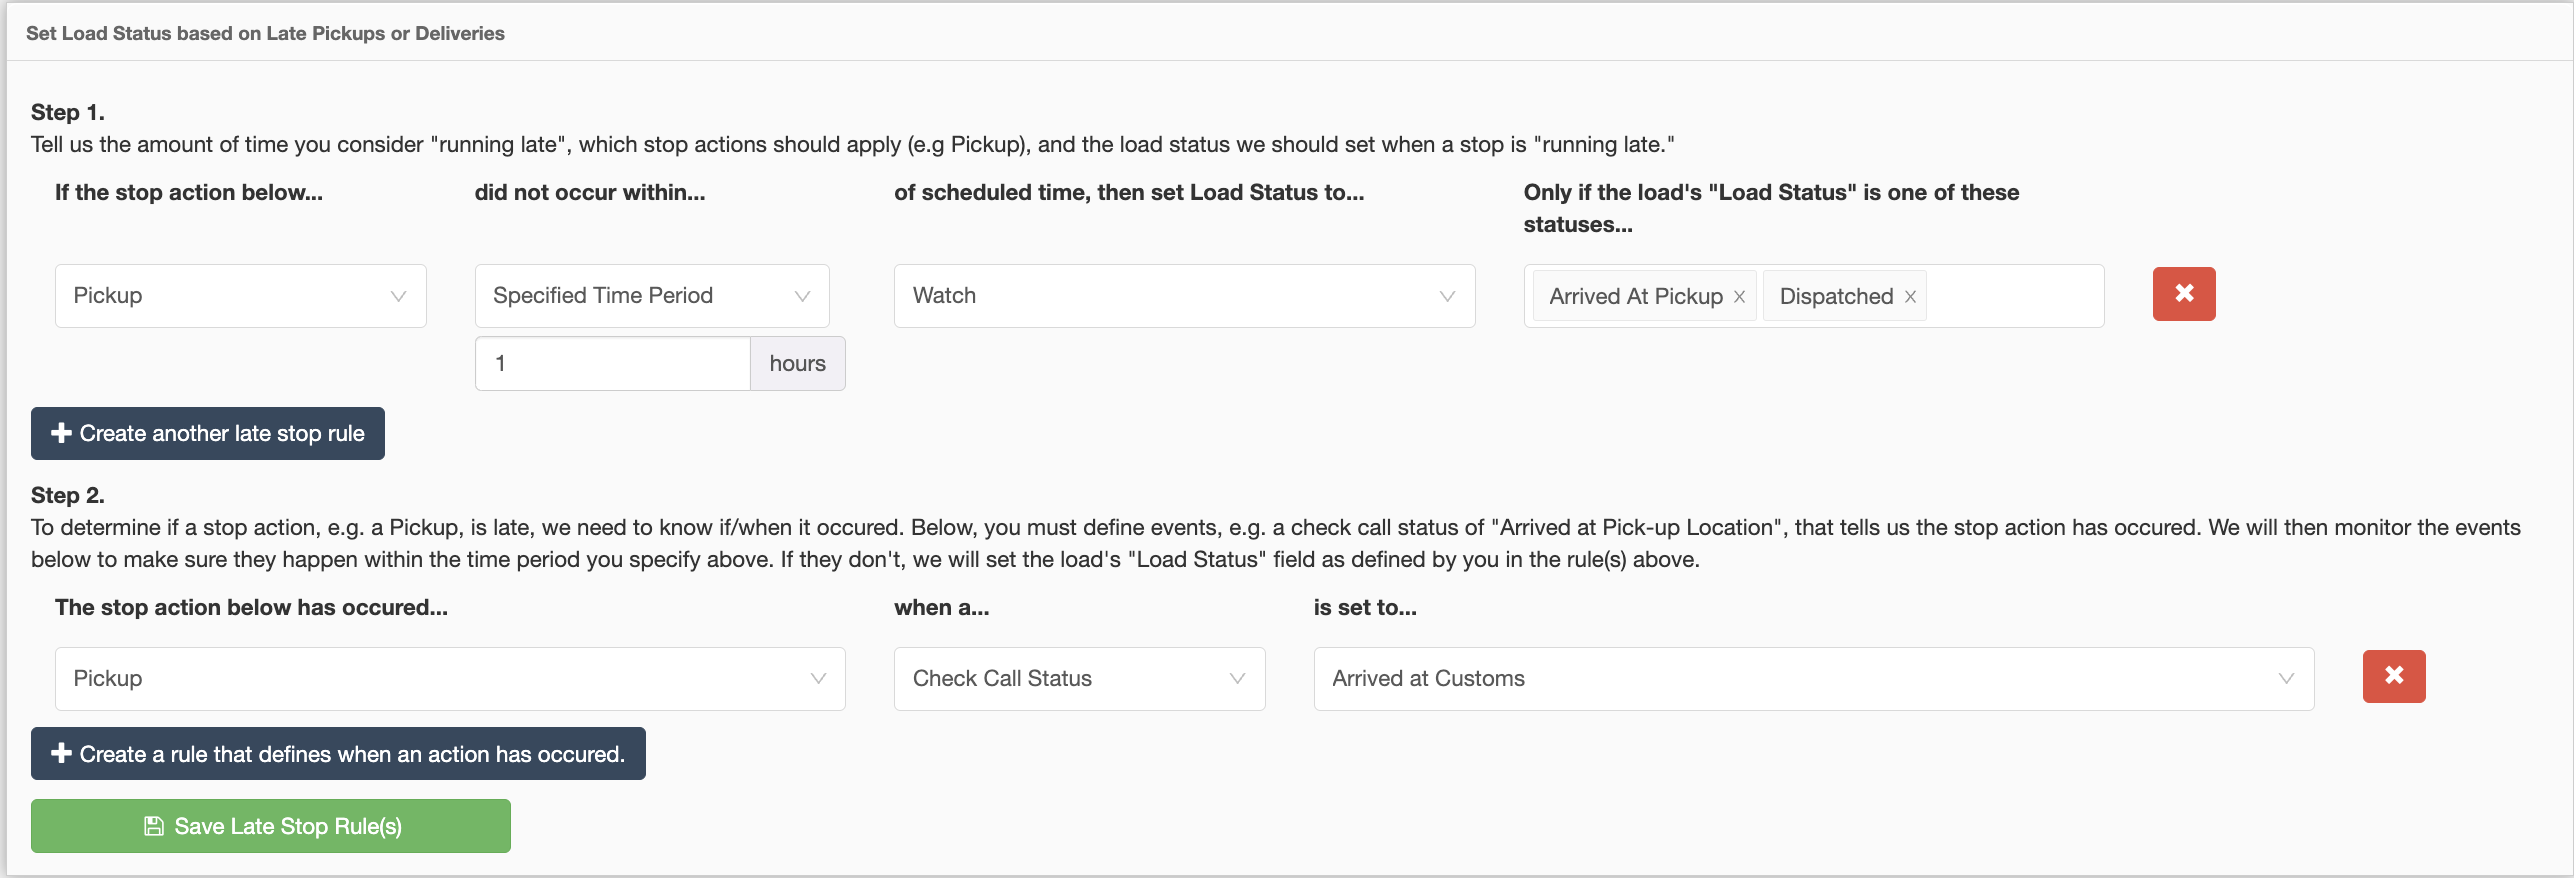
Set Load Status based on Late Pickups or Deliveries
This rule allows you to set a load status based on if a driver/carrier is running late to an appointment by changing the load status. You have the ability to set it based on Same Day arrival time or by the hour.
Set load status based on Incoming Actionable Item
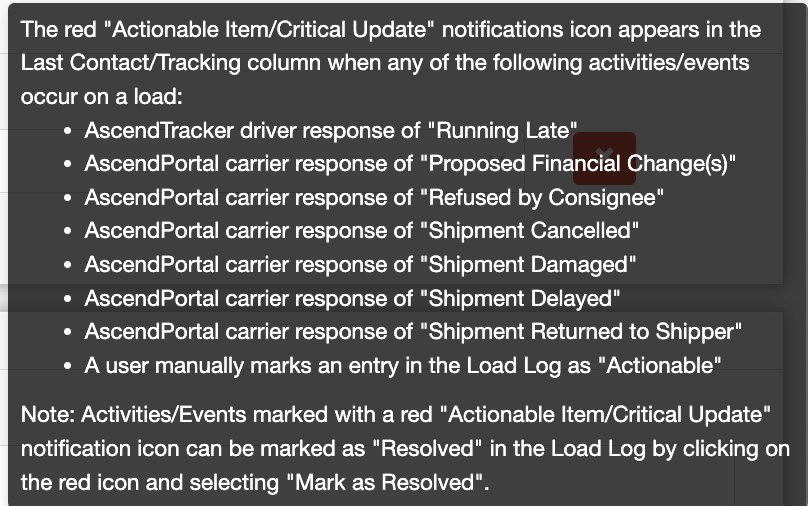
When an Incoming Actionable Item arrives (that triggers the red dot notification icon on the Last Contact column), this rule will change the Load Status based on what you set.
The below items will trigger a red icon.

Once the rule is set, as advised above, these actions will trigger a red icon in the Last Contact column. The information displayed comes from the driver, as shown below.
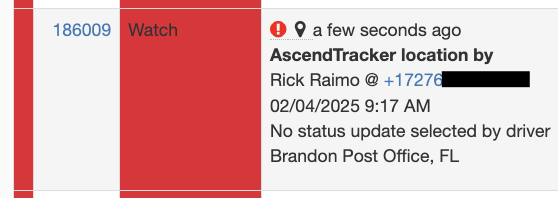
If you click on the icon, a message will appear and allow you to view the message.
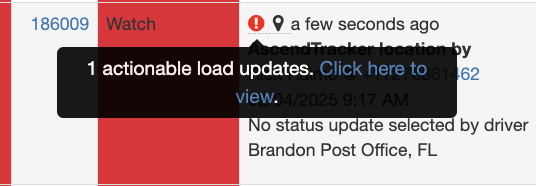

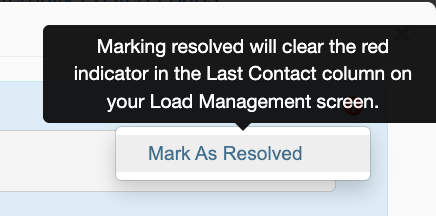
Once you have viewed the actionable item, you can clear it by clicking on the icon and removing it as an actionable item.
Show Notification Icon in Last Contact/Tracking Column in Load Management
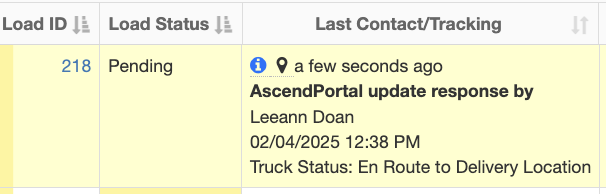
In Load Management, the Last Contact/Tracking column will help you manage those blue icon notifications. You can now choose which blue icons you want to see or don't want to see from texting, tracking integrations, EDI or the Ascend Portal.


Once you set your AWE rule for blue icon updates, they will show up in the Last Contact column with details from the driver/carrier as shown below.
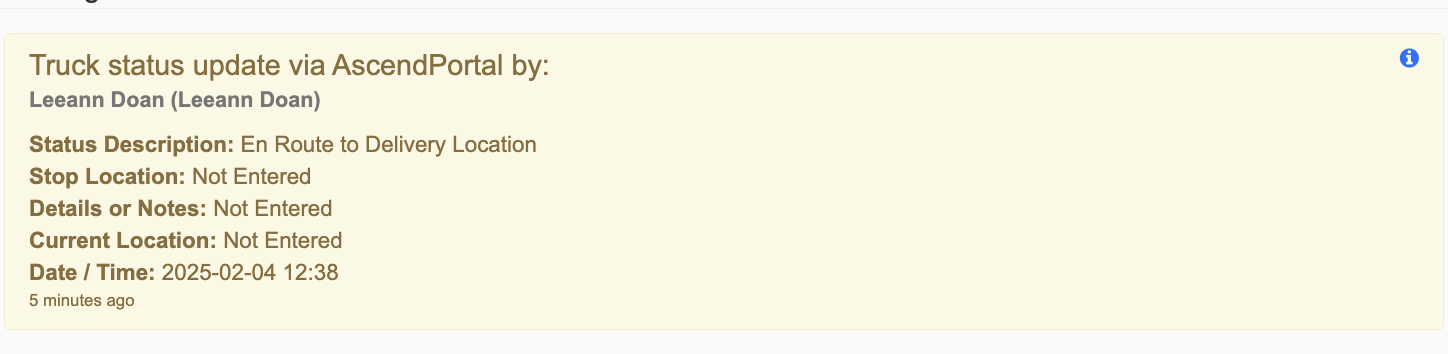
To see more details on the update, you can click on the blue icon which will provide a link to the Load Log where you can see full details of the update.
Maria
Comments