On the Document Management page, you will be able to view and manage all of your uploaded documents in one area. This means no matter how, or where, the document was uploaded to AscendTMS such as, by a user, or a document that came in via text from a driver. Even if the document was uploaded to a load, customer, carrier, location or driver form by a user.
This allows you to search, filter, view and edit tags and associations with any or all of your documents from this screen.
(To learn how to upload documents click here.)
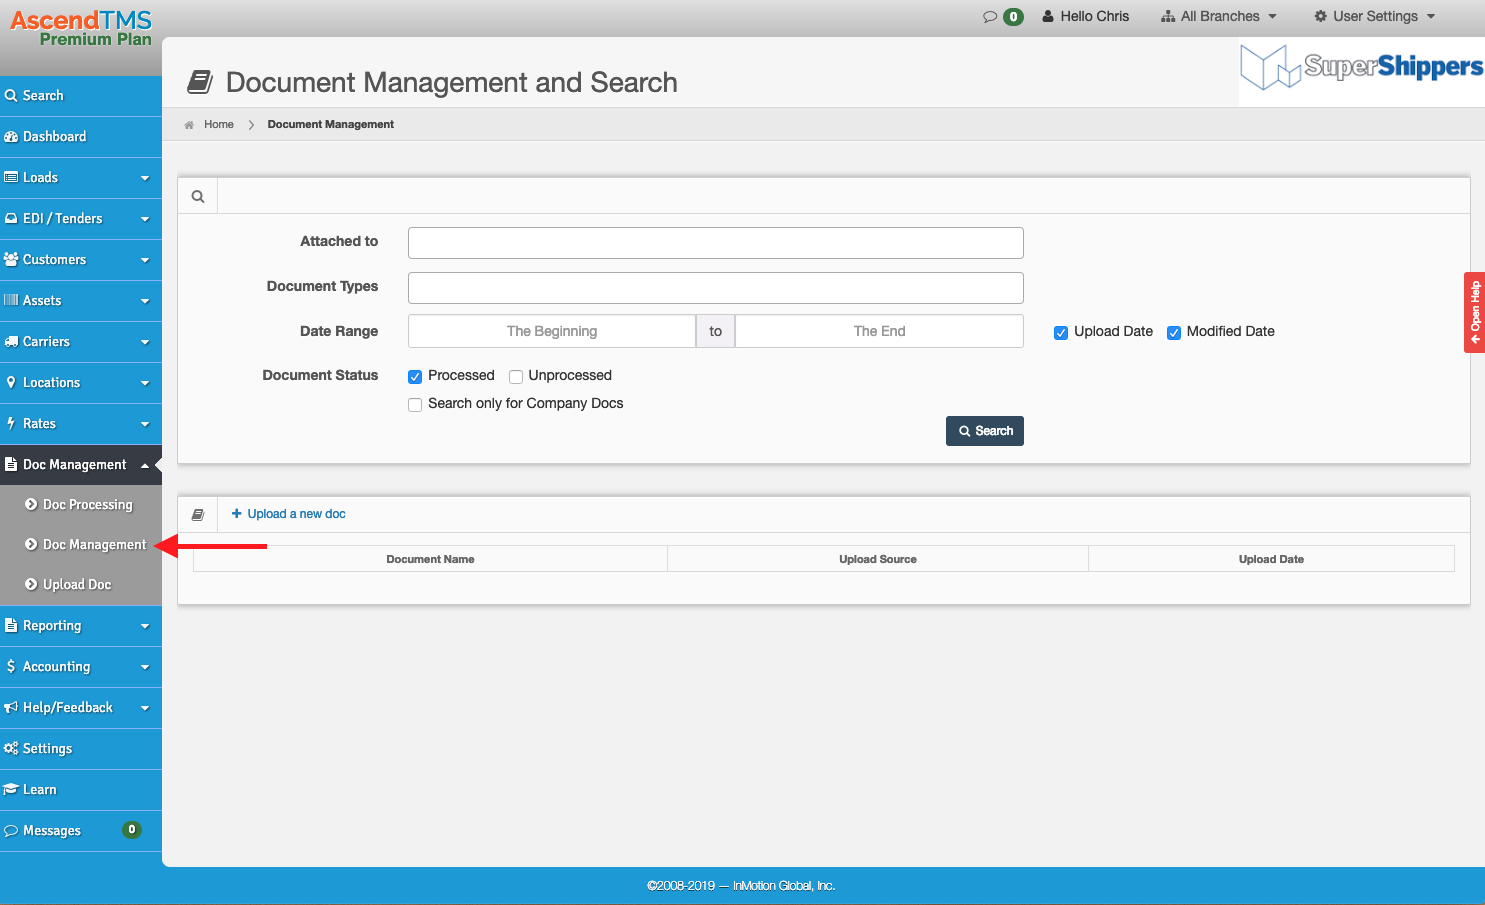
To navigate to Doc Management, click on 'Doc Management' under the Doc Management menu item.
When you first come to this screen you will not see any documents even if you have them uploaded. This is because you need to fill out some of the search criteria fields and then click on the "Search" button. Or, simply click the "Search" button to display every processed document. Please see below.
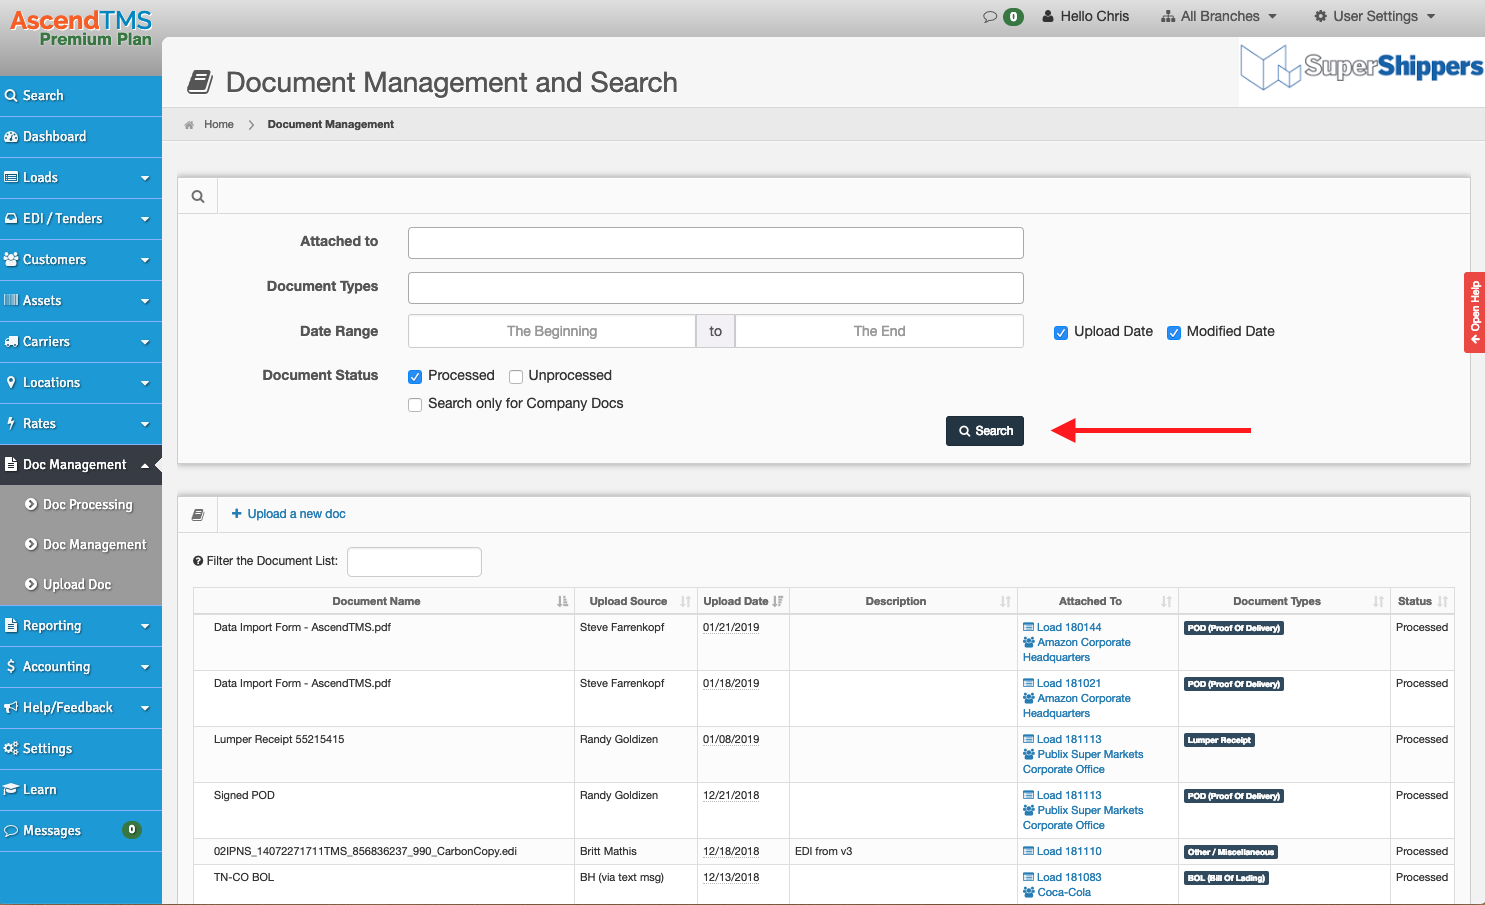
Below are some of the search fields explained. You can select as many of these fields to narrow your search down as much as you would like prior to clicking on the "Search" button.
Attached to: When documents are uploaded, they can be attached to entities like Loads, Customers, Locations, Carriers and Assets. In this field, you can search for documents that have been attached to these types of entities. Just click on the field and a drop-down list will appear. Simply type in a Customer (or other entity name) and hit Enter to select it. If you click the "Search" button at this point, it will search for documents attached to the entity you selected.
Document Types: Document Types help categorize the documents you process or upload. These include types like POD, BOL, Driver Load Confirmation (Signed), etc. To search by these, simply click on this field and select the Document Type from the list.
Date Range: There are two date types you can search by. Upload Date, which is the date the document was uploaded. And the Modified Date, which is the date the last time the document was saved. You can search by one, or the other, or both. Simply click on the checkbox next to the corresponding date type to choose.
Document Status: There are 3 document statuses you can search by: Processed, Unprocessed, and Company Docs. A Processed document is one that has been attached to an entity like a Load, Customer, Carrier, Asset, etc. AND has at least one Document Type assigned to it. An Unprocessed Document is one that only has been attached to an entity OR has been assigned a Document Type OR has neither one of these done. A Company Document typically isn't attached to anything but rather is marked as a Company Document during the processing process or uploading process.
Now that you have searched for your documents, you should have a list of them visible to you. You can now perform one of these actions: Edit document, Download Doc, Email Doc(s) or Delete Doc once you have selected a document.
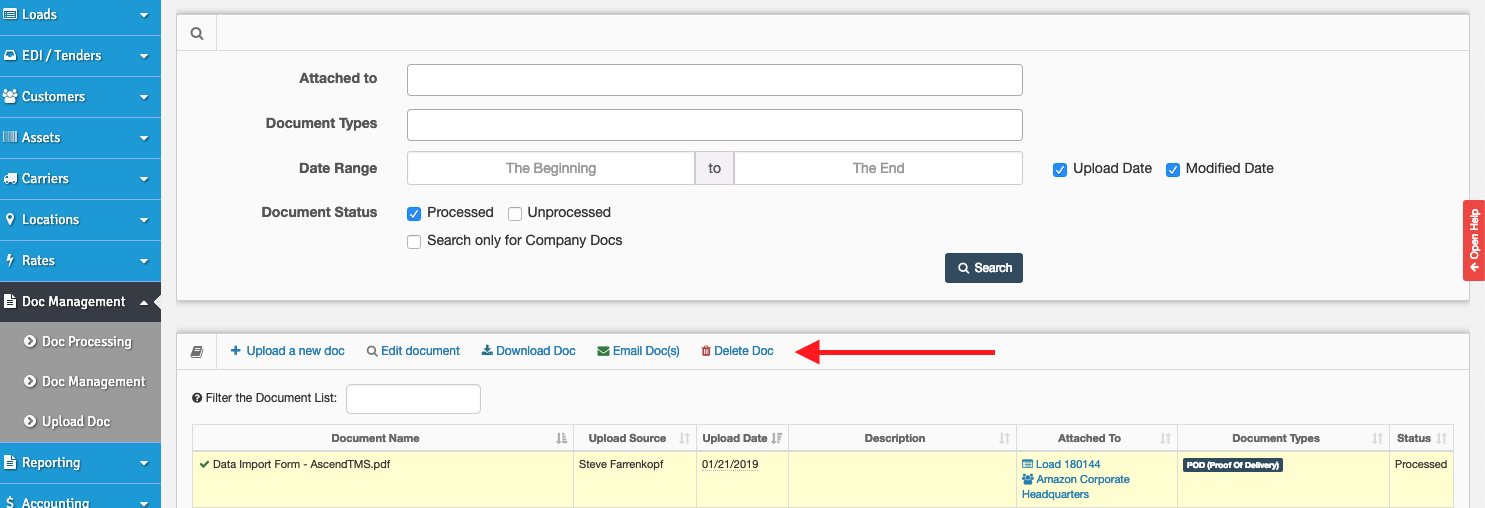
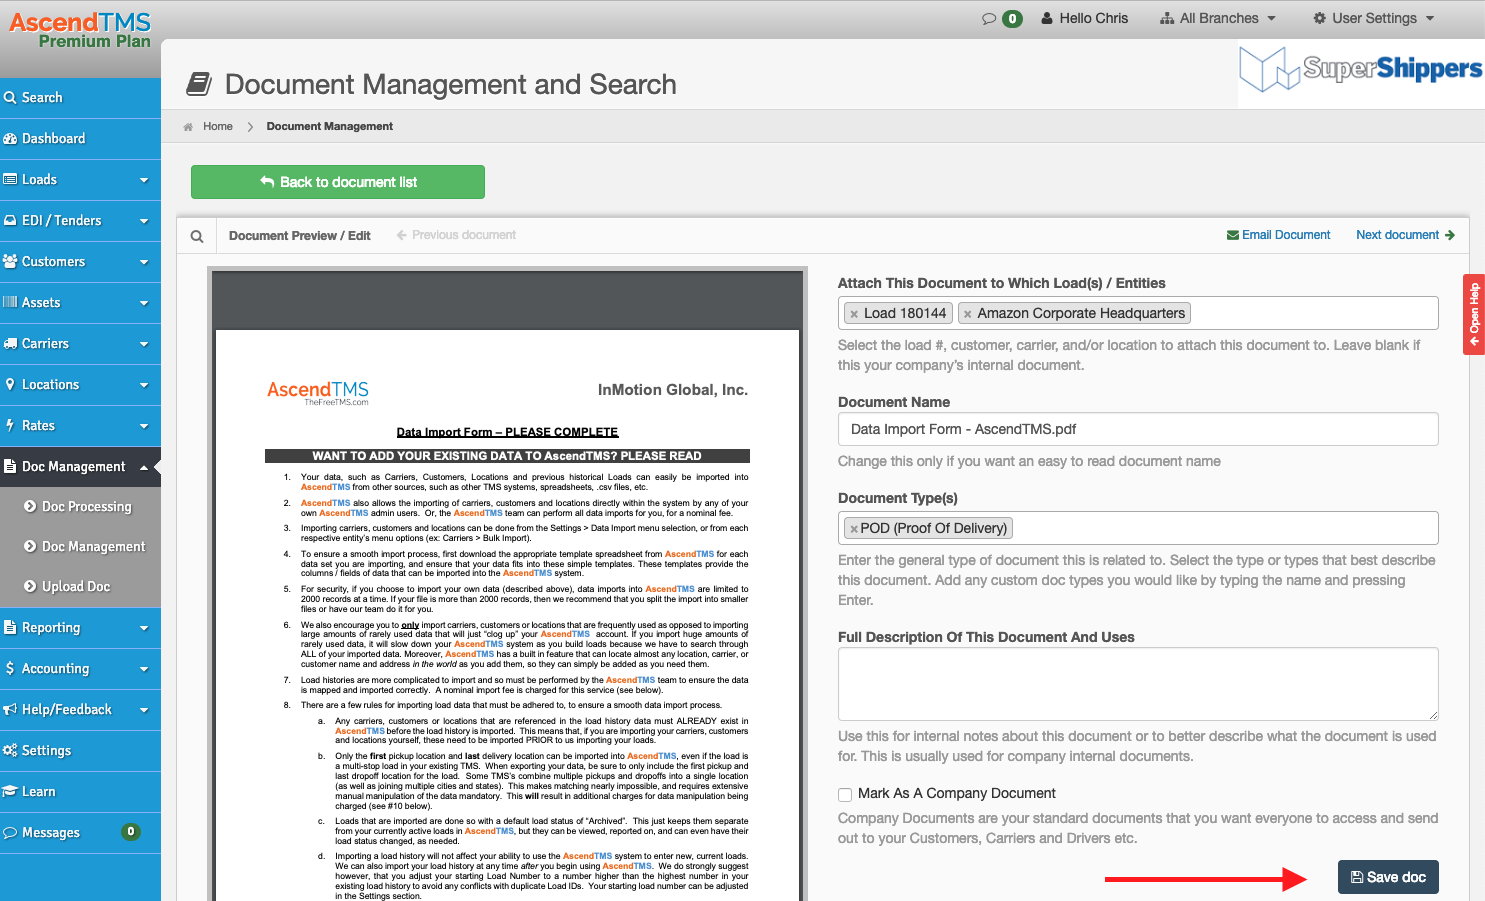
Editing a document allows you to add or modify items in a number of ways. For instance, what it is attached to, the document name, the document type, full description, or mark it as a company document. You can also preview the document from the editing page as well.
To edit a document:
1. After selecting the document, click on the "Edit Document" button.

2. Update any of the fields you would like to.
3. Click on the "Save doc" button.
You can always download any of your uploaded documents from here as well.
To download a document:
1. After selecting the document, click on the "Download Doc" button.
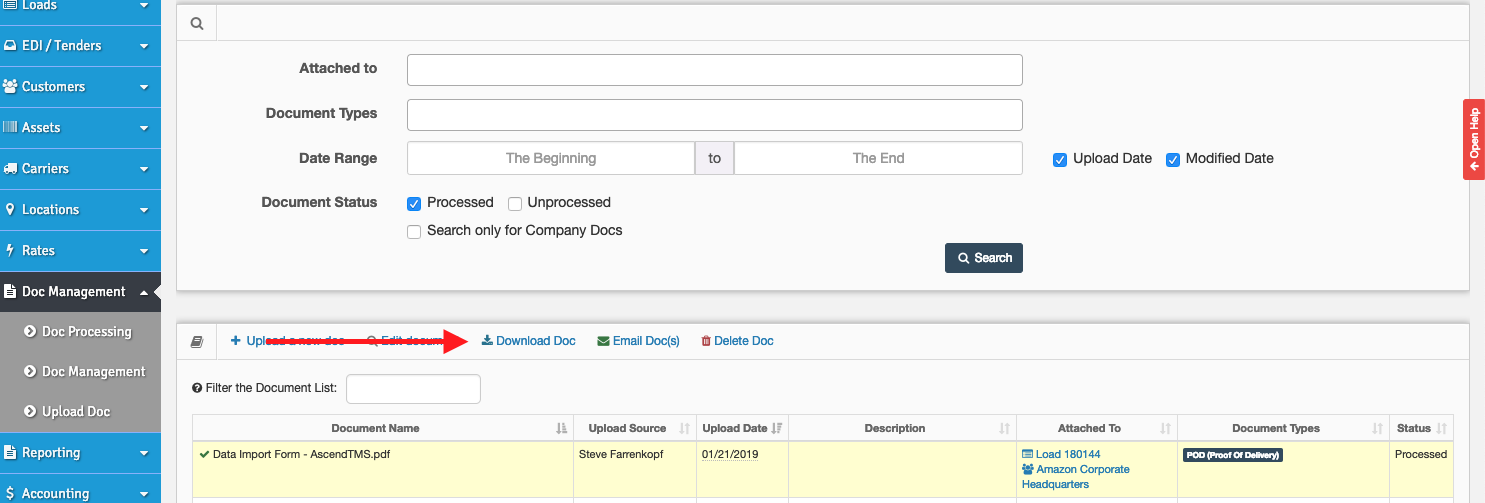
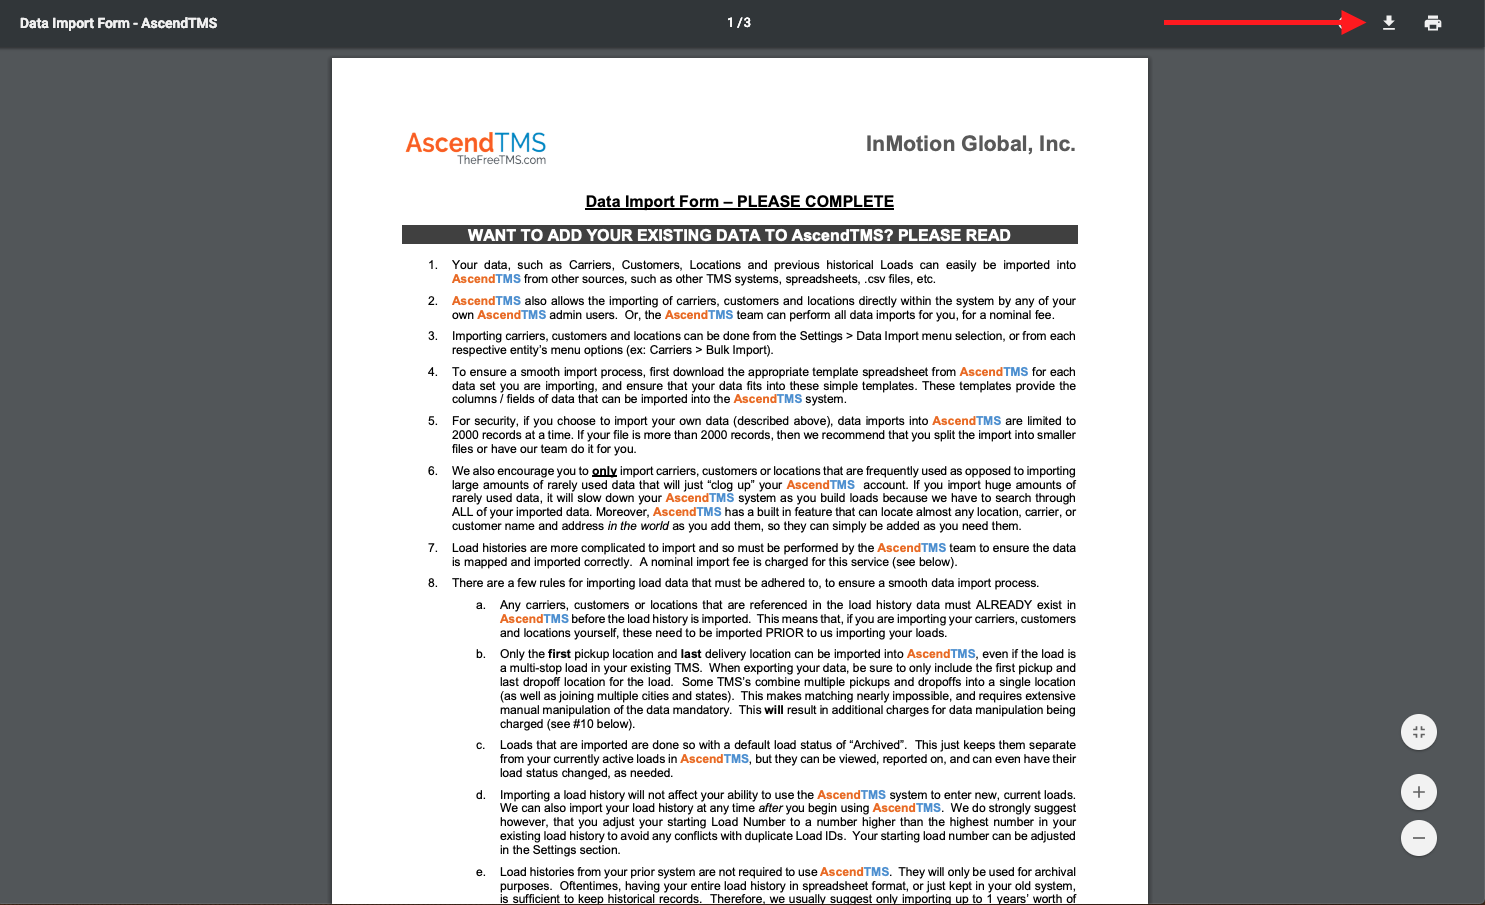
2. This opens a preview of the document. To download, just click on the download icon in the upper right corner. (If you do not see this icon, just move your mouse to the top of the page and it should appear.)
3. Your document was just downloaded to your default download folder on your computer or mobile device.
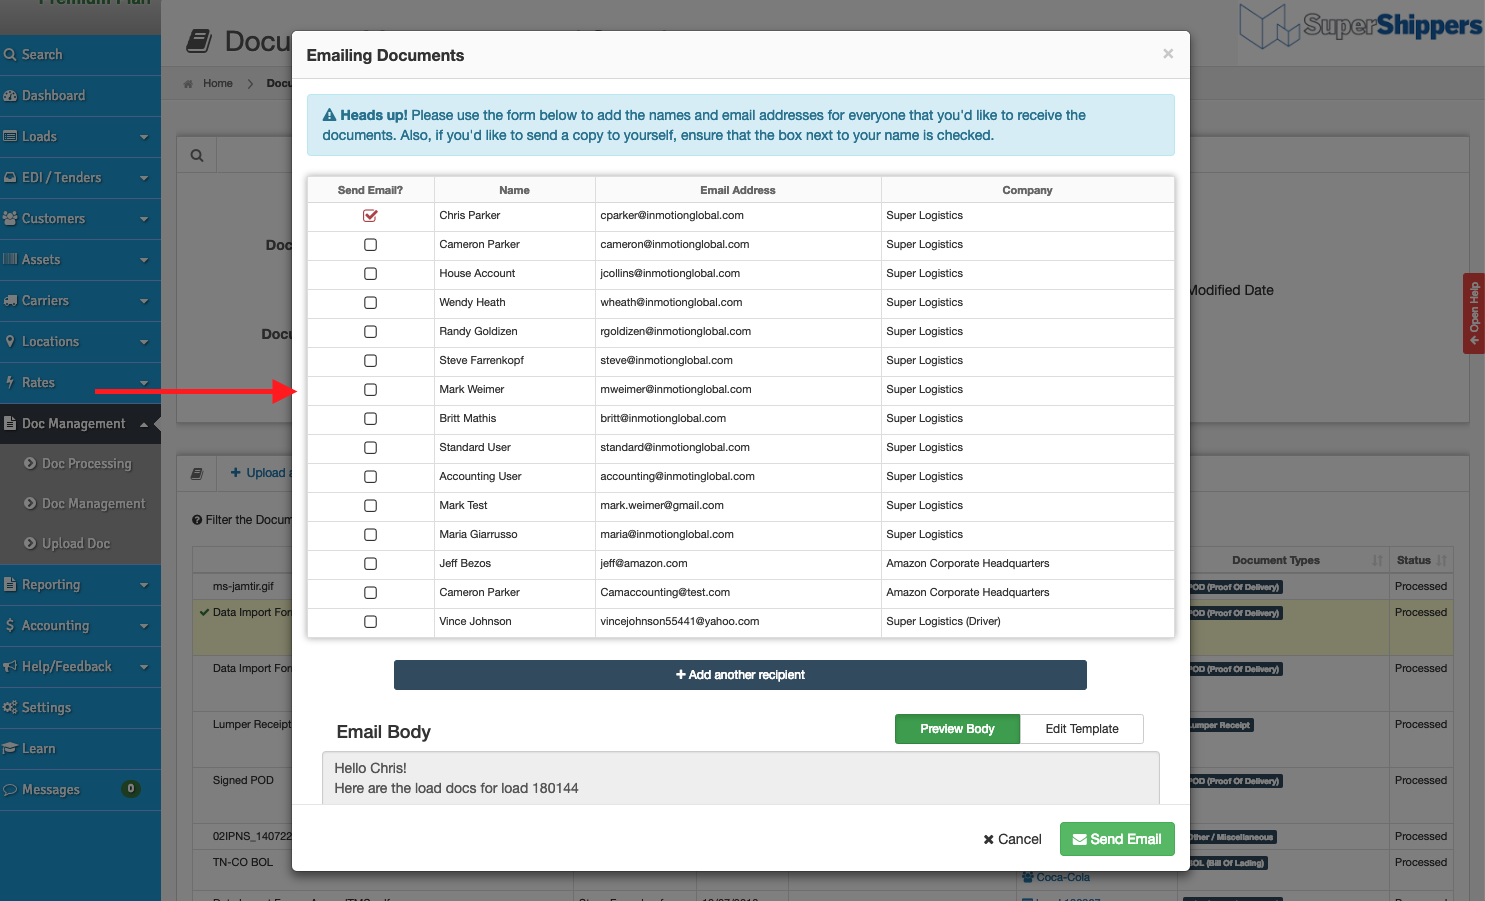
Sometimes you may want to email a document directly from the Document Management screen.
To Email a document:
1. After selecting the document, click on the "Email Doc(s)" button. (Note: You can select multiple documents and email them together)
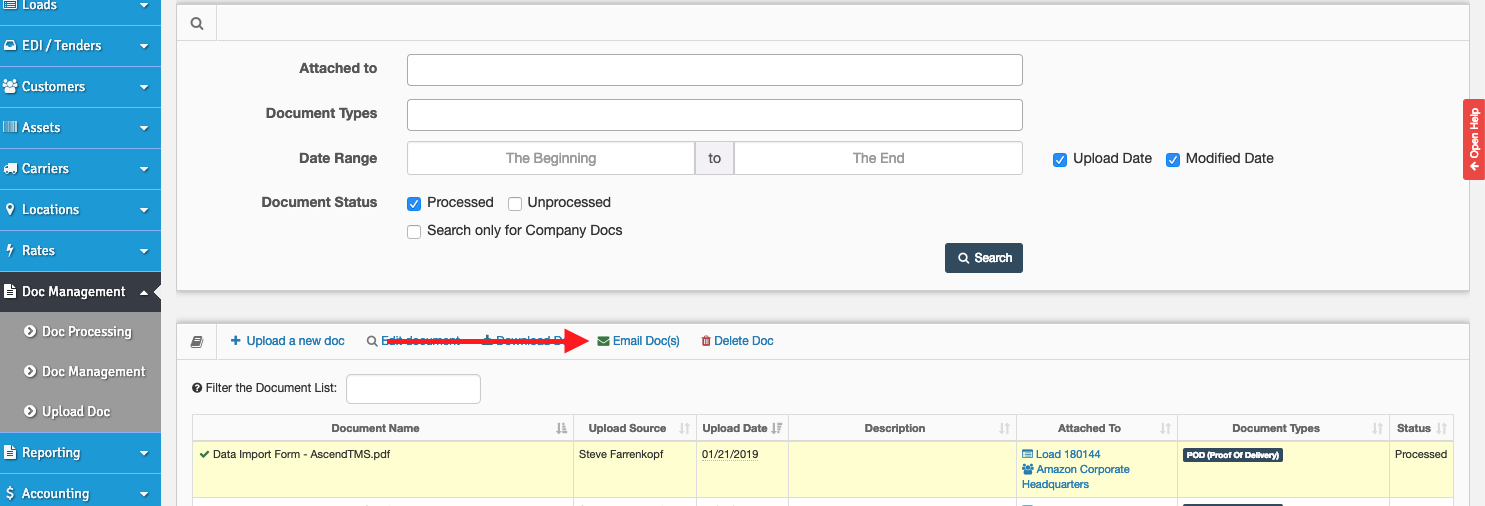
2. Select the recipient from the list. The list will always contain all of your users in AscendTMS, AND any contacts associated with the entities that the document is attached to. (Customers, Carriers, Locations, etc.)
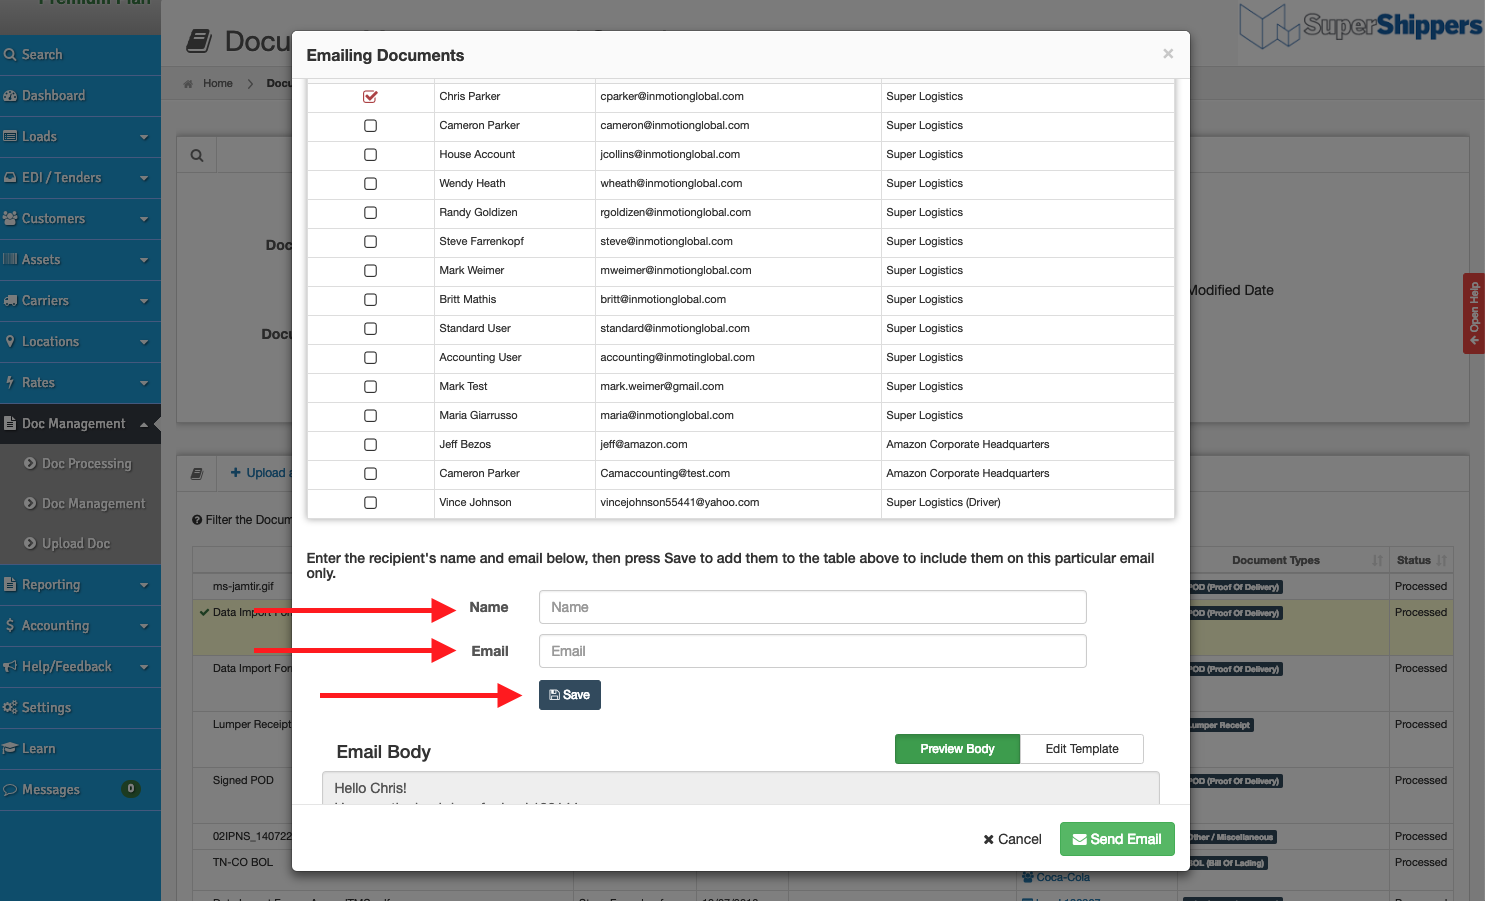
Or, you can click on "Add another recipient" if the person you would like to send it to isn't on the list. Please make sure to click the "Save" button after you add a new recipient. This will add that additional recipient to the list below so that you may select them.

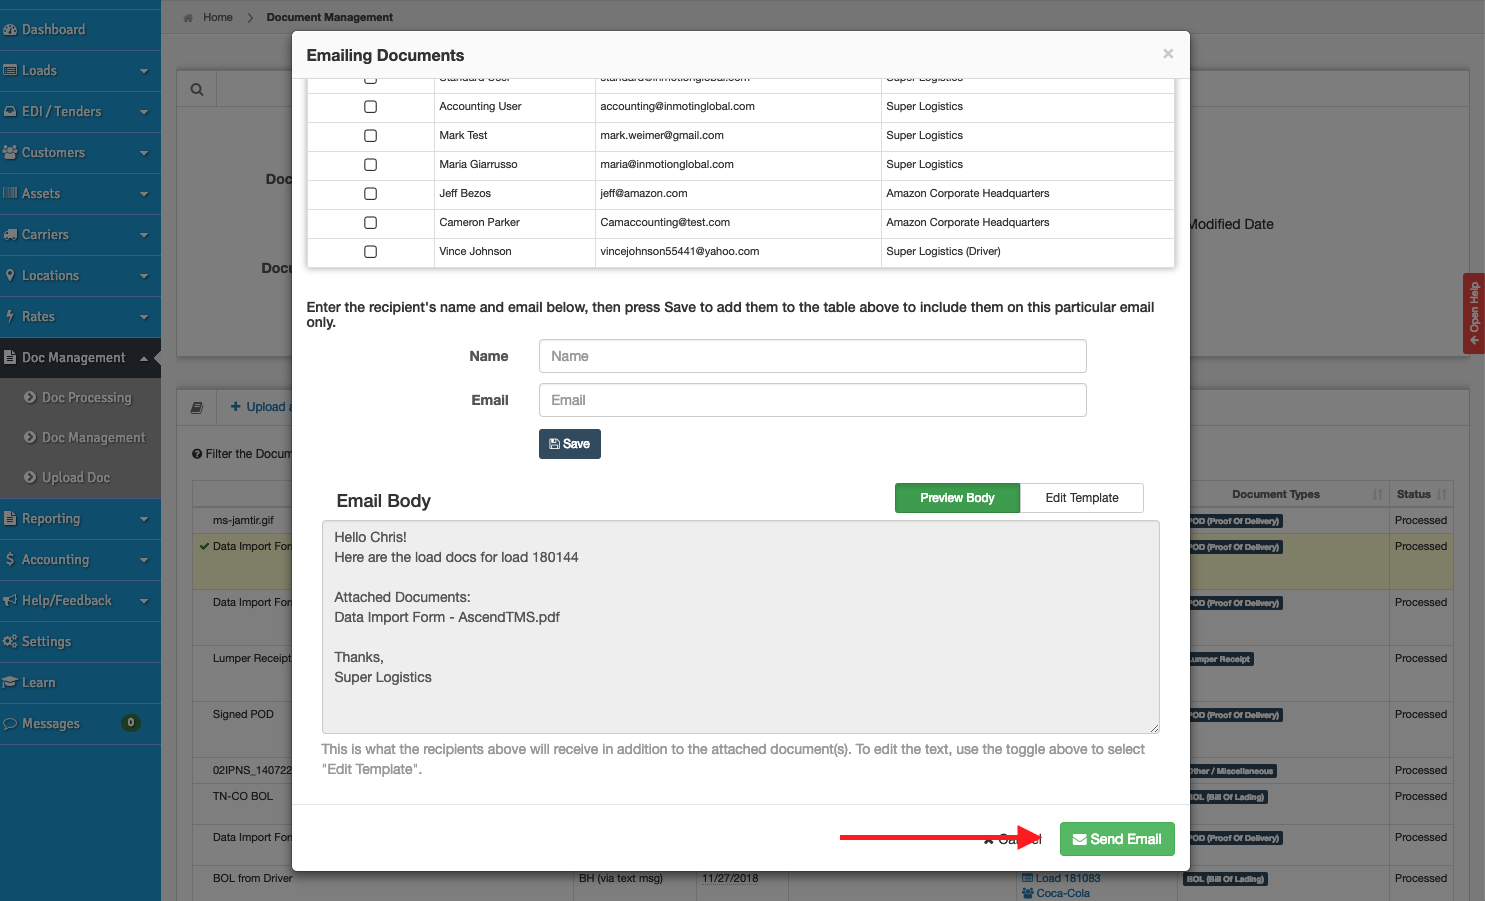
3. You can edit the Email Body if you would like to.
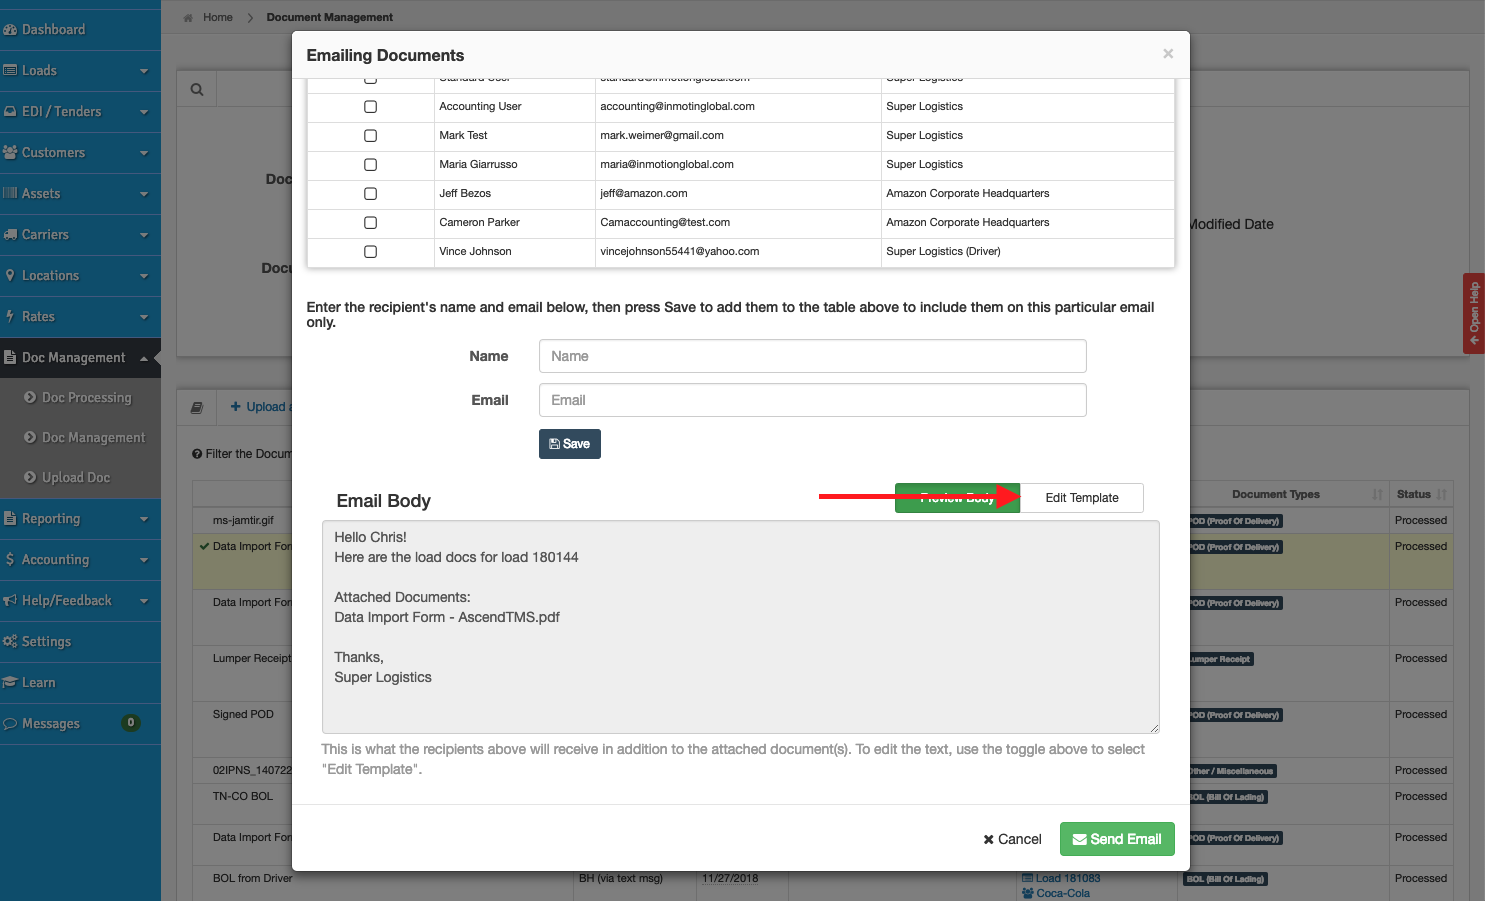
4. Click on the "Send Email" button when you are ready to do so.
You can also delete a document that has been uploaded if necessary. Please note: You cannot delete a document that you received via text from a driver at this time.
To delete a document:
1. After selecting the document, click on the "Delete Doc" button.
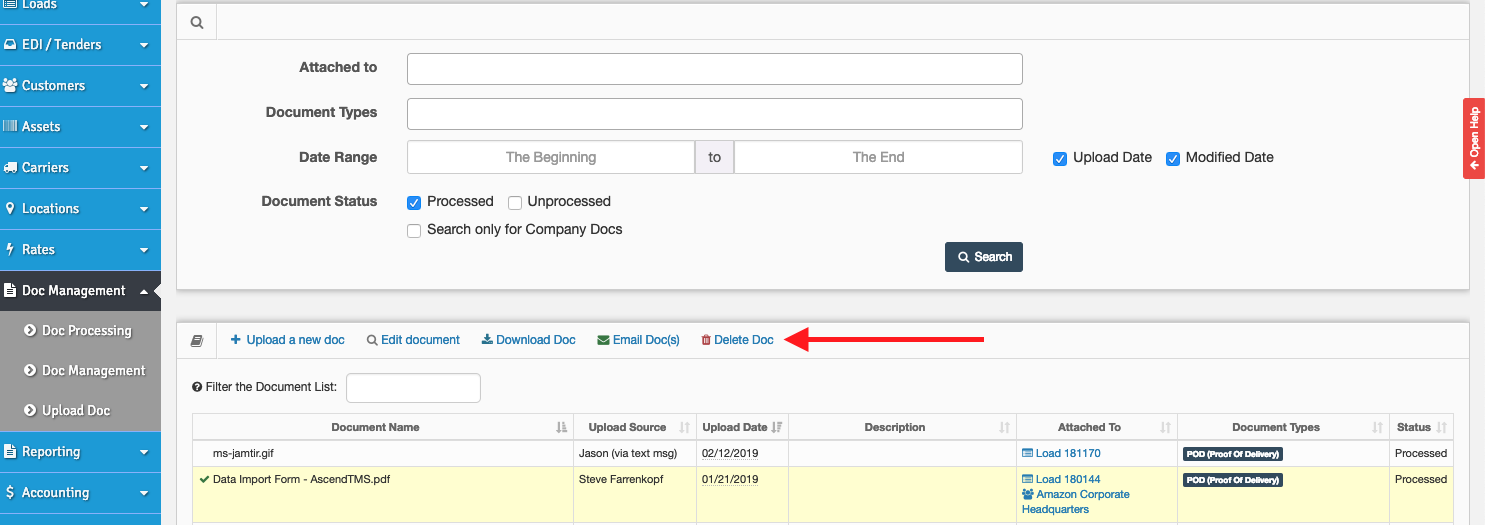
2. The document has now been deleted.
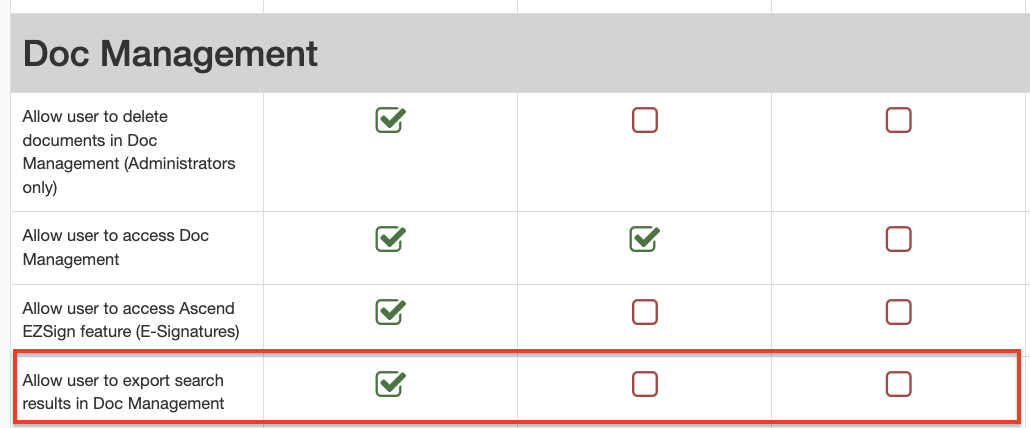
Export Report:
Once you set your criteria, you can now export your results by clicking Export Report as shown below.

There is also a Permission that can be set if Administration does not want users to be able to export. Just go to Permissions then Doc Management and you will see the permission.
Chris
Comments