By integrating AscendTMS with MacroPoint, you can improve visibility, reduce check calls, and enhance your efficiency. Follow these steps to set up and manage your MacroPoint integration seamlessly.
To start the setup process, head over to the Settings tab scroll down to Ekklesia and Billing details. Next, click "Load Tracking Settings". There is where you will see the option to start the integration with Macropoint.
Integration Steps
Follow these steps to successfully integrate Descartes MacroPoint with AscendTMS:
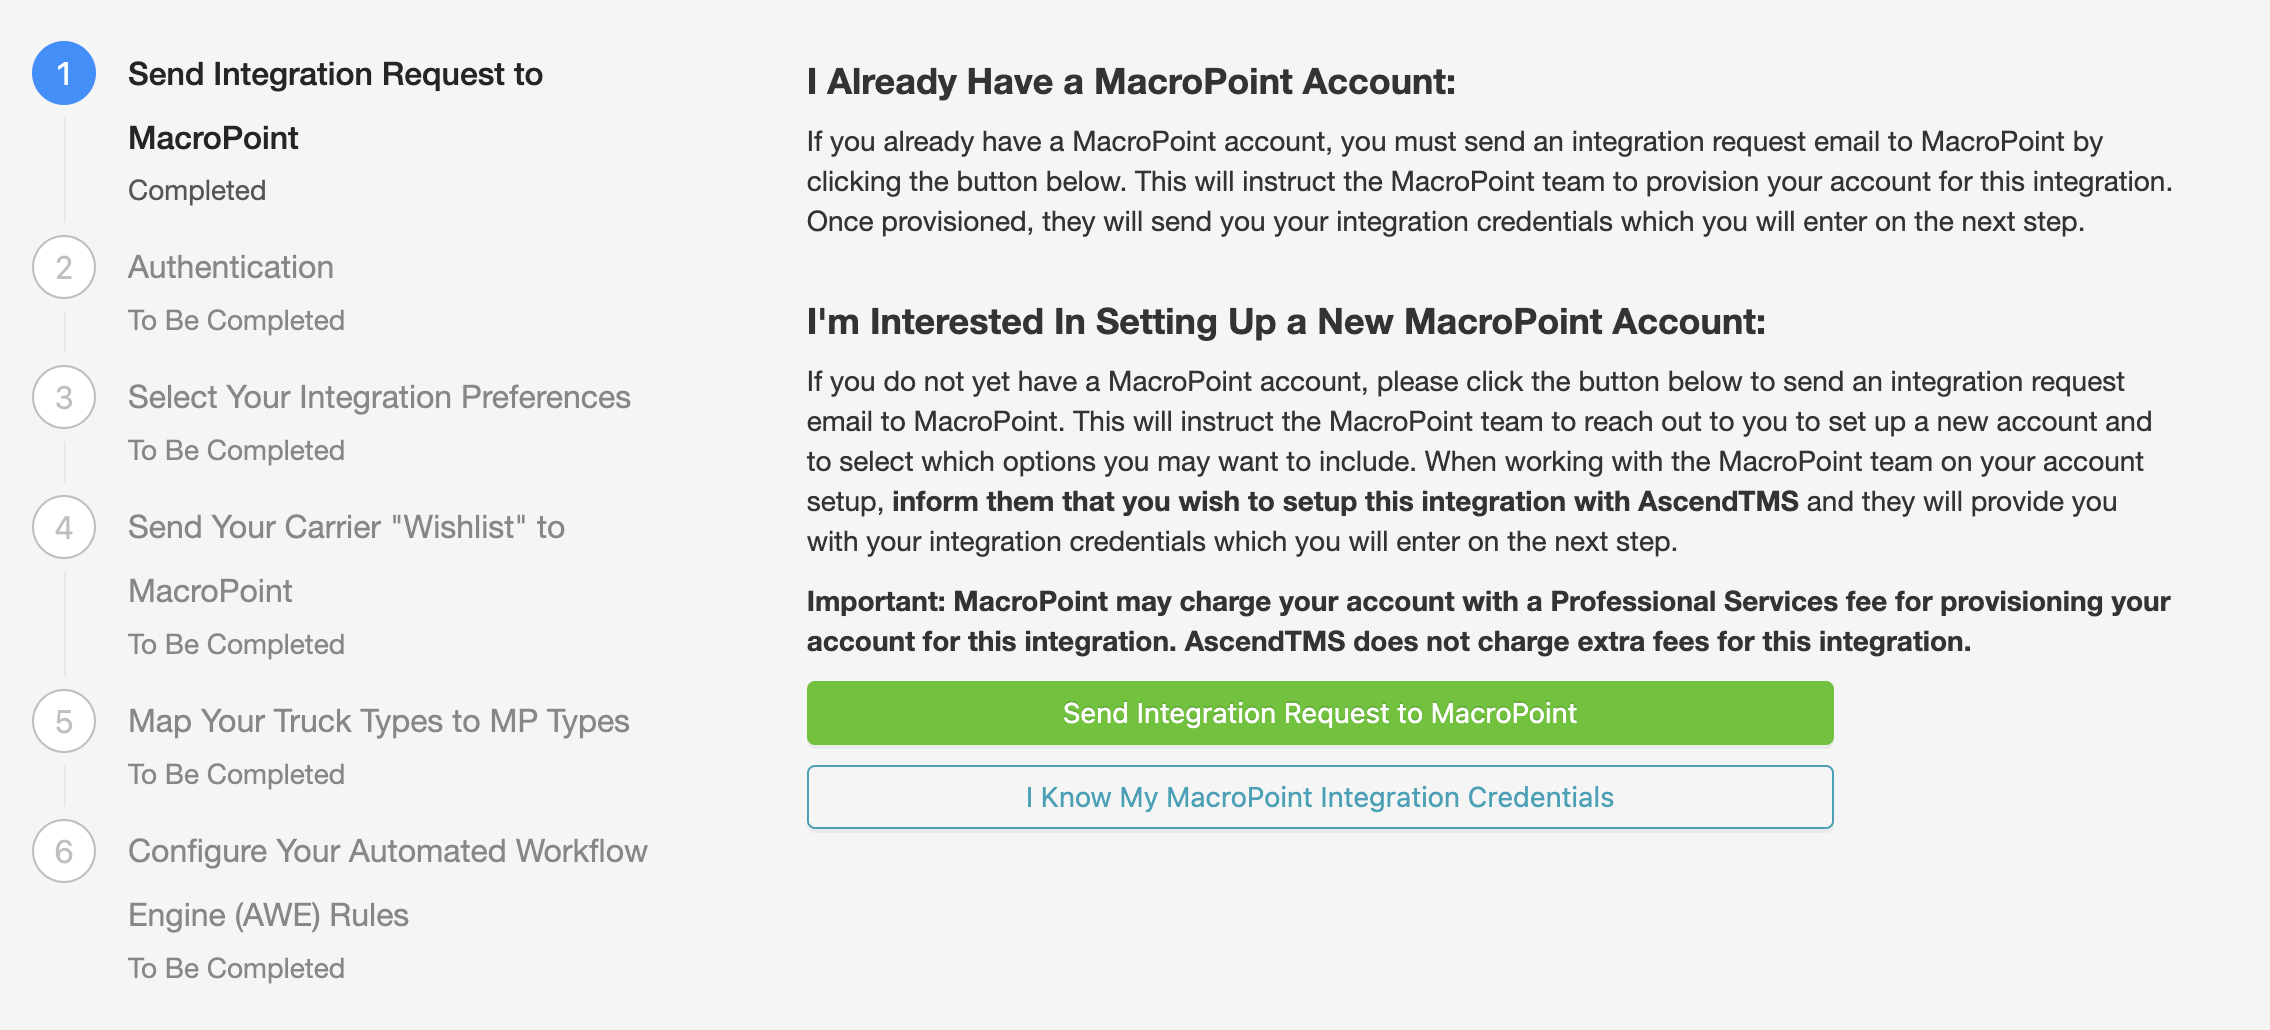
1. Send Integration Request to MacroPoint
To initiate the integration, you must request access from MacroPoint. This step involves contacting MacroPoint’s support team or your account representative to enable the integration for your AscendTMS account. You will see the below options, and you can then choose which applies to you:
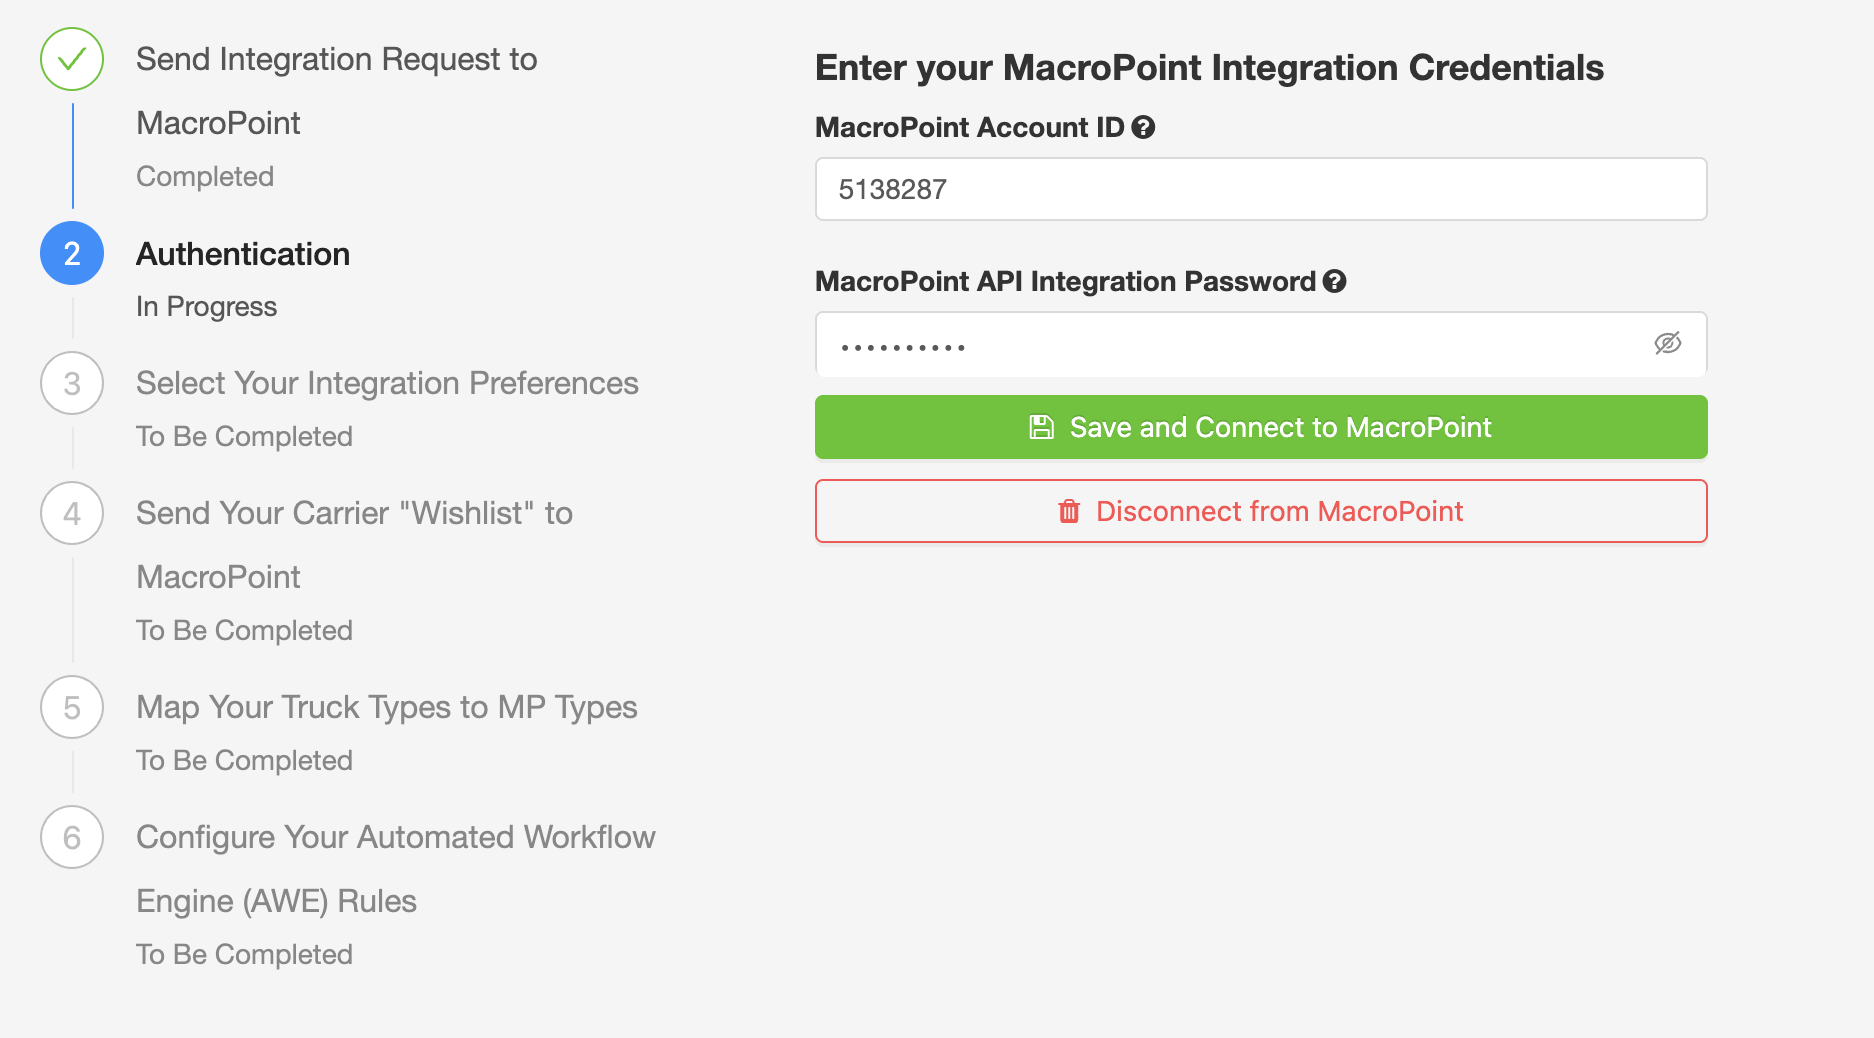
2. Authentication
Once MacroPoint has processed your request, you will need to authenticate your account. MacroPoint will provide authentication credentials, which need to be entered into AscendTMS to establish a secure connection.
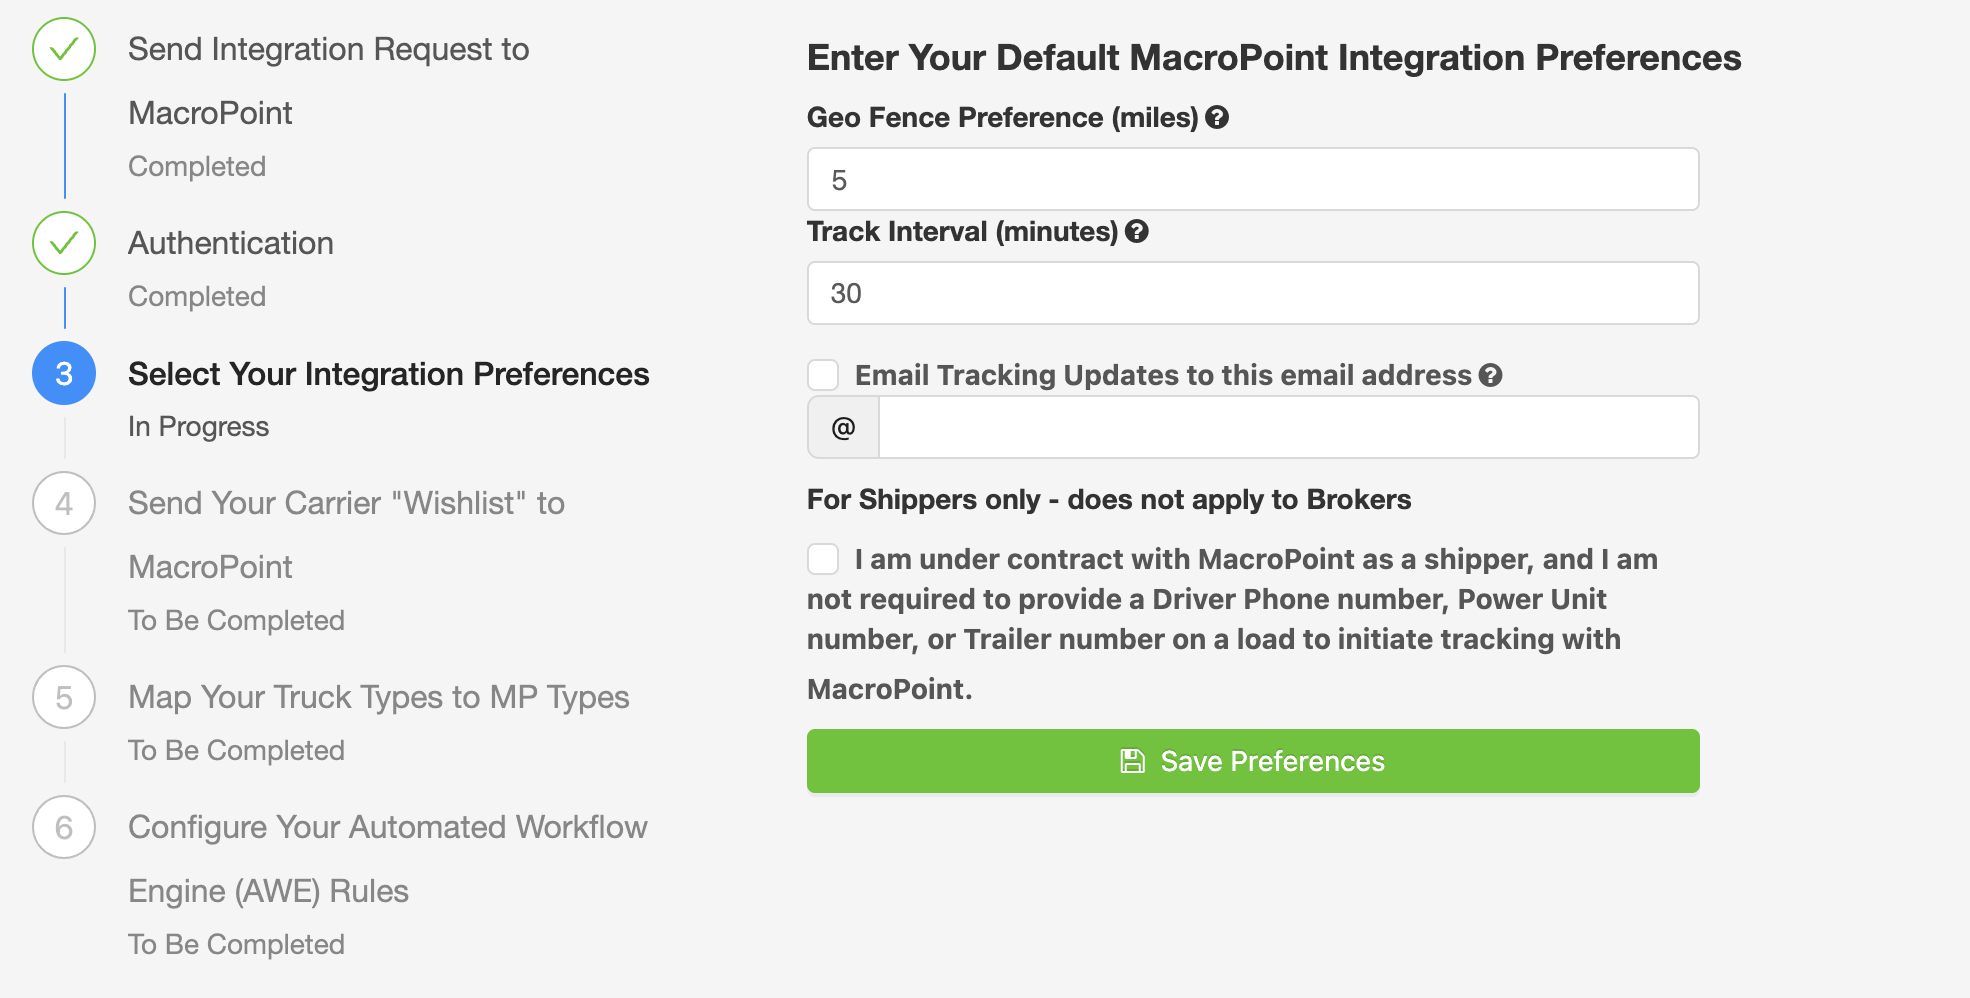
3. Select Your Integration Preferences
After authentication, configure your integration preferences in AscendTMS. This includes selecting selecting your geo fence preferences, the tracking interval, and which email you would like tracking updates sent to. If you are a shipper, you will tick the box under the area that says "For Shippers only", as seen in the below screenshot:
4. Send Your Carrier "Wishlist" to MacroPoint
To ensure proper tracking coverage, provide MacroPoint with a list of carriers you work with. This step helps them match your preferred carriers with their existing network and ensures seamless visibility across all your shipments.
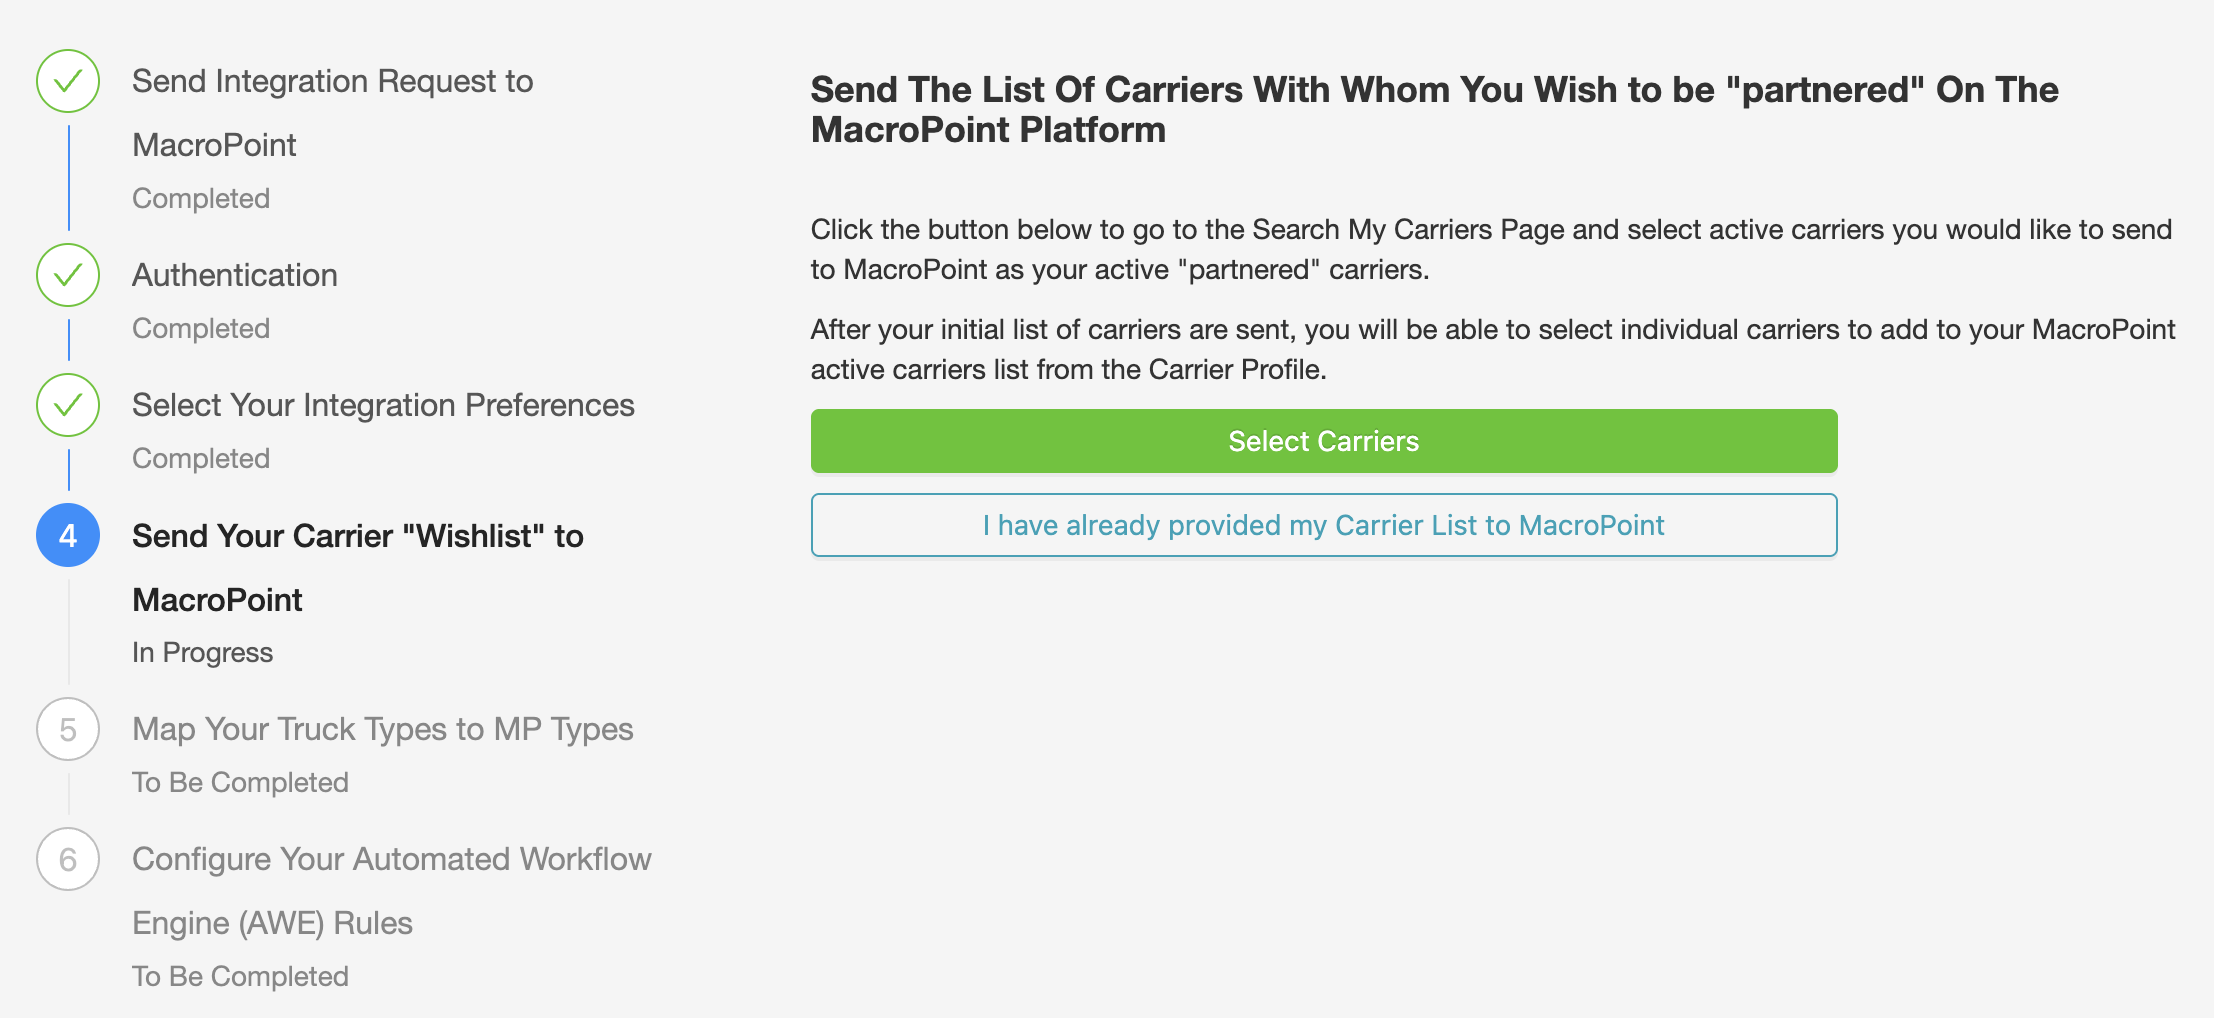
If you click the "Select Carriers" option, you will be directed to the Search My Carriers Screen, which will allow you to search your entire carrier list based on the criteria you add into the search fields.
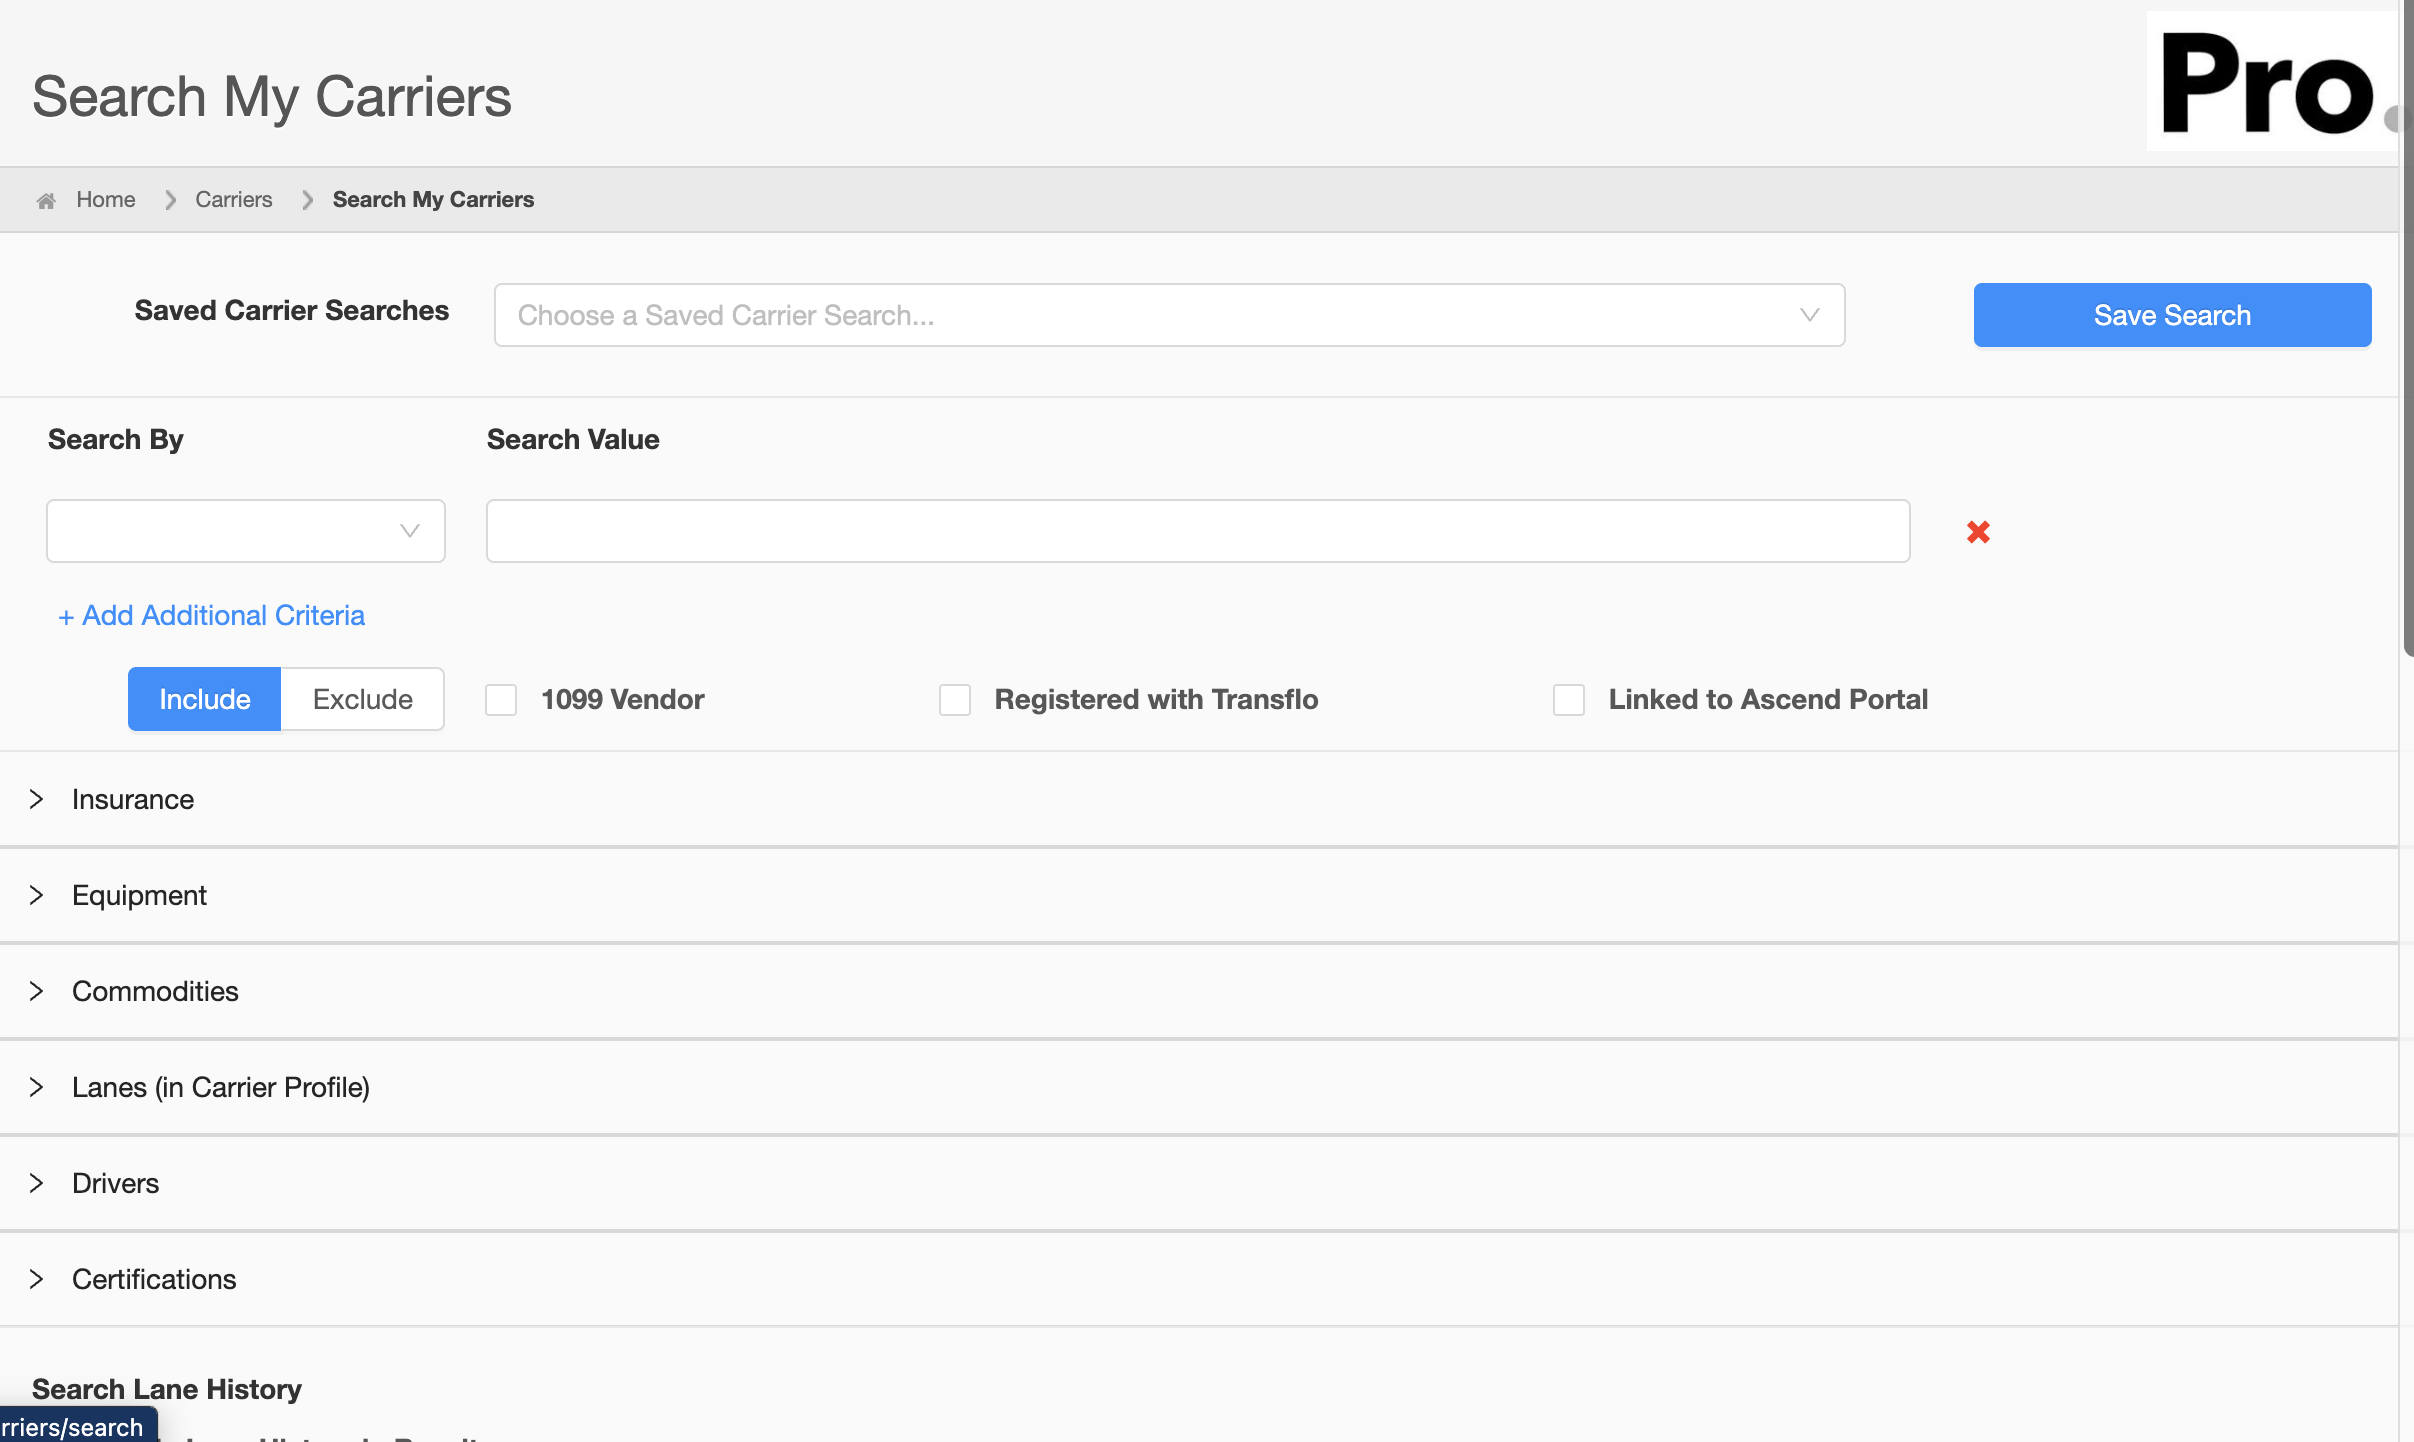
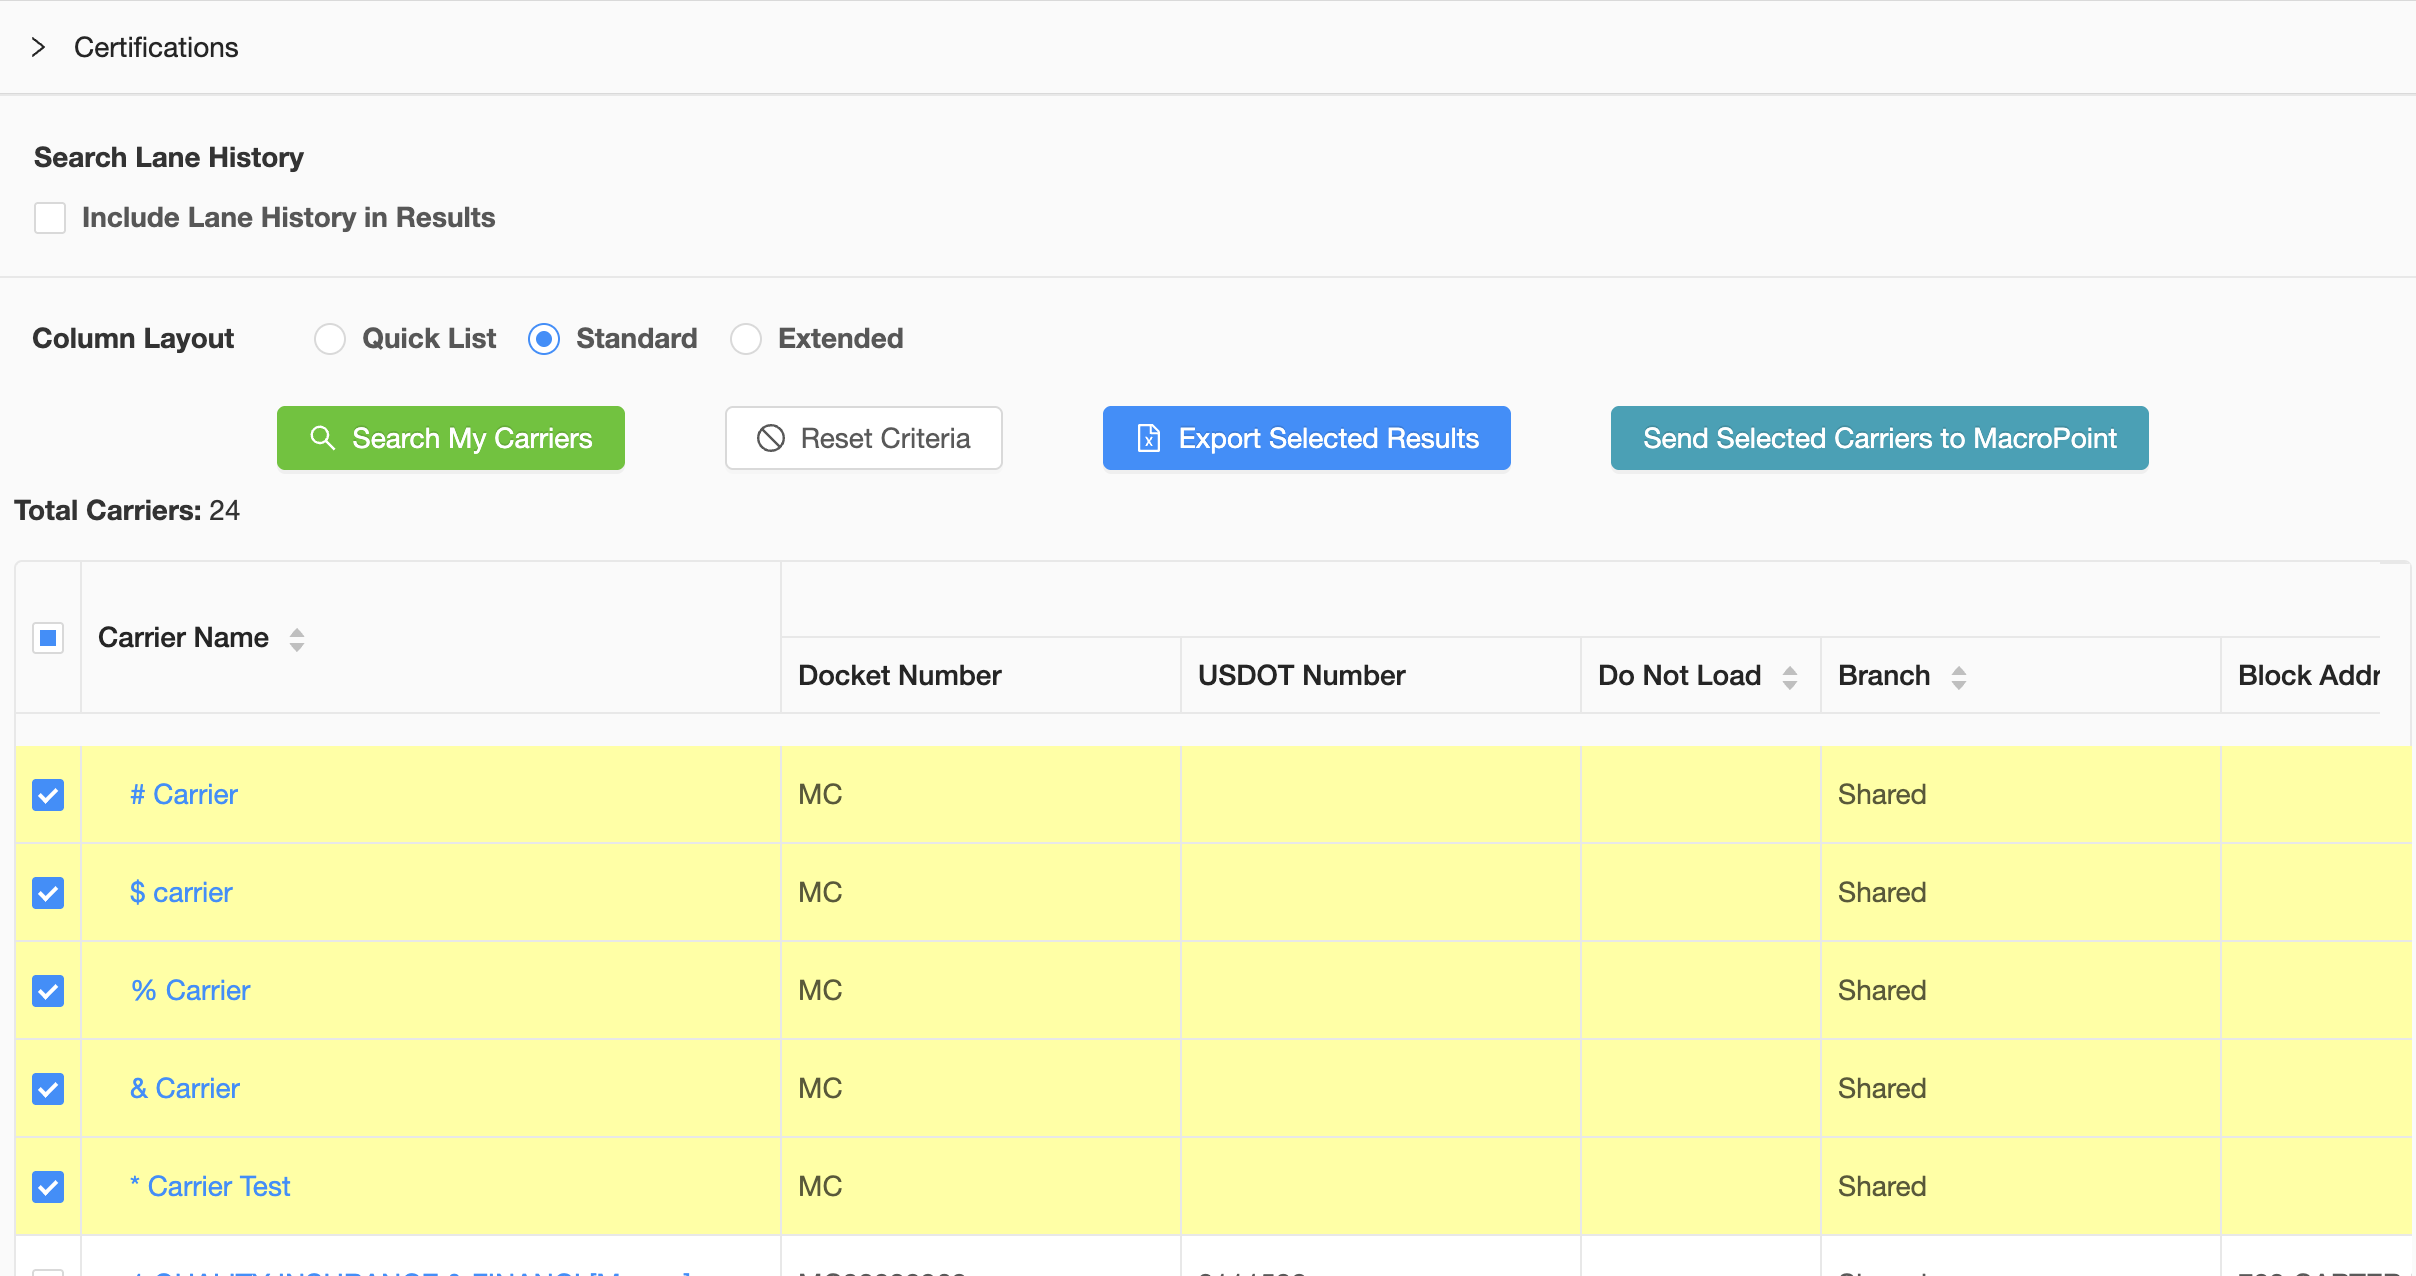
Once you have the results, you can select which carriers you would like to send to MacroPoint by checking the boxes next to the carrier names, and then clicking the "Send Selected Carriers to MacroPoint" button.
Once the selected Carriers have been sent, you will get a "Success" message, like the one seen below:

After MacroPoint is completely integrated and you have sent your carrier wishlist , you will have a new "MacroPoint Active Carriers" Column on the carrier list page. This column will keep you up to date on which carriers are partnered with MacroPoint. The statuses are listed below:

The yellow clock means that the Carrier has been selected to be sent to MacroPoint and is in the queue awaiting to be sent.

The blue checkmark means that the Carrier has been sent to MacroPoint.

The green checkmark means that MacroPoint has confirmed that the carrier is in their Partnered List.
5. Map Your Truck Types to MacroPoint Types
For accurate tracking, you must map your truck types in AscendTMS to the corresponding MacroPoint vehicle types. This standardization allows the system to correctly interpret and categorize your fleet’s tracking data.
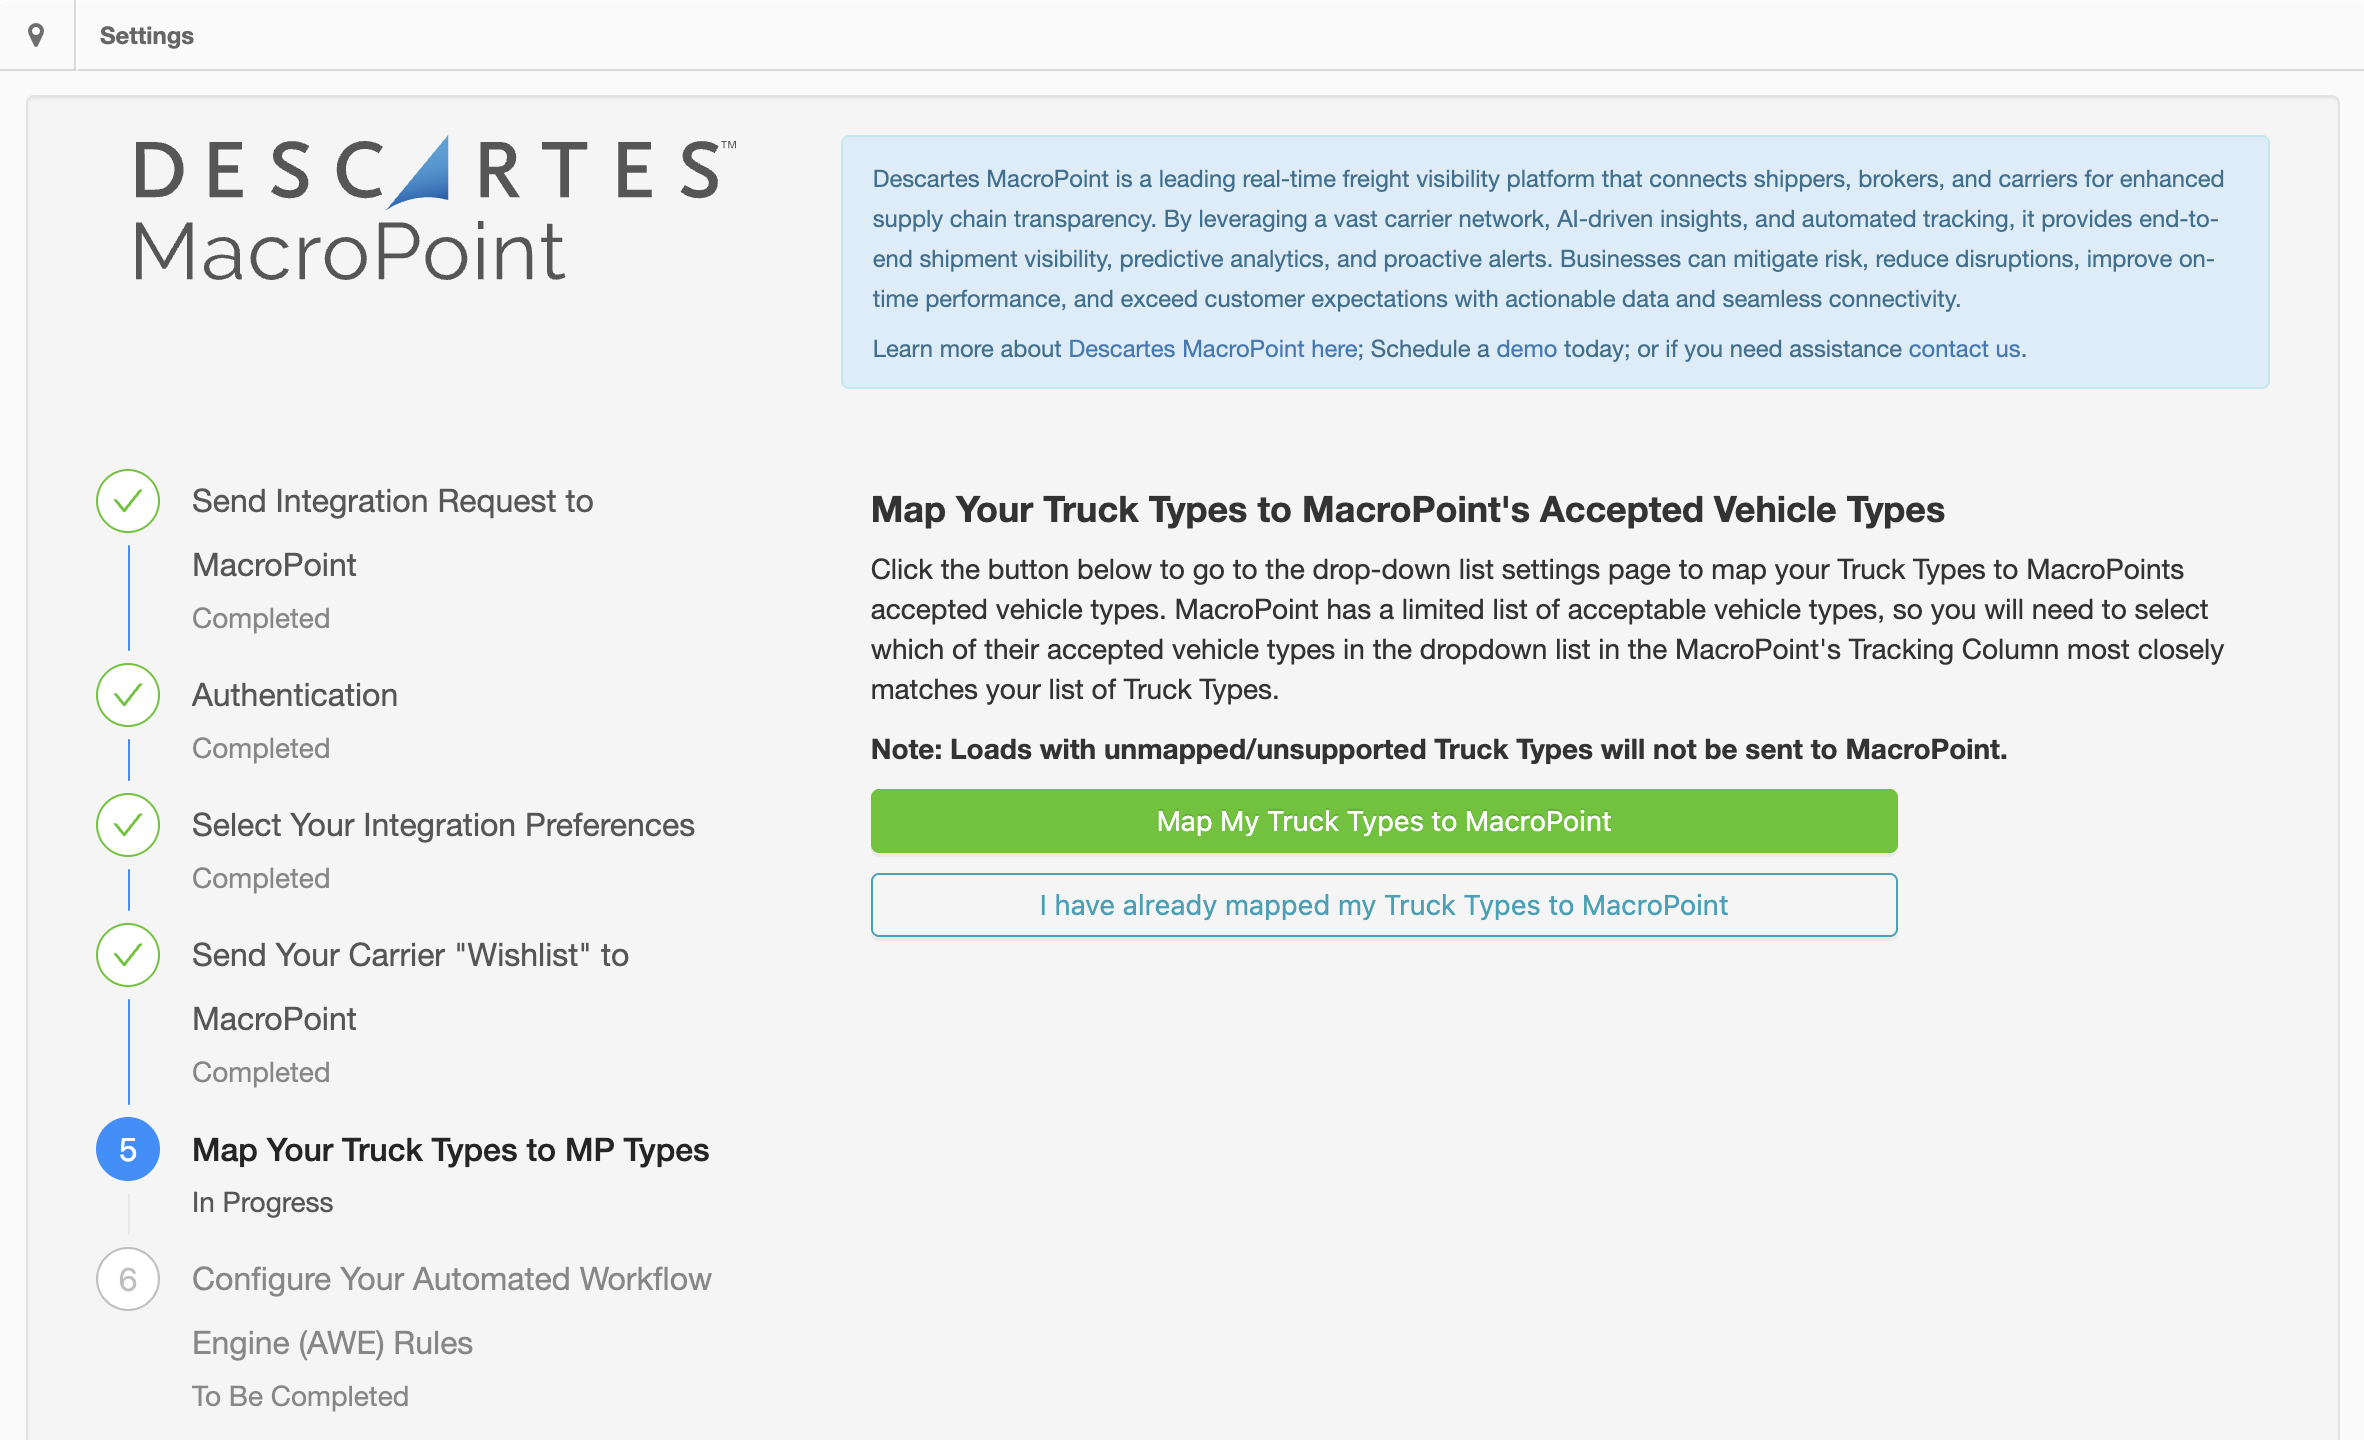
Once you click the green "Map My Truck Types to MacroPoint", you will be brought to the "Edit Company Lists" settings page where you can select which MacroPoint truck types go with the truck types already in your system.
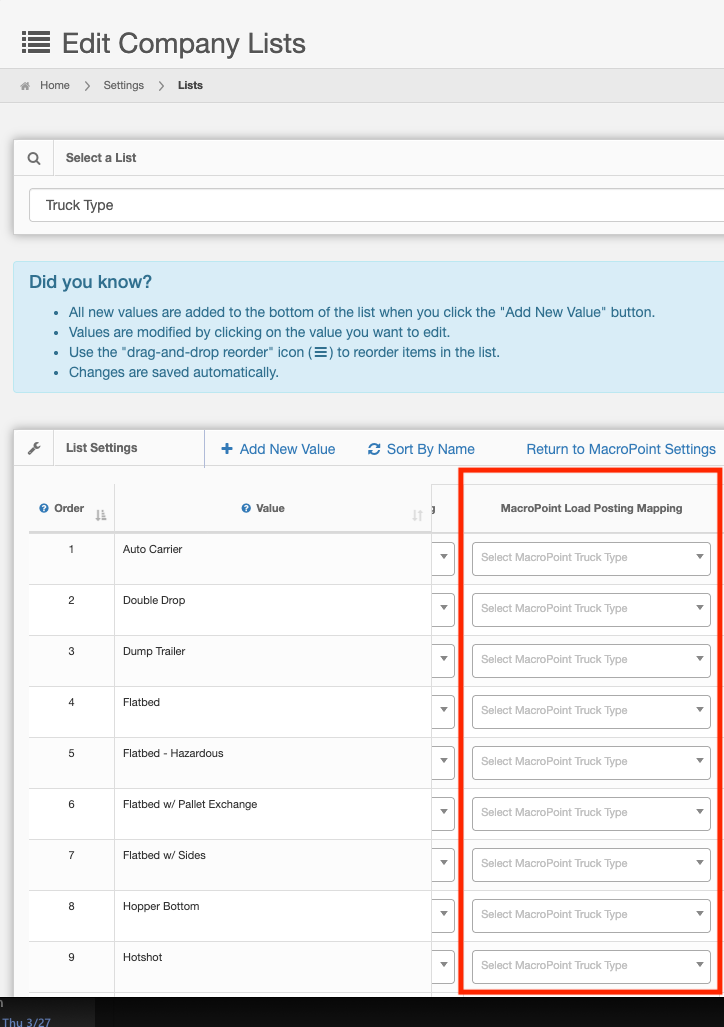
Once you have mapped the trucks correctly, you can return to the MacroPoint set up by clicking the button above the column that says "Return to MacroPoint Settings".
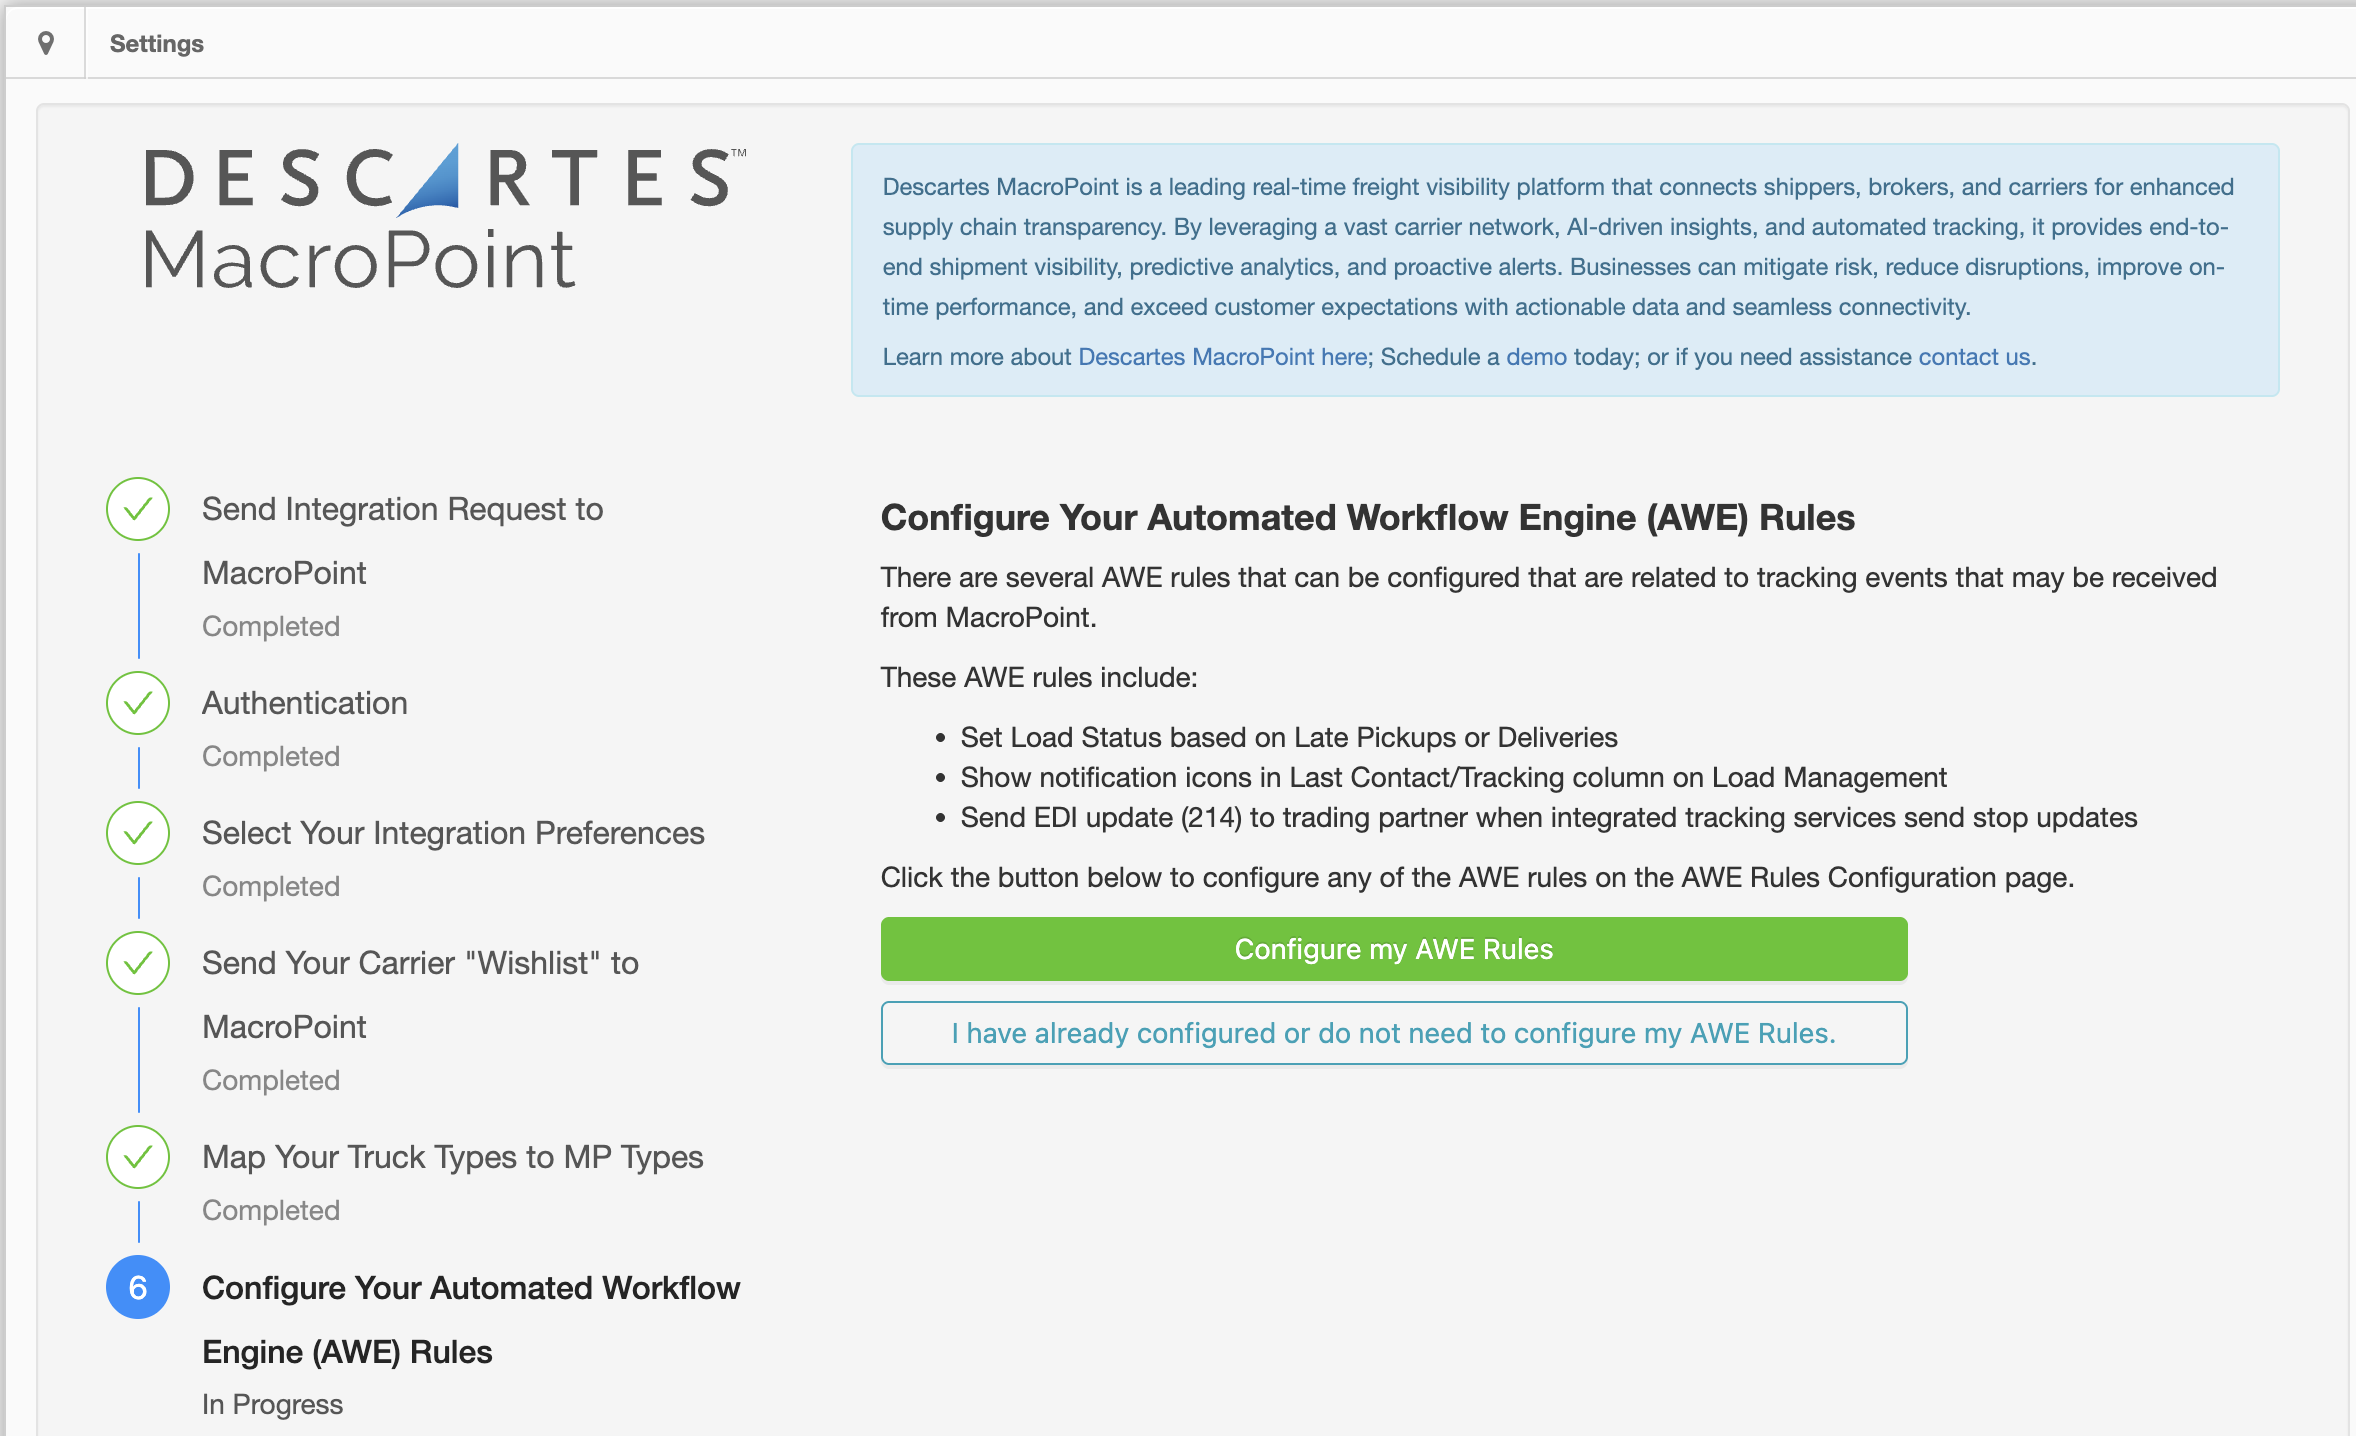
6. Configure Your Automated Workflow Engine (AWE) Rules
AscendTMS features an Automated Workflow Engine (AWE) that can be set up to trigger actions based on tracking data from MacroPoint. You are able to configure rules to automate processes, and can learn more about the AWE Rules HERE.
Tracking With MacroPoint
Once you are integrated and set up with MacroPoint, you will be able to track loads via the driver's phone or an ELD. As you are building the load, ensure that you add a carrier that has already been partnered with MacroPoint and also includes a driver with their phone number, a power unit, or trailer number with an ELD.
After you have a load built with a MacroPoint partnered carrier assigned, there are a few different places within Ascend to initiate tracking.
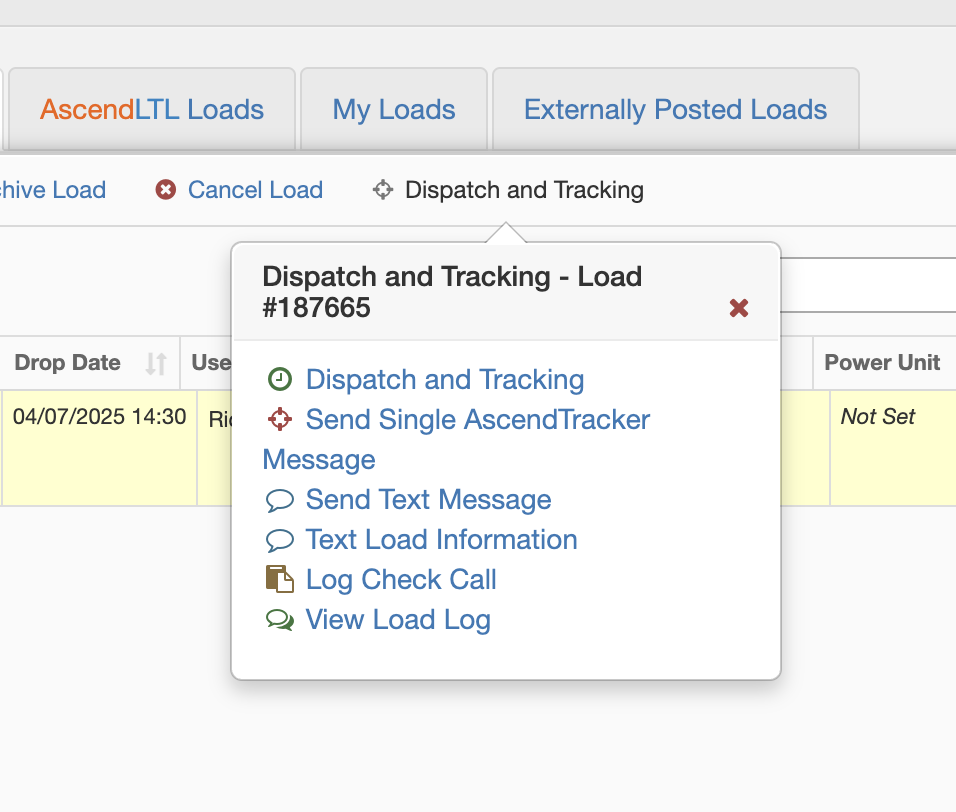
From Load Management, select the load, and click the "Dispatch and Tracking" option, and you will get the below menu:
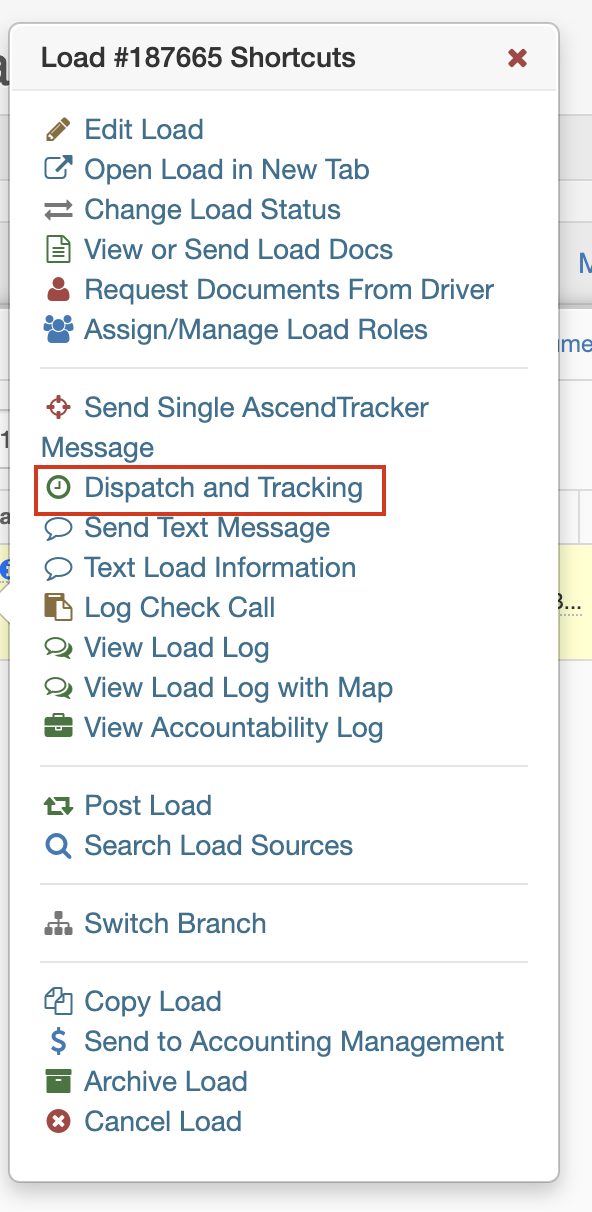
And from within the load on the Load Actions bar, here:

Whichever option you choose will bring you to the Dispatch and Tracking Modal (below) where you can confirm the load and tracking details, and then send the load to MacroPoint to enable tracking. The options to customize include Tracking Configurations and if the load has a temp-controlled truck with an ELD, the options to set temperature thresholds and tolerance. All listed can be seen in the screenshots below.
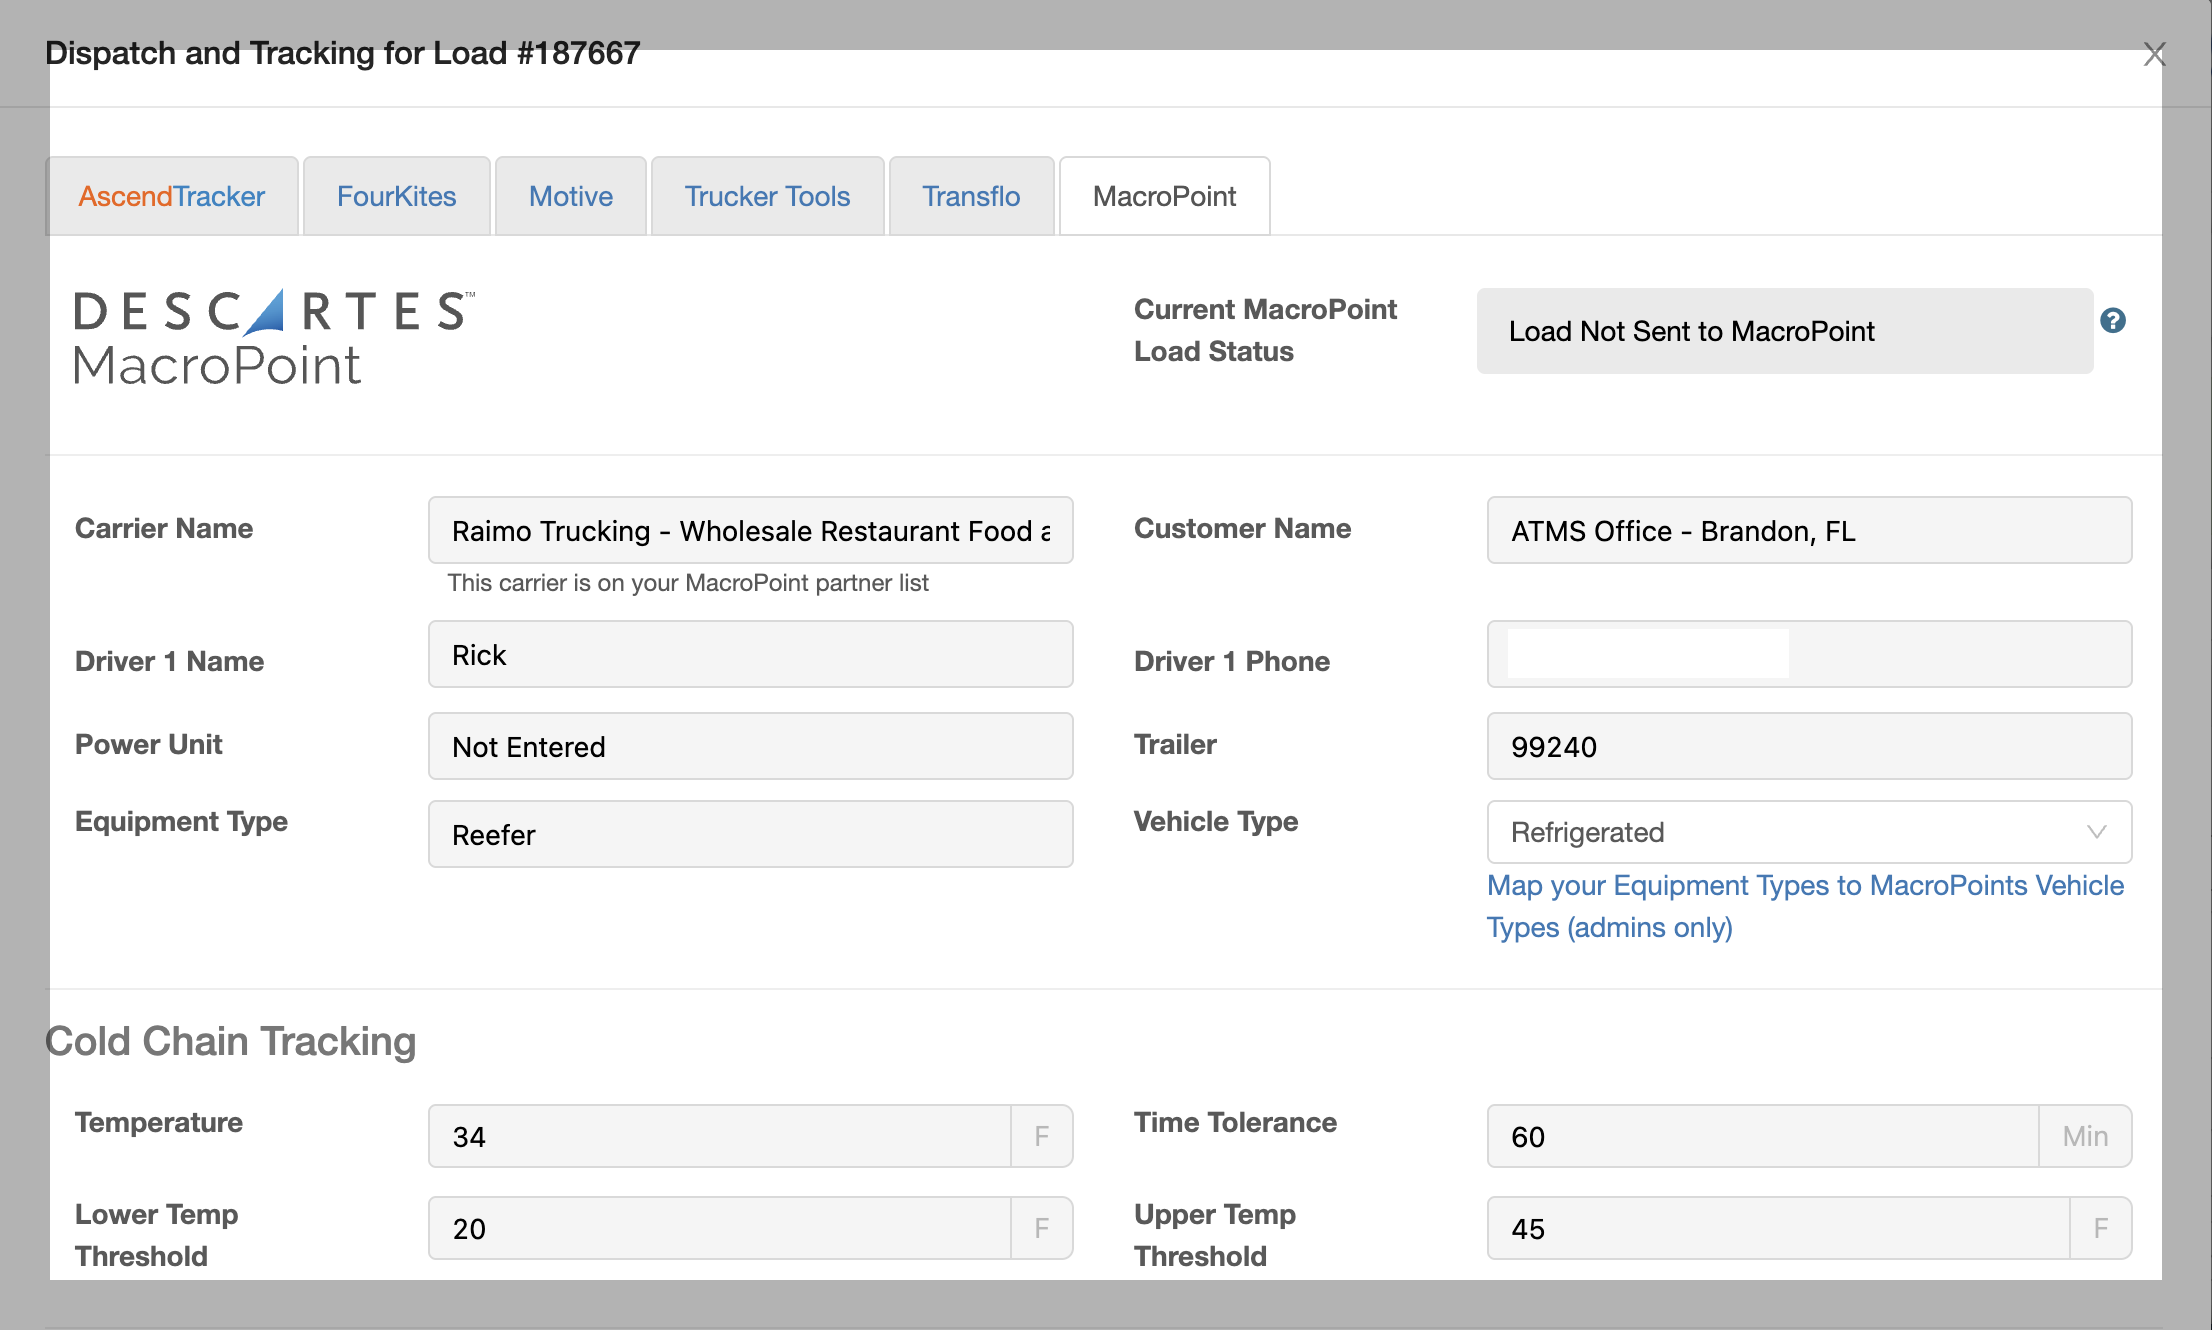
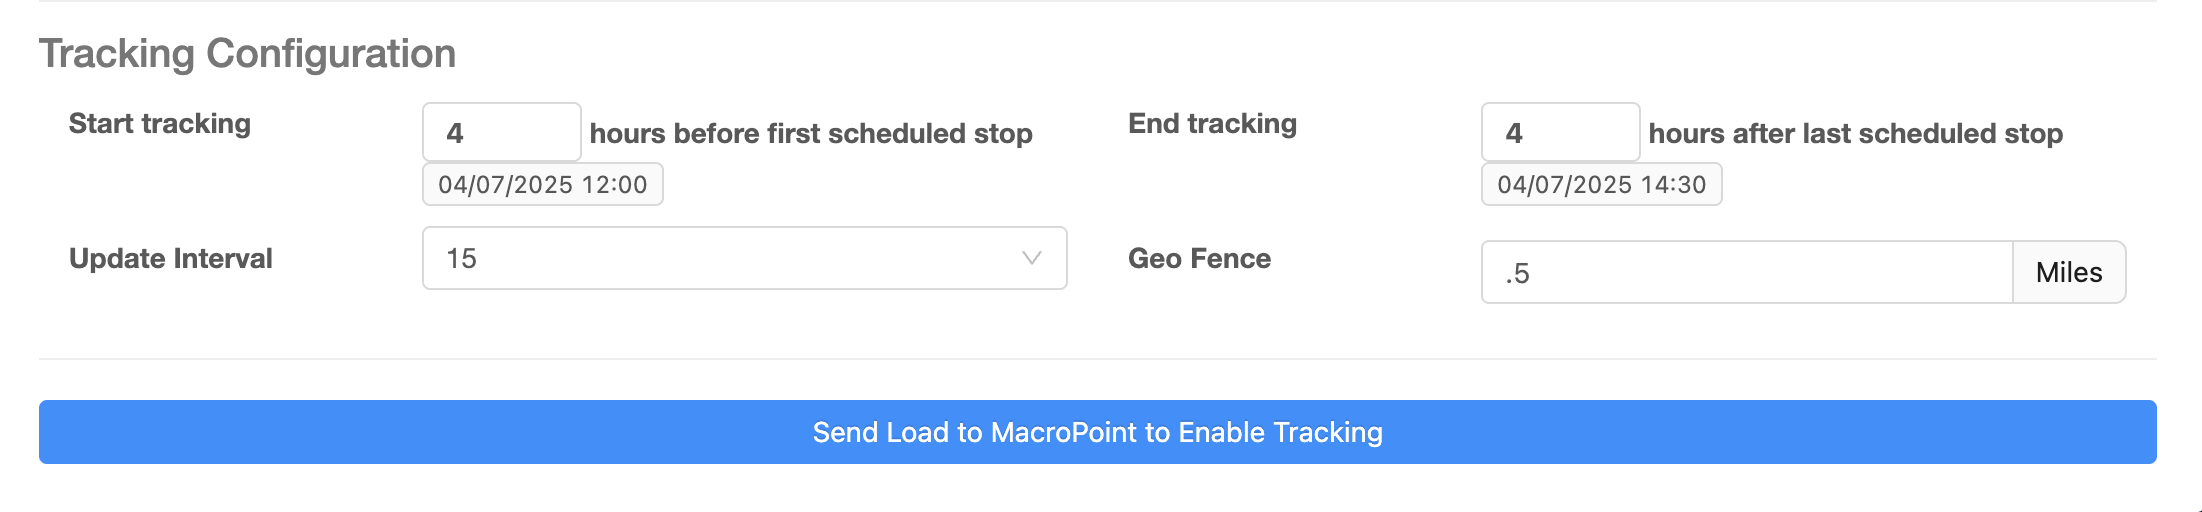
You will also be able to see current MacroPoint Load status from this modal. Once the load is dispatched, the updates shown here will also show in the load log, along with other tracking updates.

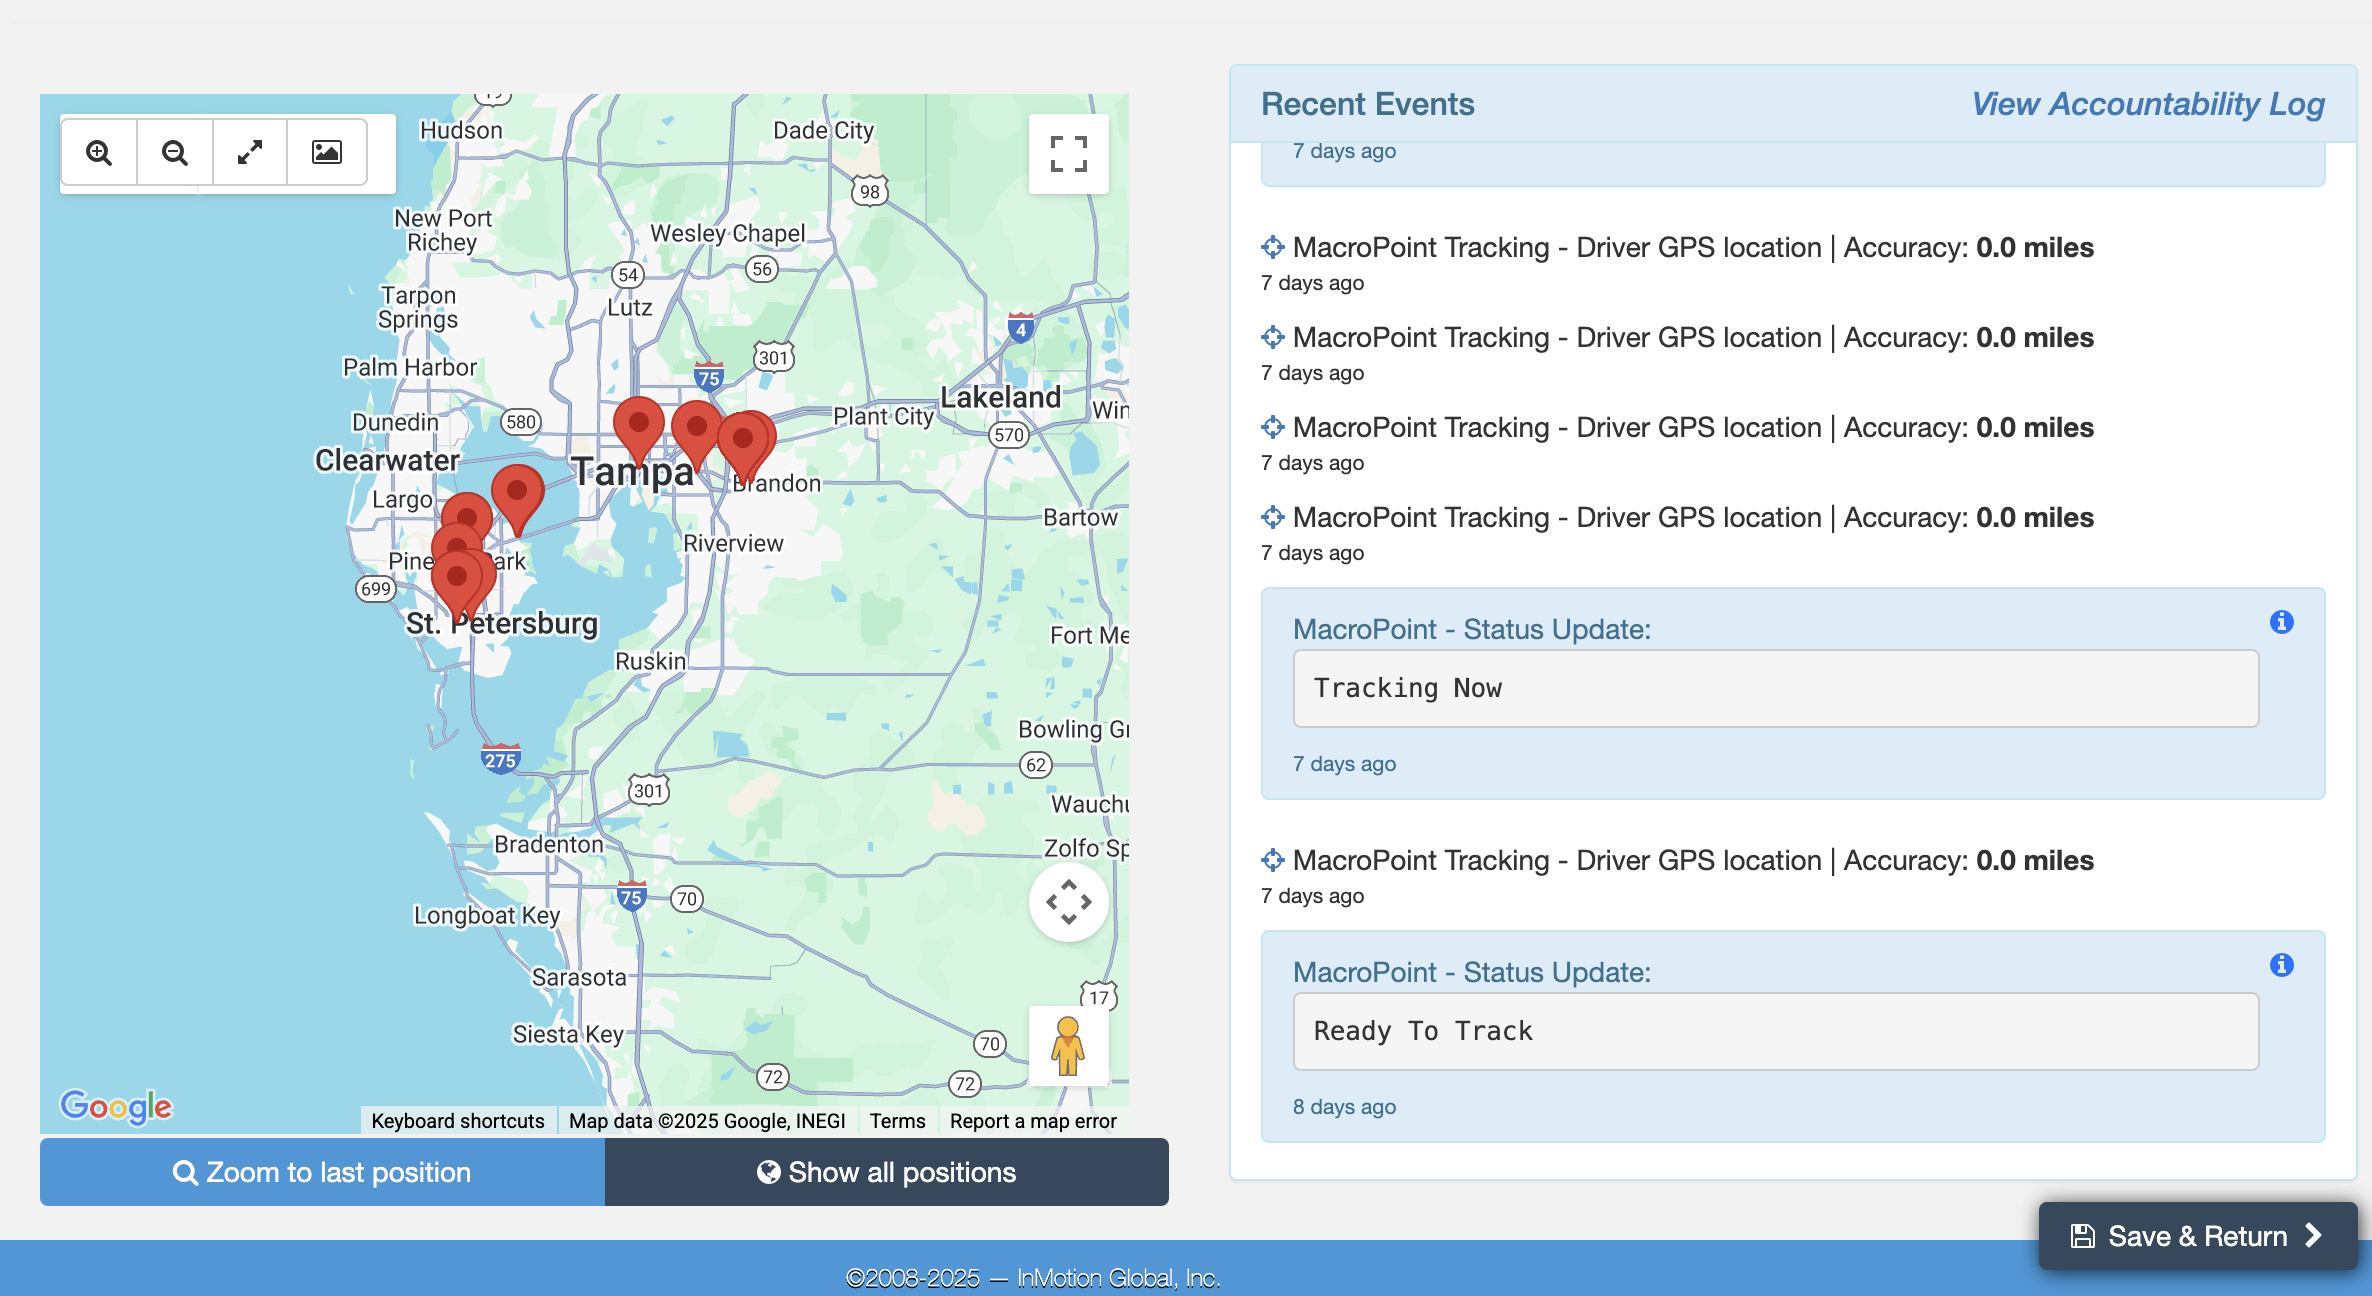
Below is an example of the Load Log with Map showing MacroPoint status updates and Driver GPS location updates on the map:
Leeann Doan
Comments