The AscendPortal is an application for Shippers, 3PL's, and brokers to electronically send load tenders and documents to their carriers from AscendTMS . Carriers are invited to participate seamlessly through the private AscendPortal . When carriers accept portal invitations, they may instantly perform the services below and more.
- Accept or reject load tenders
- Adjust appointment times (if permissions allow)
- Provide regular truck status updates including location tracking
- Upload documents such as proof of delivery and signed confirmations
- Send direct messages
- Request financial changes such as accessorial charges
Best of all, the AscendPortal is completely free to use for both you and your carriers!
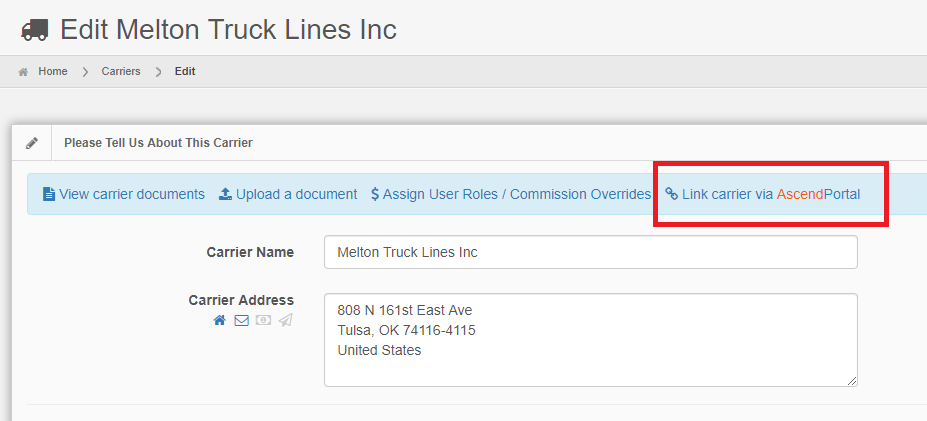
To invite carriers to become an AscendPortal user, just visit their profile page in the Carriers menu and select "Link carrier via AscendPortal " in the upper profile options.
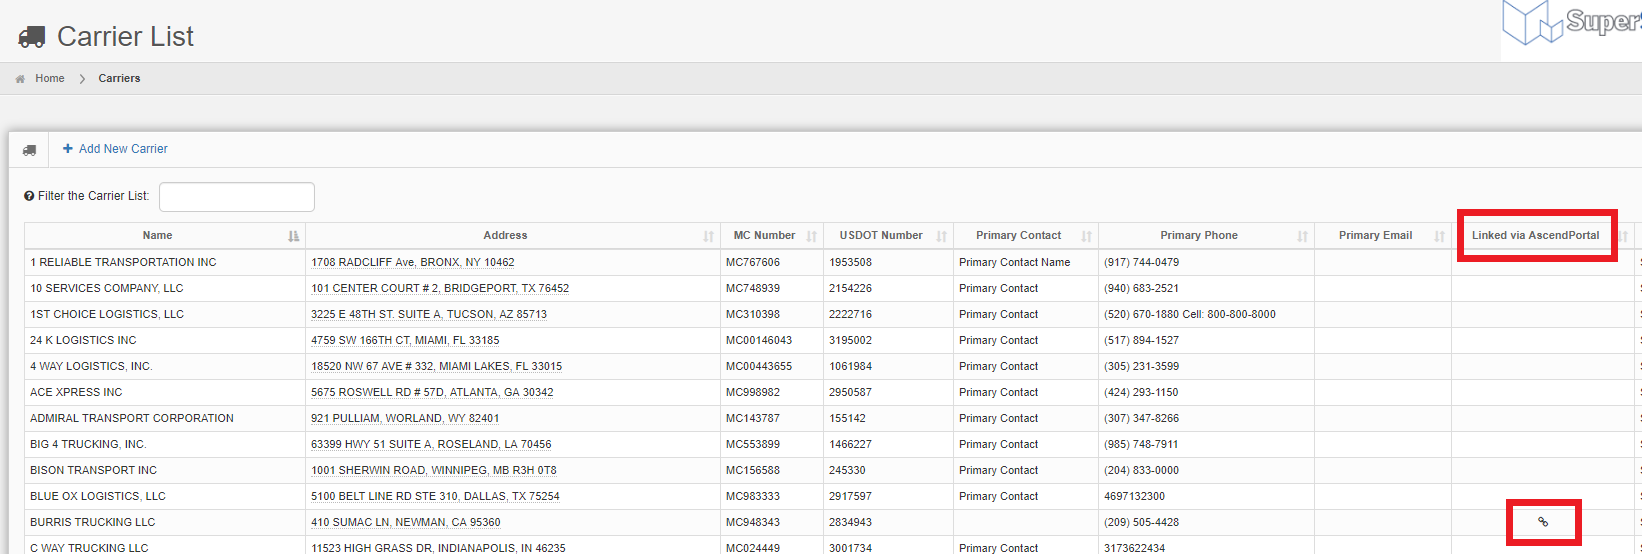
When carriers are "linked" the status is viewable from the Carrier List:
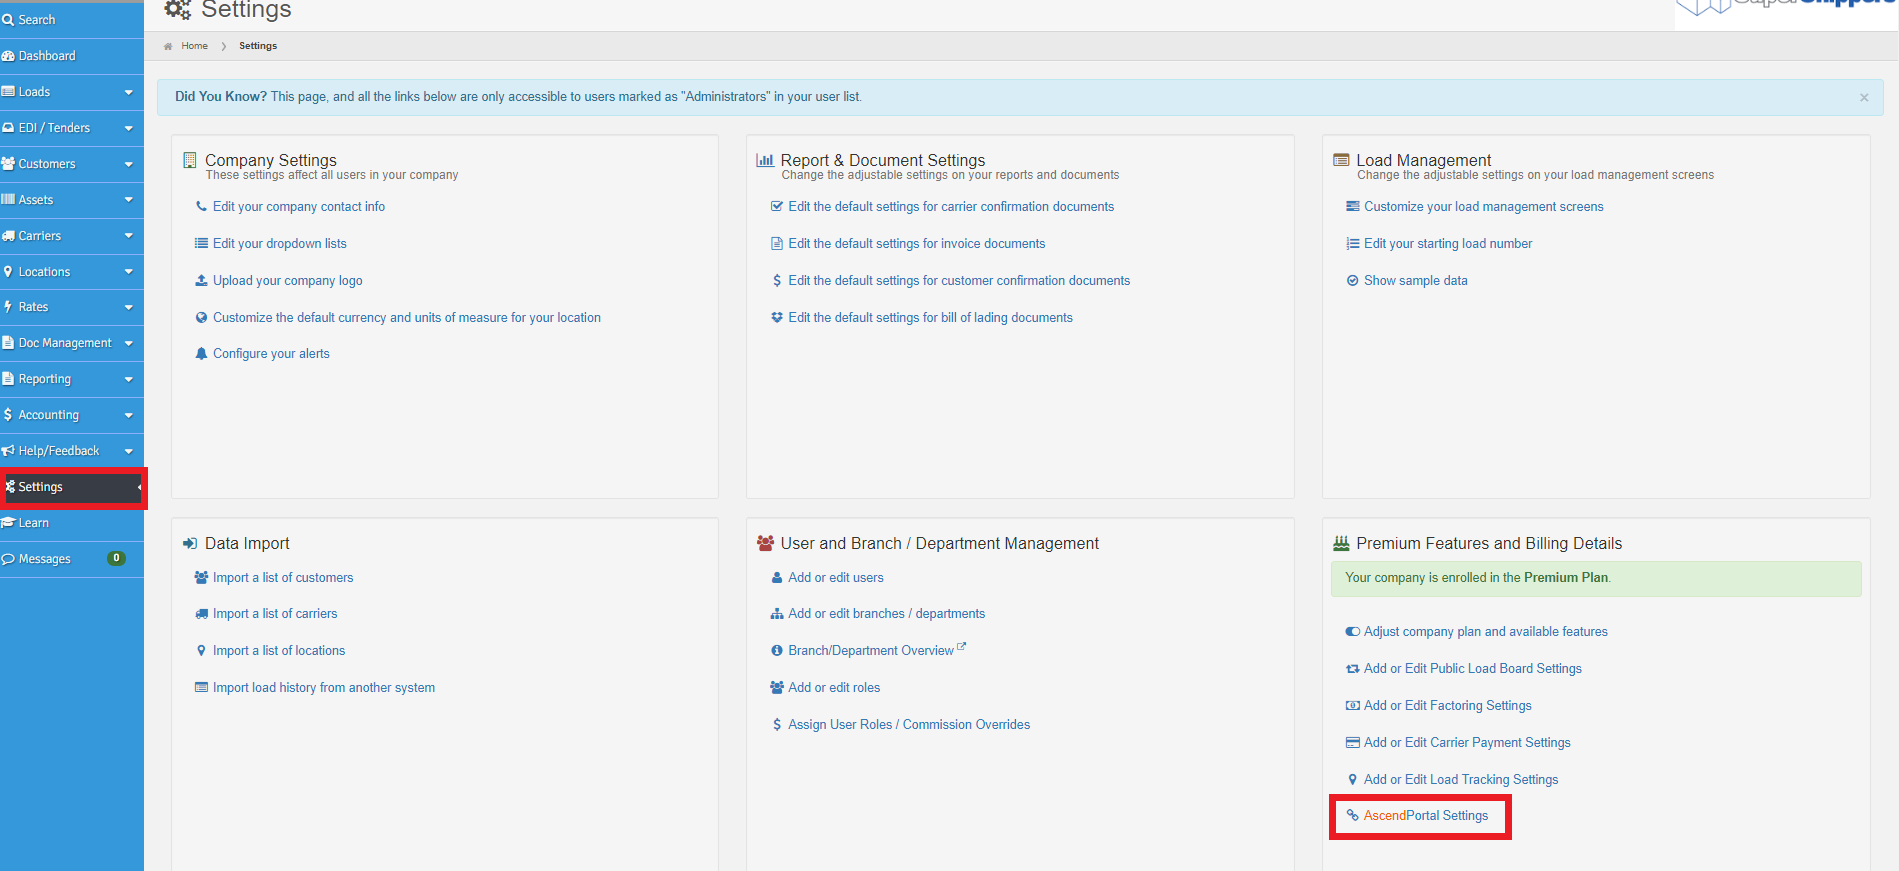
Be sure to customize your system settings to ensure your loads are updated according to your preferences. You will first navigate to the Settings menu and then select "AscendPortal Settings" located under Premium Features and Billing Details:
Once selected, you will see the screen below and have the ability to set up your Carrier Permissions, Expiration Settings, and Load/Truck Status Settings :
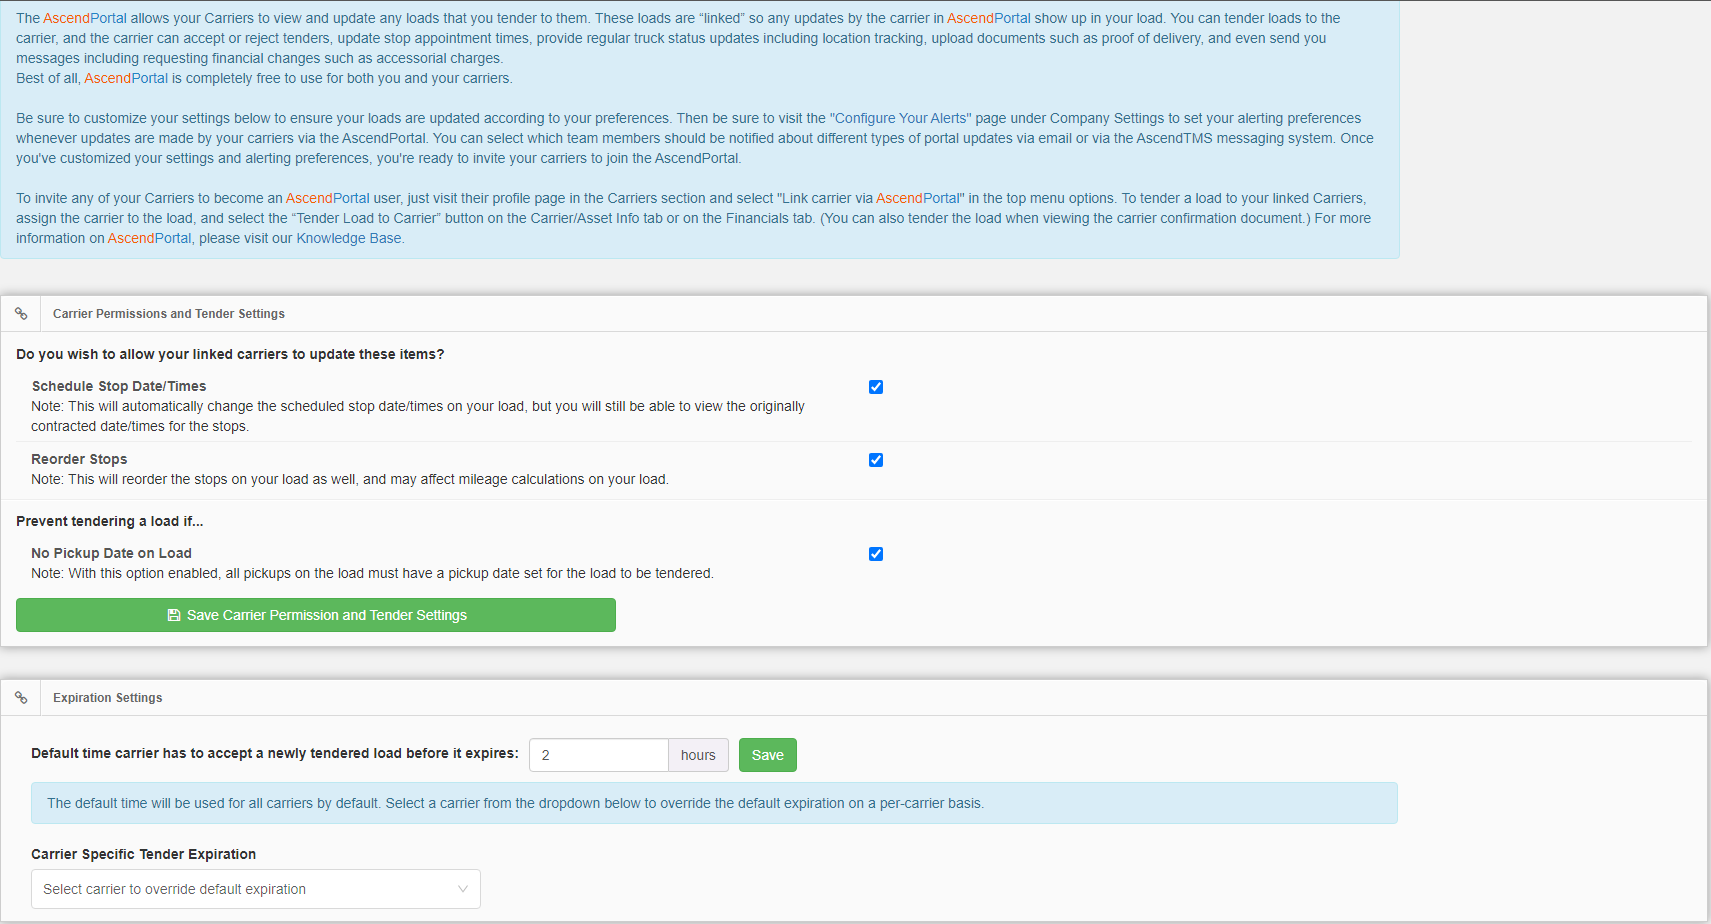
The "Carrier Permissions" is the first selection that you will need to make. If you would like to give your carrier's permission to make changes like scheduling stops or to reorder stops - please select one or both of the checkboxes below:
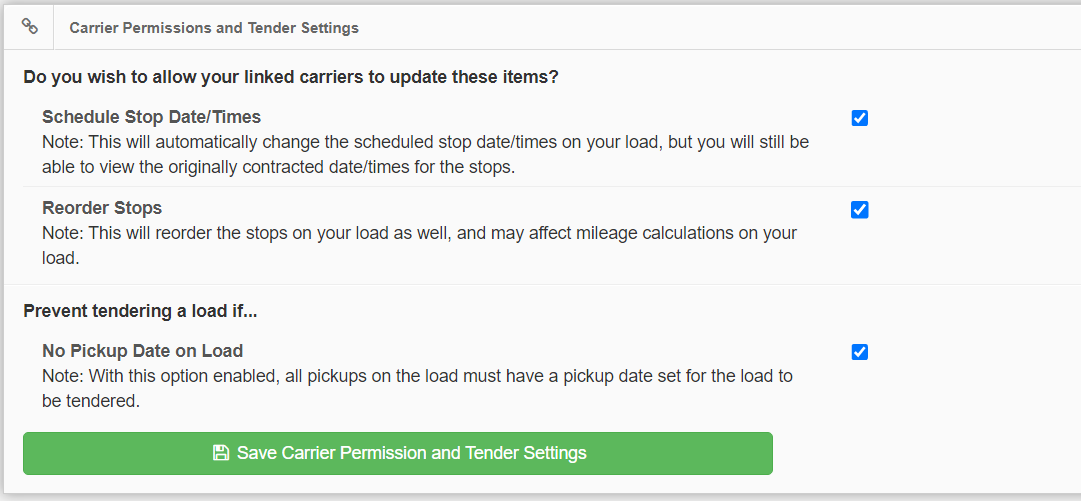
If you do not want your carriers making changes to the schedule or order of stops, please leave these checkboxes blank and these settings will be disabled. Should your carrier attempt to make a schedule or stop order change, they will be directed to call you for approval. (These settings affect all of your carriers, once you select to allow carriers to modify the stops, all of your carriers will have the ability to do so).
The next selection is your "Expiration Settings" shown below:
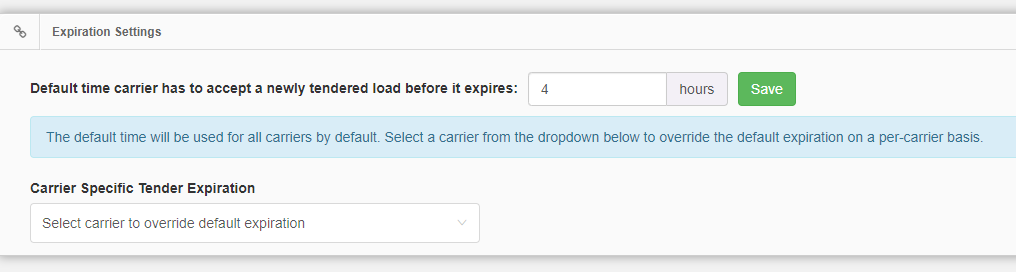
If you wish to give a carrier an expiration time that differs from your default, simply select the name of that carrier from your drop-down list and then enter and save that expiration time for that specific carrier.
Now, you can select your Load/Truck Status Settings. This will ensure that whenever your carrier updates their truck status through the AscendPortal , the Truck Status and Load Status in your AscendTMS will update correctly.
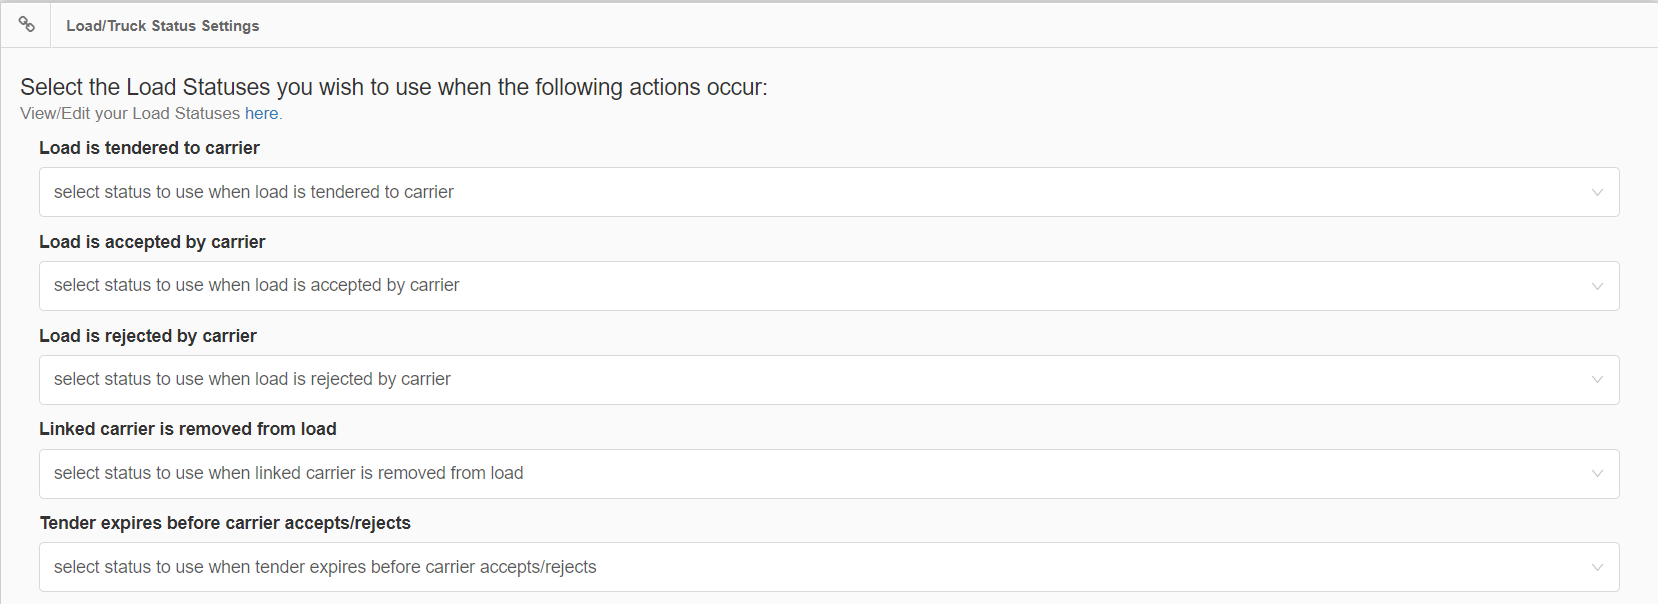
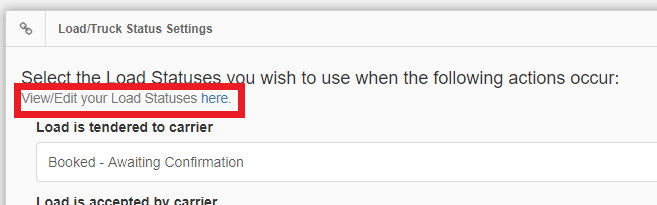
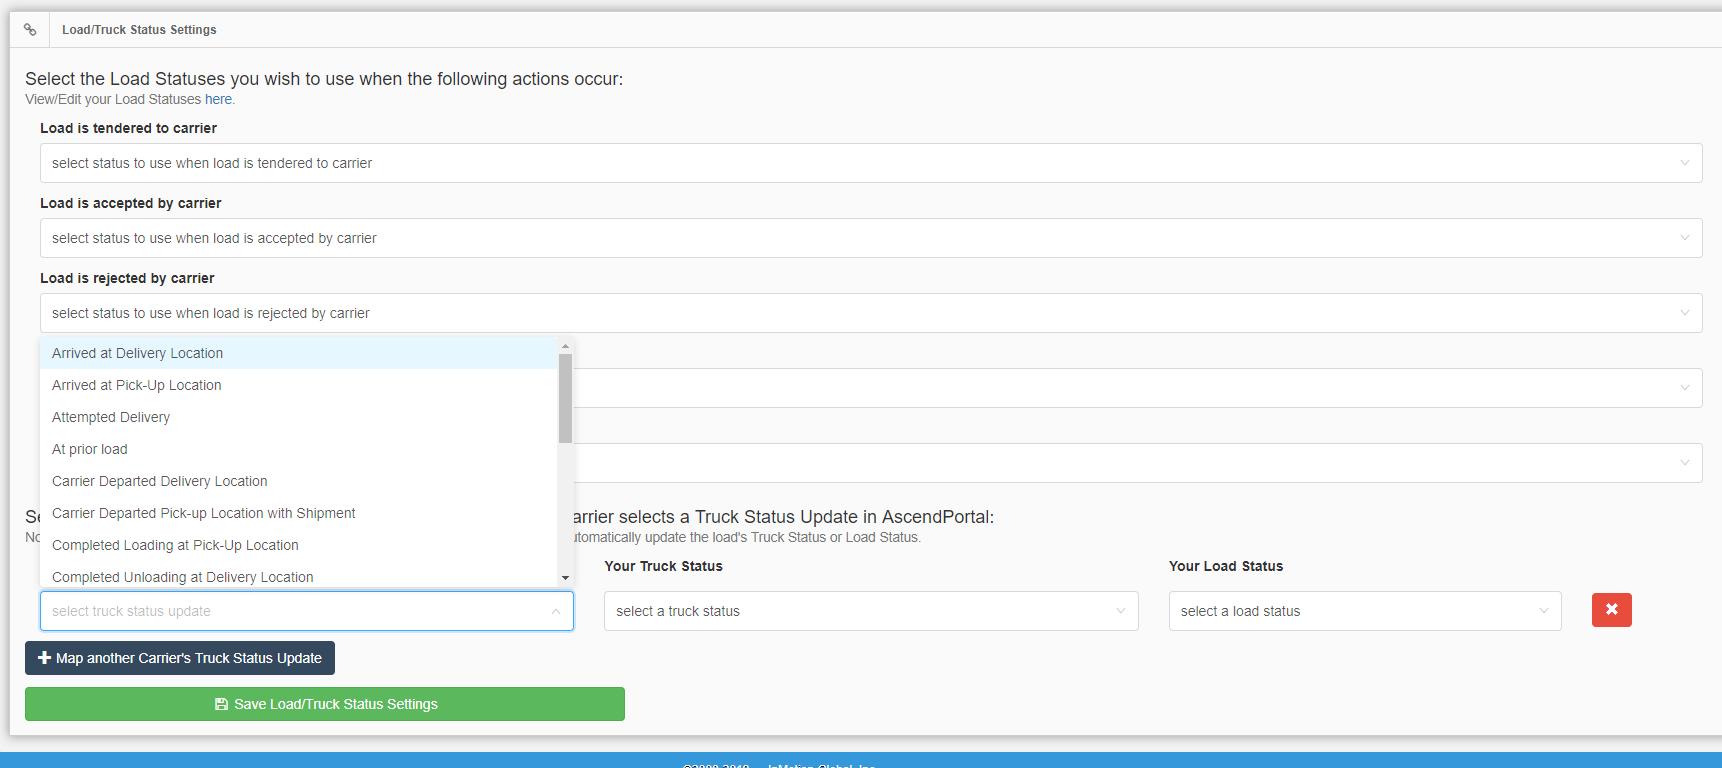
For example, when a load is tendered to a carrier, we have our Load Status set to "Booked - Awaiting Confirmation" and will be updated automatically once the load is tendered. However, you can use any Load Status from your Load Status list when this action takes place. Please complete each setting by selecting the Load Status you wish from the drop-down list.
If you do not have a Load Status that you would like to use, and would like to add a new one, please select the option to View/Edit your Load Status here:
After you have completed your Load Status settings, you may then select and map how you would like each Truck Status update to appear in AscendTMS . Carriers will be contributing regular truck status updates to the portal. You can click "+Map another Carrier's Truck Status Update" or repeat the same steps of selecting from your drop-down lists.
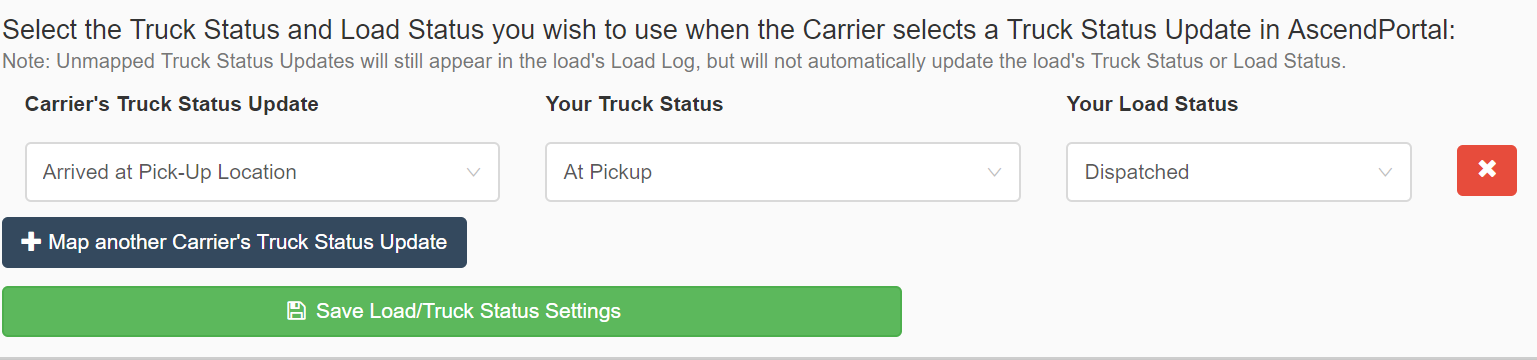
Once you have completed your mapping and confirmed all of your settings are correct, click "Save Load/Truck Status Settings".
Note: When setting up Portal settings that involve Load / Truck Status updates: Consider ALL of your settings that may affect Load / Truck status changes (ie. AscendPortal and Automated Workflow Engine) and remember.....
The status updates will be processed in the order in which they were created and appear in the UI. When a rule is triggered, it will stop going through the remainder of the rules. So, i.e., the first rule in the list WINS!
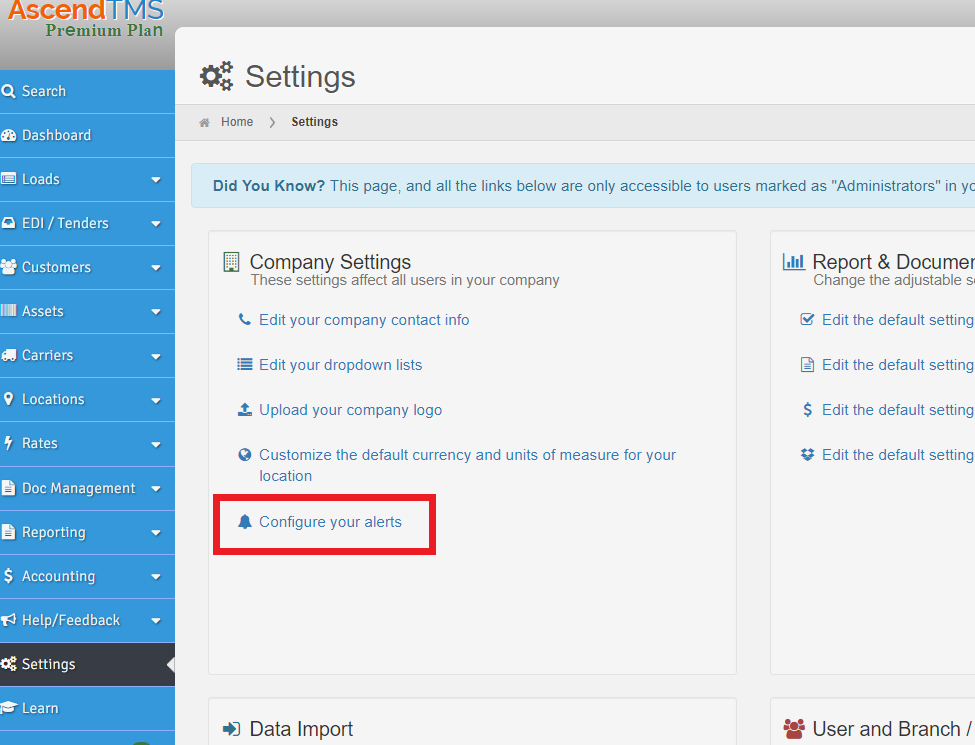
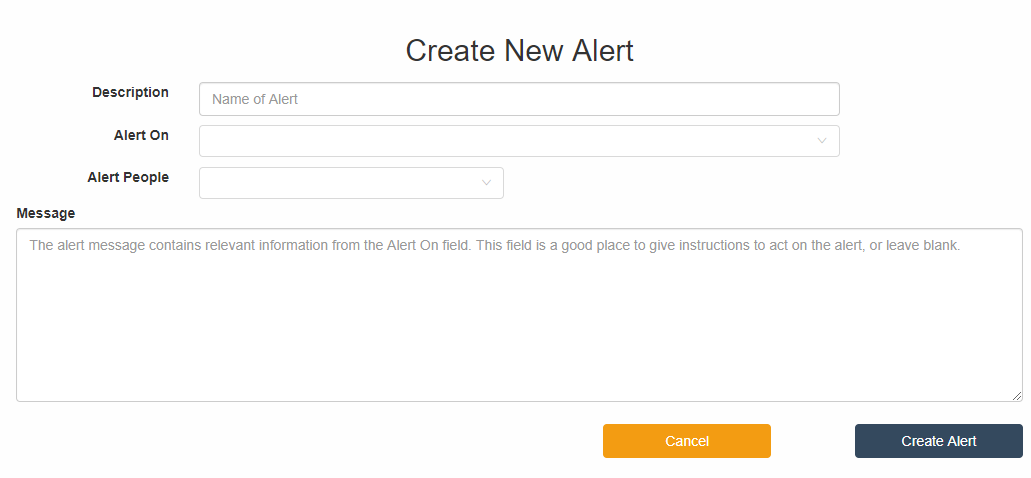
Before you are off and rolling with the AscendPortal , you must be sure to visit the "Configure Your Alerts" area under Company Settings shown below:
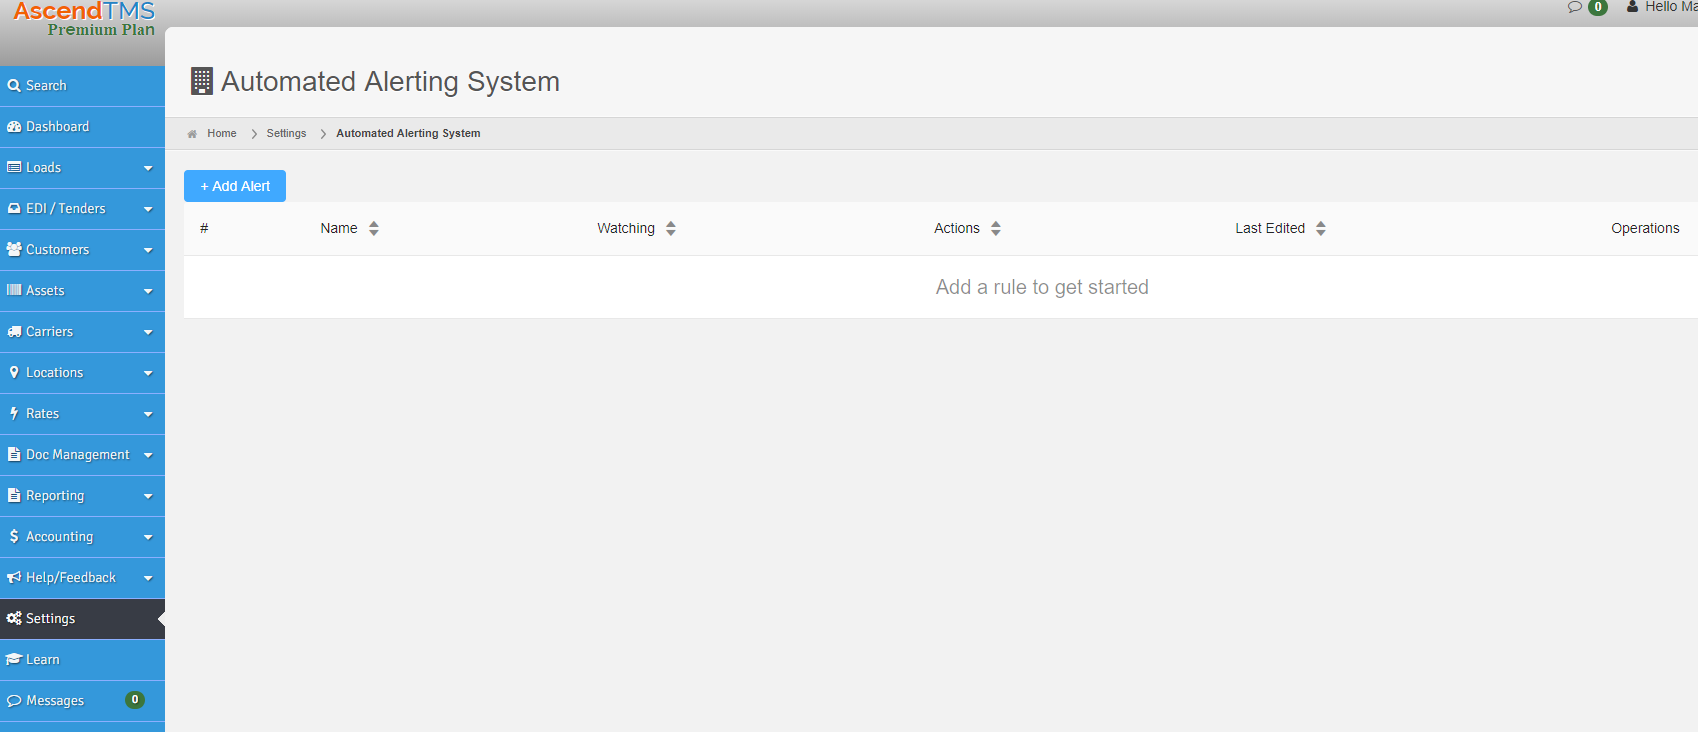
Here you can set your alerting preferences for updates that are made by your carriers via the AscendPortal . You can select which team members should be notified about different types of portal updates via email or via the AscendTMS messaging system.
First, select "Add Alert"
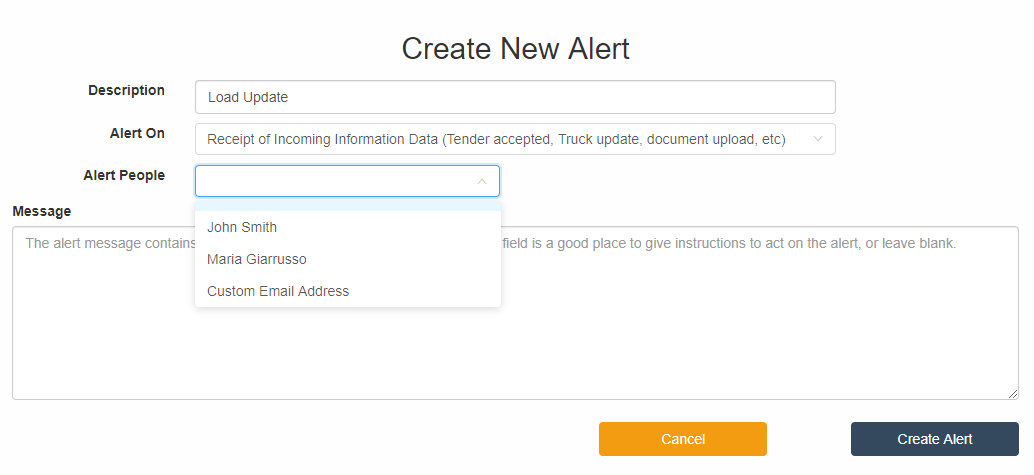
You may now enter a description/name of the Alert. Then, you can select from your drop-down list what you want to alert on, like Receipt of Incoming Information Data, Receipt of Actionable Data and Expiration of Outgoing Tender shown below:

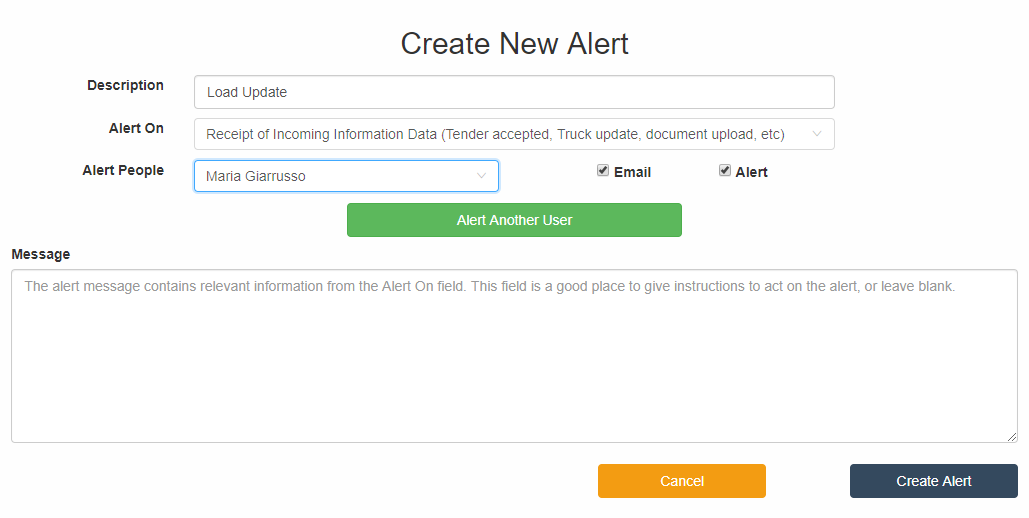
You can then choose to have these alerts via e-mail and/or AscendTMS Alerts through your messaging.
Additionally, you also have the choice to alert additional users. You can also select "Custom E-mail Address" if you wish to add an e-mail that is not being used by an AscendTMS user.
NOTE - If you choose "Custom E-mail Address" please know that you will not receive alerts via AscendTMS messaging and we recommend that you always add an alert to an AscendTMS user.
Once you've customized your settings and alerting preferences, you're ready to invite your carriers to join the AscendPortal .
To invite any of your Carriers to become an AscendPortal user, just visit their profile page in the Carriers section and select "Link carrier via AscendPortal " in the top menu options.
To tender a load to your linked carriers, assign the carrier to the load, and select the “Tender Load to Carrier” button on the Carrier/Asset Info tab or on the Financials tab. (You can also tender the load when viewing the carrier confirmation document.)
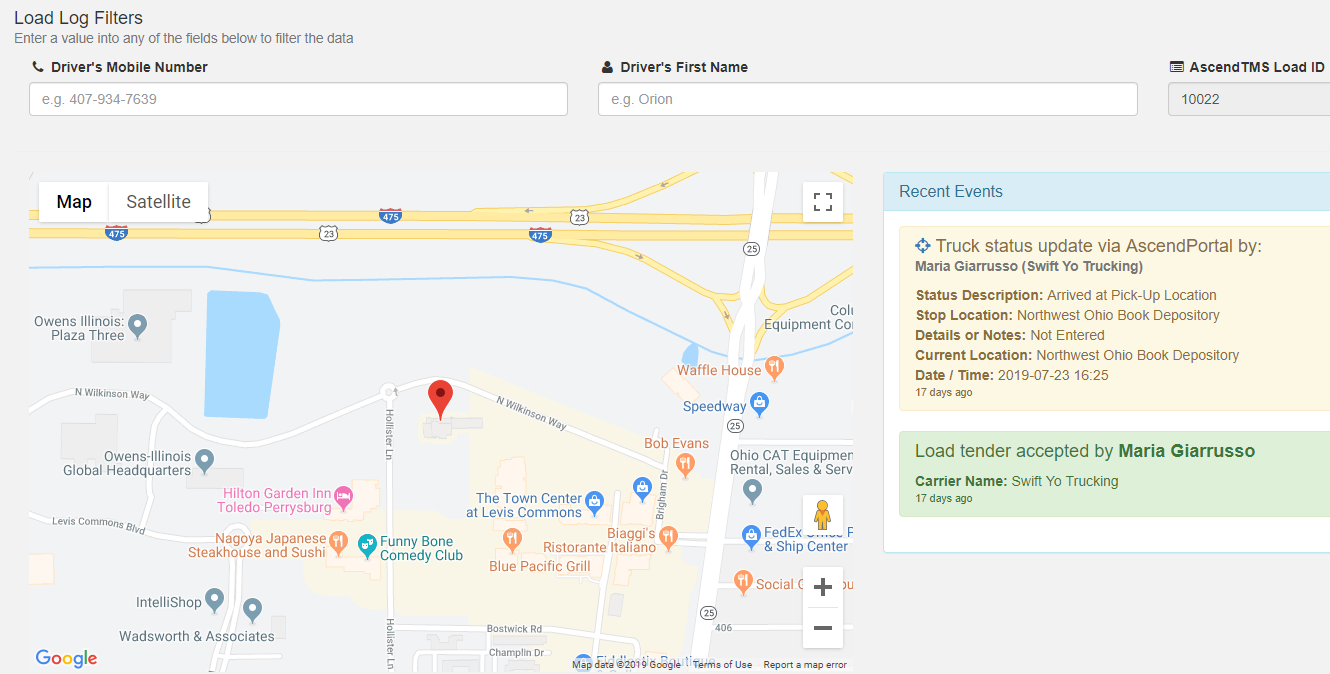
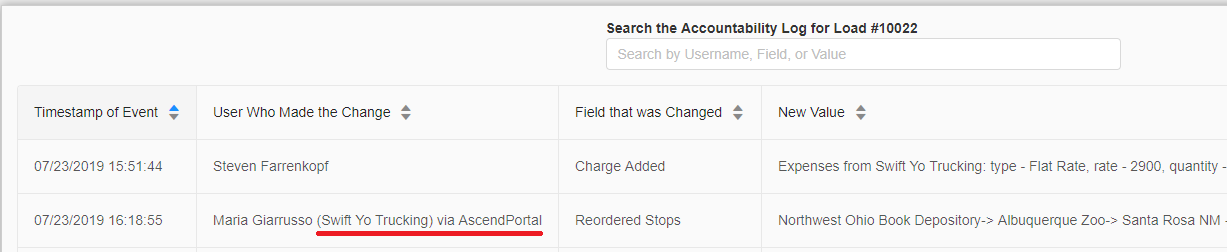
When alerting and permissions are set up and your carriers begin interacting with the AscendPortal , the operations will begin to be recorded in load logs and accountability logs.
For more information and our "How To" video, please view our AscendPortal article.
Maria
Comments